Security News
PodRocket Podcast: Inside the Recent npm Supply Chain Attacks
Socket CEO Feross Aboukhadijeh discusses the recent npm supply chain attacks on PodRocket, covering novel attack vectors and how developers can protect themselves.
@wrtnlabs/autoview-figma-cli
Advanced tools
Figma CLI for design token extraction using Personal Access Token
Personal Access Token을 사용하여 Figma 파일에서 디자인 토큰을 추출하고, boilerplate와 함께 새로운 프로젝트를 생성하는 CLI 도구입니다.
extract 명령어)/file/ 형식과 새로운 /design/ 형식 모두 지원create 명령어)cd apps/figma-cli
pnpm install
pnpm build
pnpm link --global
extract - 디자인 토큰 추출figma-cli extract
# 토큰과 URL 미리 제공
figma-cli extract --token YOUR_TOKEN --url "https://www.figma.com/design/FILE_KEY/FILE_NAME"

# 출력 파일 경로 지정
figma-cli extract --output ./my-tokens.json

# 환경변수 사용
export FIGMA_ACCESS_TOKEN=your_token_here
figma-cli extract --url "https://www.figma.com/design/FILE_KEY/FILE_NAME"
create - 프로젝트 생성 (NEW!)figma-cli create my-awesome-project
# 토큰 추출 건너뛰기
figma-cli create my-project --skip-tokens

# 다른 boilerplate 저장소 사용
figma-cli create my-project --source github:your-org/your-boilerplate

# 특정 경로에 생성
figma-cli create my-project --destination ./projects

# Private repository에서 git clone 사용
figma-cli create my-project --source github:your-org/private-repo --use-git

# 특정 브랜치 사용
figma-cli create my-project --source github:your-org/repo --use-git --branch develop

# Figma 정보 미리 제공
figma-cli create my-project --token YOUR_TOKEN --url "https://www.figma.com/design/FILE_KEY/FILE_NAME"
# GitHub 토큰을 환경변수로 설정
export GITHUB_TOKEN=ghp_xxxxxxxxxxxxxx

# Private repository 사용 (degit 방식)
figma-cli create my-project --source github:your-org/private-boilerplate
# Git clone 방식으로 private repository 클론
figma-cli create my-project --source github:your-org/private-repo --use-git

# 특정 브랜치에서 클론
figma-cli create my-project \
  --source github:your-org/private-repo \
  --use-git \
  --branch develop
Git clone 방식을 사용할 때는 다음 중 하나의 인증 방법이 필요합니다:
SSH 키 설정
# SSH URL 사용
figma-cli create my-project --source git@github.com:your-org/private-repo.git --use-git
GitHub CLI 로그인
gh auth login
figma-cli create my-project --source github:your-org/private-repo --use-git
create 명령어)CLI는 다음 파일들을 자동으로 생성합니다:
my-project/
├── src/
│   ├── styles/
│   │   └── tokens.css          # CSS Variables
│   └── tokens/
│       └── index.ts            # TypeScript 타입 정의
├── design-tokens.json          # 원본 토큰 JSON
├── package.json               # 프로젝트명 업데이트됨
└── README.md                  # 프로젝트명 업데이트됨
:root {
  /* Colors */
  --color-blue-500: #71a9dc;
  --color-pink-400: #e6bce6;
  --color-system-blue-000: #2388f3;

  /* 추가된 색상들... */
}
// Auto-generated design tokens from Figma

export type ColorToken = "blue-500" | "pink-400" | "system-blue-000";

export const colors = {
  "blue-500": "#71a9dc",
  "pink-400": "#e6bce6",
  "system-blue-000": "#2388f3",
} as const;
extract 명령어 옵션-t, --token <token>: Figma Personal Access Token (선택사항)-u, --url <url>: Figma 파일 URL (선택사항)-k, --key <key>: Figma 파일 키 (선택사항)-o, --output <path>: 출력 파일 경로 (기본값: ./design-tokens.json)-j, --json <path>: 추가 JSON 파일에서 변수 추출-v, --variable <name>: JSON 파일에서 추출할 변수명create 명령어 옵션-s, --source <url>: Boilerplate Git 저장소 URL (기본값: github:wrtnlabs/autoview-boilerplate)-d, --destination <path>: 생성할 디렉토리 (기본값: 현재 디렉토리)--skip-tokens: Figma 토큰 추출 건너뛰기--use-git: Git clone 사용 (private repo용)--branch <branch>: 클론할 브랜치 (git clone 사용시)-t, --token <token>: Figma Personal Access Token (선택사항)-u, --url <url>: Figma 파일 URL (선택사항)-k, --key <key>: Figma 파일 키 (선택사항)# 환경변수 설정
export FIGMA_ACCESS_TOKEN=figd_xxxxxxxxxxxxxx
export GITHUB_TOKEN=ghp_xxxxxxxxxxxxxx
# 프로젝트 생성 (토큰 입력 없이)
figma-cli create design-system-app
# 결과: Figma 토큰이 통합된 완성된 프로젝트
# Private boilerplate + Figma 토큰 통합
figma-cli create my-company-project \
  --source github:my-company/private-boilerplate \
  --use-git \
  --branch company-template \
  --token figd_xxxxxxxxxxxxxx \
  --url "https://www.figma.com/design/FILE_KEY/FILE_NAME"
# 디자인 토큰만 추출하고 싶을 때
figma-cli extract --token figd_xxxxxxxxxxxxxx --url "https://www.figma.com/design/FILE_KEY/FILE_NAME"
# 1. 토큰 추출 + 프로젝트 생성
figma-cli create my-project

# 2. 프로젝트 디렉토리로 이동
cd my-project

# 3. 의존성 설치
npm install

# 4. 개발 서버 시작
npm run dev
# Private repository인 경우
figma-cli create my-project --source github:org/repo --use-git

# 또는 GitHub token 설정
export GITHUB_TOKEN=ghp_xxxxxxxxxxxxxx
figma-cli create my-project --source github:org/private-repo
# SSH 키 설정 확인
ssh -T git@github.com

# 또는 HTTPS 인증 설정
gh auth login
extract 명령어)추출된 디자인 토큰은 다음과 같은 JSON 형식으로 저장됩니다:
{
  "colors": [
    {
      "name": "Primary Blue",
      "description": "Main brand color",
      "type": "color",
      "value": "rgba(0, 123, 255, 1)",
      "source": "style"
    }
  ],
  "typography": [
    {
      "name": "Heading 1",
      "description": "Main heading style",
      "type": "typography",
      "value": {
        "fontFamily": "Inter",
        "fontSize": 32,
        "fontWeight": 700,
        "lineHeight": "normal"
      },
      "source": "style"
    }
  ]
}
FAQs
Figma CLI for design token extraction using Personal Access Token
We found that @wrtnlabs/autoview-figma-cli demonstrated a healthy version release cadence and project activity because the last version was released less than a year ago. It has 4 open source maintainers collaborating on the project.
Did you know?

Socket for GitHub automatically highlights issues in each pull request and monitors the health of all your open source dependencies. Discover the contents of your packages and block harmful activity before you install or update your dependencies.

Security News
Socket CEO Feross Aboukhadijeh discusses the recent npm supply chain attacks on PodRocket, covering novel attack vectors and how developers can protect themselves.

Security News
Maintainers back GitHub’s npm security overhaul but raise concerns about CI/CD workflows, enterprise support, and token management.

Product
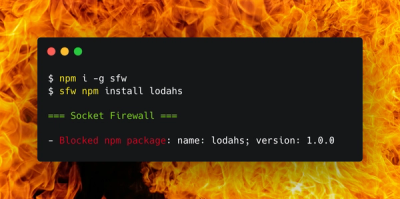
Socket Firewall is a free tool that blocks malicious packages at install time, giving developers proactive protection against rising supply chain attacks.