Research
/Security News
Critical Vulnerability in NestJS Devtools: Localhost RCE via Sandbox Escape
A flawed sandbox in @nestjs/devtools-integration lets attackers run code on your machine via CSRF, leading to full Remote Code Execution (RCE).
ai-coding-assistants-setup
Advanced tools
Setup tool for integrating AI coding assistants into development workflows
Enterprise-grade development workflow automation powered by AI coding assistants
Setup • Features • Prerequisites • Documentation • Contributing • License
Get started in seconds with a single command:
npx ai-coding-assistants-setup
This command will:
npx ai-coding-assistants-setup --help              # Show help
npx ai-coding-assistants-setup --dry-run           # Preview changes without modifying files
npx ai-coding-assistants-setup --non-interactive   # Skip prompts, use defaults
npx ai-coding-assistants-setup --verbose           # Show detailed output
AI Coding Assistants Setup is a comprehensive toolkit that transforms your development workflow with enterprise-grade automation, quality assurance, and AI-powered assistance. This project provides production-ready configurations for Claude Code, Roo Code, and other AI assistants, along with automated workflows for code quality, security scanning, performance testing, and release management.
This project embodies a dual-purpose philosophy that revolutionizes how teams work with AI:
We remove friction from AI-assisted development by providing:
We ensure AI-generated code meets enterprise standards through:
This creates a virtuous cycle where:
The AI-only commit/PR enforcement is a perfect example - it encourages teams to leverage AI for all development while ensuring complete transparency and traceability of AI-generated code.
Claude Code is Anthropic's official AI coding assistant that provides:
📚 Claude Code Documentation | 🛠️ CLI Usage | 🔧 Settings
Roo Code is an AI-powered development environment that offers:
📚 Roo Code Documentation | 🎯 SPARC Methodology | ⚙️ Custom Modes
Note: The Quick Start command above (
npx ai-coding-assistants-setup) is the recommended way to set up your project. The sections below provide additional details and manual setup options.
When you run the setup command, the following changes will be made to your project:
.github/workflows/ - CI/CD pipelines for quality checks and releases.husky/ - Git hooks for pre-commit and commit message validation.claude/ - Claude AI assistant configuration.eslintrc.json - ESLint configuration.prettierrc.json - Prettier formatting rulescommitlint.config.js - Commit message standards.env.example - Environment variable templateCLAUDE.md - Project context for AI assistantsThe following scripts will be added (existing scripts are preserved):
{
  "scripts": {
    "lint": "echo \"lint not configured yet\"",
    "typecheck": "echo \"typecheck not configured yet\"",
    "format:check": "echo \"format:check not configured yet\"",
    "build": "echo \"build not configured yet\"",
    "test": "echo \"test not configured yet\"",
    "test:unit": "echo \"test:unit not configured yet\"",
    "test:integration": "echo \"test:integration not configured yet\"",
    "test:e2e": "echo \"test:e2e not configured yet\""
  }
}
These are placeholder scripts that ensure your CI/CD workflows can run immediately. Replace them with your actual commands as you implement each tool.
The setup creates default configuration files for ESLint and Prettier, but projects are free to customize or replace these entirely with their own rules:
The default .eslintrc.json provides basic rules, but you can:
# Replace with your existing ESLint config
cp your-existing/.eslintrc.json .eslintrc.json

# Or extend/modify the generated config
# Edit .eslintrc.json to add your custom rules, plugins, and extends
Example custom configuration:
{
  "extends": [
    "eslint:recommended",
    "@typescript-eslint/recommended",
    "your-company/eslint-config"
  ],
  "plugins": ["your-custom-plugin"],
  "rules": {
    "your-custom-rule": "error",
    "indent": ["error", 2],
    "quotes": ["error", "single"]
  }
}
The default .prettierrc.json uses standard formatting, but you can:
# Replace with your existing Prettier config
cp your-existing/.prettierrc.json .prettierrc.json

# Or customize the generated config
# Edit .prettierrc.json with your team's preferences
Example custom configuration:
{
  "semi": false,
  "singleQuote": true,
  "tabWidth": 4,
  "trailingComma": "all",
  "printWidth": 100,
  "useTabs": false
}
If your project already has lint/format configurations:
.eslintrc.* or .prettierrc.* fileslint and format:check scripts work with your configurationsThe setup supports any ESLint/Prettier configuration, including:
eslint-plugin-react, @typescript-eslint/parsereslint-plugin-vue, @vue/eslint-config-prettier@angular-eslint/eslint-plugineslint-plugin-nodeAfter customizing your rules, verify they work with the CI system:
# Test your custom lint configuration
npm run lint

# Test your custom format configuration
npm run format:check

# Run a complete quality check
npm run test && npm run lint && npm run format:check
The AI Coding Assistants Setup provides the infrastructure and automation, while giving you complete freedom to define your code style and quality standards.
This setup includes an innovative feature that enforces AI-generated commits and pull requests through git hooks. This ensures consistent, high-quality code contributions while leveraging AI capabilities.
Commit Enforcement (.husky/commit-msg):
Co-Authored-By: Claude <noreply@anthropic.com>Generated with Claude CodePR Enforcement (.husky/pre-push):
gh) for PR verificationWhen using Claude Code:
# Commits automatically include the required signature
/git-commit

# PRs created through Claude include the signature
# The PR body will contain: 🤖 Generated with [Claude Code](https://claude.ai/code)
If you want to allow human-generated commits/PRs, simply remove or modify the hooks:
# To disable commit enforcement
rm .husky/commit-msg

# To disable PR enforcement
rm .husky/pre-push
After running the setup, you may want to install these development tools that the configuration files support:
# Code Quality Tools
npm install --save-dev eslint prettier eslint-config-prettier eslint-plugin-prettier

# Git Hooks
npm install --save-dev husky
npx husky install

# Commit Standards
npm install --save-dev @commitlint/cli @commitlint/config-conventional

# TypeScript (if using)
npm install --save-dev typescript @types/node

# Testing (choose based on your needs)
npm install --save-dev jest @types/jest           # For Jest
npm install --save-dev vitest                      # For Vitest
npm install --save-dev mocha chai                  # For Mocha/Chai
Note: The setup tool only copies configuration files. Installing these packages is optional and depends on which tools you want to use in your project.
If you prefer to set up manually or need to customize specific parts:
Create a .env file in your project root:
# Only the Anthropic API key goes here
ANTHROPIC_API_KEY=sk-ant-xxxxxxxxxxxxxxxxxxxx
Configure additional API keys in .claude/settings.local.json (copy from .claude/settings.local.json.example):
See the Environment Variables Documentation for the complete reference of all available environment variables.
Copy these files and directories to your project:
.github/workflows/quality.yml - Automated quality checks for PRs (testing, linting, security scanning).github/workflows/release.yml - Semantic release automation with changelog generation.github/workflows/load-test.yml - K6 performance testing pipeline.github/workflows/ci.yml.example - Example CI workflow caller for pull requests.github/workflows/deploy.yml.example - Example deployment workflow showing the complete pattern: release → deploy → load test.github/workflows/k6/ - K6 test scripts and configurations.github/workflows/scripts/ - Helper scripts for CI/CD operations.github/code_review_guidelines.md - Guidelines for AI-powered code reviews.github/security_scan_guidelines.md - Security scanning configuration.github/dependabot.yml - Automated dependency updatesNote: The workflow files (quality.yml, release.yml, load-test.yml) are reusable workflows. You need to create caller workflows in your project to use them. Example callers are provided in ci.yml.example and deploy.yml.example. See Step 6: Create Workflow Callers below for detailed instructions.
.husky/pre-commit - Pre-commit checks (linting, formatting, tests).husky/commit-msg - Commit message validation, Jira key detection, and AI-generated commit enforcement.husky/pre-push - Pre-push checks to ensure PRs are AI-generated.claude/commands/project.md - Custom Claude commands for your project.claude/settings.json - Claude project settings.claude/settings.local.json.example → .claude/settings.local.json - Local API keys and MCP configuration.mcp.json - Model Context Protocol server configurationsonar-project.properties.example → sonar-project.properties - SonarCloud configurationcommitlint.config.js - Commit message standards enforcement.env.example → .env - Environment variables template# Open Claude CLI
claude
# Install the GitHub app
/install-github-app
See Claude GitHub Actions Documentation for more details.
Use the GitHub CLI to set up secrets from your .env file:
# Copy .github/workflows/.env.example to .github/workflows/.env
cp .github/workflows/.env.example .github/workflows/.env

# Edit the file with your values
# Then run:
gh secret set --env-file .github/workflows/.env
Required secrets:
PAT: Your GitHub Personal Access TokenOptional secrets for enhanced features:
SONAR_TOKEN, SNYK_TOKEN, GITGUARDIAN_API_KEYSENTRY_AUTH_TOKEN, SENTRY_ORG, SENTRY_PROJECTK6_CLOUD_TOKENANTHROPIC_API_KEYSee the Environment Variables Documentation for details on all available secrets.
Ensure your package.json includes these scripts:
{
  "scripts": {
    "test:unit": "jest --testPathPattern=unit",
    "test:integration": "jest --testPathPattern=integration",
    "test:e2e": "jest --testPathPattern=e2e",
    "lint": "eslint .",
    "format:check": "prettier --check .",
    "typecheck": "tsc --noEmit",
    "build": "your-build-command"
  }
}
The workflow files you copied are reusable workflows. Create these caller workflows in your project's .github/workflows/ directory. Example files are provided as ci.yml.example and deploy.yml.example.
ci.yml)name: CI
on:
pull_request:
types: [opened, synchronize, reopened]
push:
branches:
- main
- develop
jobs:
quality:
uses: ./.github/workflows/quality.yml
secrets: inherit
deploy.yml)See deploy.yml.example for the complete pattern. The recommended approach:
name: Deploy

on:
  push:
    branches:
      - main # Production
      - staging # Staging (includes automatic load testing)
      - develop # Development

jobs:
  # Step 1: Create release
  release:
    uses: ./.github/workflows/release.yml
    with:
      environment: ${{ github.ref_name }}
      release_strategy: 'semantic'
      require_approval: ${{ github.ref_name == 'main' }}
      node_version: '20'
    secrets: inherit

  # Step 2: Deploy application
  deploy:
    needs: release
    runs-on: ubuntu-latest
    steps:
      # Your custom deployment logic here

  # Step 3: Load test (staging only)
  load_test:
    needs: [release, deploy]
    if: github.ref_name == 'staging'
    uses: ./.github/workflows/load-test.yml
    with:
      environment: staging
      test_scenario: smoke
    secrets: inherit
Note: The workflows are separated for flexibility. See deploy.yml.example for the complete implementation with all features.
load-test-caller.yml)name: Load Test
on:
workflow_dispatch:
inputs:
test_file:
description: 'K6 test file to run'
required: true
default: 'basic-load-test.js'
duration:
description: 'Test duration (e.g., 30s, 5m)'
required: false
default: '1m'
vus:
description: 'Number of virtual users'
required: false
default: '10'
jobs:
load-test:
uses: ./.github/workflows/load-test.yml
with:
test_file: ${{ github.event.inputs.test_file }}
duration: ${{ github.event.inputs.duration }}
vus: ${{ github.event.inputs.vus }}
secrets: inherit
your-project/
├── .github/
│   ├── workflows/         # CI/CD pipelines
│   │   ├── quality.yml    # Code quality checks
│   │   ├── release.yml    # Automated releases with deployment
│   │   ├── load-test.yml  # Performance testing
│   │   ├── ci.yml.example # Example CI caller workflow
│   │   └── deploy.yml.example # Example deployment workflow
│   ├── code_review_guidelines.md
│   └── security_scan_guidelines.md
├── .claude/               # Claude configuration
│   ├── commands/
│   └── settings.json
├── .husky/                # Git hooks
├── docs/                  # Documentation
├── src/                   # Your source code
└── tests/                 # Test suites
Runs on every pull request:
Automated semantic releases:
The recommended pattern (see deploy.yml.example):
The deployment workflow pattern includes automatic load tests for staging. This follows best practices:
Performance validation:
The recommended pattern separates concerns for maximum flexibility:
release.yml): Creates semantic version, changelog, and GitHub releasedeploy.yml.example): Implements your custom deployment logicload-test.yml): Runs performance tests after deploymentdeploy.yml.example to .github/workflows/deploy.ymldeploy job with your deployment commandsFor staging deployments, the example workflow:
load_testing jobTo run load tests manually or with different parameters, use the load-test-caller.yml example.
To test the npx command locally during development:
# Link the package globally
npm link

# Test the command
ai-coding-assistants-setup --help

# Or test with npx from the project directory
npx . --help
npm unlink -g ai-coding-assistants-setup
We welcome contributions! Please see our Contributing Guide for details.
This project is licensed under the MIT License - see the LICENSE file for details.
Built with ❤️ by Cody Swann
FAQs
Setup tool for integrating AI coding assistants into development workflows
The npm package ai-coding-assistants-setup receives a total of 7 weekly downloads. As such, ai-coding-assistants-setup popularity was classified as not popular.
We found that ai-coding-assistants-setup demonstrated a healthy version release cadence and project activity because the last version was released less than a year ago. It has 1 open source maintainer collaborating on the project.
Did you know?

Socket for GitHub automatically highlights issues in each pull request and monitors the health of all your open source dependencies. Discover the contents of your packages and block harmful activity before you install or update your dependencies.

Research
/Security News
A flawed sandbox in @nestjs/devtools-integration lets attackers run code on your machine via CSRF, leading to full Remote Code Execution (RCE).

Product
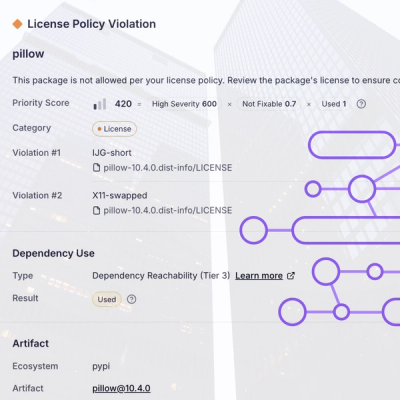
Customize license detection with Socket’s new license overlays: gain control, reduce noise, and handle edge cases with precision.

Product
Socket now supports Rust and Cargo, offering package search for all users and experimental SBOM generation for enterprise projects.