

Product
Introducing Rust Support in Socket
Socket now supports Rust and Cargo, offering package search for all users and experimental SBOM generation for enterprise projects.
By Trevor Norris - Jul 31, 2025
![]()

[English] | [Русский]
CatMagick is a framework designed to make websites easily (both frontend and backend!).
routes / middleware foldersCatMagick requires Node.js to run. Minimal version of NodeJS depends on your use case - CatMagick can work on very old versions as long as you disable some features.
CatMagick Plus (full features): v16.0.0+
CatMagick (no database): v14.18.0+
CatMagick Mini (no database, no hot-reload): v9.11.0+
Install it in your project from NPM Registry using a package manager: NPM, Yarn or PNPM.
# Install latest stable version from NPM Registry using NPM
npm install catmagick

# Install latest stable version from NPM Registry using Yarn
yarn add catmagick

# Install latest stable version from NPM Registry using PNPM
pnpm add catmagick
Or install the latest beta version in your project from GitHub using a package manager: NPM, Yarn or PNPM.
# Install latest beta version from GitHub using NPM
npm install git+https://github.com/BoryaGames/CatMagick.git

# Install latest beta version from GitHub using Yarn
yarn add git+https://github.com/BoryaGames/CatMagick.git

# Install latest beta version from GitHub using PNPM
pnpm add https://github.com/BoryaGames/CatMagick.git
To run your project, you just need to require() it.
# Do it directly
node -e "require('catmagick')"

# Or make a start.js file instead
echo require('catmagick') > start.js
node start.js
CatMagick requires a config.json file in root of your project to start. While it has a lot of options, all of them are completely optional.
{
  "web": {
    "port": 80, // webserver listen port, defaults to auto-detect
    "domain": "example.com", // your website's domain, no default
    "proxies": 1, // number of proxies before your website (example, CloudFlare), required to correctly detect IP-addresses under proxies
  },
  "SSL": {
    "enabled": true, // if your website should work on https
    "proxy": true, // if your website does not have it's own cert and key files, but there's some proxy (example, CloudFlare) adding a SSL in between, then set this option to true, make sure that enabled is also true for this to work
    "cert": "cert.pem", // if your website has SSL enabled and does not use a proxy, you need to specify the certificate file, defaults to cert.pem
    "key": "key.pem" // if your website has SSL enabled and does not use a proxy, you need to specify the certificate key file, defaults to key.pem
  },
  "logs": {
    "requests": true, // log all requests to console or not, defaults to true
    "WebSocket": true, // log all WebSocket connections or disconnections to console, defaults to true
  },
  "database": {
    "enabled": true, // do you need a database in your project, defaults to false
    "type": "sqlite", // what database do you want, sqlite is the most easy one for beginners to setup, defaults to sqlite, you must install your database's package for it to work
    "file": "database.db", // if you use sqlite, what file should it save to, defaults to database.db
  },
  "features": {
    "sourceMaps": true, // should CatMagick add source maps after transforming .jsx files to .js, defaults to true
    "SSR": true, // should enable server-side rendering support, defaults to false
    "minify": true // should minify JSX files to reduce file size and load times
  },
  "hotReload": {
    "routes": true, // automatically detect changes in your routes and perform a partial reload, defaults to true
    "middleware": true, // automatically detect changes in your middleware and perform a partial reload, defaults to true
    "database": true, // automatically detect changes in your databases and perform a partial reload, defaults to true
    "events": true, // automatically detect changes in your events and perform a partial reload, defaults to true
    "config": true // automatically detect changes in your config and perform a partial reload, defaults to true, some parts (like webserver listen port) cannot be changed and requires a manual full restart
  },
  "sessions": {
    "secret": "p2ssw0rd!", // if your project requires sessions to authorize the user, make a secure password for encrypting them, no default
    "secureCookie": false // if your cookies should be https, defaults to true, you must disable it if you're using HTTP, or your sessions may not work
  },
  "captcha": {
    "enabled": true, // do you need captcha in your website, defaults to false
    "provider": "recaptcha", // captcha provider - recaptcha/hcaptcha/turnstile, defaults to recaptcha
    "siteKey": "12345", // your captcha site key, no default
    "secretKey": "54321" // your captcha secret key, no default
  }
}
Once you have made your config.json, create routes, middleware and events folders, if you use a database - you also need to create a databases folder.
Now, go to your routes folder and just add index.html to it, start your project and go to your website - you will see your HTML there.
While that may look as normal HTML, CatMagick already injected itself there.
Now, add <script src="/app.jsx"></script> to your HTML and go to a new file app.jsx inside your routes folder.
By default, CatMagick renders component called Root, so let's make it:
new class Root extends CatMagick.Component {
  render() {
    return <h1>Meow!</h1>;
  }
}
You can now see this <h1> on your website - it means CatMagick works! :tada:
⚠️ If you make a syntax error inside a JSX file, the error will be printed in the server console and the client will receive old version before an error and your users will not be affected. While that may seem as a useful feature, you may be confused why your code did not update if you're not using IDE and not looking at the server's console.
new class Root extends CatMagick.Component {
  render() {
    return (
      // Use empty tag <>something</> to combine multiple components into one root component
      <>
        <h1>Meow!</h1>
        {/* Self-closing <tag /> */}
        <br />
        {/* "color" is an attribute */}
        <MyComponent color="red">
          {/* Content of your component */}
          World
        </MyComponent>
      </>
    );
  }
}

// Your own component
new class MyComponent extends CatMagick.Component {
  // Read attributes from an argument
  render({ color }) {
    // To add custom CSS styles, the most easy way to use "style" attribute, and it's value is a JavaScript object
    return <p style={{
      "color": color
    }}>
      {/* Use {something} syntax to insert JavaScript variables inside HTML tags */}
      {/* useContent() just returns the content inside your component (in this case, "World") */}
      Hello, {useContent()}!
    </p>;
  }
}
When debugging, debug mode can be a useful feature for you.
// Enable debug mode
CatMagick.debug = true;

new class Root extends CatMagick.Component {
  render() {
    return <h1>Meow!</h1>;
  }
}
Debug mode will output extra logs to the console: when render is happening, how much time did it took, state of the WebSocket, router logs and more.
Let's make a simple page with three buttons using custom components.
new class Root extends CatMagick.Component {
  render() {
    return (
      <>
        <MyButton /> <MyButton /> <MyButton />
      </>
    );
  }
}

new class MyButton extends CatMagick.Component {
  render() {
    function btnClicked() {
      // We need to increment clicks
    }

    // "click" is an attribute to listen for click event
    return <button click={btnClicked}>Clicks: 0</button>;
  }
}
We want to be able to see amount of clicks on the button. Let's try something:
new class MyButton extends CatMagick.Component {
  render() {
    var clicks = 0;

    function btnClicked() {
      clicks++;
    }

    return <button click={btnClicked}>Clicks: {clicks}</button>;
  }
}
Nope, clicks variable is being reset back to 0 on every render, as it's inside the render() function. Maybe let's move it outside?
var clicks = 0;

new class MyButton extends CatMagick.Component {
  render() {
    function btnClicked() {
      clicks++;
    }

    return <button click={btnClicked}>Clicks: {clicks}</button>;
  }
}
Well, we still have two problems:
We have any amount of buttons (for example, 3 here), but only one variable.
Even though we changing the clicks variable, we do not update the on-screen data, so the user doesn't see the new amount.
The best way to solve this is using a hook called useState.
new class MyButton extends CatMagick.Component {
  render() {
    // "clicks" is the variable itself here, but to change it we must use a setter called "setClicks", and 0 is value of our variable
    var [clicks, setClicks] = useState(0);

    function btnClicked() {
      // We increment our variable
      setClicks(clicks + 1);
    }

    return <button click={btnClicked}>Clicks: {clicks}</button>;
  }
}
This hook will automatically save everything, it works with multiple instances of the component and also automatically updates the screen!
⚠️ Hook - is a function that is supposed to execute the same time and same amount of times every render.
  if (someCondition) {
    var [clicks, setClicks] = useState(0);
  }
This hook can be called 0 or 1 times depending on the condition, that's a WRONG usage and may cause your variables not to save or replace other variables.
There's two hooks made for heavy computations and other uses.
var [num, setNum] = useState(0);

// Pretend this is a heavy computation
var value = (num ** 2);
We do not want to compute value on every render if the num didn't change.
var [num, setNum] = useState(0);

// Pretend this is a heavy computation
var value = useMemo(() => (num ** 2), [num]);
A hook called useMemo will make the computation only if num did change. This way if the num = 2 on the first render, and num = 2 on the second render - it will not call the function again, but take the same value from memory.
Okay, but pretend this is a really heavy computation.
var [num, setNum] = useState(0);

// Pretend this is a really heavy computation
var value = useCache(() => (num ** 2), [num]);
The useCache hook works the same as useMemo, but can store infinite amount of previous values.
num = 2, it computes the value.
num = 2, it takes value from memory.
num = 3, it computes the new value.
num = 2, and here useMemo will compute the value again, but useCache will go back and take the value from memory.
Another useful hook is called an effect.
useEffect(() => {
  // An effect function
}, [num]);
The useEffect works the same as useMemo - it will only call the function only if dependency array has changed.
But, there's also some differences to it:
useEffect doesn't return anything.
Effect is called only AFTER the render is done.
Effect can optionally return a clean-up function - this function calls before the effect gets called again.
useEffect(() => {
  console.log(2);

  return () => {
    console.log(3);
  };
}, [num]);

console.log(1);
num = 2, in the first render 1 is printed to the console.
2 is being printed to the console only after full render is done.
num = 3 - num has changed, 3 is being printed to the console as previous effect is doing it's clean-up.
Then, 1 is being printed to the console.
After the render, 2 is being printed to the console again.
Sometimes, you just want to do a simple focus:
input.focus();
But you must get the input element first. And a reference can help with that.
useReferenceis not a hook, so you can call it safely any amount of times.
new class Root extends CatMagick.Component {
  render() {
    // We create a reference
    var input = useReference();

    useEffect(() => {
      // After the render, we can focus the input using the reference we've made.
      // Don't forget: input is a reference and not an element, you must call it first to get the element - input()
      input().focus();

      // By the way, ref.displayData() is a shortcut for ref().getBoundingClientRect()
      console.log(input.displayData());
    }, []);

    // We must add the reference to "ref" attribute
    return <input type="text" ref={input} />;
  }
}
Also, you can use references to pass some value to the parent component.
new class Root extends CatMagick.Component {
  render() {
    var test = useReference();

    useEffect(() => {
      console.log(test()); // -> 5
    }, []);

    return <Child test={test} />;
  }
}

new class Child extends CatMagick.Component {
  render({ test }) {
    // Set the value to 5
    test.set(5);

    return <p>Hello, World!</p>;
  }
}
Sometimes you just need to force a re-render. Normally useState will re-render the element after it's value been changed, but if your component relies on some external data source and it changed, you need to update the screen yourself.
CatMagick.rerender();
This is as simple as calling a function.
Your application can be multi-page, but transition between them is not really fast.
CatMagick.goto("/login");
This is the simplest use of CatMagick's router - it will automatically do a GET request to that page, do a clean-up for all current effects and replace current HTML with that page.
Sometimes, this just doesn't work correctly or you want to be even faster - then you can merge pages into a single page.
new class Main extends CatMagick.Component {
  render() {
    return (
      <>
        <h1>This is the main page.</h1>
        <br />
        {/* CatMagick.handleLink is a function that automatically replaces your <a> link with CatMagick.goto(href) */}
        <a href="/login" click={CatMagick.handleLink}>Go to login</a>
      </>
    );
  }
}

new class Login extends CatMagick.Component {
  render() {
    return (
      <>
        <h1>This is the login page.</h1>
      </>
    );
  }
}

CatMagick.route("/", "Main");
CatMagick.route("/login", "Login");
Router will handle fast transition to that link and also browser's back/forward buttons.
The first argument to .route method is a path, but you can actually use patterns instead of specifying exact path.
/users/12345 - exact path
/users/$ - match anything (/users/12345, /users/54321, /users/cat)
/users/$id - match anything, but save it as id (which you can use later)
/users/$$ - match anything, including deeper paths (/users/12345, /users/54321/send, /users/cat/edit/confirm)
/$? - use a question mark to make it optional (/, /home, /download)
/$$? - you can use a question mark here too (/, /home, /download/windows)
If you want to get the current path and it's extra information - call useLocation() (not a hook).
new class UserPage extends CatMagick.Component {
  render() {
    var location = useLocation();

    // Current link is http://localhost/users/12345?show_servers=true#bio

    console.log(location.pathname); // -> /users/12345
    console.log(location.search); // -> ?show_servers=true
    console.log(location.hash); // -> #bio
    console.log(location.params.id); // -> 12345
  }
}

CatMagick.route("/users/$id", "UserPage");
Sometimes you want to remove a component from the screen, but keep its current state. Or maybe you want to pre-render component in background without showing it on the screen.
new class Root extends CatMagick.Component {
  render() {
    var [show, setShow] = useState(true);

    return (
      <center>
        <div style={{
          "display": show ? "block" : "none"
        }}>
          <Counter />
        </div>
        <br /><br />
        <button click={() => setShow(!show)}>Show / Hide</button>
      </center>
    );
  }
}

new class Counter extends CatMagick.Component {
  render() {
    var [count, setCount] = useState(0);

    return <button click={() => {
      setCount(count + 1);
    }}>Count: {count}</button>;
  }
}
This will work, but even though element has display: none; in CSS, it's still in DOM and browser will render it in background, let's change it to built-in component Activity.
new class Root extends CatMagick.Component {
  render() {
    var [show, setShow] = useState(true);

    return (
      <center>
        <Activity show={show}>
          <Counter />
        </Activity>
        <br /><br />
        <button click={() => setShow(!show)}>Show / Hide</button>
      </center>
    );
  }
}
Now, when show = false, component will completely remove from the DOM, but still its render() function will be called, its state being remembered and its effects will still work.
Look at this code:
new class Root extends CatMagick.Component {
  render() {
    var [swap, setSwap] = useState(false);

    return (
      <center>
        {swap ? <div>
          <input type="text" placeholder="Input 2" />
          <input type="text" placeholder="Input 1" />
        </div> : <div>
          <input type="text" placeholder="Input 1" />
          <input type="text" placeholder="Input 2" />
        </div>}
        <br /><br />
        <button click={() => setSwap(!swap)}>Swap</button>
      </center>
    );
  }
}
We swap the inputs on button press, but the state of the component is position-based. You can see the inputs swap (their placeholder swaps), but the text inside the input remains at the same position. You can solve this by using keys:
new class Root extends CatMagick.Component {
  render() {
    var [swap, setSwap] = useState(false);

    return (
      <center>
        {swap ? <div>
          <input type="text" placeholder="Input 2" key="myinput2" />
          <input type="text" placeholder="Input 1" key="myinput1" />
        </div> : <div>
          <input type="text" placeholder="Input 1" key="myinput1" />
          <input type="text" placeholder="Input 2" key="myinput2" />
        </div>}
        <br /><br />
        <button click={() => setSwap(!swap)}>Swap</button>
      </center>
    );
  }
}
Now, CatMagick understands that inputs have been swapped and will do it more efficiently while also swapping the state.
new class Root extends CatMagick.Component {
  render() {
    var [swap, setSwap] = useState(false);

    return (
      <center>
        {swap ? <div>
          <Counter key="mycounter2" />
          <Counter key="mycounter1" />
        </div> : <div>
          <Counter key="mycounter1" />
          <Counter key="mycounter2" />
        </div>}
        <br /><br />
        <button click={() => setSwap(!swap)}>Swap</button>
      </center>
    );
  }
}

new class Counter extends CatMagick.Component {
  render({ key }) {
    var [count, setCount] = useState(0);

    return <button click={() => setCount(count + 1)} key={key}>
      Count: {count}
    </button>;
  }
}
This code with custom component also works, but a little different inside. Both counters are being rendered 2 times at the same time:
Normal render
CatMagick saw the state needs to be swapped
CatMagick does state migration
Second render with correct state
You can use built-in <Animation> component to make animations:
new class Root extends CatMagick.Component {
  render() {
    var [blue, setBlue] = useState(false);
    var [hidden, setHidden] = useState(false);

    return (
      <center>
        <br />
        <Animation>
          {!hidden && <div style={{
            "backgroundColor": blue ? "blue" : "red"
          }}></div>}
        </Animation>
        <br /><br />
        <button click={() => setBlue(!blue)}>Change color</button>
        <br />
        <button click={() => setHidden(!hidden)}>Show / Hide</button>
      </center>
    );
  }
}
By just wrapping your element(s) in this component, it will show, hide, change color, move, etc smoothly.
⚠️ Animations currently doesn't work in Firefox, as it doesn't support View Transition API.
You may want to customize the animations:
        <Animation animation="slow-fade">
          {!hidden && <div style={{
            "backgroundColor": blue ? "blue" : "red"
          }}></div>}
        </Animation>
::view-transition-old(.slow-fade) {
  animation-duration: 500ms;
}

::view-transition-new(.slow-fade) {
  animation-duration: 500ms;
}
In case you're moving an element, you should also add an unique name attribute to the animation - this way browser will find the element's position after it has moved. Or in case you're animating a list, make sure to also use name and key attributes.
You add your routes in routes folder, but same as client router you can use patterns here too, but they're more limited.
Server supports $ folder for anything and $id to save it for later use.
We have only made client routes, but how do we make an API routes? You just need to create a _route.js file in your route folder.
Let's create a routes/users/$id/_route.js file:
// We got a GET request on this route
exports.get = (req, res) => {
  // Read saved $id from URL
  console.log(req.params.id); // -> 12345

  // Respond with JSON
  res.json({
    "username": "test"
  });
};

// We got a POST request on this route
exports.post = (req, res) => {
  // Set status code
  res.status(418);

  // Respond with text
  res.end("Hello, World!");
};
Next, let's make a middleware - it's a code that runs on every single request and on every single method, and can interrupt the request before the route even gets called. Create a file in middlewares folder with any name you like.
// The middleware function
module.exports = (req, res) => {
  // If the ip address matches, respond with the error and stop route from executing
  if (req.ip == "123.45.6.78") {
    res.status(403);
    res.end("Access Denied!");
    return false;
  }

  // Otherwise, let's log request's ip address and continue the route normally
  console.log("Request from", req.ip);
  return true;
};
Middleware can be asynchronous - request will wait until your middleware finishes.
All your routes and middleware will be automatically reloaded on changes, if hot-reload is enabled in config.
In case requested route doesn't exist, CatMagick will respond with 404. If requested route exists, but requested method doesn't, CatMagick will respond with 405. If requested route exists, but it fails due to an error, it will be reported to the console and CatMagick will respond with 500.
If you want to make your own friendly design for errors, you can add 400.html, 404.html, 405.html, 500.html files in project root.
Let's make a real-time chat app.
new class Root extends CatMagick.Component {
  render() {
    // We'll save messages in a state
    var [messages, setMessages] = useState([]);

    // A reference is needed to get text from input
    var input = useElement();

    useEffect(() => {
      fetch("/api/messages").then(res => res.json()).then(res => {
        // We got message list from server
        setMessages(messages);
      });
    }, []);

    function sendMessage() {
      // Read text from the input and clear the input
      var content = input().value;
      input().value = "";

      // This method is just like normal browser fetch(), but accepts JSON as body
      CatMagick.fetch("/api/messages", {
        "method": "POST",
        "body": { content }
      });
    }

    return (
      <center>
        <br />
        <h1>Chat</h1>
        <br />
        {messages.map(message => <p>{message}</p>)}
        <br /><br />
        <input type="text" ref={input} placeholder="Text..."> <button click={sendMessage}>Send</button>
      </center>
    );
  }
}
var messages = [];

exports.get = (req, res) => {
  res.json(messages);
};

exports.post = (req, res) => {
  // Validate content
  if (!req.body.content) {
    res.status(400);
    return res.end("You need to specify content.");
  }

  messages.push(req.body.content);
  res.status(204);
  res.end();
};
Okay, but we need to somehow update the page for every user with new message without reloading it, we can use useEvent hook on the client and dispatchEvent on the server for that.
// Server
CatMagick.dispatchEvent("NEW_MESSAGE", req.body.content);
// Client
useEvent("MESSAGE_CREATE", content => {
  // Add new message to the array
  setMessages([...messages, content]);
});
While this works fine, you can improve it by using WebSocket to send messages too:
// Send from client
dispatchEvent("SEND_MESSAGE", content);
To receive events on the server, make /events/SEND_MESSAGE.js file:
module.exports = (content, client) => {
  // Add message to the list
  messages.push(content);

  // Update messages for all users
  CatMagick.dispatchEvent("NEW_MESSAGE", content);

  // By the way, you can use the client variable to store info about the client
  // This client is authorized as user 123
  client.user = 123;
  // We can send events based on condition: send only to all clients authorized as user 123
  CatMagick.dispatchEvent("TEST", messages, client => client.user == 123);
};
Let's improve previous chat app by using a database instead of in-memory array. Start from setting up your config to enable database.
Now, you need to create a database schemas - create /databases/Message.js file:
module.exports = CatMagick.createDatabase({
  "id": CatMagick.wholeNumber,
  "content": CatMagick.unlimitedText
});
You need to specify all data you want to store - we just want to store message's content. But everything in a database must have an unique data - so make sure that first property will be an unique identifier - it can have any name and type, but must be the first one.
Now, let's talk about types:
CatMagick.wholeNumber - a whole number, that's not a floating point (example: 34)
CatMagick.floatingNumber - a number, that can be a floating point (example: 34.7)
CatMagick.unlimitedText - any string (example: "CatMagick")
CatMagick.limitedText(300) - a string with the limit of it's length so it can be stored more efficiently (example: "CatMagick")
CatMagick.boolean - a logic value (examples: false, true)
Time to use our new database in action, let's modify get all messages route:
exports.get = async (req, res) => {
  // Use a database
  var Message = CatMagick.useDatabase("Message");

  // Get all messages
  var messages = await Message.get();

  // Respond with the list of messages
  res.json(messages);
};
.getmethod accepts conditions as an argument, if you want to get all messages with a specific content you can doawait Message.get({ "content": "Test" }).
Now, let's modify new message event:
module.exports = (content, client) => {
  // Use a database
  var Message = CatMagick.useDatabase("Message");

  // Add new message
  await Message.add({ content });

  // Update messages for all users
  CatMagick.dispatchEvent("NEW_MESSAGE", content);
};
Since
idis a whole number, it can be auto-generated so you don't have to specify it when adding new data to the database. If your unique property is not a whole number, make sure to give an unique identifier when adding new data.
And a few useful methods:
// Delete from database
await Message.delete({
  "id": 34
});

// Delete everything
await Message.delete();

// Get all messages
var messages = await Message.get();

// Get one message (getOne returns one object instead of an array)
var msg = await Message.getOne({
  "id": 7
});

// Edit third message
await messages[2].edit({
  "content": "New content!"
});

// Delete first message
await messages[0].delete();
Let's say you have a User database:
module.exports = CatMagick.createDatabase({
  "id": CatMagick.wholeNumber,
  "username": CatMagick.limitedText(255)
});
A message can have an author which is a User - you could store it's ID, but you need to manually get the User everytime you need it.
var User = require("./User.js");

module.exports = CatMagick.createDatabase({
  "id": CatMagick.wholeNumber,
  "author": User,
  "content": CatMagick.unlimitedText
});
But you can do relations like this - just specify another database as a type.
var cat = await User.getOne({
  "id": 123
});

await Message.add({
  "author": cat,
  "content": "Test"
});
We just saved the author of the message to the database. Now, next time you get it, it will be a User object already:
var msg = await Message.getOne({
  "id": 7
});

console.log(msg.author.id); // 123
console.log(msg.author.username); // cat
Secure your website from bots using CAPTCHA - first, set it up in the config. Then, just add a <Captcha /> component to your website:
new class Root extends CatMagick.Component {
  render() {
    var getToken = useReference();

    return (
      <center>
        <br />
        <br />
        <Captcha getToken={getToken} />
        <br />
        <br />
        <button click={() => {
          CatMagick.fetch("/send", {
            "method": "POST",
            "body": {
              "captcha": getToken()()
            }
          });
        }}>Send</button>
      </center>
    );
  }
}
Once user clicked "Send", you can use a reference to get solved token to send to your server. And you can verify it like this:
exports.post = async (req, res) => {
  if (!await CatMagick.verifyCaptcha(req.body.captcha)) {
    // Captcha failed
    res.status(400);
    return res.end("Invalid captcha.");
  }

  // Captcha passed
  res.status(204);
  res.end();
};
First, don't forget to enable SSR in the config. After that, you can insert server variables like this:
<p>Your IP address is {_%= req.ip %_}</p>
There's three variations of this syntax:
{_% code %_} - execute code when page is loading, do not insert anything
{_%= code %_} - insert some value, but filter the output to prevent XSS
{_%- code %_} - insert any value, useful for inserting JSX tags
You can write both frontend and backend inside a single JSX file.
"@private"
async function test(name) {
  return `Your name - ${name}, and your IP address - ${req.ip}`;
}

async function meow() {
  console.log(await test("John"));
}
Here, test(name) function is being executed on the server (backend) and works just like a normal function in frontend, while meow() is a normal client function (frontend).
⚠️ Private functions must be async top-level functions, there should be
"@private"before each server top-level variable or function. There should be at least one empty line between functions.
FAQs
CatMagick is a framework to make websites easily.
The npm package catmagick receives a total of 4 weekly downloads. As such, catmagick popularity was classified as not popular.
We found that catmagick demonstrated a healthy version release cadence and project activity because the last version was released less than a year ago. It has 1 open source maintainer collaborating on the project.
Did you know?

Socket for GitHub automatically highlights issues in each pull request and monitors the health of all your open source dependencies. Discover the contents of your packages and block harmful activity before you install or update your dependencies.
Product
Socket now supports Rust and Cargo, offering package search for all users and experimental SBOM generation for enterprise projects.
Product
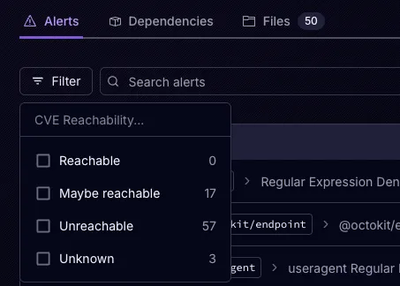
Socket’s precomputed reachability slashes false positives by flagging up to 80% of vulnerabilities as irrelevant, with no setup and instant results.

Product
Socket is launching experimental protection for Chrome extensions, scanning for malware and risky permissions to prevent silent supply chain attacks.