Research
/Security News
Critical Vulnerability in NestJS Devtools: Localhost RCE via Sandbox Escape
A flawed sandbox in @nestjs/devtools-integration lets attackers run code on your machine via CSRF, leading to full Remote Code Execution (RCE).
create-mvc-server
Advanced tools
A CLI tool to quickly scaffold a server with a database of your choice
A CLI tool to quickly scaffold an Express.js app with different database options.
To install this package globally, run:
npm install -g create-mvc-server
After installation, you can create a new Express app by running:
npx create-mvc-server <project-name>
.env.testPGDATABASE=your_test_db_name
.env.developmentPGDATABASE=your_db_name
Create the first endpoint test in app.test.js:
const request = require("supertest");
const app = require("../app");

describe("GET /endpoint", () => {
  it("should respond with 200 status", async () => {
    const response = await request(app).get("/endpoint");
    expect(response.statusCode).toBe(200);
  });
});
Run the test:
npm test
const express = require("express");
const router = express.Router();
const { getExample } = require("../controllers/example-controller.js");

router.get("/example", getExample);

module.exports = router;
const { selectExample } = require("../models/example-model.js");

exports.getExample = (req, res, next) => {
  selectExample()
    .then((example) => {
      res.status(200).send({ example });
    })
    .catch((err) => {
      next(err);
    });
};
const db = require("../../db/connection.js");

exports.selectExample = () => {
  return db.query("SELECT * FROM example_table").then(({ rows }) => {
    return rows;
  });
};
createdb <database-name>
.env.developmentDB_HOST=localhost
DB_USER=your_db_user
DB_PASSWORD=your_db_password
DB_NAME=your_db_name
mysql -u your_db_user -p
CREATE DATABASE your_db_name;
After configuring your .env file and setting up the database, you can start the server:
npm start
const express = require("express");
const router = express.Router();
const { getUsers, createUser } = require("../controllers/userController");

router.get("/users", getUsers);
router.post("/users", createUser);

module.exports = router;
const db = require("../config/db");

exports.getUsers = (req, res) => {
  db.query("SELECT * FROM users", (err, results) => {
    if (err) {
      res.status(500).json({ message: "Error fetching users" });
    } else {
      res.status(200).json(results);
    }
  });
};

exports.createUser = (req, res) => {
  const { name, email } = req.body;
  db.query(
    "INSERT INTO users (name, email) VALUES (?, ?)",
    [name, email],
    (err, results) => {
      if (err) {
        res.status(500).json({ message: "Error creating user" });
      } else {
        res.status(201).json({ id: results.insertId, name, email });
      }
    }
  );
};
const db = require("../config/db");

db.query(
  `CREATE TABLE IF NOT EXISTS users (
    id INT AUTO_INCREMENT PRIMARY KEY,
    name VARCHAR(255) NOT NULL,
    email VARCHAR(255) NOT NULL UNIQUE
  )`,
  (err) => {
    if (err) {
      console.error("Error creating users table:", err.message);
    } else {
      console.log("Users table ready");
    }
  }
);
.env.developmentMONGO_URI=your_mongodb_uri
After configuring your .env file and setting up the database, you can start the server:
npm start
const express = require("express");
const router = express.Router();
const { getUsers, createUser } = require("../controllers/userController");

router.get("/users", getUsers);
router.post("/users", createUser);

module.exports = router;
const User = require("../models/userModel");

exports.getUsers = async (req, res) => {
  try {
    const users = await User.find();
    res.status(200).json(users);
  } catch (error) {
    res.status(500).json({ message: error.message });
  }
};

exports.createUser = async (req, res) => {
  const { name, email } = req.body;

  if (!name || !email) {
    return res.status(400).json({ message: "Name and email are required" });
  }

  try {
    const user = await User.create({ name, email });
    res.status(201).json(user);
  } catch (error) {
    res.status(500).json({ message: error.message });
  }
};
const mongoose = require("mongoose");

const userSchema = new mongoose.Schema(
  {
    name: {
      type: String,
      required: true,
    },
    email: {
      type: String,
      required: true,
      unique: true,
    },
  },
  { timestamps: true }
);

module.exports = mongoose.model("User", userSchema);
DATABASE_URL=sqlite:./database.db
After configuring your .env file and setting up the database, you can start the server:
npm start
const express = require("express");
const router = express.Router();
const { getUsers, createUser } = require("../controllers/userController");

router.get("/users", getUsers);
router.post("/users", createUser);

module.exports = router;
const db = require("../config/db");

exports.getUsers = (req, res) => {
  db.all("SELECT * FROM users", [], (err, rows) => {
    if (err) {
      res.status(500).json({ message: "Error fetching users" });
      return;
    }
    res.status(200).json(rows);
  });
};

exports.createUser = (req, res) => {
  const { name, email } = req.body;
  db.run(
    "INSERT INTO users (name, email) VALUES (?, ?)",
    [name, email],
    function (err) {
      if (err) {
        res.status(500).json({ message: "Error creating user" });
        return;
      }
      res.status(201).json({ id: this.lastID, name, email });
    }
  );
};
const db = require("../config/db");

// Create table if not exists
db.serialize(() => {
  db.run(`CREATE TABLE IF NOT EXISTS users (
    id INTEGER PRIMARY KEY AUTOINCREMENT,
    name TEXT NOT NULL,
    email TEXT NOT NULL UNIQUE
  )`);
});
copy the URI connection string - "postgres://...", or keep that tab open as you complete the next step.Carrying on from before, with the database password and URI both handy:
DATABASE_URL=postgresql://postgres:[YOUR-PASSWORD]@<host>:<port>/postgres
New + button at the top right.yarn and the default start command to yarn start.Environment Variables section:Key called DATABASE_URL using the URI for Value from your .env.production fileKey called NODE_ENV, set the value to productionLogs for it by going to the Events on the dashboardWhen it's deployed, you can view it via the generated link, upon navigating there you will be greeted with an error, make sure you are pointing to an existing endpoint, such as /api and confirm your data is being fetched correctly.
I welcome contributions to improve this tool! Here’s how you can help:
If you find a bug or have a feature request, please create an issue on the GitHub repository.
git clone https://github.com/<your-username>/create-mvc-server.git
git checkout -b my-new-feature
git add .
git commit -m "Add my new feature"
git push origin my-new-feature
I do not claim ownership of any third-party works included in this project. All third-party content is used under fair use or with permission from the original authors. If there are any issues with the use of third-party content, please contact me, and I will address them promptly.
FAQs
A CLI tool to quickly scaffold a server with a database of your choice
The npm package create-mvc-server receives a total of 1 weekly downloads. As such, create-mvc-server popularity was classified as not popular.
We found that create-mvc-server demonstrated a healthy version release cadence and project activity because the last version was released less than a year ago. It has 1 open source maintainer collaborating on the project.
Did you know?

Socket for GitHub automatically highlights issues in each pull request and monitors the health of all your open source dependencies. Discover the contents of your packages and block harmful activity before you install or update your dependencies.

Research
/Security News
A flawed sandbox in @nestjs/devtools-integration lets attackers run code on your machine via CSRF, leading to full Remote Code Execution (RCE).

Product
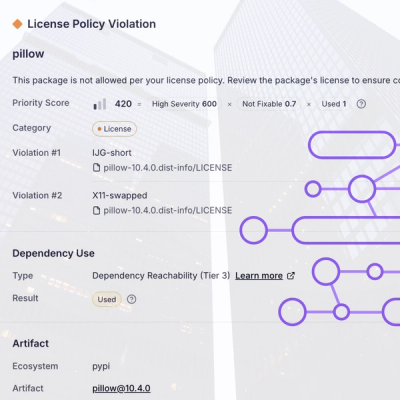
Customize license detection with Socket’s new license overlays: gain control, reduce noise, and handle edge cases with precision.

Product
Socket now supports Rust and Cargo, offering package search for all users and experimental SBOM generation for enterprise projects.