Product
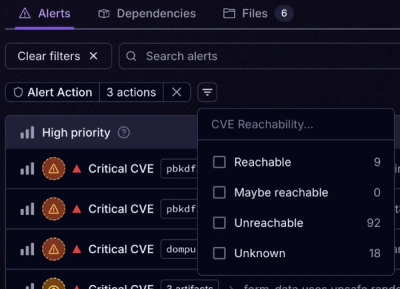
Introducing Tier 1 Reachability: Precision CVE Triage for Enterprise Teams
Socket’s new Tier 1 Reachability filters out up to 80% of irrelevant CVEs, so security teams can focus on the vulnerabilities that matter.
cypress-auth0-simulator
Advanced tools
A Cypress plugin specifically created for SDK's that integrate
with Auth0! Cypress-Auth0-Simulator will simulate an auth0 server, running on localhost, so you
don't have to create fake Auth0 accounts while developing or running tests that require authentication!
Features:
cy.given() command.npm install cypress-auth0-simulator --dev
This plugin supports the following javascript sdks that interface with auth0:
To set the correct SDK, you need to set the AUTH0_SDK environment variable inside your cypress.config.ts or through
any of the usual cypress environmental variables options.
in the cypress.config.ts file
// integrations/cypress/cypress.config.ts
export default defineConfig({
    env: {
        // This is the SDK used to communicate with Auth0, can be either 'auth0-js', 'auth0-vue', 'auth0-react' or 'nextjs-auth0'
        AUTH0_SDK: 'auth0-js',
    }
});
or with the use of an .env file (
examples: auth0-vue, auth0-react, nextjs-auth0
or create-react-app)
# .env.auth0-react
AUTH0_SDK="auth0-js"
// cypress/support/e2e.ts or in your cypress/support/commands.ts

import 'cypress-auth0-simulator/commands';
We need to register an encrypt cypress task.
// cypress.config.ts
import { encrypt } from 'cypress-auth0-simulator';

export default defineConfig({
    e2e: {
        setupNodeEvents(on) {
            on('task', { encrypt });
        },
    },
});
// cypress.config.ts
export default defineConfig({
    e2e: {
        setupNodeEvents(on) {
            const { encrypt } = require('cypress-auth0-simulator');
            on('task', { encrypt });
        },
    },
});
An example of all the possible environment variables can be found in the cypress.config.ts file.
// cypress.config.ts
export default defineConfig({
    env: {
        // This is the SDK used to communicate with Auth0, can be either 'auth0-js', 'auth0-vue', 'auth0-react' or 'nextjs-auth0'
        AUTH0_SDK: 'auth0-js',
        // This is the port of the simulated Auth0 server to which the Auth0 SDK will connect
        AUTH0_SIMULATOR_PORT: 4400,
        // The intended consumer of the token
        AUTH0_AUDIENCE: 'https://your-audience/',
        // The Client ID of the Auth0 application
        AUTH0_CLIENT_ID: '67c25b266aa911ee8c990242ac120002',
        // The type of authentication flow used by the Auth0 SDK
        AUTH0_CONNECTION: 'Username-Password-Authentication',
        // The default scope for the Auth0 user
        AUTH0_SCOPE: 'openid profile email offline_access',
        // This is the secret used to sign the JWT tokens
        AUTH0_CLIENT_SECRET: '',
        // This is the secret used to encrypt the session cookie
        AUTH0_COOKIE_SECRET: '',
        // This is the name of the session cookie used by the Cypress tests
        AUTH0_SESSION_COOKIE_NAME: 'appSession',
    }
});
These same variables can also be set through the use of env files: (
examples: auth0-react, nextjs-auth0 create-react-app)
# /integrations/cypress/.env.auth0-react
AUTH0_SDK="auth0-react"
AUTH0_SIMULATOR_PORT=4400
AUTH0_AUDIENCE="https://your-audience/"
AUTH0_CONNECTION="Username-Password-Authentication"
AUTH0_SCOPE="openid profile email offline_access"
AUTH0_CLIENT_ID="67c25b266aa911ee8c990242ac120002"
AUTH0_CLIENT_SECRET='YOUR_AUTH0_CLIENT_SECRET'
AUTH0_COOKIE_SECRET='6d0598f28f62a9aee14929ef46c7c8befdc0150d870ec462fa45629511fd2a46'
NOTE: Make sure that the SDK you're using is pointing to the same values as you're passing in the Cypress env when running in Cypress!
// Auth0-Vue SDK example
export const auth0 = createAuth0({
  domain: 'https://localhost:4400',
  clientId: '67c25b266aa911ee8c990242ac120002',
  authorizationParams: {
    audience: 'https://your-audience/',
    scope: 'openid profile email offline_access',
  },
});
The Auth0 SDK's require a https connection to work. This can easily be setup by using mkcert to create a self-signed certificate for your localhost.
A running example with setting up mkcert instruction can be found here at @simulacrum/ui
Cypress recommends using start-server-and-test to ensure the test process exits and any servers are shut down.
Make sure to follow the following convention for creating your own start command with Auth0-Cypress
npx start-server-and-test <first command> <first resource> <second command> <second resource> <test command>
As example:
# This will start the server and test commands in parallel
npx start-server-and-test \
# This will start the application server that will be tested against in Cypress
'npm run start:server' http://localhost:3000 \
# This will start the Auth0 simulator GraphQL server
'npm run start:auth0' http://localhost:4000 \ ##
# This will start the Cypress tests
cypress open
See the scripts section in package.json for various examples on the use of integrating
withstart-server-and-test command.
The following commands are now available in your test suite:
An example of these commands in use can be found in the login.spec.ts file.
createSimulation creates the fake auth0 server with your configuration
describe('tests requiring auth', () => {
    it('should access restricted resource', () => {
        cy.createSimulation(); // Will use the default configuration set in cypress.config.ts
        // OR
        cy.createSimulation({ options }); // Will use the options passed in to start the simulated Auth0 server
    });
})
given creates a fake user that can be used to log into the fake auth0 server.
describe('tests requiring auth', () => {
    it('should access restricted resource', () => {
        cy
            .createSimulation({ options })
            .given() // with no arguments a random user is created
            .login();
    });
})
describe('tests requiring auth', () => {
    it('should access restricted resource', () => {
        cy
            .createSimulation()
            .given({ email: 'bob@gmail.com' })  // fixed fields
            .login();
    });
})
Depending on the SDK that has been configured, a token will be requested through the use of getTokenSilently(). Which will set the token in the local storage of the browser.
Call login and logout in your test. For example:
describe('log in', () => {
    it('should get token without signing in', () => {
        cy
            .createSimulation({ options })
            .visit("/")
            .contains("Log out").should('not.exist')
            .given()
            .login()
            .visit("/")
            .contains("Log out")
            .logout();
    });
});
cy.logout will destroy the simulation and do any clean up between tests like removing cookies.
cy.logout();
Make VERY sure that the Auth0 env variable values you're using, are the EXACT same as the variables you're passing into Cypress.
https://github.com/bahmutov/start-server-and-test#use-http-get-requests
It is possible to hook up express middleware to log each endpoint that is called and any associated querystring or POST
data by simply adding the debug: true option when calling createSimulation:
describe('debug auth0 server', () => {
    it("should log in and log out", () => {
        cy.createSimulation({ debug: true })
    });
});

FAQs
Auth0 integration plugin for Cypress
The npm package cypress-auth0-simulator receives a total of 0 weekly downloads. As such, cypress-auth0-simulator popularity was classified as not popular.
We found that cypress-auth0-simulator demonstrated a not healthy version release cadence and project activity because the last version was released a year ago. It has 1 open source maintainer collaborating on the project.
Did you know?

Socket for GitHub automatically highlights issues in each pull request and monitors the health of all your open source dependencies. Discover the contents of your packages and block harmful activity before you install or update your dependencies.

Product
Socket’s new Tier 1 Reachability filters out up to 80% of irrelevant CVEs, so security teams can focus on the vulnerabilities that matter.

Research
/Security News
Ongoing npm supply chain attack spreads to DuckDB: multiple packages compromised with the same wallet-drainer malware.

Security News
The MCP Steering Committee has launched the official MCP Registry in preview, a central hub for discovering and publishing MCP servers.