Security News
Crates.io Users Targeted by Phishing Emails
The Rust Security Response WG is warning of phishing emails from rustfoundation.dev targeting crates.io users.
dotenv-mono
Advanced tools
This package permit to have a centralized dotenv on a monorepo. It also includes some extra features such as manipulation and saving of changes to the dotenv file, a default centralized file, and a file loader with ordering and priorities.
To prevent code duplication and enhance re-usability, a centralized configuration including all of your environment variables might be handy.
Rather of generating a .env file for each package, we may utilize a single .env file at the project's root.
This is a package that allows monorepo applications and packages to share and load a centralized dotenv. It's based over dotenv package.
It also includes some extra features such as manipulation and saving of changes to the dotenv file, a default centralized file, and a file loader with ordering and priorities.
The plugin dotenv-expand is enabled by default.
├── .env
├── .env.production
├── .env.defaults
├── packages
│   ├── ui-library
│   ├── other-library
├── apps
│   ├── web
│   │   ├── .storybook
│   ├── docs
The package search the first .env file, matching with some priority criteria, by walking up the parent directories.
Starting from the current process directory, this package finds the first file that matches the best filepath and filename criteria with the highest priority. The greater the depth of the up folder, the lesser its priority.
The priority can be customized on the configuration with the priorities property, see the example below on
the usage section.
Note: The allowed values for
NODE_ENVare usuallytest,developmentandproduction.
| Priority | Filename |
|---|---|
| 75 | .env.$(NODE_ENV).local |
| 50 | .env.local |
| 25 | .env.$(NODE_ENV) |
| 1 | .env |
Given the following folder structure with dotenv files:
├── .env
├── .env.production
├── apps
│   ├── .env.development
│   ├── web
│   ├── docs
│   │   ├── .env
│   │   ├── .env.local
Having the following priority order:
| Path | Priority | Depth |
|---|---|---|
.env | 1 | 2 |
.env.production | 25 | 2 |
apps/.env.development | 25 | 1 |
apps/docs/.env | 1 | 0 |
apps/docs/.env.local | 50 | 0 |
Then we will have the following outcome scenarios:
| Current working directory | Env | Match |
|---|---|---|
/ | development | .env |
/ | production | .env.production |
apps/web | development | .env |
apps/web | development | apps/.env.development |
apps/docs | development | apps/docs/.env.local |
Install the library from npm or yarn just running one of the following command lines:
| npm | yarn |
|---|---|
npm install dotenv-mono --save | yarn add dotenv-mono |
For custom advanced configuration of Next.js, you can create a next.config.js or next.config.mjs file in the root of
your project directory (next to package.json).
Add the following line at the top of the file:
require("dotenv-mono").load();
require("dotenv-mono").load();

/**
 * @type {import('next').NextConfig}
 */
const nextConfig = {
	/* config options here */
};

module.exports = nextConfig;
The main configuration file is .storybook/main.js. This file controls the Storybook server's behavior, so you must restart Storybook’s process when you change it.
Add the following lines on the file:
const dotenv = require("dotenv-mono").load();

const config = {
	/* config options here */
	env: (config) => {
		return {
			...config,
			...dotenv.env,
		};
	},
};

module.exports = config;
Simple methods to export environment variables from the dotenv into the working process. Here are several potential implementation approaches based on your preferences.
// Inline
require("dotenv-mono").load(/* config */);

// Using the function
const {dotenvLoad} = require("dotenv-mono");
dotenvLoad(/* config */);

// Using import
import {dotenvLoad} from "dotenv-mono";
const dotenv = dotenvLoad(); // Dotenv instance

// Using the class
const {Dotenv} = require("dotenv-mono");
const dotenv = new Dotenv(/* config */);
dotenv.load();
If you need a fast way to replace dotenv package with dotenv-mono, and you need also to have a retro-compatible feature, you can have back directly the output like dotenv package using the config method.
// Inline
const output = require("dotenv-mono").config(/* config */);

// Using the function
const {dotenvConfig} = require("dotenv-mono");
const output = dotenvConfig(/* config */);
// Use `.dotenv.server` or `.dotenv.server.local`, etc...
load({extension: "server"});
// You can specify the file path
load({path: "../../configs/.env"});
dotenv-expand extensionload({expand: false});
// Suppress console output from dotenv
load({quiet: false});
load({defaults: ".env.def"});
// If `.dotenv.overwrite` is present use it with max priority
load({
	priorities: {
		".env.overwrite": 100,
	},
});
const dotenv = require("dotenv-mono").load();
dotenv.save({"MY_ENV_1": "enjoy"});

// Without loading into the working process
const {Dotenv} = require("dotenv-mono");
const dotenv = new Dotenv();
dotenv.loadFile(); // Skip loading into the process
dotenv.save({
	"MY_ENV_1": "enjoy",
	"MY_ENV_2": "'enjoy quotes'",
	"MY_ENV_3": 999,
});
As on the dotenv package on the CLI/Console, you can use the --require (-r) command line option to preload dotenv. By doing this, you do not need to require and load dotenv in your application code.
$ node -r dotenv-mono/load your_script.js
The configuration options below are supported as command line arguments in the format dotenv_config_<option>=value
$ node -r dotenv-mono/load your_script.js dotenv_config_path=/custom/path/to/.env dotenv_config_debug=true
Additionally, you can use environment variables to set configuration options. Command line arguments will precede these.
$ DOTENV_CONFIG_<OPTION>=value node -r dotenv-mono/load your_script.js
$ DOTENV_CONFIG_ENCODING=latin1 DOTENV_CONFIG_DEBUG=true node -r dotenv-mono/load your_script.js dotenv_config_path=/custom/path/to/.env
You can use dotenv-mono as a command-line tool to run commands with environment variables loaded from your .env files. This is similar to dotenv-cli but with all the enhanced features of dotenv-mono.
# Basic usage - load .env and run a command
dotenv-mono -- node your_script.js

# Load specific .env file
dotenv-mono -e .env.production -- node your_script.js

# Load multiple .env files
dotenv-mono -e .env.local -e .env.production -- node your_script.js

# Set additional variables
dotenv-mono -v NODE_ENV=production -v DEBUG=true -- node your_script.js

# Print a variable value
dotenv-mono -p NODE_ENV

# Debug mode - see what files would be loaded
dotenv-mono --debug -e .env.production

# Use all dotenv-mono features
dotenv-mono --cwd /path/to/project --extension server --depth 3 -- node server.js
| Option | Description |
|---|---|
--help | Print help message |
--debug | Output the files that would be processed but don't actually parse them or run the command |
-e <path> | Parse the file <path> as a .env file and add variables to the environment (multiple allowed) |
-v <n>=<value> | Put variable <n> into environment using <value> (multiple allowed) |
-p <variable> | Print value of <variable> to the console |
--no-expand | Skip variable expansion |
--override | Override system variables |
--quiet | Suppress console output from dotenv |
--cwd <path> | Specify the current working directory |
--depth <number> | Specify the max depth to reach when finding up the folder tree |
--encoding <enc> | Specify the encoding of your file containing environment variables |
--extension <ext> | Specify to load specific dotenv file used only on specific apps/packages |
--defaults <file> | Specify the defaults dotenv filename |
--priorities <json> | Specify the criteria of the filename priority to load as dotenv file |
| Setting | Description | Default |
|---|---|---|
cwd | Specify the current working directory | process.cwd() |
debug | Turn on/off logging to help debug why certain keys or values are not being set as you expect | false |
defaults | Specify the defaults dotenv filename (it can't override any environment variables) | .env.defaults |
depth | Specify the max depth to reach finding up the folder from the children directory | 4 |
encoding | Specify the encoding of your file containing environment variables | utf8 |
expand | Turn on/off the dotenv-expand plugin | true |
extension | Specify to load specific dotenv file used only on specific apps/packages (ex. .env.server...) | |
override | Override any environment variables that have already been set on your machine with values from your .env file | false |
path | Specify a custom path if your file containing environment variables is located elsewhere | |
priorities | Specify the criteria of the filename priority to load as dotenv file | See Priorities |
quiet | Turn on/off quiet mode to suppress console output from dotenv | true |
It will read your .env file following the criteria, parse the contents, assign it to process.env.
Note: This method differs from the previous
loadfunction. In that it requires the configuration to be loaded on the class instance via the constructor.
public load(loadOnProcess: boolean): Dotenv;
It will read your .env file following the criteria, parse the contents, ready to be read or changed programmatically.
public loadFile(): Dotenv;
Merge the data on input with the loaded data from load or loadFile, and save the changes on the original dotenv file.
Note: If
.env.defaultsis present, it won't be overwritten, you can just save the changes on the main dotenv file (.env,.env.local, etc...)
public save(changes: Record<string, any>): Dotenv;
See the dotenv documentation HERE
public parse<T extends Record<string, any> = Record<string, any>>(src: string | Buffer): T;
Have an idea? Found a bug? Please raise to ISSUES or PULL REQUEST. Contributions are welcome and are greatly appreciated! Every little bit helps, and credit will always be given.
FAQs
This package permit to have a centralized dotenv on a monorepo. It also includes some extra features such as manipulation and saving of changes to the dotenv file, a default centralized file, and a file loader with ordering and priorities.
The npm package dotenv-mono receives a total of 9,974 weekly downloads. As such, dotenv-mono popularity was classified as popular.
We found that dotenv-mono demonstrated a healthy version release cadence and project activity because the last version was released less than a year ago. It has 1 open source maintainer collaborating on the project.
Did you know?

Socket for GitHub automatically highlights issues in each pull request and monitors the health of all your open source dependencies. Discover the contents of your packages and block harmful activity before you install or update your dependencies.

Security News
The Rust Security Response WG is warning of phishing emails from rustfoundation.dev targeting crates.io users.

Product
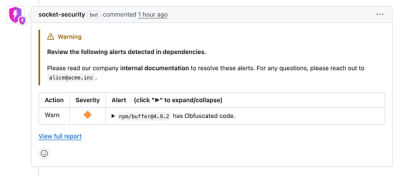
Socket now lets you customize pull request alert headers, helping security teams share clear guidance right in PRs to speed reviews and reduce back-and-forth.

Product
Socket's Rust support is moving to Beta: all users can scan Cargo projects and generate SBOMs, including Cargo.toml-only crates, with Rust-aware supply chain checks.