Product
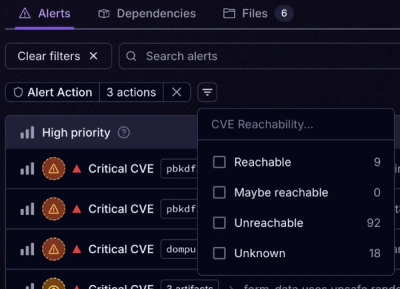
Introducing Tier 1 Reachability: Precision CVE Triage for Enterprise Teams
Socket’s new Tier 1 Reachability filters out up to 80% of irrelevant CVEs, so security teams can focus on the vulnerabilities that matter.
elasticio-cli
Advanced tools
In order to use this tool, you must have Node v12 (or higher) installed. To install this tool, run:
npm install elasticio-cli -g
In order to check if the installation was successful, just type in your terminal:
$ elasticio
You should see an output like this:
$ elasticio

     elasticio 1.2.0

   USAGE

     elasticio <command> [options]

   COMMANDS

     cmp:process <path> [fixture]           Run the startup, init, process, and shutdown function of an action/trigger. Only the process is mandatory
     cmp:exec <path> [func] [fixture]       Run component actions
     help <command>                         Display help for a specific command

   GLOBAL OPTIONS

     -h, --help         Display help
     -V, --version      Display version
     --no-color         Disable colors
     --quiet            Quiet mode - only displays warn and error messages
     -v, --verbose      Verbose mode - will also output debug messages
This confirms a successful installation.
A test fixture is a JSON test sample that a piece of code should be run against. Every test fixture for the elasticio platform should have a msg field and a cfg field at minimum. A snapshot field can also be included. All test fixtures are stored together in one JSON file, test/fixture.json, where test is a folder stored at the same level as component.json.
Here is a simple example of a fixture file that contains two fixtures. The fixture you would like to use can be selected at runtime.
{
  "fixtures": {
    "successfulFixture": {
      "cfg": {},
      "msg": {
        "body": {}
      }
    },
    "failFixture": {
      "cfg": {},
      "msg": {
        "body": {}
      }
    }
  }
}
Your component's configuration may contain sensitive data, such as API keys or OAuth tokens. Such data must not be placed inside fixture files that may be pushed to a version control system, such as GitHub. Instead they should be replaced by variables using the "{{ Handlebars }}" syntax inside the fixture file. For example:
"access_token":"{{GOOGLE_ACCESS_TOKEN}}"
The variable values will be taken from the .env file of your component, which should be in the same folder as component.json.
GOOGLE_CALENDAR_ID=fubar@acme.org
GOOGLE_REFRESH_TOKEN=very-secret-refresh-token
GOOGLE_ACCESS_TOKEN=very-secret-access-token
Executing an action/trigger process locally will typically use the cmp:process command. Running
elasticio cmp:process
will immediately launch you into this process, and run the command on the directory you are currently located in. To run the command in a different directory, add an optional [path] after the command.
While running this command, you will supply an action/trigger linked to a file. This file is required to export a process function, which will be executed. In addition to process, the file can also export startup, init, and shutdown functions. If they exist, they will run in the order startup => init => process => shutdown; identical to the platform. The returned data from startup is accessible in shutdown. The function signatures are:
exports.startup = function startup(cfg) { return startupData; };
exports.init = function init(cfg) { };
exports.process = function process(msg, cfg, snapshot) { };
exports.shutdown = function shutdown(cfg, startupData) { };
Furthermore, if the action/trigger has a static schema, the provided fixture will be initially be checked against its respective schema for an invalid message. This will not impede the running of the process action.
The CLI tool will print all details emitted from the process, and any values that have been returned before it exits.
cmp:process takes two optional flags:
To view the help menu for this function, type elasticio cmp:process -h.
> elasticio cmp:process -x success -a lookupObject
cmp:exec will allow you to run verifyCredentials and any exported function from an action/trigger that may be used on the platform. For example, this allows you to run the functions getMetaModel and other Select View functions. It can be run from within a component directory, or from outside by providing a path.
The CLI tool assumes that exported functions and verifyCredentials will have the following signatures:
exports.verify = async function verify(cfg, optional callback); // found in verifyCredentials.js
exports.getMetaModel = function getMetaModel(cfg);
exports.selectViewFunctions = function selectView(cfg);
exports.process = function process(msg, cfg, snapshot);
verify, getMetaModel, and any Select View function should take the cfg as first parameter. For this function, running process will not run it with the startup/shutdown functions, and will run only the selected method in isolation. This can be beneficial for testing purposes.
If the action/trigger has a static schema, the provided fixture will be initially be checked against its respective schema before running the function for an invalid message. This will not impede the running of the process action, and will only occur if verifyCredentials is not being run.
cmp:exec takes three optional flags:
If both the function name verify and an action name are provided, the verify will override and the CLI will run verifyCredentials.
> elasticio cmp:exec [path or current directory] -f verify => will run verifyCredentials
Running shutdown functions will not currently take any startup data, since it is run in isolation.
cmp:validate will run validation on your component.json file and print results to the terminal. It will validate numerous aspects of the file, including:
No flags are supported at the moment
> elasticio cmp:validate [path or current directory]
There is currently no way to toggle on/off certain error messages/warnings.
If your action/trigger requires global variables, such as those listed in the documentation, these should be added to a file beside fixtures.json in the test directory called .globalEnv, and treated similar to an .env file.
For example:
ELASTICIO_TASK_ID=baf9042hig1mlks13gbpej
These will be loaded into process.env at runtime.
It is possible to configure Microsoft Visual Studio Code so that when you are editing a component, pressing F5 on an action/trigger file will cause cmp:process to be evaluated against that file. In order to do so, one can create a launch.json file at the root folder for the component. The launch.json should look like the following:
{
    "version": "0.2.0",
    "configurations": [
        {
            "type": "node",
            "request": "launch",
            "name": "execute EIO CLI",
            "console": "integratedTerminal",
            "outputCapture": "std",
            "args": [
                "<Path to elasticio - can be learned from through `which elasticio`>",
                "cmp:process",
                "-x",
                "<name of fixture in ./test/fixture.json>",
                "-a",
                "${fileBasenameNoExtension}"
             ]
        }
    ]
}
If the console argument is omitted, then not all log statements will be rendered. If the console argument is set to internalConsole, then all log statements will appear though the terminal will not be interactive and colors will not be rendered. If the console argument is set to integratedTerminal then all log statement will appear and be colorized. The terminal will be interactive for any prompts that are required.
When running the cli from the prompt within MS VS Code version 1.42.1, then prompts should be interactive for most terminals (e.g. bash, powershell, cmd).
FAQs
Command-line interface for elastic.io components
We found that elasticio-cli demonstrated a not healthy version release cadence and project activity because the last version was released a year ago. It has 17 open source maintainers collaborating on the project.
Did you know?

Socket for GitHub automatically highlights issues in each pull request and monitors the health of all your open source dependencies. Discover the contents of your packages and block harmful activity before you install or update your dependencies.

Product
Socket’s new Tier 1 Reachability filters out up to 80% of irrelevant CVEs, so security teams can focus on the vulnerabilities that matter.

Research
/Security News
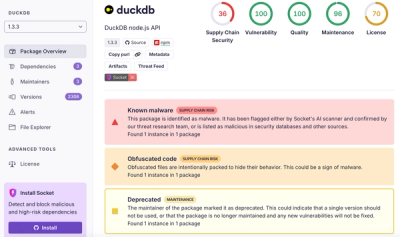
Ongoing npm supply chain attack spreads to DuckDB: multiple packages compromised with the same wallet-drainer malware.

Security News
The MCP Steering Committee has launched the official MCP Registry in preview, a central hub for discovering and publishing MCP servers.