Product
Introducing GitHub Actions Scanning Support
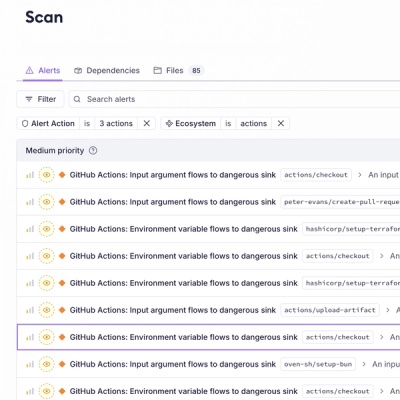
Detect malware, unsafe data flows, and license issues in GitHub Actions with Socket’s new workflow scanning support.
fastify-fusion
Advanced tools
Fastify API framework with `best practices` and `plugins` fused together to make it easy to build and maintain your API.
Fastify API framework with best practices and plugins fused together to make it easy to build and maintain your API.
fuse().start().fastify-swagger and scalar with sensible defaults.@fastify/helmet with sensible defaults.@fastify/cors with sensible defaults for apis.pino-pretty to make it easy to read and access to a logger instance.@fastify/rate-limit with sensible defaults../public static path and easy to add / configure your own.npm install fastify-fusion fastify
If you already have a Fastify app, you can use fuse to add the default options and plugins to your app.
import fastify from 'fastify';
import { fuse, FuseOptions } from 'fastify-fusion';

const app = fastify();

// Fuse the app. It will use the default options if none are provided. If you want to use your own options, pass them in as the second argument.
await fuse(app);
You can also pass in the FuseOptions to customize your fastify instance.
import fastify from 'fastify';
import { fuse, FuseOptions } from 'fastify-fusion';

const fuseOptions: FuseOptions = {
  static: true,
  log: true,
  helmet: false,
  rateLimit: false
};

const app = await fuse(app, fuseOptions);
You can also use the built in start() function to get up and running quickly. This function will create a Fastify app and start the server for you.
import fastify from 'fastify';
import { start, fuse } from 'fastify-fusion';

const app = fastify();

// fuse the app with default options
await fuse(app);

// start the app. Set the options with StartOptions type.
await start(app);
You can customize the behavior of fastify-fusion by passing in options to the fuse function or when creating a new Fastify app with fastify().
import { fuse, FuseOptions } from 'fastify-fusion';
import Fastify from 'fastify';
const app = Fastify();
const options: FuseOptions = {
  helmet: {
    contentSecurityPolicy: false, // Disable CSP for simplicity
  },
  static: {
    path: '/static/', // Serve static files from /public
    dir: './static', // Path to the static files
  },
  rateLimit: {
	max: 200, // Allow 200 requests per minute per IP address
  },
};
await fuse(app, options);
Here is the FuseOptions interface with all the available options:
export type FuseOptions = {
	static?: boolean | StaticOptions;
	log?: boolean | LoggerOptions;
	helmet?: boolean | FastifyHelmetOptions;
};
By default, all the options are set to true, which means that all of the default settings will be applied. You can learn about the default settings in each features's documentation below.
You can start your Fastify app using the start function. This function will start the Fastify server and log the URL where the server is running. This will use the default configuration for the server, which includes a default port of 3000 and a host of 0.0.0.0 if process.env.PORT or process.env.HOST are not set.
import { fastify, start } from 'fastify-fusion';

const app = await fastify();
start(app);
You can customize the port and host by passing in a StartOptions object to the start function.
import { fastify, start, type StartOptions } from 'fastify-fusion';

const app = await fastify();
const options: StartOptions = {
  port: 3001, // Set the port to 3000
  host: '127.0.0.1', // Set the host to 127.0.0.1
};

start(app, options);
If you want to also set the startup message when the server starts, you can pass in a message function to the StartOptions. This function will receive the host and port as arguments and should return a string that will be logged to the console.
import { fastify, start, type StartOptions } from 'fastify-fusion';
const app = await fastify();
const options: StartOptions = {
  message: (host, port) => `🌏 started successfully at http://${host}:${port}`,
};
start(app, options);
By default fastify-fusion serves static files from the ./public directory. You can change this by passing in a StaticOptions object to the fuse function. The default configuration serves static files from the /public path. Here is an example of how to customize the static file serving:
const defaultStaticPath = [
    {
        dir: path.resolve('./public'),
        path: '/',
    },
];
import { fuse, FuseOptions } from 'fastify-fusion';
import Fastify from 'fastify';
const app = Fastify();
const options: FuseOptions = {
  static: {
    dir: './static/', // Serve static files from /static
    path: '/static', // Path to the static files
  },
};
await fuse(app, options);
By default, fastify-fusion uses Pino for logging and configures it with sensible defaults. You can customize the logging behavior by passing in a LoggerOptions object to the fuse function. The default logging configuration uses pino-pretty and here are the default options:
export const defaultLoggingOptions = {
	transport: {
		target: 'pino-pretty',
		options: {
			colorize: true,
			translateTime: true,
			ignore: 'pid,hostname',
			singleLine: true,
		},
	},
};
Here is an example of how to customize the logging options:
import { fuse, FuseOptions } from 'fastify-fusion';
import Fastify from 'fastify';
const app = Fastify();
const options: FuseOptions = {
  log: {
    level: 'info', // Set the log level
    prettyPrint: true, // Enable pretty print for development
  },
};
await fuse(app, options);
If you want to access the logger instance, you can use the logger function. This function will return a logger instance that you can use to log messages in your application. This will use the default logging options if none are provided. Here is an example of how to use the logger instance:
import { logger } from 'fastify-fusion';

const log = logger();
log.info('This is an info message');
fastify-fusion uses fastify-helmet to set security headers by default. You can customize the behavior of fastify-helmet by passing in a FastifyHelmetOptions object to the fuse function. The default configuration sets the following headers:
export const defaultFastifyHelmetOptions: FastifyHelmetOptions = {
	// Turn off CSP (mostly for HTML) to avoid overhead
	contentSecurityPolicy: false,

	// Remove the X-Power-By header
	hidePoweredBy: true,

	// Prevent your API from being framed
	frameguard: {action: 'deny'},

	// Disable DNS prefetching
	dnsPrefetchControl: {allow: false},

	// Enable HSTS for one year on HTTPS endpoints
	hsts: {
		maxAge: 31_536_000, // 365 days in seconds
		includeSubDomains: true,
		preload: true,
	},

	// Block sniffing of MIME types
	noSniff: true,

	// Basic XSS protections
	xssFilter: true,

	// Don't send Referer at all
	referrerPolicy: {policy: 'no-referrer'},

	// Tighten cross-origin resource loading
	crossOriginResourcePolicy: {policy: 'same-origin'},

	// You generally don't need the embedder/policy on an API
	crossOriginEmbedderPolicy: false,

	// Leave CSP nonces off
	// eslint-disable-next-line @typescript-eslint/naming-convention
	enableCSPNonces: false,
};
You can customize the security headers by passing in a FastifyHelmetOptions object to the fuse function. The default configuration sets the following:
import { fuse, FuseOptions } from 'fastify-fusion';
import Fastify from 'fastify';
const app = Fastify();
const options: FuseOptions = {
  helmet: {
    contentSecurityPolicy: false, // Disable CSP for simplicity
    crossOriginEmbedderPolicy: false, // Disable COEP for simplicity
  },
};
await fuse(app, options);
fastify-fusion uses @fastify/rate-limit to limit the number of requests to your API. By default, it allows 100 requests per minute per IP address. You can customize the rate limiting behavior by passing in a RateLimitOptions object to the fuse function. Here is an example of how to customize the rate limiting options:
export const defaultFastifyRateLimitOptions: FastifyRateLimitOptions = {
	// Enable rate limiting
	global: true,
	// Limit to 100 requests per minute
	max: 500,
	// Time window for the rate limit
	timeWindow: 60_000, // 1 minute in milliseconds
	// allow list for local development and testing
	allowList: ['127.0.0.1', '0.0.0.0'],
};
You can customize the rate limiting options by passing in a RateLimitOptions object to the fuse function. Here is an example of how to customize the rate limiting options:
import { fuse, FuseOptions } from 'fastify-fusion';
import Fastify from 'fastify';
const app = Fastify();
const options: FuseOptions = {
  rateLimit: {
	max: 200, // Allow 200 requests per minute per IP address
  },
};
await fuse(app, options);
fastify-fusion uses @fastify/cors to enable CORS for your API. By default, it allows all origins and methods. You can customize the CORS behavior by passing in a FastifyCorsOptions object to the fuse function. Here is an example of how to customize the CORS options:
import { fuse, FuseOptions } from 'fastify-fusion';
import Fastify from 'fastify';
const app = Fastify();
const options: FuseOptions = {
  cors: {
	origin: [
		'https://app.yourdomain.com',
		'https://staging.yourdomain.com'
	],
	methods: ['GET', 'POST', 'PATCH', 'PUT', 'DELETE', 'OPTIONS'], // Allowed methods
	allowedHeaders: ['Content-Type', 'Authorization', 'X-Requested-With', 'Bearer'], // Allowed headers
	exposedHeaders: ['Content-Length', 'X-Requested-With'], // Exposed headers
	credentials: true, // Allow credentials
  },
};
await fuse(app, options);
Here are the default CORS options:
export const defaultFastifyCorsOptions: FastifyCorsOptions = {
	origin: true, // Allow all origins
	methods: ['GET', 'POST', 'PATCH', 'PUT', 'DELETE', 'OPTIONS'], // Allowed methods
	allowedHeaders: ['Content-Type', 'Authorization', 'X-Requested-With', 'Bearer'], // Allowed headers
	exposedHeaders: ['Content-Length', 'X-Requested-With'], // Exposed headers
	credentials: true, // Allow credentials
};
fastify-fusion integrates with fastify-swagger and scalar to provide OpenAPI documentation and a user-friendly interface for exploring your API. By default, it serves the OpenAPI documentation at /docs/json and the Scalar UX at /. You can customize the route prefixes and the static path for the docs UX.
You can customize the OpenAPI options by passing in an OpenApiOptions object to the fuse function. Here is an example of how to customize the OpenAPI options:
import { fuse, FuseOptions } from 'fastify-fusion';
import Fastify from 'fastify';
const app = Fastify();
const options: FuseOptions = {
  openApi: {
	openApiRoutePrefix: '/api-docs', // Change the OpenAPI JSON route prefix
	docsPrefix: '/docs', // Change the OpenAPI docs route prefix
	docsUxPrefix: '/docs-ux', // Change the Scalar UX route prefix
  },
};
await fuse(app, options);
You can also set it to false to disable the OpenAPI documentation and Scalar UX:
import { fuse, FuseOptions } from 'fastify-fusion';
import Fastify from 'fastify';
const app = Fastify();
const options: FuseOptions = {
	openApi: false, // Disable OpenAPI documentation and Scalar UX
};
await fuse(app, options);
If you want to contribute to this project, please read the Contributing Guide for more information on how to get started.
This project is licensed under the MIT License. Copyright (c) Jared Wray.
FAQs
Fastify API framework with `best practices` and `plugins` fused together to make it easy to build and maintain your API.
The npm package fastify-fusion receives a total of 108 weekly downloads. As such, fastify-fusion popularity was classified as not popular.
We found that fastify-fusion demonstrated a healthy version release cadence and project activity because the last version was released less than a year ago. It has 1 open source maintainer collaborating on the project.
Did you know?

Socket for GitHub automatically highlights issues in each pull request and monitors the health of all your open source dependencies. Discover the contents of your packages and block harmful activity before you install or update your dependencies.

Product
Detect malware, unsafe data flows, and license issues in GitHub Actions with Socket’s new workflow scanning support.

Product
Add real-time Socket webhook events to your workflows to automatically receive pull request scan results and security alerts in real time.

Research
The Socket Threat Research Team uncovered malicious NuGet packages typosquatting the popular Nethereum project to steal wallet keys.