js-camera
This is a custom element V1-based camera component.
Installation
npm install js-camera;
API
API Documentation
Changelog
Changelog
Examples
There are some examples in "./examples" in this package.Here is the first one to get you started.
Usage
Use Camera Controls
You can use play, pause, capture and camera face switch immediately by using "controls" attribute on camera element.
Add "controls" and "autoplay" attributes to the camera element.
If necessary, specify the camera face with the "facing" attribute and the resolution with the "width" and "height" attributes.
The default for the "facing" attribute is "back". If omitted, the rear camera opens.
<js-camera id="camera" controls autoplay facing="back" width="1920" height="1080"></js-camera>
You can receive the photos taken at the event and send them to the server.
Also use the play and pause events if needed.
import 'js-camera';
const camera = document.querySelector('#camera');
await camera.waitOpen();
camera
.on('opened', () => {})
.on('played', () => {})
.on('paused', () => {})
.on('tookphoto', evt => {
console.log(evt.detail.base64.slice(0, 30));
});
Try camera options
If you want to experiment with different camera options, you can use "dat-gui" for the camera element and use the options menu.
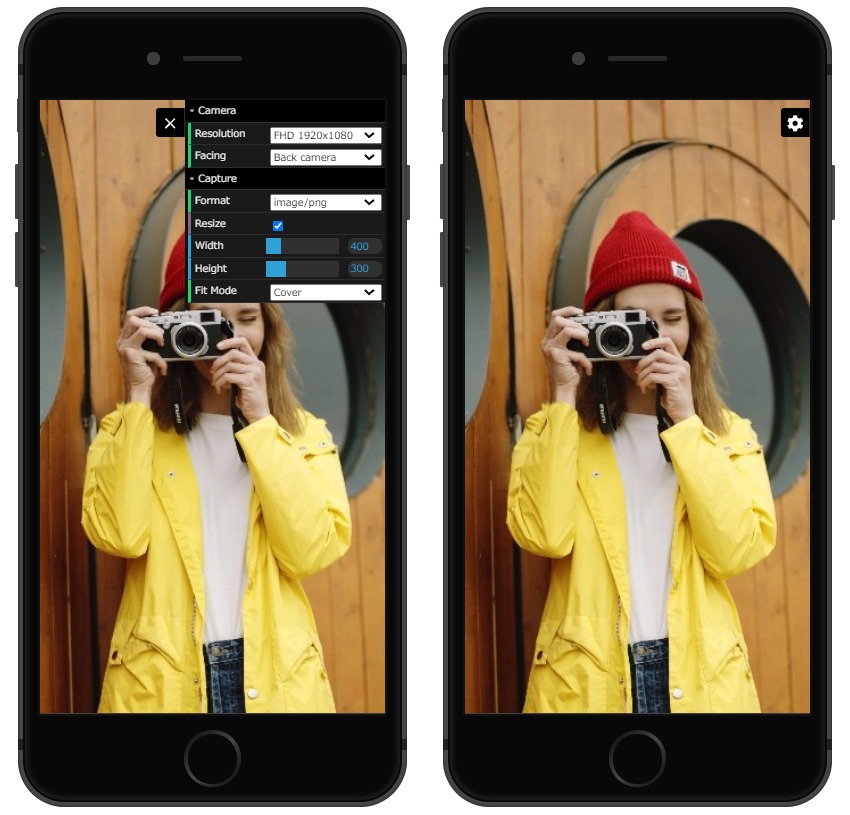
The current GUI options can be accessed from the camera element "guiState".
Here is an example using the GUI option.
Add "dat-gui" attribute to the camera element.
<js-camera id="camera" dat-gui></js-camera>
Get camera elements with JS and operate GUI options.
import 'js-camera';
const camera = document.querySelector('#camera');
const [width, height] = camera.guiState.resolution.split(',');
await camera.open(camera.guiState.facing, width, height);
camera.close();
const options = {format: camera.guiState.format};
if (camera.guiState.resize) {
options.width = camera.guiState.width;
options.height = camera.guiState.height;
options.fit = camera.guiState.fit;
}
const base64 = camera.capture(options);
console.log(base64);
camera.pause();
camera.pause();
camera.play();
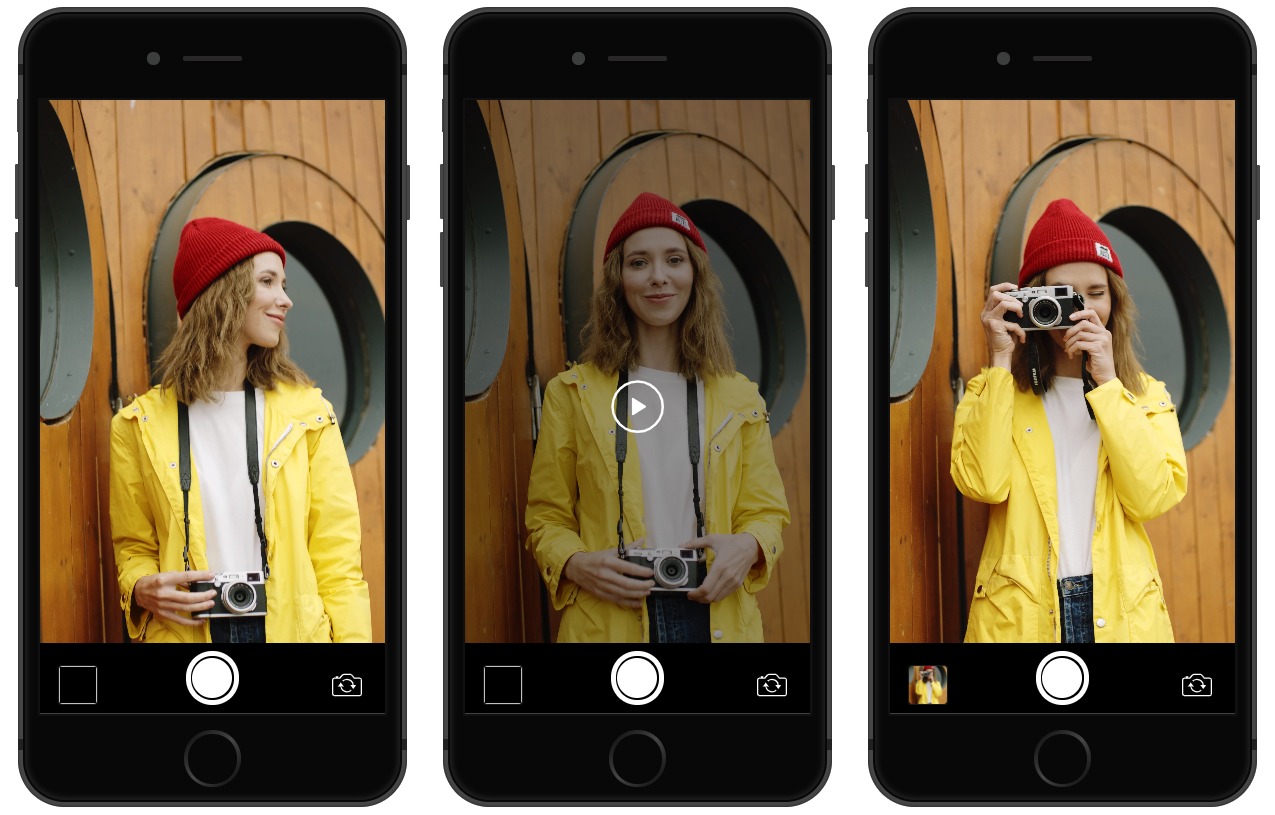
Basic camera usage.
Place the camera open/close, play, pause, and capture buttons in the HTML.
<style>
.actions {
  position: absolute;
  z-index: 1002;
  left: 0;
  bottom: 0;
  padding: 10px;
  width: 100%;
  text-align: center;
}
</style>

<js-camera id="camera"></js-camera>

<div class="actions">
  <button id="btnOpen" type="button">Open</button>
  <button id="btnClose" type="button">Close</button>
  <button id="btnPause" type="button">Pause</button>
  <button id="btnPlay" type="button">Play</button>
  <button id="btnCapture" type="button">Take photo</button>
</div>
Implements camera opening, closing, playing, pausing, and button event capture.
This is the easiest way to use the camera.
import 'js-camera';
const camera = document.querySelector('#camera');
document.querySelector('#btnOpen').addEventListener('click', async () => {
await camera.open('back');
});
document.querySelector('#btnClose').addEventListener('click', () => {
if (!camera.opened)
return;
camera.close();
});
document.querySelector('#btnPause').addEventListener('click', () => {
if (!camera.opened)
return;
camera.pause();
});
document.querySelector('#btnPlay').addEventListener('click', () => {
if (!camera.opened)
return;
camera.play();
});
document.querySelector('#btnCapture').addEventListener('click', () => {
if (!camera.opened)
return;
let base64 = camera.capture();
console.log(`Capture: ${base64}`);
base64 = camera.capture({format: 'image/webp'});
console.log(`WebP capture: ${base64}`);
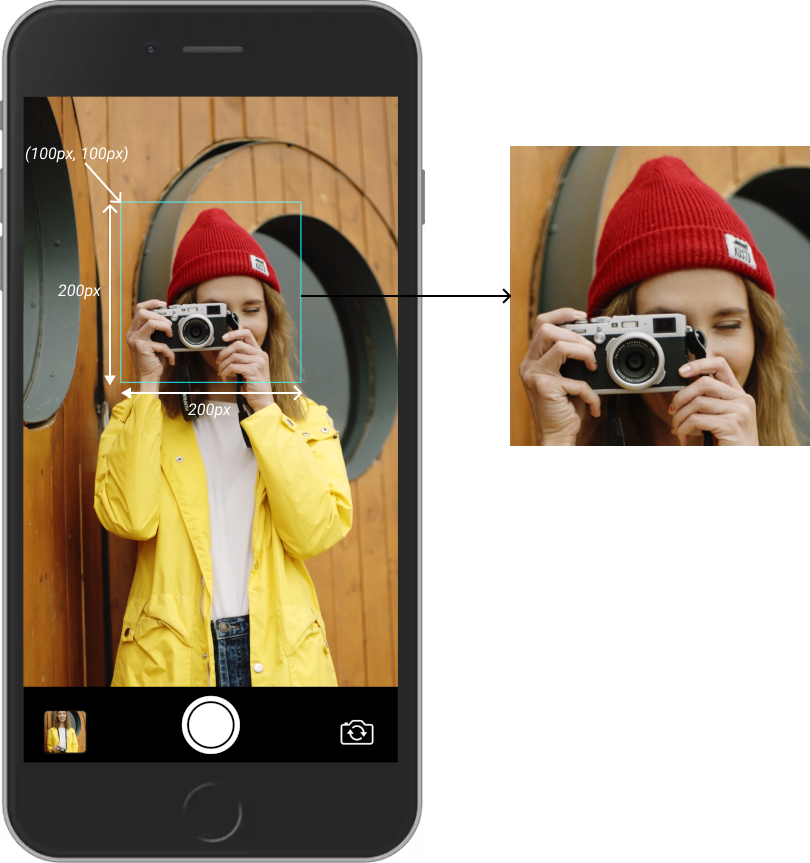
base64 = camera.capture({
fit: 'cover',
width: 300,
height: 200
});
console.log(`Resize capture: ${base64}`);
});
License
MIT licensed