Dynamsoft JavaScript Barcode SDK for Web


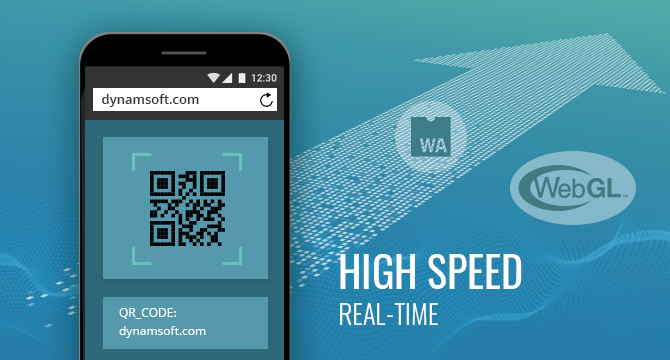
Dynamsoft BarcodeReader SDK for Web is a JavaScript library for barcode scanning based on the WebAssembly technology. It supports real-time localization and decoding of various barcode types. The library is capable of scanning barcodes from static images as well as directly from live video streams. It also supports reading multiple barcodes at once.
Also see Dynamsoft JavaScript Barcode SDK for Node.
Install
yarn
$ yarn add dynamsoft-javascript-barcode
npm
$ npm install dynamsoft-javascript-barcode --save
cdn
<script src="https://cdn.jsdelivr.net/npm/dynamsoft-javascript-barcode@7.6.0/dist/dbr.js" data-productKeys="PRODUCT-KEYS"></script>
<script src="https://unpkg.com/dynamsoft-javascript-barcode@7.6.0/dist/dbr.js" data-productKeys="PRODUCT-KEYS"></script>
Download zip
Quick Usage
<!DOCTYPE html>
<html>
<body>
    <script src="https://cdn.jsdelivr.net/npm/dynamsoft-javascript-barcode@7.6.0/dist/dbr.js" data-productKeys="PRODUCT-KEYS"></script>
    <script>
        let scanner = null;
        (async()=>{
            scanner = await Dynamsoft.BarcodeScanner.createInstance();
            scanner.onFrameRead = results => {console.log(results);};
            scanner.onUnduplicatedRead = (txt, result) => {alert(txt);};
            await scanner.show();
        })();
    </script>
</body>
</html>
Vue example
React example
Angular example
Table of Contents
Features
Supported Symbologies:
1D barcode: Code 39, Code 128, Code 93, Codabar, Interleaved 2 of 5 (ITF), EAN-13, EAN-8, UPC-A, UPC-E, Industrial 2 of 5 (Code 2 of 5 Industry, Standard 2 of 5, Code 2 of 5), Code 39 Extended.
2D barcode: PDF417, QR, DataMatrix, Aztec, MaxiCode, Dot Code.
GS1 Databar: Omnidirectional, Truncated, Stacked, Stacked Omnidirectional, Expanded, Expanded Stacked, Limited.
Patch Code
GS1 Composite Code
Postal Code: USPS Intelligent Mail, PostNet, Planet, Australian Post, UK Royal Mail (RM4SCC).
- Supported Data Sources:
Blob, HTMLImageElement, HTMLVideoElement, and URL, etc.
Browser Compatibility:
-
Unlike typical server-based applications, this library requires some advanced features which fortunately are supported by all mainstream modern browsers. These advanced features are listed below:
-
Combining the requirements above results in the following table of supported browsers.
NOTE: Apart from the browsers, the operating systems running on the target devices may also impose some limitations of their own that could restrict the use of the library. Therefore, the following table serves as a rough estimation instead of an accurate guideline. Browser compatibility ultimately depends on whether the browser on that particular operating system supports the features listed above.
| Chrome | v57+ (v59+ on Android/iOS1) |
| Firefox | v52+ (v55+ on Android/iOS1) |
| Edge2 | v16+ |
| Safari3 | v11+ |
1 Video streaming is not supported in Chrome/Firefox on iOS.
2 On Edge, due to strict Same-origin policy, you must host the library in the same domain as your web page.
3 Safari 11.2.2 ~ 11.2.6 are not supported.
Compact and Full Editions
As more features are being added to the library, the supporting wasm file is getting larger. For flexibility, we provide two editions. The compact edition has fewer features but downloads and compiles faster; on the other hand, the full edition has all features built-in.
wasm size1(gzip) | 810KB | 1.1 MB |
| 1D | ✓ | ✓ |
| QR | ✓ | ✓ |
| Mirco QR | - | ✓ |
| PDF417 | ✓ | ✓ |
| Mirco PDF417 | - | ✓ |
| DataMatrix | ✓ | ✓ |
| Aztec | - | ✓ |
| MaxiCode | - | ✓ |
| Patch Code | - | ✓ |
| GS1 Composite Code | - | ✓ |
| GS1 DataBar | - | ✓ |
| Dot Code | - | ✓ |
| Postal Code | - | ✓ |
| DPM | - | ✓ |
| getRuntimeSettings | ✓ | ✓ |
| updateRuntimeSettings | ✓ | ✓ |
| getIntermediateResults | - | ✓ |
| initRuntimeSettingsWithString | - | ✓ |
| outputSettingsToString | - | ✓ |
| recommended scenario2 | Customer Facing Application | Enterprise Solution |
1 The wasm file size is based on version 7.2.2. In later versions, the size may differ.
2 The compact edition downloads and compiles faster, which makes it more suitable for the scenario where a customer only needs to scan a barcode once. In comparison, scenarios where an employee needs to scan lots of barcodes continuously or where uncommon barcodes or advanced features are required, use the full edition by simply setting the following before you call loadWasm or CreateInstance.
Dynamsoft.BarcodeReader._bUseFullFeature = true;
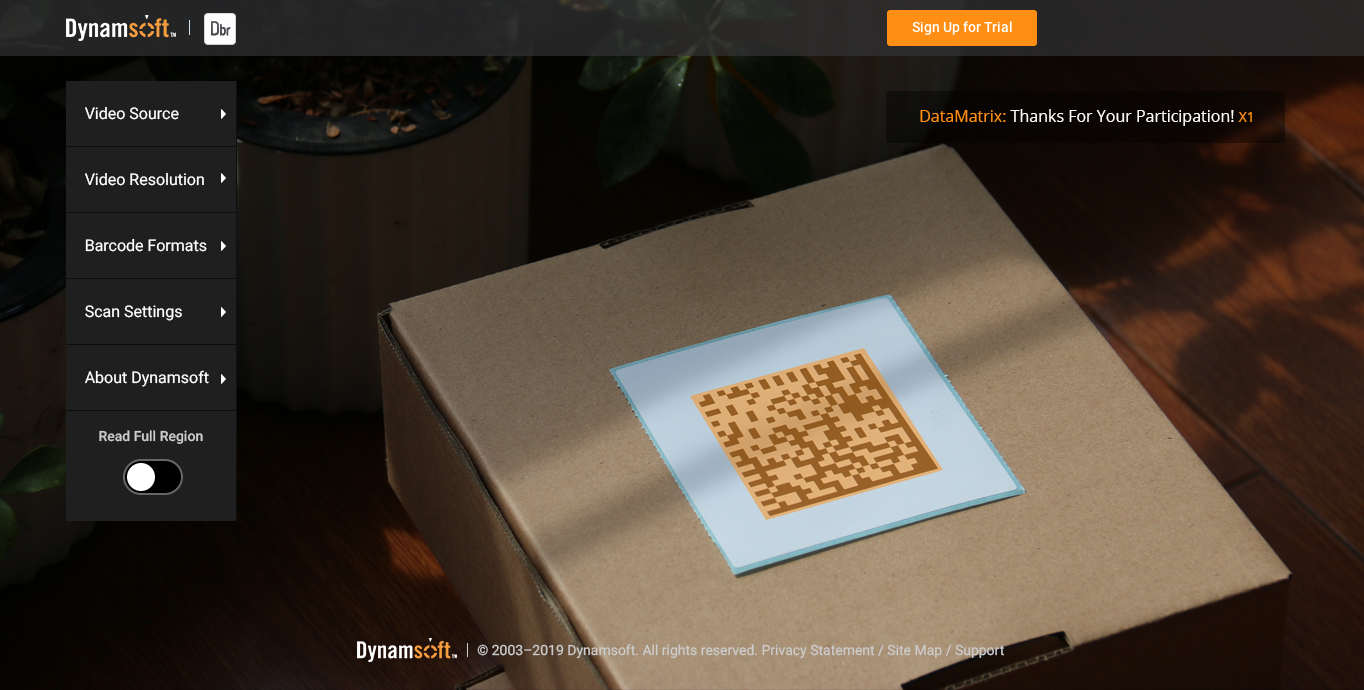
Live Demo
The following is a screenshot of the live demo. Try it here.
Getting Started: HelloWorld
This section will help you use the library to build a simple web application to decode barcodes from a video stream.
Basic Requirements
- Internet connection
- Supported Browser
- Camera access
Step One: Write code in one minute!
Create an HTML file with the following content. Deploy this to your web server and run the application over HTTPS.
- You will need to replace
PRODUCT-KEYS with a trial key for the sample code to work correctly. You can acquire a trial key here.
- If you don't have a ready-to-use web server and you happen to have a package manager like
npm or yarn, you can set up a simple http server in minutes. Check out http-server on npm or yarn.
<!DOCTYPE html>
<html>
<body>
<script src="https://cdn.jsdelivr.net/npm/dynamsoft-javascript-barcode@7.6.0/dist/dbr.js" data-productKeys="PRODUCT-KEYS"></script>
<script>
  let scanner = null;
  (async()=>{
      scanner = await Dynamsoft.BarcodeScanner.createInstance();
      scanner.onFrameRead = results => {console.log(results);};
      scanner.onUnduplicatedRead = (txt, result) => {alert(txt);};
      await scanner.show();
  })();
</script>
</body>
</html>
Try in JSFiddle
Step Two: Tackle a few issues.
Open the file in your browser and there will be a pop-up asking for permission to access the camera. Once the access is granted, you will see the video stream in the default UI of the BarcodeScanner.
Note: If you don't see the pop-up, wait a few seconds for the initialization to finish.
Possible Scenario 1
If you open the HTML file as file:/// or http://, the following error may appear in the browser console:
[Deprecation] getUserMedia() no longer works on insecure origins. To use this feature, you should consider switching your application to a secure origin, such as HTTPS. See https://goo.gl/rStTGz for more details.
In Safari 12 the error is
Trying to call getUserMedia from an insecure document.
As the error states, to access the camera with the API getUserMedia, a secure channel (https://) is required.
Note: If you use Chrome or Firefox, you might not get the error because these two browsers allow camera access via file:/// and http://localhost.
To make sure your web application can access the camera, try to configure your web server to support HTTPS. The following links may help.
Possible Scenario 2
For testing purposes, a self-signed certificate can be used when configuring HTTPS. When accessing the site, the browser might say "the site is not secure". In this case, go to the certificate settings and trust this certificate.
In a production environment, you will need a valid HTTPS certificate that does not have this issue. If you don't have one yet, you can get a free one from Let’s Encrypt. We recommend obtaining a paid certificate from companies such as Verisign, GeoTrust, etc.
Step Three: Time to scan!
Put something with a barcode in front of the camera and you'll see it located and decoded right in the UI.
Step Four: Dive into the code
Now, take a look at the sample code. You can find that there is nothing but two scripts inside the <body>
-
The following script includes the core library in the application via a jsDelivr CDN
<script src="https://cdn.jsdelivr.net/npm/dynamsoft-javascript-barcode@7.6.0/dist/dbr.js" data-productKeys="PRODUCT-KEYS"></script>
The same can be done with other CDNs like unpkg
<script src="https://unpkg.com/dynamsoft-javascript-barcode@7.6.0/dist/dbr.js" data-productKeys="PRODUCT-KEYS"></script>
NOTE: : Since we do change the library a bit in each release, to make sure your application doesn't get interrupted by automatic updates, use a specific version in your production environment, as shown above. Using a general major version like @7 is not recommended.
-
The following script initializes and uses the library
<script>
let scanner = null;
(async()=>{
scanner = await Dynamsoft.BarcodeScanner.createInstance();
scanner.onFrameRead = results => {console.log(results);};
scanner.onUnduplicatedRead = (txt, result) => {alert(txt);};
await scanner.show();
})();
</script>
For now, pay attention to the following two events.
onFrameRead
This event is triggered after each single frame is scanned. The results object contains all the barcode results that the library found on this frame.onUnduplicatedRead
This event is triggered when a new barcode (not a duplicate) is found. txt holds the barcode text value while result is an object that holds details of the found barcode.
In the following sections, you'll find more detailed information on how the library works and how you can customize it to your needs.
Taking a closer look
Initializing
The library is based on the WebAssembly standard; therefore, on first use, it needs some time to download and compile the wasm files. After the first use, the browser may cache the file so that the next time no 'downloading' is required.
Dynamsoft.BarcodeReader.loadWasm is the API to start the initialization.
try{
    await Dynamsoft.BarcodeReader.loadWasm();
}catch(ex){
    console.error(ex);
}
That said, as shown in the sample above, you don't necessarily need to call the above API because other APIs like Dynamsoft.BarcodeReader.createInstance and Dynamsoft.BarcodeScanner.createInstance will call loadWasm themselves.
let reader = null;
let scanner = null;
try{
    reader = await Dynamsoft.BarcodeReader.createInstance();
    scanner = await Dynamsoft.BarcodeScanner.createInstance();
}catch(ex){
    console.error(ex);
}
NOTE: Including the library with a script tag doesn't automatically initialize the library. For better performance, you may want to call loadWasm to download and compile the wasm file in advance and create a reader or scanner instance later.
The detailed initialization includes the following steps:
1. Download
Download the necessary resources. Usually, we deploy the resources on CDN and set a long cache duration. If your web server is faster, you should put the resources on your own server instead of the CDN.
2. Compile
The wasm files are automatically compiled once downloaded. The compilation time varies among different devices & browsers. While it takes less than a second on latest phones or PCs, it may take seconds or longer on some older devices.
3. Initialize
The library needs to initialize every time the page loads. The initialization means creating an BarcodeReaderor BarcodeScanner instance with specified settings.
Configuring Scanner Settings
When creating an instance of the BarcodeScanner object, there are several configuration options. The following code shows some of the most useful ones:
await scanner.updateVideoSettings({ video: { width: 1280, height: 720, facingMode: "environment" } });
await scanner.updateRuntimeSettings("speed");
let runtimeSettings = await scanner.getRuntimeSettings();
runtimeSettings.barcodeFormatIds = Dynamsoft.EnumBarcodeFormat.BF_ONED | Dynamsoft.EnumBarcodeFormat.BF_QR_CODE;
await scanner.updateRuntimeSettings(runtimeSettings);
let scanSettings = await scanner.getScanSettings();
scanSettings.duplicateForgetTime = 20000;
scanSettings.intervalTime = 300;
await scanner.updateScanSettings(scanSettings);
Try in JSFiddle
As you can see in the code, there are three categories of configurations.
-
get/updateVideoSettings: Configures the data source, i.e., the video stream. These settings include which camera to use, the resolution, etc.. Learn more here.
-
get/updateRuntimeSettings: Configures the decode engine. Find a full list of these settings and their corresponding descriptions here.
Try in JSFiddle
e.g.
await barcodeScanner.updateRuntimeSettings("single");
await barcodeScanner.updateRuntimeSettings("speed");
await barcodeScanner.updateRuntimeSettings("balance");
await barcodeScanner.updateRuntimeSettings("coverage");
let settings = await barcodeScanner.getRuntimeSettings();
settings.localizationModes = [
      Dynamsoft.EnumLocalizationMode.LM_CONNECTED_BLOCKS,
      Dynamsoft.EnumLocalizationMode.LM_SCAN_DIRECTLY,
      Dynamsoft.EnumLocalizationMode.LM_LINES, 0, 0, 0, 0, 0];
settings.deblurLevel = 2;
await barcodeScanner.updateRuntimeSettings(settings);
-
get/updateScanSettings: Configures the behavior of the scanner which includes duplicateForgetTime, intervalTime and filter, etc.
Customizing the UI
While the library provides a built-in BarcodeScanner which has its own UI, feel free to customize it.
The default scanner UI is defined in the file dist/dbr.scanner.html. There are 3 ways to customize it:
- Modify the file
dist/dbr.scanner.html directly (only possible when you deploy these files yourself instead of using the CDN).
- Copy the file
dist/dbr.scanner.html, modify it and specify the new file as the default UI by its URL Dynamsoft.BarcodeScanner.defaultUIElementURL = url. Note that you must set defaultUIElementURL before you call createInstance.
- Build the UI into your own web page and call
scanner.setUIElement(HTMLElement) to specify that element.
The following introduces the 3rd way. Check out the following code on how it's done.
<!DOCTYPE html>
<html>
<body>
<div id="div-video-container">
<video class="dbrScanner-video" playsinline="true"></video>
</div>
<script src="https://cdn.jsdelivr.net/npm/dynamsoft-javascript-barcode@7.6.0/dist/dbr.js" data-productKeys="PRODUCT-KEYS"></script>
<script>
let scanner = null;
(async()=>{
scanner = await Dynamsoft.BarcodeScanner.createInstance();
await scanner.setUIElement(document.getElementById('div-video-container'));
scanner.onFrameRead = results => {console.log(results);};
scanner.onUnduplicatedRead = (txt, result) => {alert(txt);};
await scanner.show();
})();
</script>
</body>
</html>
Try in JSFiddle
The code has set the element div-video-container as the UI and inside it there is a video element for showing the video stream.
NOTE: The class name of the video element must be set to dbrScanner-video.
<video class="dbrScanner-video" playsinline="true"></video>
Next, you can add the camera list and resolution list.
If the class names match the default ones which are dbrScanner-sel-camera and dbrScanner-sel-resolution, the library will automatically populate the lists and handle the camera/resolution switching automatically.
<select class="dbrScanner-sel-camera"></select>
Try in JSFiddle
<select class="dbrScanner-sel-resolution"></select>
8 default resolutions will automatically show up.
Try in JSFiddle
Too many resolutions may be overwhelming for end users. Check out the following code on how to offer your own resolution options.
<select class="dbrScanner-sel-resolution">
    <option class="dbrScanner-opt-gotResolution" value="got"></option>
    <option data-width="1920" data-height="1080">1920 x 1080</option>
    <option data-width="1280" data-height="720">1280 x 720</option>
    <option data-width="640" data-height="480">640 x 480</option>
</select>
Possible Issue: : Generally you need to provide a resolution that the camera supports. However, in case a camera does not support a specified resolution, it usually will just use the nearest supported resolution. As a result, the selected resolution may not be the actual resolution.
Solution: To take care of this issue, you can add an option with the class name dbrScanner-opt-gotResolution (as shown above) which the library will then use to show the actual resolution being used.
Try in JSFiddle
Advanced Usage
Print out log for better debugging
Include the following in your code to print internal logs in the console.
Dynamsoft.BarcodeReader._onLog = console.log;
Show found barcodes
Try the following code to show found barcodes in input elements on the page
<input id="ipt-0">
<input id="ipt-1">
<input id="ipt-2">
let iptIndex = 0;
let scanner = null;
(async()=>{
scanner = await Dynamsoft.BarcodeScanner.createInstance();
await scanner.setUIElement(document.getElementById('div-video-container'));
scanner.onFrameRead = results => {console.log(results);};
scanner.onUnduplicatedRead = (txt)=>{
document.getElementById('ipt-' + iptIndex).value = txt;
if(3 == ++iptIndex){
scanner.onUnduplicatedRead = undefined;
scanner.hide();
}
};
await scanner.show();
})();
Try in JSFiddle
Read a specific area/region
To speed up the scanning process, you can choose to scan only a specific area/region.
let settings = await scanner.getRuntimeSettings();
settings.region.regionMeasuredByPercentage = 1;
settings.region.regionLeft = 25;
settings.region.regionTop = 25;
settings.region.regionRight = 75;
settings.region.regionBottom = 75;
await scanner.updateRuntimeSettings(settings);
Try in JSFiddle
Self-hosted | Offline | Intranet Deployment
For commercial usage, we highly recommend self-hosted deployment. The following steps guide you through how to deploy the library on your own server.
- Step one: Place the files
Locate the following files and place them in the same directory on your server. You can get them in dist/.
dbr.js // For <script>
dbr.browser.mjs // For <script type="module">
dbr.scanner.html // Scanner default UI
dbr-<version>.worker.js // A worker thread for decoding
dbr-<version>.wasm.js // Compact Editions
dbr-<version>.wasm // Compact Editions
dbr-<version>.full.wasm.js // Full Editions
dbr-<version>.full.wasm // Full Editions
-
Step two: Configure the server
Make sure that your webserver serves the *.wasm file with Content-Type: application/wasm. Otherwise, the browser won't be able to recognize it.
All you need to do is set the MIME type for .wasm to application/wasm.
Different servers are configured differently, below lists a few popular ones
-
Step three: [Optional] Configure the engineResourcePath
If the resource files like the wasm files are not placed in the same directory as the file dbr.js. Then you will need to specify the path with the API engineResourcePath. Note that it must be set before loadWasm or createInstance is called.
Dynamsoft.BarcodeReader.engineResourcePath = "url/to/the/dir/";
Known Issues
- We use
webgl in BarcodeScannner by default. If you need a specific resolution like 800 * 600 and find the barcode area is wrong, you can turn webgl off by setting scanner._bUseWebgl = false;.
Changelog
https://www.dynamsoft.com/Products/Dynamic-Barcode-Reader-News.aspx#javascript
How to Upgrade
From version 7.2.2-v2 to 7.3.0-v0
- If you are using a CDN, be sure to change the version number in the URL like this
<script src="https://cdn.jsdelivr.net/npm/dynamsoft-javascript-barcode@7.6.0/dist/dbr.js" data-productKeys="PRODUCT-KEYS"></script>
- If you have deployed the library files on your own server, you'll need to replace the old files with the new version. Download the latest version here.
From versions prior to7.2.2-v2 to 7.3.0-v0
Dynamsoft made several changes in the version 7.2.2-v2; therefore it may take a bit more effort to upgrade the library from an older version to the version 7.2.2-v2 or a later version including the latest 7.3.0-v0 (as of January 2020). Apart from changing the code to include the correct version of the library, you'll also need to make changes to your code related to the APIs of the library. Check out this post for more information. If you need further assistance with the upgrade, please feel free to contact Dynamsoft Support.
API Documentation
Online Document
License Activation
It takes several steps to activate a purchased license, the following steps assume you have already acquired a commercial license from Dynamsoft. If you haven't done so yet, you can purchase a license here.
-
Step One : Log in the Customer Portal with your Dynamsoft account
If you don't have an Dynamsoft account, sign up here. Be sure to use the same email that was registered for the purchase.
-
Step Two : Find the License
Once logged in, click Full License under License on the left menu bar and you should be able to see your purchased key on the right pane.
-
Step Three : Activate the License
Under Status, click the button Activate to go to the Activation page, click Activate again and confirm the activation.
-
Step Four : Set a Domain
This step is optional but recommended. By setting a domain to your key, you can protect it against usage abuse. To do this, go back to Full License, find your License and click Details. On the Details page, click Order Detail to get to the order details page where you can see a Set Domain button. Click it, specify a domain and submit.
A few examples of the domain
www.dynamsoft.com
demo.dynamsoft.com
*.dynamsoft.com
-
Step Five : Use the License
You may have noticed that in all the samples above, we have the following line of code
<script src="https://cdn.jsdelivr.net/npm/dynamsoft-javascript-barcode@7.6.0/dist/dbr.js" data-productKeys="PRODUCT-KEYS"></script>
To use your activated key, you simply need to replace PRODUCT-KEYS with it.
License Agreement
https://www.dynamsoft.com/Products/barcode-reader-license-agreement.aspx#javascript
Contact Us
If there are any questions, please feel free to contact support@dynamsoft.com.