Product
Announcing Socket Fix 2.0
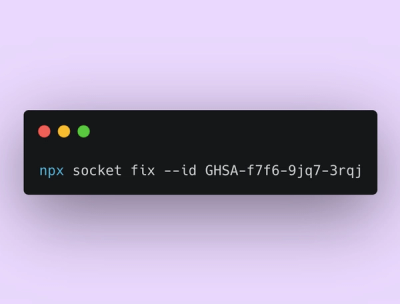
Socket Fix 2.0 brings targeted CVE remediation, smarter upgrade planning, and broader ecosystem support to help developers get to zero alerts.
Very lite but extendable mapping framework to create Mapnik ready maps with OpenStreetMap data (and more).
For now, only Carto based projects are supported (with .mml or .yml config), but in the future we hope to plug in MapCSS too.
Only the core needs:

Note: Node.js versions are moving very fast, and kosmtik or its dependencies are hardly totally up to date with latest release. Ideally, you should run the LTS version of Node.js. You can use a Node.js version manager (like NVM) to help.
npm -g install kosmtik
This might need root/Administrator rights. If you cannot install globally you can also install locally with
npm install kosmtik
This will create a node_modules/kosmtik folder. You then have to replace all occurences of kosmtik
below with node node_modules/kosmtik/index.js.
To reinstall all plugins:
kosmtik plugins --reinstall
To get command line help, run:
kosmtik -h
To run a Carto project (or .yml, .yaml):
kosmtik serve <path/to/your/project.mml>
Then open your browser at http://127.0.0.1:6789/.
You may also want to install plugins. To see the list of available ones, type:
kosmtik plugins --available
And then pick one and install it like this:
kosmtik plugins --install pluginname
For example:
kosmtik plugins --install kosmtik-map-compare [--install kosmtik-overlay…]
By default Kosmtik places a configuration file into $HOMEDIR/.config/kosmtik.yml
where $HOMEDIR is your home directory. You can change that by setting the
environment variable KOSMTIK_CONFIGPATH to the appropriate file.
In the configuration file Kosmtik stores information about installed plugins and you can change certain settings that should be persistent between runs.
Configurable settings are:
Because you often need to change the project config to match your
local env, for example to adapt the database connection credentials,
kosmtik comes with an internal plugin to manage that. You have two
options: with a json file named localconfig.json, or with a js module
name localconfig.js.
Place your localconfig.js or localconfig.json file in the same directory as your
carto project (or .yml, .yaml).
In both cases, the behaviour is the same, you create some rules to target
the configuration and changes the values. Those rules are started by the
keyword where, and you define which changes to apply using then
keyword. You can also filter the targeted objects by using the if clause.
See the examples below to get it working right now.
[
    {
        "where": "center",
        "then": [-122.25, 49.25, 10]
    },
    {
        "where": "Layer",
        "if": {
            "Datasource.type": "postgis"
        },
        "then": {
            "Datasource.dbname": "vancouver",
            "Datasource.password": "",
            "Datasource.user": "ybon",
            "Datasource.host": ""
        }
    },
    {
        "where": "Layer",
        "if": {
            "id": "hillshade"
        },
        "then": {
            "Datasource.file": "/home/ybon/Code/maps/hdm/DEM/data/hillshade.vrt"
        }
    }
]
exports.LocalConfig = function (localizer, project) {
    localizer.where('center').then([29.9377, -3.4216, 9]);
    localizer.where('Layer').if({'Datasource.type': 'postgis'}).then({
        "Datasource.dbname": "burundi",
        "Datasource.password": "",
        "Datasource.user": "ybon",
        "Datasource.host": ""
    });
    // You can also do it in pure JS
    project.mml.bounds = [1, 2, 3, 4];
};
By default Kosmtik uses Carto to render the style. Via plugins
it is possible to use other renderers or Carto implementations. You can switch the renderer installing
the appropriate plugin and by passing the command line option --renderer NAME. NAME refers to the
renderer name (e.g. carto for the default renderer or magnacarto for the Magnacarto renderer).
Run kosmtik plugins --available to get an up to date list.
FAQs
Make maps with OpenStreetMap and Mapnik
The npm package kosmtik receives a total of 8 weekly downloads. As such, kosmtik popularity was classified as not popular.
We found that kosmtik demonstrated a not healthy version release cadence and project activity because the last version was released a year ago. It has 2 open source maintainers collaborating on the project.
Did you know?

Socket for GitHub automatically highlights issues in each pull request and monitors the health of all your open source dependencies. Discover the contents of your packages and block harmful activity before you install or update your dependencies.

Product
Socket Fix 2.0 brings targeted CVE remediation, smarter upgrade planning, and broader ecosystem support to help developers get to zero alerts.

Security News
Socket CEO Feross Aboukhadijeh joins Risky Business Weekly to unpack recent npm phishing attacks, their limited impact, and the risks if attackers get smarter.

Product
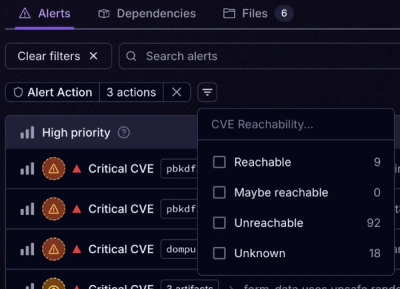
Socket’s new Tier 1 Reachability filters out up to 80% of irrelevant CVEs, so security teams can focus on the vulnerabilities that matter.