Security News
Astral Launches pyx: A Python-Native Package Registry
Astral unveils pyx, a Python-native package registry in beta, designed to speed installs, enhance security, and integrate deeply with uv.
node-api-analytics
Advanced tools
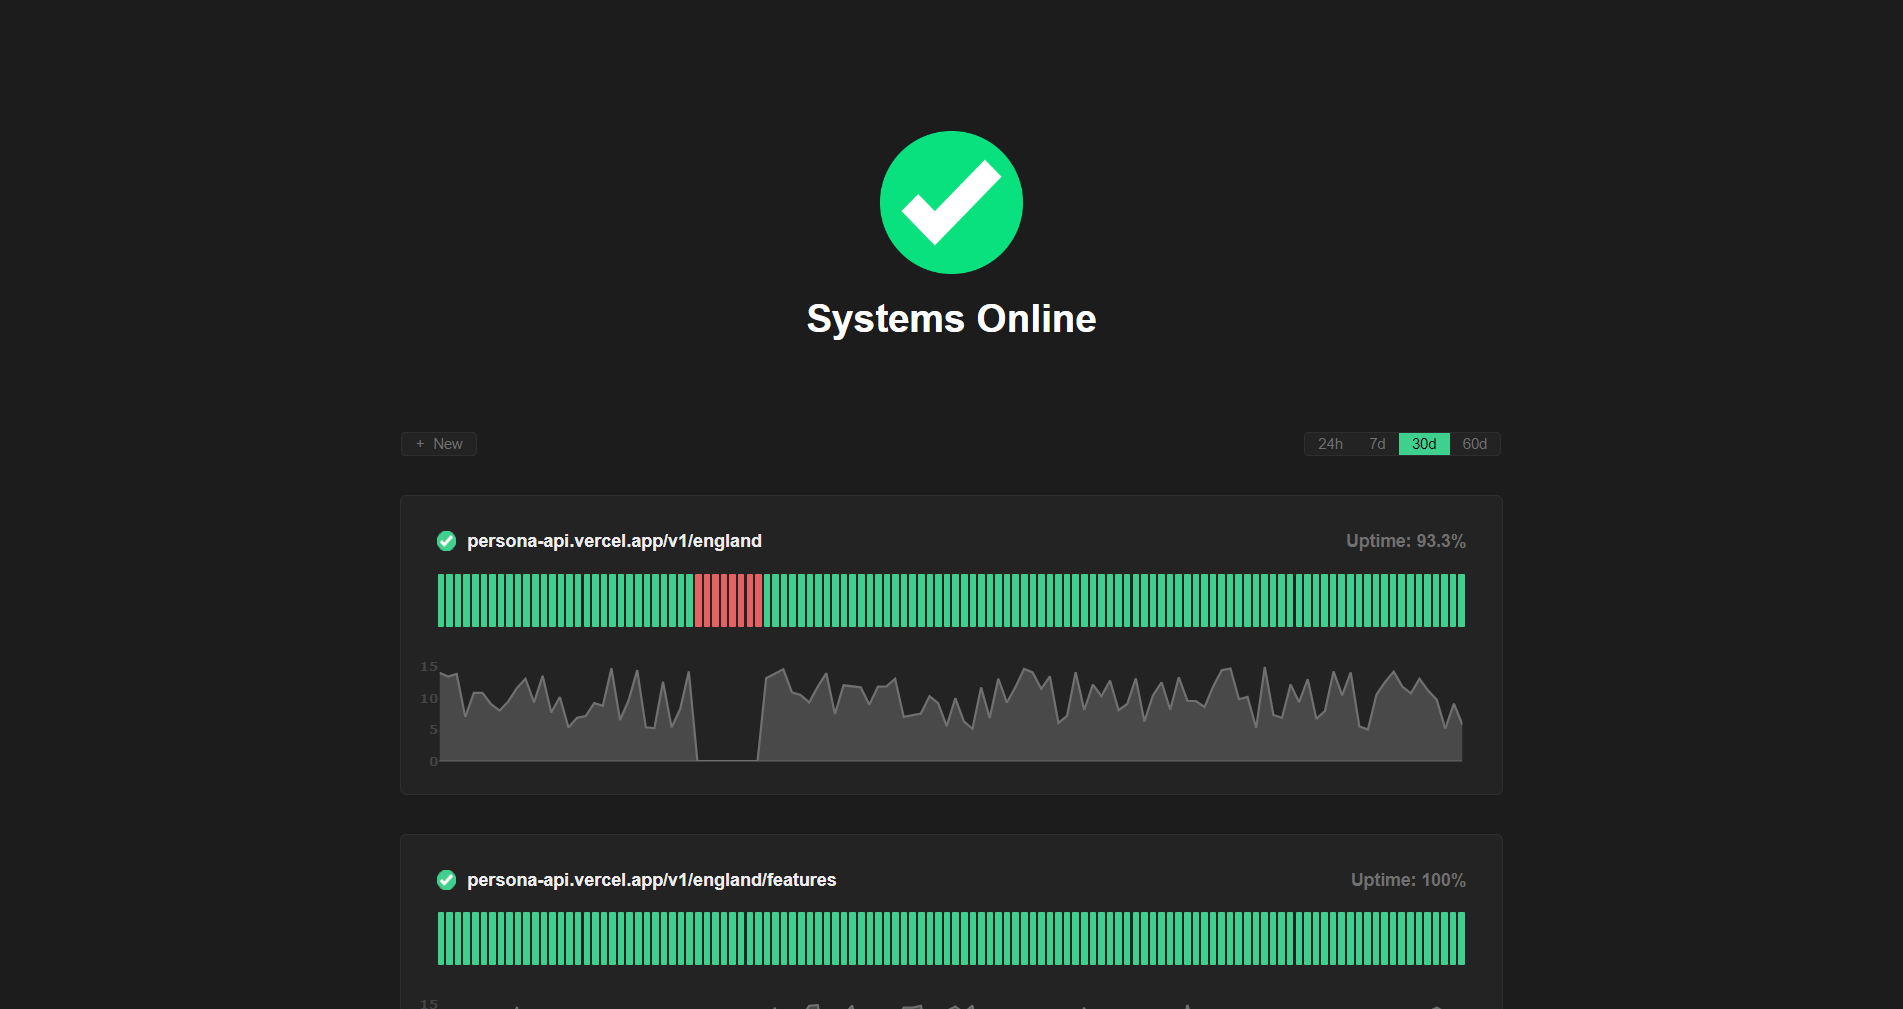
A free lightweight API analytics solution, complete with a dashboard.
Head to https://apianalytics.dev/generate to generate your unique API key with a single click. This key is used to monitor your API server and should be stored privately. It's also required in order to view your API analytics dashboard and data.
Add our lightweight middleware to your API. Almost all processing is handled by our servers so there is minimal impact on the performance of your API.
npm install node-api-analytics
import express from 'express';
import { expressAnalytics } from 'node-api-analytics';

const app = express();

app.use(expressAnalytics(<API-KEY>));  // Add middleware

app.get("/", (req, res) => {
    res.send({message: "Hello World"});
});

app.listen(8080, () => {
    console.log('Server listening at localhost:8080');
})
Custom mapping functions can be provided to override the default behaviour and tailor the retrival of information about each incoming request to your API's environment and usage.
import express from 'express';
import { expressAnalytics, Config } from 'node-api-analytics';

const app = express();

const config = new Config();
config.getIPAddress = (req) => {
  return req.headers["X-Forwarded-For"];
}
config.getUserAgent = (req) => {
  return req.headers["User-Agent"];
}
app.use(expressAnalytics(<API-KEY>, config));  // Add middleware
import Fastify from 'fastify';
import { fastifyAnalytics } from 'node-api-analytics;

const fastify = Fastify();

fastify.addHook('onRequest', fastifyAnalytics(<API-KEY>));  // Add middleware

fastify.get('/', function (request, reply) {
  reply.send({ message: 'Hello World!' });
})

fastify.listen({ port: 8080 }, function (err, address) {
  console.log('Server listening at https://localhost:8080');
  if (err) {
    fastify.log.error(err);
    process.exit(1);
  }
})
import Fastify from 'fastify';
import { fastifyAnalytics, Config } from 'node-api-analytics;

const fastify = Fastify();

const config = new Config();
config.getIPAddress = (req) => {
  return req.headers["X-Forwarded-For"];
}
config.getUserAgent = (req) => {
  return req.headers["User-Agent"];
}
fastify.addHook('onRequest', fastifyAnalytics(<API-KEY>, config));  // Add middleware
import Koa from "koa";
import { koaAnalytics } from "node-api-analytics";

const app = new Koa();

app.use(koaAnalytics(<API-KEY>));  // Add middleware

app.use((ctx) => {
  ctx.body = { message: "Hello World!" };
});

app.listen(8080, () =>
  console.log('Server listening at https://localhost:8080')
);
import Koa from "koa";
import { koaAnalytics, Config } from "node-api-analytics";

const app = new Koa();

const config = new Config();
config.getIPAddress = (req) => {
  return req.headers["X-Forwarded-For"];
}
config.getUserAgent = (req) => {
  return req.headers["User-Agent"];
}
app.use(koaAnalytics(<API-KEY>, config));  // Add middleware
Your API will now log and store incoming request data on all valid routes. Your logged data can be viewed using two methods:
You can use the same API key across multiple APIs, but all your data will appear in the same dashboard. We recommend generating a new API key for each additional API server you want analytics for.
Head to https://apianalytics.dev/dashboard and paste in your API key to access your dashboard.
Demo: https://apianalytics.dev/dashboard/demo

Logged data for all requests can be accessed via our REST API. Simply send a GET request to https://apianalytics-server.com/api/data with your API key set as X-AUTH-TOKEN in headers.
import requests

headers = {
 "X-AUTH-TOKEN": <API-KEY>
}

response = requests.get("https://apianalytics-server.com/api/data", headers=headers)
print(response.json())
fetch("https://apianalytics-server.com/api/data", {
  headers: { "X-AUTH-TOKEN": <API-KEY> },
})
  .then((response) => {
    return response.json();
  })
  .then((data) => {
    console.log(data);
  });
curl --header "X-AUTH-TOKEN: <API-KEY>" https://apianalytics-server.com/api/data
Opt-in active API monitoring is coming soon. Our servers will regularly ping your API endpoints to monitor uptime and response time. Optional email alerts to notify you when your endpoints are down can be subscribed to.

All data is stored securely in compliance with The EU General Data Protection Regulation (GDPR).
For any given request to your API, data recorded is limited to:
Data collected is only ever used to populate your analytics dashboard. All data stored is anonymous, with the API key the only link between you and your logged request data. Should you lose your API key, you will have no method to access your API analytics.
At any time, you can delete all stored data associated with your API key by going to https://apianalytics.dev/delete and entering your API key.
API keys and their associated API request data are scheduled be deleted after 1 year of inactivity.
This project is still in the early stages of development and bugs are to be expected.
Contributions, issues and feature requests are welcome.
git checkout -b my-new-feature)git commit -am 'Add some feature')git push origin my-new-feature)FAQs
Monitoring and analytics for node API applications.
The npm package node-api-analytics receives a total of 27 weekly downloads. As such, node-api-analytics popularity was classified as not popular.
We found that node-api-analytics demonstrated a healthy version release cadence and project activity because the last version was released less than a year ago. It has 1 open source maintainer collaborating on the project.
Did you know?

Socket for GitHub automatically highlights issues in each pull request and monitors the health of all your open source dependencies. Discover the contents of your packages and block harmful activity before you install or update your dependencies.

Security News
Astral unveils pyx, a Python-native package registry in beta, designed to speed installs, enhance security, and integrate deeply with uv.

Security News
The Latio podcast explores how static and runtime reachability help teams prioritize exploitable vulnerabilities and streamline AppSec workflows.

Security News
The latest Opengrep releases add Apex scanning, precision rule tuning, and performance gains for open source static code analysis.