Quickmin
Quickmin is a database administration administraon tool builder. It is build on top of React-Admin. It takes a configuration of
your database schema as a YAML file, and provides a UI as well as a RESTful api to acces your data, without any code needed. Quickmin can work as a standalone app, or as a middleware inside of a web app. It also performs automatic schema migration.
Getting Started
To get started, first install the quickmin command globally with:
npm install -g quickmin
Then, in your project folder, run:
quickmin init
This will generate an initial quickmin.yaml configuration, which is the file that holds information
about your database schema and authentication. By default, it will contain a collection, i.e. a database
table, called posts. This is only for demonstration, of course, and the idea is that you will replace it with
your own database schema. Next, to start the server and interact with your database, run:
quickmin
And you should see the following output:
UI available at:
  http://localhost:3000/

REST endpoints at:
  http://localhost:3000/posts
What has happened is that quickmin created a database for the specified schema, and saved it in quickmin.db, which uses SQLite by default.
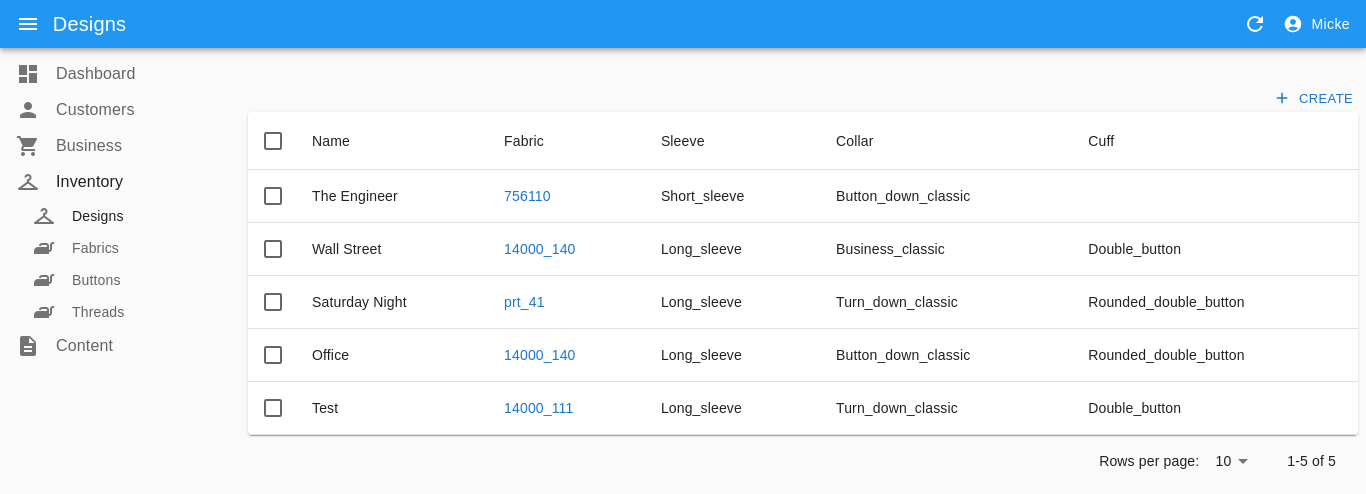
It then created a REST endpoint to access the data in the database, as well as a UI for an administrator to manage the data. If you visit the UI url at
http://localhost:3000/ you will see that there is a React-Admin interface there. The default username/password is admin/admin.
The initial quickmin.yaml configuration will look something like below, and a good next step is obviously to change the admin password.
jwtSecret: "6c6353c20458c619256d6e209067eb9e"
adminUser: "admin"
adminPass: "admin"
collections:
pages:
fields:
<Text id="title" listable/>
<Text id="content" multiline fullWidth/>
Single Admin Authorization
With regards to authorization, quickmin can work with two different kinds of users. The first type is called "configurations suers". The configuration user is defined in the quickmin.yaml, offering a quick setup for users. This user is particularly convenient for initial system deployment and works seamlessly even when the database is empty. However, the configuration user is limited - only one configuration user can be defined, and the credentals are fixed in the configuration file, they can not be changed during can not be changed during runtime. The configuration user will always have the role admin, and is defined like this in the quickmin.yaml file:
adminUser: "admin"
adminPass: "admin"
User and Role Based Authorization
The other type of user, called "database user", on the other hand, is defined within a dedicated database table. To enable the use of database users, the system must be configured to identify the location of these users. This involves tagging specific fields in the database that correspond to user data, as well as using specific
field types. For example, to enable authorization with database users, we can create a table called users like this:
collections:
  users:
    <Text id="name" username listable/>
    <Select id="role" choices="customer,user,admin" role listable filter/>
    <AuthMethod id="google_auth" provider="google" listable tab="auth"/>
This configuration snippet outlines the structure of the "users" collection in the database. It includes fields for capturing the user's name, role, and an authentication method specifically configured for Google. The use of tags, i.e. username, role and the special field type AuthMethod provides context and functionality to these fields within the admin interface. So, one one hand there is nothing special with this table, and it could be called something else than "users", and we are free to store whatever information we want there. On the other hand, the table is designated as the auth table by tagging certain fields to give them special meaning for the sake of
authentication and authorization.
Secure Views
Secure views are a database feature that allows you to control access to specific columns or rows of a table, providing an fine grained layer of security. This feature is particularly useful when you want to restrict users' access to sensitive information or when you need to present a simplified or filtered view of the data.
Secure views are often read-only to maintain data integrity and security. However, writable views, a related concept, allow users to perform write operations (such as inserts, updates, or deletes) on the view itself. Not all database systems support writable views, and within the set of engines supporting them, the exact details of how to use and configure them varies.
Therefore, quickmin provides its own impementation of secure and writeable views independent of the database engine. For example, we might we want a table for posts, that is, by default, only accessible by the admin user. There can also be a view of this table, allowing the author of the post to edit it. Then, there can be a view of public posts, readable by everyone. This would be configured like this:
collections:
users:
posts:
access: admin
fields:
<Text id="title" fullWidth listable/>
<Image id="image" tab="image"/>
<Reference id="author" reference="users" listable tab="author"/>
<Select id="status" choices="draft,published" listable tab="publication"/>
<RichText id="content" fullWidth />
my_posts:
access: user
from: posts
where:
author: $uid
published_posts:
readAccess: public
from: posts
where:
status: published
Using Quickmin as a Middleware
Through the quickmin command, quickmin provides a UI and a RESTapi for data access. This can be seen as a "backand as an app", or a self hosted "backend as a service". We can now put a front-end accessing this data, and this way create e.g. a content management system. However, often it is convenient to have these two component run as part of the same app. For this scenarion, Quickmin can be used as a middleware and plug into a web framework. The following code creates a QuickminServer.
import QuickminServer from "quickmin/server";
let config=fs.readFileSync("quickmin.yaml","uft8");
let quickminServer=new QuickminServer(config);
The instance of the QuickminServer has a method called handleRequest that takes a Request object and returns a Response object. This is in order to make it as generic as possible, so the exact details on how to get it to work depends on your framework.
Client Api
The Quickmin server provides a RESTful api for accessing data, as well as handling client side authentication. There is also a wrapper for this api to make using it convenient.


