Product
Introducing Rust Support in Socket
Socket now supports Rust and Cargo, offering package search for all users and experimental SBOM generation for enterprise projects.
stateful-pages
Advanced tools
A simple and lightweight library for state management.
Put the Stateful Pages script tag at the bottom of the body, but before your JavaScript code.
<html lang="en">

<body>

<!-- Body -->

<script src="path/to/stateful/pages"></script>
<script src="path/to/your/code"></script>
</body>

</html>
To use Stateful Pages, wrap your code inside a <stateful> tag.
<stateful>
    <h1>Stateful Pages!</h1>
</stateful>
Each <stateful> tag works independently, so there can be multiple tags per page, but you can also just put the entire
page within one tag.
This is where the work is done. Everything works based on the values within the state. To set values in the state,
use setState() from the stateful tag.
const stateful = document.getElementById("stateful-root");
const { setState } = stateful;

setState({
    foo: "bar",
});
Getting values within the state is done using the state object from the tag.
const stateful = document.getElementById("stateful-root");
const { state, setState } = stateful;

setState({
    foo: "bar",
});

console.log(state.foo); // "bar"
To use a value in the page, use the <value> tag.
<stateful id="stateful-root">
    <p>The value is
        <value name="foo"></value>
    </p>
</stateful>

<script>
    const stateful = document.getElementById("stateful-root");
    const { state, setState } = stateful;

    setState({
        foo: "bar",
    });
</script>
This will render out to
<p>The value is bar</p>
This will produce a button with a counter
<stateful id="stateful-root">
    <button id="button">Click me!</button>
    Presses:
    <value name="presses"></value>
</stateful>

<script>
    const stateful = document.getElementById("stateful-root");
    const { state, setState } = stateful;

    setState({
        presses: 0,
    });

    document.getElementById("button").onclick = () => {
        setState({
            presses: state.presses + 1,
        });
    };
</script>
Every time the button is pressed, the counter will increment.
Conditionals can be created using the <if> tag. Nested within the <if> tag
can be one <then> tag, zero or more <elif> tags, and zero or one <else> tag.
<stateful id="stateful-root">
    <h1>
        <if condition="raining">
            <then>It is raining</then>
            <else>It is not raining</else>
        </if>
    </h1>
</stateful>

<script>
    const stateful = document.getElementById("stateful-root");
    const { state, setState } = stateful;

    setState({
        raining: true,
    });
</script>
This will render to
<h1>It is raining</h1>
Notice how the <h1> tag is wrapping the entire conditional. You can also put the
<h1> tag within the conditional, and it would produce the same result.
The <when> tag functions similarly to switch statements in many programming
languages.
<stateful id="stateful-root">

    <label for="when-select">When Value:</label>
    <select id="when-select">
        <option>0</option>
        <option>1</option>
        <option>2</option>
        <option>3</option>
        <option>4</option>
    </select>

    <when value="number">
        <case value="!0">
            <p>Zero</p>
        </case>
        <case value="!1">
            <p>One</p>
        </case>
        <case value="!2">
            <p>Two</p>
        </case>
        <case value="!3">
            <p>Three</p>
        </case>
        <else>
            <p>Other</p>
        </else>
    </when>

</stateful>

<script>
    const stateful = document.getElementById("stateful-root");
    const { state, setState } = stateful;

    setState({
        number: 0,
    });

    document.getElementById("when-select").onchange = e => {
        setState({
            whenValue: e.target.value,
        });
    }

</script>
This would initially render to
<label for="when-select">When Value:</label>
<select id="when-select">
    <option>0</option>
    <option>1</option>
    <option>2</option>
    <option>3</option>
    <option>4</option>
</select>
<p>Zero</p>
and then would update whenever the selection changes.
FAQs
Lightweight state manager
We found that stateful-pages demonstrated a not healthy version release cadence and project activity because the last version was released a year ago. It has 1 open source maintainer collaborating on the project.
Did you know?

Socket for GitHub automatically highlights issues in each pull request and monitors the health of all your open source dependencies. Discover the contents of your packages and block harmful activity before you install or update your dependencies.

Product
Socket now supports Rust and Cargo, offering package search for all users and experimental SBOM generation for enterprise projects.

Product
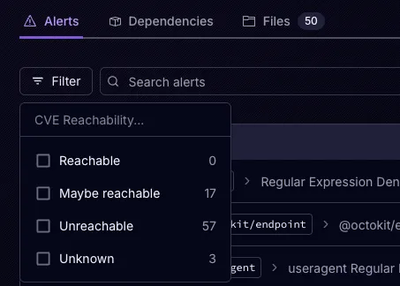
Socket’s precomputed reachability slashes false positives by flagging up to 80% of vulnerabilities as irrelevant, with no setup and instant results.

Product
Socket is launching experimental protection for Chrome extensions, scanning for malware and risky permissions to prevent silent supply chain attacks.