
Security News
Deno 2.6 + Socket: Supply Chain Defense In Your CLI
Deno 2.6 introduces deno audit with a new --socket flag that plugs directly into Socket to bring supply chain security checks into the Deno CLI.
By Sarah Gooding - Dec 12, 2025
Tested on TL-MR6400 should work on others as well
$ npm i tl-api

# or

$ yarn add tl-api
import { ACT, authenticate, execute } from "tl-api";

const baseUrl = "http://192.168.1.1";

const { info, ...context } = await authenticate(baseUrl, {
  password: "admin",
});
console.log("info: %j", info);
console.log("sess: %j", context.sessionId);
console.log("tokn: %j", context.tokenId);

const result = await execute(
  baseUrl,
  [
    [
      ACT.GL,
      "LAN_WLAN",
      [
        "name",
        "Standard",
        "SSID",
        "BSSID",
        "X_TP_Band",
        "PossibleChannels",
        "AutoChannelEnable",
        "Channel",
        "X_TP_Bandwidth",
        "Enable",
        "BasicEncryptionModes",
        "BeaconType",
      ],
    ],
  ],
  context
);
console.dir(result, { depth: 4 });
Once authenticated you will need to use the execute function and pass it an array of actions.
Actions is an array of operations you want to perform. Each operation is defined as an array in the following format
You can login into your router and hook into data encrypt and decrypt methods with the following snippet.
$.Iencryptor.AESDecrypt_backup = $.Iencryptor.AESDecrypt;
$.Iencryptor.AESEncrypt_backup = $.Iencryptor.AESEncrypt;
$.Iencryptor.AESDecrypt = function(data) {
	let decrypted = $.Iencryptor.AESDecrypt_backup(data);
	console.log("RECV:\n" + decrypted);
	return decrypted;
}
$.Iencryptor.AESEncrypt = function(data) {
	console.log("SEND:\n" + data);
	return $.Iencryptor.AESEncrypt_backup(data);
}
This will log RECV: & SEND: message before encrypting and decrypting payload, and you can take a note of <actionType>, <actionOperationId>, <actionAttributesOrFields>, <stack>, <pStack> values after you perform specific actions in the UI.
You can see some values described in this document in the Example section and also in example.js.
[
  [<actionType>, <actionOperationId>, <actionAttributesOrFields>, <stack>, <pStack>],
]
| Field | Required | Default | Type | Description | Example |
|---|---|---|---|---|---|
<actionType> | Yes | - | number | Action type, can be any of ACT.* | ACT.GET |
<actionOperationId> | Yes | - | string | String representing the operation | "LTE_BANDINFO" |
<actionAttributesOrFields> | No | [] | string[] or Record<string, any> | Optional list or a key value map of attributes. Writes usually need a map and reads, specifically reading lists requires fields as array. Not all operations require attributes, for such cases you can skip or use an empty array [] or object {}. | {pageNumber: 12} or ['index', 'from', 'content', 'unread'] |
<stack> | No | "0,0,0,0,0,0" | string | Not really sure what this does but some <actionOperationId>s require specific "stacks". If ommited the default all zeros are used. | "2,1,0,0,0,0" |
<pStack> | No | "0,0,0,0,0,0" | string | Not sure if this is used by the device at all, almost always this stays as default all zeros. | "0,0,0,0,0,0" |
const getLteBandInfo = [[ACT.GET, "LTE_BANDINFO"]];

const getTotalUnreadSmsMessages = [
  [ACT.GET, "LTE_SMS_UNREADMSGBOX", ["totalNumber"]],
];

const getUnreadSmsMessageBoxPage = [
  [ACT.SET, "LTE_SMS_UNREADMSGBOX", { pageNumber: 1 }],
  [
    ACT.GS,
    "LTE_SMS_UNREADMSGENTRY",
    ["index", "from", "content", "receivedTime", "unread"],
  ],
];

const performLogout = [[ACT.CGI, "cgi/logout"]];
{
  error: 0,
  // error code or 0 if success
  actions: [
    // actions array is in the same order as the actions to be performed
    {
      req: [1, "LTE_BANDINFO"],
      // original actions that got executed
      res: {
        // resulting object or an array if the request was ACT.GS or ACT.GL
        stack: "0,0,0,0,0,0",
        attributes: {
          // Attributes related to this particular request
          LTE_RadioInterface: "8",
          LTE_ActiveBand: "122",
          LTE_ActiveChannel: "1699",
        },
      },
    },
  ],
}
FAQs
TPLink Router API
The npm package tl-api receives a total of 146 weekly downloads. As such, tl-api popularity was classified as not popular.
We found that tl-api demonstrated a not healthy version release cadence and project activity because the last version was released a year ago. It has 1 open source maintainer collaborating on the project.
Did you know?

Socket for GitHub automatically highlights issues in each pull request and monitors the health of all your open source dependencies. Discover the contents of your packages and block harmful activity before you install or update your dependencies.
Security News
Deno 2.6 introduces deno audit with a new --socket flag that plugs directly into Socket to bring supply chain security checks into the Deno CLI.
Security News
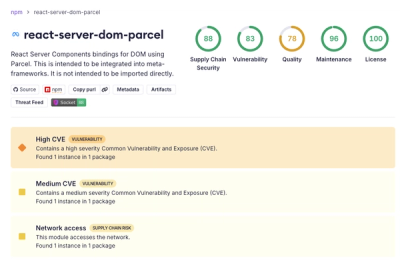
New DoS and source code exposure bugs in React Server Components and Next.js: what’s affected and how to update safely.

Security News
Socket CEO Feross Aboukhadijeh joins Software Engineering Daily to discuss modern software supply chain attacks and rising AI-driven security risks.