Research
/Security News
Critical Vulnerability in NestJS Devtools: Localhost RCE via Sandbox Escape
A flawed sandbox in @nestjs/devtools-integration lets attackers run code on your machine via CSRF, leading to full Remote Code Execution (RCE).
vue-toastify
Advanced tools
I wanted a notification plugin which I can use by passing props from the server and can also be called at run time. With this component it's has just become super easy. It's easily extendable and customizable and it has no dependencies.
Check it out at Netlify
Requires Vue 2.2.0+
npm i vue-toastify
or with CDNs:
In your main js file:
import VueToastify from "vue-toastify";
Vue.use(VueToastify);
Then anywhere just call:
this.$vToastify.success("easy-peasy");
You may pass a settings object to the use statement like so:
Vue.use(VueToastify, {
    my: "settings"
});
or change any of the settings during run-time with the following
this.vToastify.setSettings(settingsObject);
This will return the current settings after the updates.
| setting | type | default | details |
|---|---|---|---|
| singular | Boolean | false | Only allow one notification on the screen at a time, others will be queued up for showing later. |
| withBackdrop | Boolean | false | Enables backdrop to be shown. |
| backdrop | String | "rgba(0, 0, 0, 0.2)" | The rgba value for the backdrop. |
| position | String | "bottom-right" | Defines where the notifications should be showing on the screen. Available values are: "top-left", "top-center", "top-right", "center-left", "center-center", "center-right", "bottom-left", "bottom-center", "bottom-right" |
| errorDuration | Number | 8000 | The duration in milliseconds the error notification should be visible for. |
| successDuration | Number | 4000 | The duration in milliseconds the success notification should be visible for. |
| warningInfoDuration | Number | 6000 | The duration in milliseconds the warning and info notification should be visible for. |
| canTimeout | Boolean | true | Whether the notifications disappears after the set time. |
| canPause | Boolean | true | Whether the notifications can be paused by hovering over them. |
| hideProgressbar | Boolean | false | Whether the progressbar should be shown on the notification or not. |
| defaultTitle | Boolean | true | Whether a default title should be shown if no title is supplied. |
| theme | String | "dark" | What theme should be displaying. By default there's light and dark. |
| orderLatest | Boolean | true | Whether new notifications should display on top of the stack or not. |
| transition | String/Object | null | If string supplied this will apply the usual transition classes (eg.: .name-enter-active), if object supplied it expect a name and optionally a moveClass (this class has to use !important for its rules) attribute. The name will be applied as above. The move class applied when the notifications adjust their position. |
| iconEnabled | Boolean | true | If set to false, no icon will be shown on the notification. |
| draggable | Boolean | true | Whether to enable dismissing the notification by dragging or not. |
| dragThreshold | Number | 0.75 | A number between 0 - 5 representing how far the notification should be dragged to dismiss. |
| baseIconClass | String | null | If string is set, this will be appended to every user supplied icon's class. |
| maxToasts | Number | 6 | Defines how many toasts should be visible at a time. Others are queued. |
| oneType | Boolean | false | If turned on, only toasts with unique mode/type will be show. Others are queued. |
You can pass to the functions either a string for the body of the status and optionally a title for the second argument like so:
this.$vToastify.error("body", "title");
Or pass an object to the method:
this.$vToastify.info(stausObject);
The following properties can be set on the object:
| property | type | details |
|---|---|---|
| body | String | Required parameter, you may pass html to this. |
| title | String | Enables pausing of the loader and the timeout on hover. |
| type | String | Defines what notification type should be showing available types: "success", "warning", "info", "error" defaults to "success". This can only be set if you're using this.$vtNotify() Alternatively you may use the methods: this.$vToastify.warning("more readable") |
| mode | String | If set the notification will be shown in the given mode: loader, prompt. Alternatively you may use the methods: this.$vToastify.loader("more readable") |
| url | String | If set, clicking on the notification will take the user to the given location (does not support vue router yet) |
| icon | String / Object | If set, this will be displayed instead of the default icons. If is a string the string will be assigned to the class unless it is an svg. If it is an object it may take the following attributes { tag: "i", ligature: "", icon: "" } |
| answers | Object | If the type is prompt the object keys will display to the user and the value will be returned in the promise. It defaults to { Yes: true, No: false } (Note: to include special characters like space, -, _, etc use quotation marks: "my key": |
| callback | Function | This function will be called when the notification has been dismissed or the timeout has finished. |
You may additionally overwrite the following plugin settings on a notification by notification basis by adding them on the status object.
canTimeoutcanPausedefaultTitleduration - The time the notification is displayed in milliseconds regardless of its type. (this cannot be updated later)themehideProgressbartransitioniconEnableddraggabledragThresholdorderLatestYou may alternatively pass in an http error response like:
fetch().then().catch(error => this.$vToastify.error(error));
Only this.$vToastify.error() will look for status and statusText on the error object.
Every notification method returns a unique id associated to your notification object.
The notification supports multiple modes
You can either pass the mode property on the status object which is one of the following strings: "prompt", "loader" or by calling:
this.$vToastify.loader("Please Wait...")
this.$vToastify.prompt({
    body: "Are there hot singles in your area?",
    answers: { Yes: true, No: false }
})
The prompt does not return an id instead it returns a Promise so may use it as:
...}).then(value => {
    if (value) {
        this.$vToastify.prompt("Is it a scam?")
            .then(value => console.log(value ? "Yay!" : "Nay"))
    }
})
The answers object consist of a key value pairs in the object where the key is displayed to the user and the value returned by the promise. If not set it defaults to: { Yes: true, No: false }.
There are various events are emitted by the notification:
vtFinishedvtDismissedvtStartedvtPausedvtResumedvtDragStartedvtDragFinishedto which you can listen by either the listen or the listenOnce methods. The event's payload is an object containing the notification's id:
this.$vToastify.listen("vtDismissed", payload => console.log(payload.id))
A loader cannot be dismissed, you'll have to stop the loader yourself like so:
this.$vToastify.stopLoader(id)
This will stops the loader with the given id or loaders if array of ids given. If no id provided, all loaders will be closed.
For returning a notification object use:
this.$vToastify.getToast(id)
This if found returns the notification object from the visible ones or queued toasts otherwise all of the notification objects in an array from both the visible and queued toasts. If not found returns false.
For updating the notification object during run-time use:
this.$vToastify.changeToast(id, statusObject)
This will merge the object you pass in and the existing notification. It will return true if successfully updated and false if the notification isn't found.
For removing a notification use:
this.$vToastify.removeToast(id)
This will remove the notification if the id is given otherwise it will remove all of the notifications. If id supplied and not found between the queued or currently displaying notifications, it will return false, otherwise it returns the ids of the currently visible notifications.
To pass a notification from the server, assign your notification object to window.notification before importing your scripts. On mount this will gets displayed to the user. If this notification object has a property called delay, the notification display will be delayed by the given number of milliseconds.
You can add your own methods to the plugin like so:
Vue.use(VueToastify, {
  customNotifications: {
    clientError: {
      body: "You did it!",
      defaultTitle: false,
      icon: '<svg width="50" height="50">\n' +
              '<rect width="50" height="50" style="fill:rgb(0,0,255);" />\n' +
            '</svg> ',
      canTimeout: false
    },
    moreOfTheAbove: { ...
  }
});
If the above is defined in the customNotifications object, you can use this method like so:
this.$vToastify.clientError("this will overwrite the body", "this will add a title");
or as usual pass in an object which will merge with the predefined props.
Default styles maybe overridden with !important. To add custom styles you all you have to do is follow the example in ./src/assets/toast.scss and add your custom styles. Once added rename .vt-theme-dark to .vt-theme-my-custom-name and in the settings or the status object pass the theme as theme: "my-custom-name". Include this stylesheet in the project and you're good to go.
Add ability to display notifications simultaneously at different locations
Increase test coverage
add SPA support for the url attribute
Accept components as content or as icon
Re-write in TypeScript and use the vue core's validateProps(), rewrite for vue 3
Get url props on the answers object for redirecting on click of the button
V2
Clean up icons
Set styles as an external stylesheet
setSettings to return boolean.
Packages with similar capabilities:
FAQs
Simple and dependency-free notification plugin.
The npm package vue-toastify receives a total of 707 weekly downloads. As such, vue-toastify popularity was classified as not popular.
We found that vue-toastify demonstrated a healthy version release cadence and project activity because the last version was released less than a year ago. It has 0 open source maintainers collaborating on the project.
Did you know?

Socket for GitHub automatically highlights issues in each pull request and monitors the health of all your open source dependencies. Discover the contents of your packages and block harmful activity before you install or update your dependencies.

Research
/Security News
A flawed sandbox in @nestjs/devtools-integration lets attackers run code on your machine via CSRF, leading to full Remote Code Execution (RCE).

Product
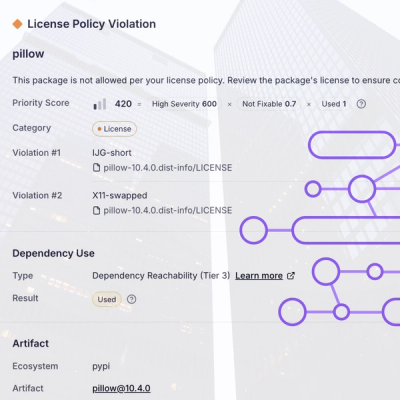
Customize license detection with Socket’s new license overlays: gain control, reduce noise, and handle edge cases with precision.

Product
Socket now supports Rust and Cargo, offering package search for all users and experimental SBOM generation for enterprise projects.