Product
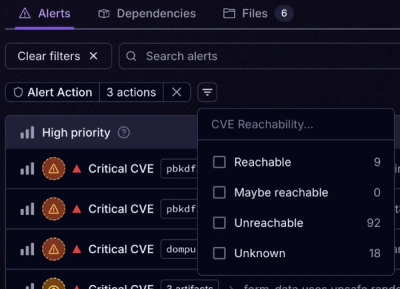
Introducing Tier 1 Reachability: Precision CVE Triage for Enterprise Teams
Socket’s new Tier 1 Reachability filters out up to 80% of irrelevant CVEs, so security teams can focus on the vulnerabilities that matter.
给我一个URL,返给你个JSON数据。 API documentation
先安装nodejs
$ npm install -g ymock
user/study/ymock)$ ymock init demo1
执行成功后会在当前目录下创建demo1目录,并在在demo1目录里创建文件ymockcfg.js。
module.exports = [
  {
  }
];
这个文件就是你生成JSON数据的配置文件了。
{
  "name": "john",
  "age": "24"
}
module.exports = [
  {
    test: /user\.json/,
    respondWith: 'data/user.json'
  }
];
$ ymock run
http://127.0.0.1:8080, 不出意外就可以看到输出的数据了。ymockcfg.js本质上就是一个nodejs模块(不过修改该文件,不用重启服务),该模块返回的是个数组,在数组中添加URL匹配规则以及对应的JSON数据。 数组的元素格式:
{
  test: /user\.json/,
  respondWith: 'data/user.json'
}
test属性test属性定义URL匹配规则,目前该属性可取值为字符串,正则表达式和函数。
test取值—字符串采用精确匹配策略,接着上面的举例,修改ymockcfg.js:
module.exports = [
	{
		test: 'http://127.0.0.1:8080/user.json',
		respondWith: 'data/user.json'
	}
];
只有当请求URL为http://127.0.0.1:8080/user.json时才能匹配。
test取值—正则表达式采用正则匹配的方式,如【快速开始】的举例。
test取值—函数会把请求对象(http.IncomingMessage)作为参数传给该函数,如果函数返回true则匹配成功,否则不匹配。这是最灵活的一种方式。 继续修改ymockcfg.js:
{
		test: function(req){
			// 你的逻辑
			return ~req.url.indexOf('user.json');
		},
		respondWith: 'data/user.json'
}
respondWith属性respondWith属性定义JSON数据生成方式:
respondWith取值为number, null, boolean, undefined, Object,则直接返回该数据;respondWith取值为String:respondWith取值为Function,则调用该函数。respondWith取值—普通字符串respondWith可以取值字符串,此时作为text/plain格式字符串返回的。 修改ymockcfg.js:
module.exports = [
	{
		test: function(req){
			// 你的逻辑
			return ~req.url.indexOf('user.json');
		},
		respondWith: 'hi ymock!'
	}
];
respondWith取值—JSON文件字符串如果字符串以".json"结尾则认为是相对于当前目录的JSON文件。如【快速开始】举例。
respondWith取值—mockjson文件字符串如果字符串以".mockjson"结尾则认为是相对于当前目录的MockJSON文件。 继续上面的举例(此时要mock 5条用户数据的列表),在data目录添加userlist.mockjson文件(mockJSON语法):
{
	"data|5-5": [
		{
			"name": "@MALE_FIRST_NAME",
			"age|20-24": 0
		}
	]
}
修改ymockcfg.js:
module.exports = [
	{
		test: function(req){
			// 你的逻辑
			return ~req.url.indexOf('user.json');
		},
		respondWith: 'hi ymock!'
	},
	{
		test: /userlist\.json/,
		respondWith: 'data/userlist.mockjson' // 返回mockjson文件
	}
];
在浏览器中访问http://127.0.0.1:8080/userlist.json,会发现生产5跳数据。
respondWith取值—函数如果你想更加自由的控制mock的数据,那就给respondWith赋值个函数吧。此时会把函数的返回值作为mock数据。不过你也可以不返回数据,直接在函数中操作res来确定返回值(本质是个中间件)。
先来个栗子(根据请求参数决定mock数据)。修改ymockcfg.js:
module.exports = [
	{
		test: /user\.json/,
		respondWith: function(req, res){
			return {
				name: req.query.name
			}
		}
	}
];
访问http://127.0.0.1:8080/user.json?name=john,则输出:
{
  name: "john"
}
根据请求中QueryString的参数不同,而输出的mock数据也不同。
respondWith函数的形参(req, res, next)respondWidth的函数本质是个中间件,参数同中间件的形参。
req会挂载两个属性req.query和req.body。res可以自定义响应数据。respondWith函数返回值返回值如果返回值是以".json"或者".mockjson"结尾的字符串,则视为相对于当前目录的JSON文件,
module.exports = [
	{
		test: /user\.json/,
		respondWith: function(){
			return 'data/user.json'; // 返回json文件名称字符串
		}
	}
];
同理如果以”.mockjson"结尾的字符串则视为相对于当前目录的mockjson文件:
module.exports = [
	{
		test: /user\.json/,
		respondWith: function(){
			return 'data/userlist.mockjson';
		}
	}
];
支持respondWith是个异步函数,可以用来模拟接口耗时等。
module.exports = [
	{
		test: /user\.json/,
		respondWith: function(req, res){
			return new Promise(resolve => {
        setTimeout(() => {
          resolve('data/userlist.mockjson');
        }, 2000)
      })
		}
	}
];
执行命令可以查看ymock命令的帮助:
$ ymock -h
执行下面命令查看init子命令的帮助
$ ymock init -h
执行下面命令查看run子命令的帮助
$ ymock run -h
如果你有兴趣欢迎添砖加瓦!
FAQs
Simple, powerfull api mock
We found that ymock demonstrated a not healthy version release cadence and project activity because the last version was released a year ago. It has 1 open source maintainer collaborating on the project.
Did you know?

Socket for GitHub automatically highlights issues in each pull request and monitors the health of all your open source dependencies. Discover the contents of your packages and block harmful activity before you install or update your dependencies.

Product
Socket’s new Tier 1 Reachability filters out up to 80% of irrelevant CVEs, so security teams can focus on the vulnerabilities that matter.

Research
/Security News
Ongoing npm supply chain attack spreads to DuckDB: multiple packages compromised with the same wallet-drainer malware.

Security News
The MCP Steering Committee has launched the official MCP Registry in preview, a central hub for discovering and publishing MCP servers.