InvenTree KiCad - HTTP Library Plugin
A KiCad Conform API endpoint plugin, designed for integration with InvenTree, empowers users to seamlessly incorporate InvenTree parts into KiCad's parts library tool. Please note that this plugin exclusively offers metadata and necessitates the presence of corresponding symbol and footprint libraries within the KiCad EDA environment.
As of the current stage of development, KiCad exclusively offers read-only access to parts through the HTTP lib interface.
However, this plugin provides a metadata import tool to import changes made within KiCad 7. Please note that KiCad 8 stopped supporting that though. This enables users to add footprints, symbols and datasheets to individual parts during the schematic design process if not already available and re-import that information into InvenTree to have it available for the next time.
Installing the Plugin
There are several methods available for installing this plugin. To gain a comprehensive understanding of the installation process, please refer to the InvenTree - Installing a Plugin Guide. Depending on your preferred approach, the following instructions will provide you with the necessary information.
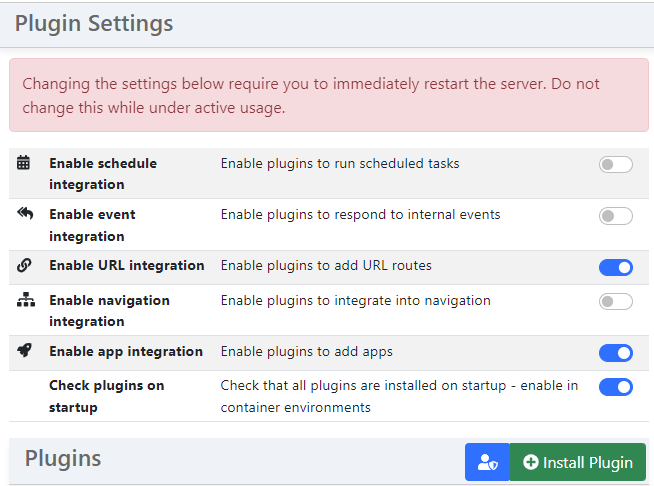
Prior to plugin installation, ensure that you've activated both URL Integration and App Integration. You can accomplish this by going to Settings → Plugin Settings → Plugins. Additionally, if you're operating within a Docker environment, be sure to enable Check plugins on startup as well.
Through GitHub
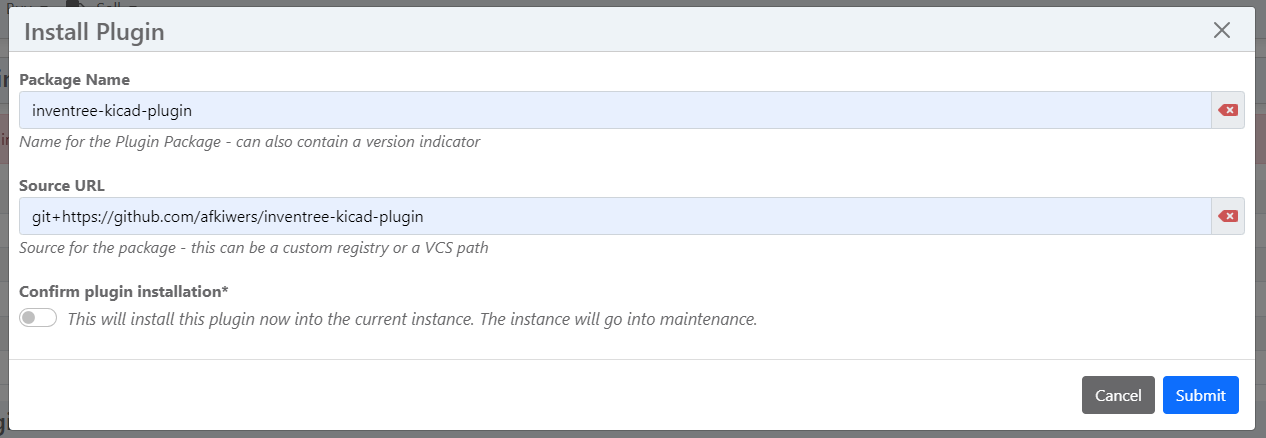
Navigate to the Plugin Settings and click on the Install Plugin button. This will trigger a new window to appear, prompting you to enter the following information:
Through PiP
The plugin can be found here: inventree-kicad-plugin.
- Package Name: inventree-kicad-plugin
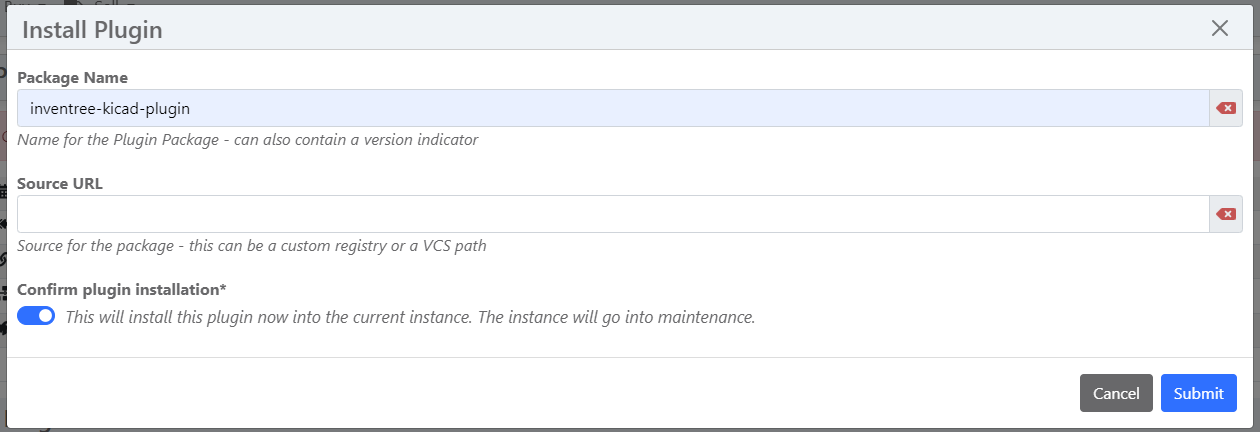
IMPORTANT: Remember to restart your server and run the migrate command to implement the model changes required for this plugin. Failure to do so may result in the plugin encountering issues and not functioning correctly.
Configure Plugin Settings
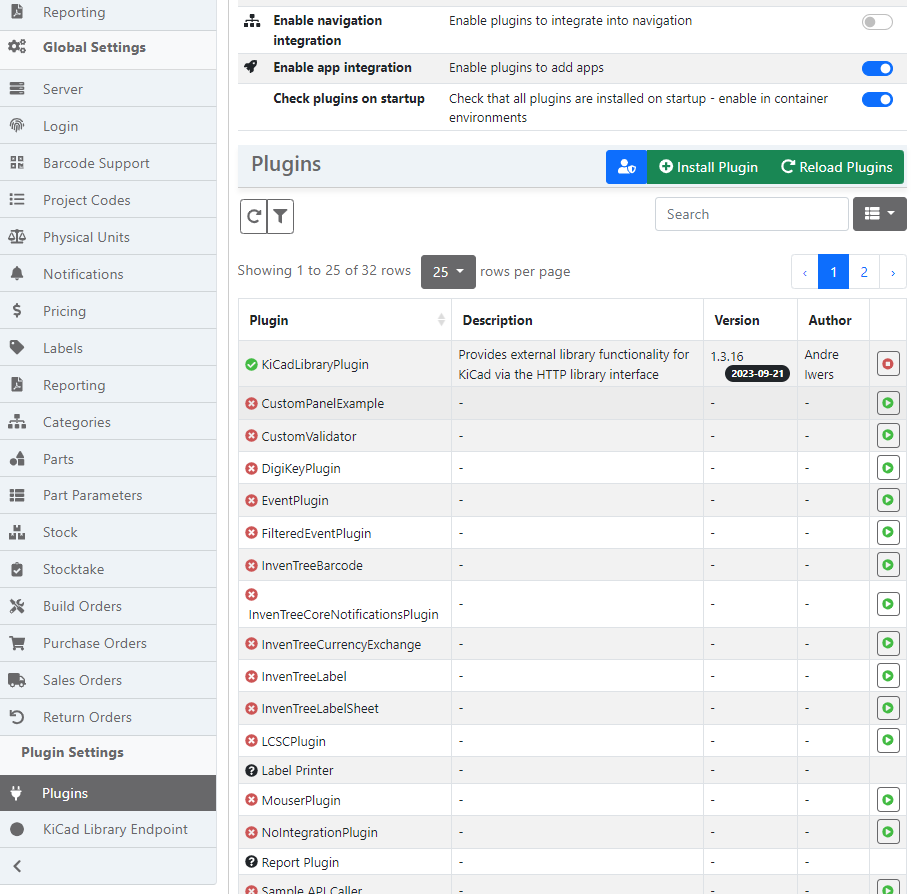
After installing the plugin, head over to the Plugin Settings and activate it. Look for KiCadLibraryPlugin in the list of available plugins.
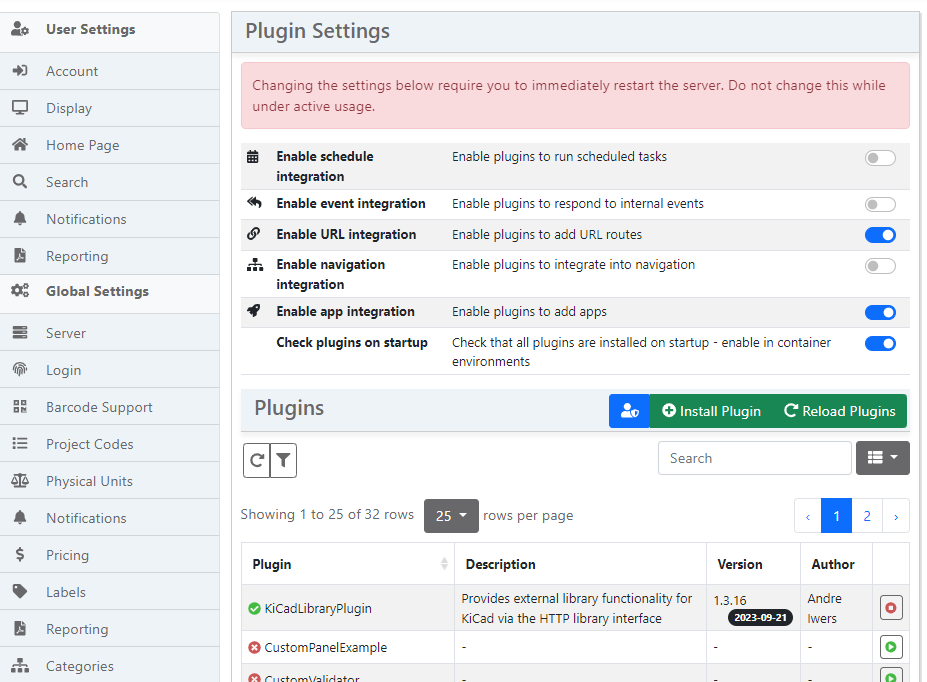
Once activated, you'll see a new plugin KiCad Library Endpoint on the left hand side. Click on it to open the plugin and proceed with the setup process.
Adding Categories to KiCad
Navigate to the admin backend, and scroll down until you find the INVENTREE_KICAD section. Within this section, click on KiCad Categories.
If the section is not visible, ensure you've enabled the "Enable URL integration" and "Enable app integration" options in the Plugin Settings and run a database migration.

Once opened the "KiCad Categories" model, you'll have the option to add new categories which, once added, will be visible in KiCad's Symbol Chooser dialog.

Adding Categories to KiCad via REST API
Alternatively you can use the REST API to add categories to KiCad.
The API can be accessed via the endpoint /plugin/kicad-library-plugin/api/category/
Retrieve Active Categories
To get a list of all active categories
GET /plugin/kicad-library-plugin/api/category/
Returns
[
  {
    "pk": 2,
    "category": {
      "id": 12,
      "name": "Tantalum",
      "pathstring": "Capacitors/Tantalum",
      ...
    },
    "default_symbol": "Device:C_Polarized",
    "default_footprint": "",
    "default_reference": "C",
    "default_value_parameter_template": {
      "id": 49,
      "name": "Value",
      ...
    },
    "footprint_parameter_template": {
      "id": 8,
      "name": "Footprint",
      ...
    }
  },
  {
    "pk": 1,
    "category": {
      "id": 6,
      "name": "Ceramic",
      "pathstring": "Capacitors/Ceramic",
      ...
    },
    "default_symbol": "Device:C",
    "default_footprint": "",
    "default_reference": "C",
    "default_value_parameter_template": {
      "id": 49,
      "name": "Value",
      ...
    },
    "footprint_parameter_template": {
      "id": 8,
      "name": "Footprint",
      ...
    }
  },
  ...
]
Get a Specific Category
GET /plugin/kicad-library-plugin/api/category/<id>/
where <id> is the primary key of the KiCad category, not the InvenTree category.
Returns (for /plugin/kicad-library-plugin/api/category/1/)
{
    "pk": 1,
    "category": {
      "id": 6,
      "name": "Ceramic",
      "pathstring": "Capacitors/Ceramic",
      ...
    },
    "default_symbol": "Device:C_Polarized",
    "default_footprint": "",
    "default_reference": "C",
    "default_value_parameter_template": {
      "id": 49,
      "name": "Value",
      ...
    },
    "footprint_parameter_template": {
      "id": 8,
      "name": "Footprint",
      ...
    }
}
Add a New Category
To add a category to KiCad call
POST /plugin/kicad-library-plugin/api/category/
JSON data:
{
    "category": <INVENTREE_CATEGORY_PK>,       // mandatory
    "default_symbol": "",                      // optional
    "default_footprint": "",                   // optional
    "default_reference": "",                   // optional
    "default_value_parameter_template": null,  // optional
    "footprint_parameter_template": null       // optional
}
Note: The parameter templates can be set either via id, or name. Set the value to a number or string respectively.
Update Category
To update an existing category call
PATCH /plugin/kicad-library-plugin/api/category/<id>/
The request data only has to contain the values you want to change, e. g.:
{
    "default_symbol": "Device:C",
    "default_value_parameter_template": "Value",
    "footprint_parameter_template": 2
}
Note: The parameter templates can be set either via id, or name. Set the value to a number or string respectively.
Delete Category
To remove a category from KiCad call
DELETE /plugin/kicad-library-plugin/api/category/<id>/
without any data, where <id> is the KiCad category id.
Note: There is no undo! Be sure before calling.
Default Settings for Categories
The plugin allows you to set default values when the child part lacks specific details regarding the KiCad symbol, footprint, or reference. This feature is particularly useful when dealing with components such as resistors or capacitors, as they often share the same symbols, reducing the need for repetitive data entry.
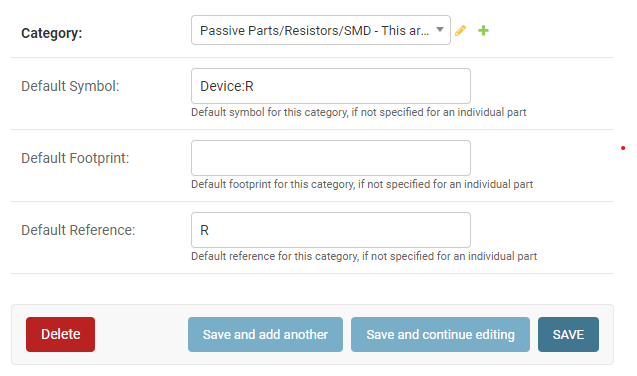
If you have existing Footprint/Package Type parameters assigned to your components and prefer not to define a separate KiCad Footprint Parameter for them, you can leverage the Footprint Parameter Mapping functionality to establish a connection to KiCad Footprint names. Simply incorporate the desired mappings into the KiCad category:
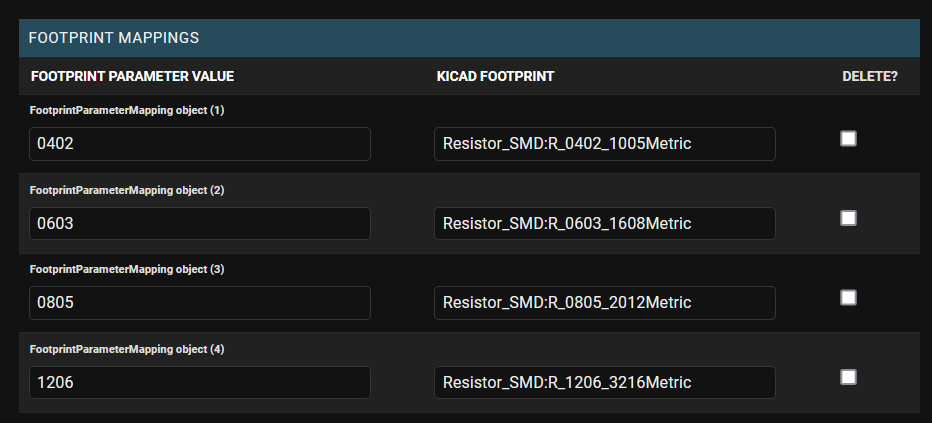
Additionally, you can combine this with the per-category "Footprint Parameter Template" override to utilize a different parameter for mapping purposes.

If you want to make specific parameters always visible on a footprint, you can add a new parameter to your part parameter template to configure the default visibility.
By default, setting a parameter named Kicad_Visible_Fields with comma-separated names of the parameters you would like to be visible on your footprint will be set as visible. Spaces between commas and parameter names are tolerated.

The parameter name used to check field visibility can be changed in settings. This parameter will not be visible from KiCad.
Creating User Access Tokens
Return to the administrative backend, navigate to the USER model, and access API Tokens. Select "ADD API Token" to generate a token designated for a specific user. It's crucial to highlight the importance of creating separate tokens for each user, rather than using a universal token for everyone.

KiCad HTTP Library File
Below is an example config which should help you get started reasonably quickly. The only thing needed here is to replace http://127.0.0.1:8000 with your server's InvenTree URL, and replace usertokendatastring with a valid token. Save it as a file with .kicad_httplib extension, as specified in the preliminary KiCad docs. To use it, add it as a symbol library inside KiCad.
Please Note: The config file does not contain any part or category information. It merely tells KiCad what API to expect, what token to use and where to find it.
{
    "meta": {
        "version": 1.0
    },
    "name": "KiCad HTTP Library",
    "description": "A KiCad library sourced from a REST API",
    "source": {
        "type": "REST_API",
        "api_version": "v1",
        "root_url": "http://127.0.0.1:8000/plugin/kicad-library-plugin",
        "token": "usertokendatastring",
        "timeout_parts_seconds": 60,
        "timeout_categories_seconds": 6000
    }
}
Add the HTTP library to KiCad
Inside KiCad's project manager, navigate to Preferences -> Manage Symbol Libraries and click on it. Add a GLobal Library by pressing the folder in the bottom left corner.
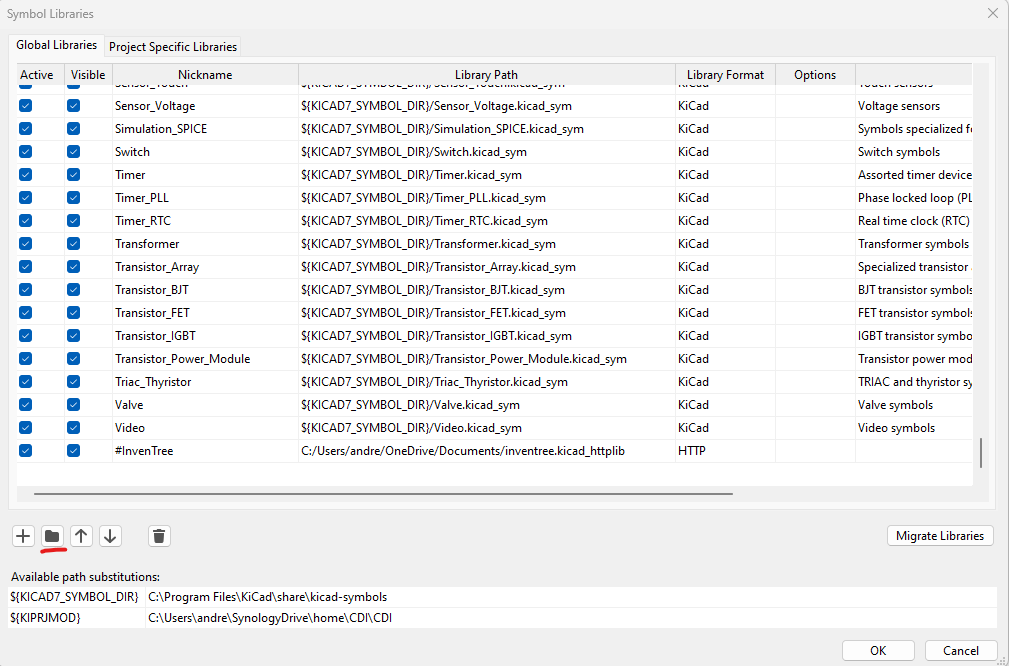
When choosing the .kicad_httplib file, KiCad will automatically detect that it is a HTTP lib file and only a Nickname needs to be set.
It's recommended to put a # as prefix to make sure it is at the top of the list. Otherwise one might end up scrolling a lot.
Display Stock Information in KiCad
If activated KiCad will show stock data inside the symbol chooser. The data will be updated whenever the set category timeout expires (timeout_categories_seconds).
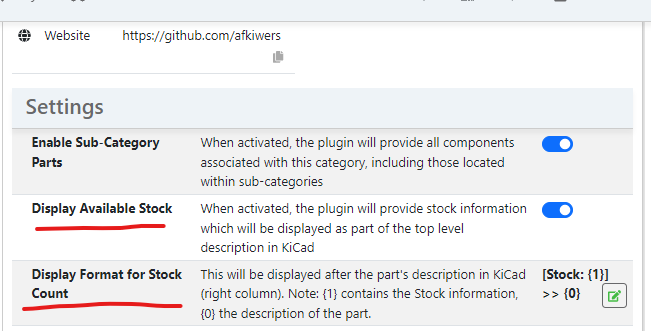
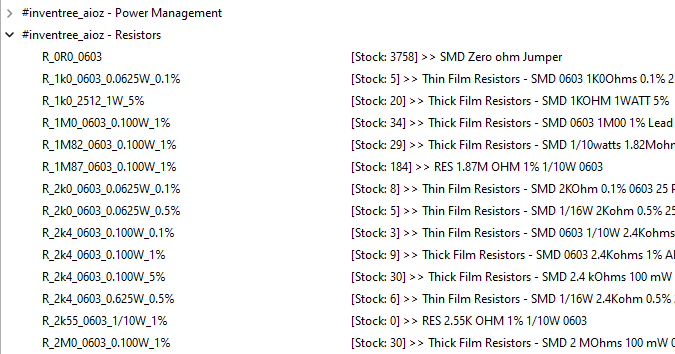
Users have the option to determine the presentation style of stock data through the Stock Count Display Format as shown above. In this setting, {0} represents the item description, while {1} represents the stock information as a numerical value. Using those placeholders, users can customize how this data is merged and showcased according to their preferences. An example of how this would look is shown below.
Please Note: The stock information is not transferred into the schematic. It is only visible inside the symbol chooser!
Use in KiCad
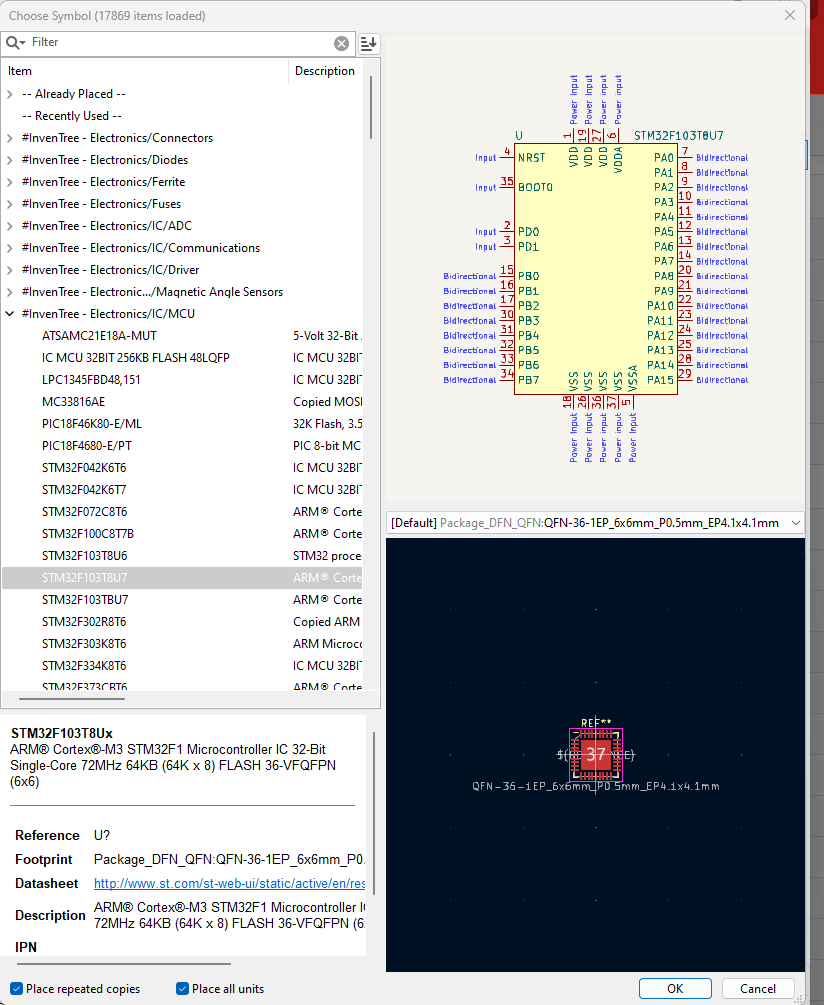
Once everything has been configured properly, KiCad should be able to display all the categories and parts using the Symbol Picker.
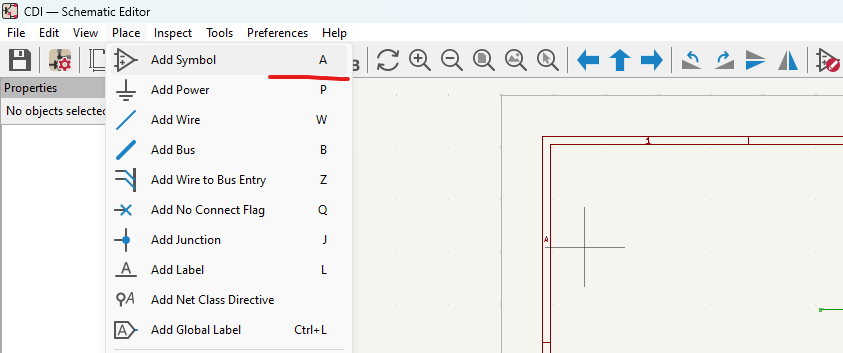
Inside the schematic, one can either use the shortcut and press A or navigate to the ribbon at the top and press Place -> Add Symbol.
The Symbol Chooser should open up and display the parts sourced from InvenTree.
Importing Metadata from Previous Projects
Since KiCad does not offer a way to push information back to the server, InvenTree needs to have all that metadata such as footprints and symbols added manually. This can be very tedious, especially when there are thousands of parts.
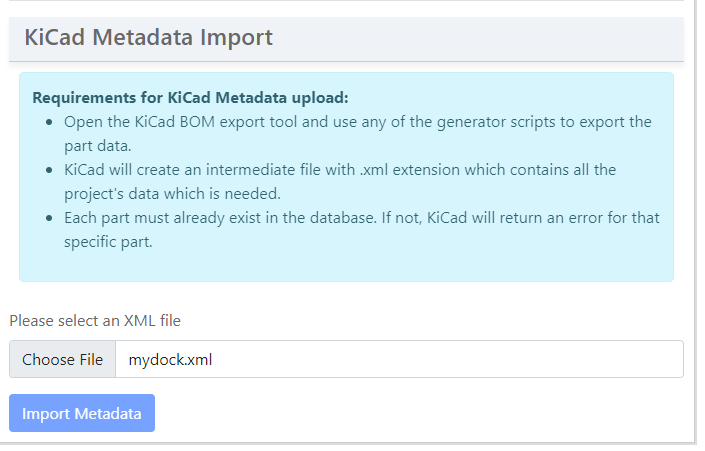
This plugin's import tool uses KiCad's intermediate file which is created whenever there is a BOM export. This file contains all the project's data which is needed.
