M23 Data Processing
This is a library of tools that compose raw image processing of fits files. It
includes modules for calibration, combination, alignment, extraction and
normalization. Additionally we also have a data processor module that processes
data based on a provided configuration file using all the aforementioned
modules.
Installation
This packages is available in pypi and can be installed via the pip package manger.
It is recommended that you install this library in a virtual environment. We can install the m23 library using the
package manager pip that comes by default with python.
python -m pip install m23
Usage
Once you've installed m23 you can use any of the modules present (example.
calibration, extraction, normalization, etc) individually or just use the main
programs m23 that do data processing for your. To process data for a
night/nights, you must define a configuration file. The processor reads the
data processing settings along with the path to input and output directories
from the configuration file.
Reference files
Most of the modules will ask for various reference files. For convenience we have included a sample of the kind of reference files used by this library here. Note that it's the responsibility of the person processing data to provide a correct reference file for the task. The reference files listed in this repo are aren't to be used but for sample so that it will help you understand the kind of reference file you're supposed to provide. We don't like to hardcode these sample reference files in the code because if the reference files change or that you like to experiment with processing with different reference files, you have that power to change reference files by merely changing the configuration file. Use this power wisely.
Process Command
Examples for configuration file for process command provided here are named Brown
and Rainbow. (B)rown comes before (R)ainbow so the file ./brown.tml denotes
the configuration for processing pre new camera (< June 16 2022) data.
NOTE FOR NEW CAMERA (>=2022) DATA
./rainbow.toml is an example configuration file for
processing data after the new camera (>= June 16 2022)
OLD CAMERA EXAMPLE
A sample configuration file (for old camera images) looks like this.
# This is a comment
[image]
rows = 1024
columns = 1024
crop_region = [] # We don't crop old camera images < June 16 2022


[processing]
no_of_images_to_combine = 10
image_duration = 7.0
radii_of_extraction = [3, 4, 5]
cpu_fraction = 0 # (Optional), use a value between 0 to 1. Default is 0.6. Use 0 (meaning use single processor) if you're debugging
# Defining dark prefix is also optional and perhaps a feature you'll almost never have to use.


## Optional, default will be used if you don't define
# [reference]
## The image file is an actual fit image while the reffile refers to the stats file for that image
# image = "C://Data Processing/Reference/RefImage.fit"
# file = "C://Data Processing/Reference/reffile.txt"
# Logfile means log file combined file. This sample log file is what internight normalization normalizes against
# logfile = "C://Data Processing/Reference/logfile.txt"
# color = "C://Data Processing/Reference/color_mean_RI.txt"


[input]

    [[input.nights]]
    path = "F://Summer 2019/September 4, 2019"
    masterflat = "C://Data Processing/2019/Python Processed/September 12 2019/masterflat.fit"
    # Optionally, you can give image_prefix to select all fit files matching the provided prefix
    # By default, only fit files matching standard naming convention (m23_xx_xx.fit) are selected.
    image_prefix = "m23b_"

    [[input.nights]]
    path = "F://Summer 2019/September 9, 2019"
    masterflat = "C://Data Processing/2019/Python Processed/September 12 2019/masterflat.fit"

    # Note that the starttime is optional and you must ONLY specify this if you
    # want to use it instead of date/time from the headers of the fit files.
    # starttime = 2010-10-20T10:20:50
    # endtime = 2010-5-10T5:34:00 # OPTIONAL and must be in UTC


[output]
path = "C://Data Processing/2019 Python Processed"
# The options below are optional and default to false if not specified
save_aligned = false
save_calibrated = false
The file should be pretty self explanatory. Note that # denotes the beginning end of line comment.
Still few things to note:
- Provide masterflat for only those nights where we would like to use masterflat of other nights.
- Any of the paths except the output path provided in the configuration file must exist, otherwise the configuration file is deemed to be problematic. Output path (along with any intermediary directories) are created if they don't already exist. This applies to masterflat path as well. So you cannot process a night that doesn't have flats before the masterflat that you want to use for the night exists.
- Make sure that you are not processing old camera nights and new camera images together, unless you absolutely know what you're doing.
Once you have a configuration file, you can start processing by invoking the command line interface as follows:
python -m m23 process config_file_path

# Example, if you have 1.toml in current directory
python -m m23 process 1.toml
Norm Command
norm is another command (a subcommand, technically) available in m23 CLI. This is a command to renormalize LOG_FILES_COMBINED for one or more nights.
The way our data processing works is that we first do a full data processing (full meaning involving Calibration, Combination, Alignment, Extraction, and Normalization) and then re-normalize the data. To re-normalize, we look at the normfactors and see what section of night of has non-erratic data. The norm subcommand takes a configuration file that describes what section of the night to use to generate LOG_FILES_COMBINED. The section of the night is described by two numbers fist_logfile_number, and last_logfile_number that describe the the range of logfiles to use. The file ./renormalize.toml contains an example of re-normalization configuration file.
Note that this command performs intra-night normalization followed by
inter-night normalization.
[processing]
radii_of_extraction = [3, 4, 5,]
cpu_fraction = 0.6 # (Optional), use a value between 0 to 1. Default is 0.6. Use 0 (meaning use single processor) if you're debugging


[input]

    [[input.nights]]
    path = "F://Summer 2022/September 04, 2022"
    first_logfile_number = 10
    last_logfile_number = 45

    [[input.nights]]
    path = "F://Summer 2022/September 12, 2022"
    first_logfile_number = 30
    last_logfile_number = 66
As you can see in the renormalization configuration, the norm subcommand lets you re-normalize multiple nights in a go. You can run the renormalization command as follows:
# Assuming you have conf.toml in your directory
python -m m23 norm conf.toml
mf Command
mf is another command available as part of m23 CLI. It takes a configuration file specifying the input night folder
and generates a masterflat for that night based to the provided output folder (creating the folder if it doesn't already exist). Note that
in order to generate the masterflat, it uses the flats from the nights provided as input. These flats should be inside the standard Calibration Frames folder that we use for our raw image processing (with the calibration folder itself being inside the folder for the night
provided as input. Additionally note that the provided folder name should match the naming convention of our raw image night folder.) The output is just a single masterflat file whose name is prepended with the date of the night and is generated in the output folder path specified in the config file. The configuration file also found in ./mf.toml is as follows:
# Note that it's important to define input and output before image definition
input = "F://Summer 2019/September 4, 2019"
output = "C://Data Processing/Masterflat"

image_duration = 7.0

# You can optionally define prefixes for darks and flats
# This is useful (especially in the case of darks) where there are two different
# kinds of darks, one for raw images and another to use when making flats
dark_prefix = "darkf"
flat_prefix = "flat"

[image]
rows = 2048
columns = 2048
# New camera images (>= June 16 2022) have vignetting ring effect which we crop.
# Array of crop regions. The last and first co-ordinate are joined to make an enclosing region
crop_region = [
    [[0, 448], [0, 0], [492, 0], [210, 181]],
    [[0, 1600], [0, 2048], [480, 2048], [210, 1867]],
    [[1400, 2048], [2048, 2048], [2048, 1500], [1834, 1830]],
    [[1508, 0], [1852, 241], [2048, 521], [2048, 0]]
]
Unlike other commands, this command can only process one night at a time and is invoked as follows:
# Assuming you have mf.toml in your directory
python -m m23 mf mf.toml
csv Command
csv is another command available as part of m23 CLI. It takes a list of input nights folders, reads the internight normalized data for each of those nights and generates one csv
file for all those nights consolidating the data into one csv file. This data is then uploaded in our google sheets that gets
used to populate our database.
The config file is as follows also available here:
# This is an example configuration file for the nights_csv subcommand

# Input is the list of night folders with data generated by process command
input = [
    "F://Data Processing/2019/September 4, 2019",
    "F://Data Processing/2019/October 12, 2019",
    "F://Data Processing/2019/October 15, 2019",
    "F://Data Processing/2019/October 29, 2019",
]

radius = 4 # This specifies which color normalized data to read

# Output is the folder in which to store the csv file
# Note that this folder exist or the command will fail
output = "F://Data Processing/2019/"
Unlike other commands, this command can only process one night at a time and is invoked as follows:
You can invoke the csv command as follows:
# Assuming you have nights_csv.toml in your directory
python -m m23 csv nights_csv.toml
Using specific module
If you want to do data processing or invoke any of the m23 modules as part of your python program, you can import
the respective module/functions/variables as follows
from m23 import start_data_processing # Data processing function
from m23.align.alignment import imageAlignment
from m23.constants import ALIGNED_COMBINED_FOLDER_NAME
For detailed info on the behavior these functions/variables, look up the source code.
Upgrading package
The package's is available in pypi at https://pypi.org/project/m23/. If the version that you've isn't the lasted version,
it is recommended that you upgrade the package by running the following command after activating your virtual environment.
python -m pip install --upgrade m23
If things go wrong
If this m23 data processing library starts producing results that don't seem correct, few things could go wrong.
- You might have provided a wrong reference file. Make sure that the R-I color reference file is exactly the one you want to use. Make sure that the contents of the reference log file aren't altered and is exactly the one you want to use. Also verify that the reference image based on which this library does alignment is exactly the one you're supposed to use.
- Bugs in source code. If you know that an earlier version of the library gave different result that the one you've, please remove the current version of
m23 and install the older version of the library using pip. So that would be :
python -m pip uninstall m23
python -m pip install m23==x.y.z
where x.y.z is a valid version number. The list of all available version numbers can be viewed at https://pypi.org/project/m23/#history.
Running Tests
If you're developing this library, adding features and doing other things,
you'll want to run the unittest to try to catch any unintended mistakes you
might have made. In order to run the tests, first install the library by running
pip install . in your terminal form the root directory of project. Then invoke
the tests by running merely pytest. You should have already run pip install - r requirements.txt before running the tests.
Contributing
This library has bugs, like most software and needs your valuable contribution.
This project uses semantic versioning meaning that the version names are
determined based on the work automatically rather than the author manually
changing them. We use python semantic
release for that.
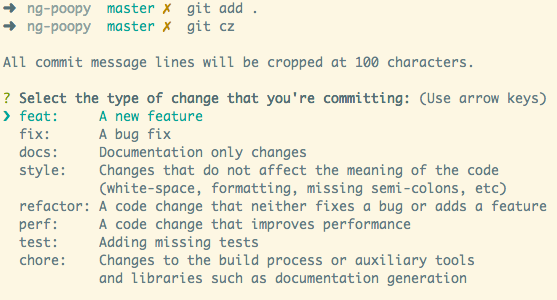
All you need to do is to write commit messages in a certain format, and the
releases will be created automatically for you by the github actions and those
releases published to github release as well as pypi. Navigate to the github
actions tab to check the status of your release or if something failed. Your
commit message must be followed by one of the few special keywords:
- "chore" for chore tasks
- "docs" for documentation related commits
- "feat" for new feature
- "fix" for bugfix
and couple others:
Note that if any of your commits make breaking changes, your commit message must
also contain the phrase "BREAKING CHANGE". This will trigger a major version
update. See some of the previous commit messages for more information and feel
free too ask if you have confusion.
Known issues
We use multiprocessing to parallelize processing of our data. In macOS, we encounter
a this issue described in so post. The post gives a solution as summarized below.
echo "export OBJC_DISABLE_INITIALIZE_FORK_SAFETY=YES" >> ~/.zshrc
. ~/.zshrc