==========
notify-run
Setup
notify-run can be installed with pip::
pip install notify-run
This will install both a Python module notify_run for sending notifications
programmatically, and the notify-run command for sending notifications
from the shell.
Configuration
Before you use either the shell command or Python package to send notifications,
you must configure an endpoint. Both the command-line interface and Python
interface provide a way of creating this configuration, and the configuration is
shared by both. The configuration is stored in a file called .config/notify-run
in your home directory.
Command-line Interface
Register a channel
To register a channel::

    notify-run register

You will then be presented with a link that you can open on the devices
you wish to subscribe to the channel. A QR code encoding the link is also
provided for convinience.

.. image:: https://raw.githubusercontent.com/notify-run/notify.run/master/py_client/screenshots/register.png
   :width: 490px
   :height: 453px
   :alt: Registering from the command line.

Sending Message
~~~~~~~~~~~~~~~

Once you have registered a channel, you can send a message to it with the
``send`` subcommand::

    notify-run send "Hi from notify-run."

To open a webpage when the notification is clicked, you can pass it to
notify-run as the `-a` parameter::

    notify-run send "Click to open notify.run!" -a https://notify.run

Using an Existing Endpoint
If you want to point notify-run at an existing endpoint, for example one
created through the web interface <https://notify.run/>_, you can use the
configure subcommand instead of register::
notify-run configure <endpoint URL>
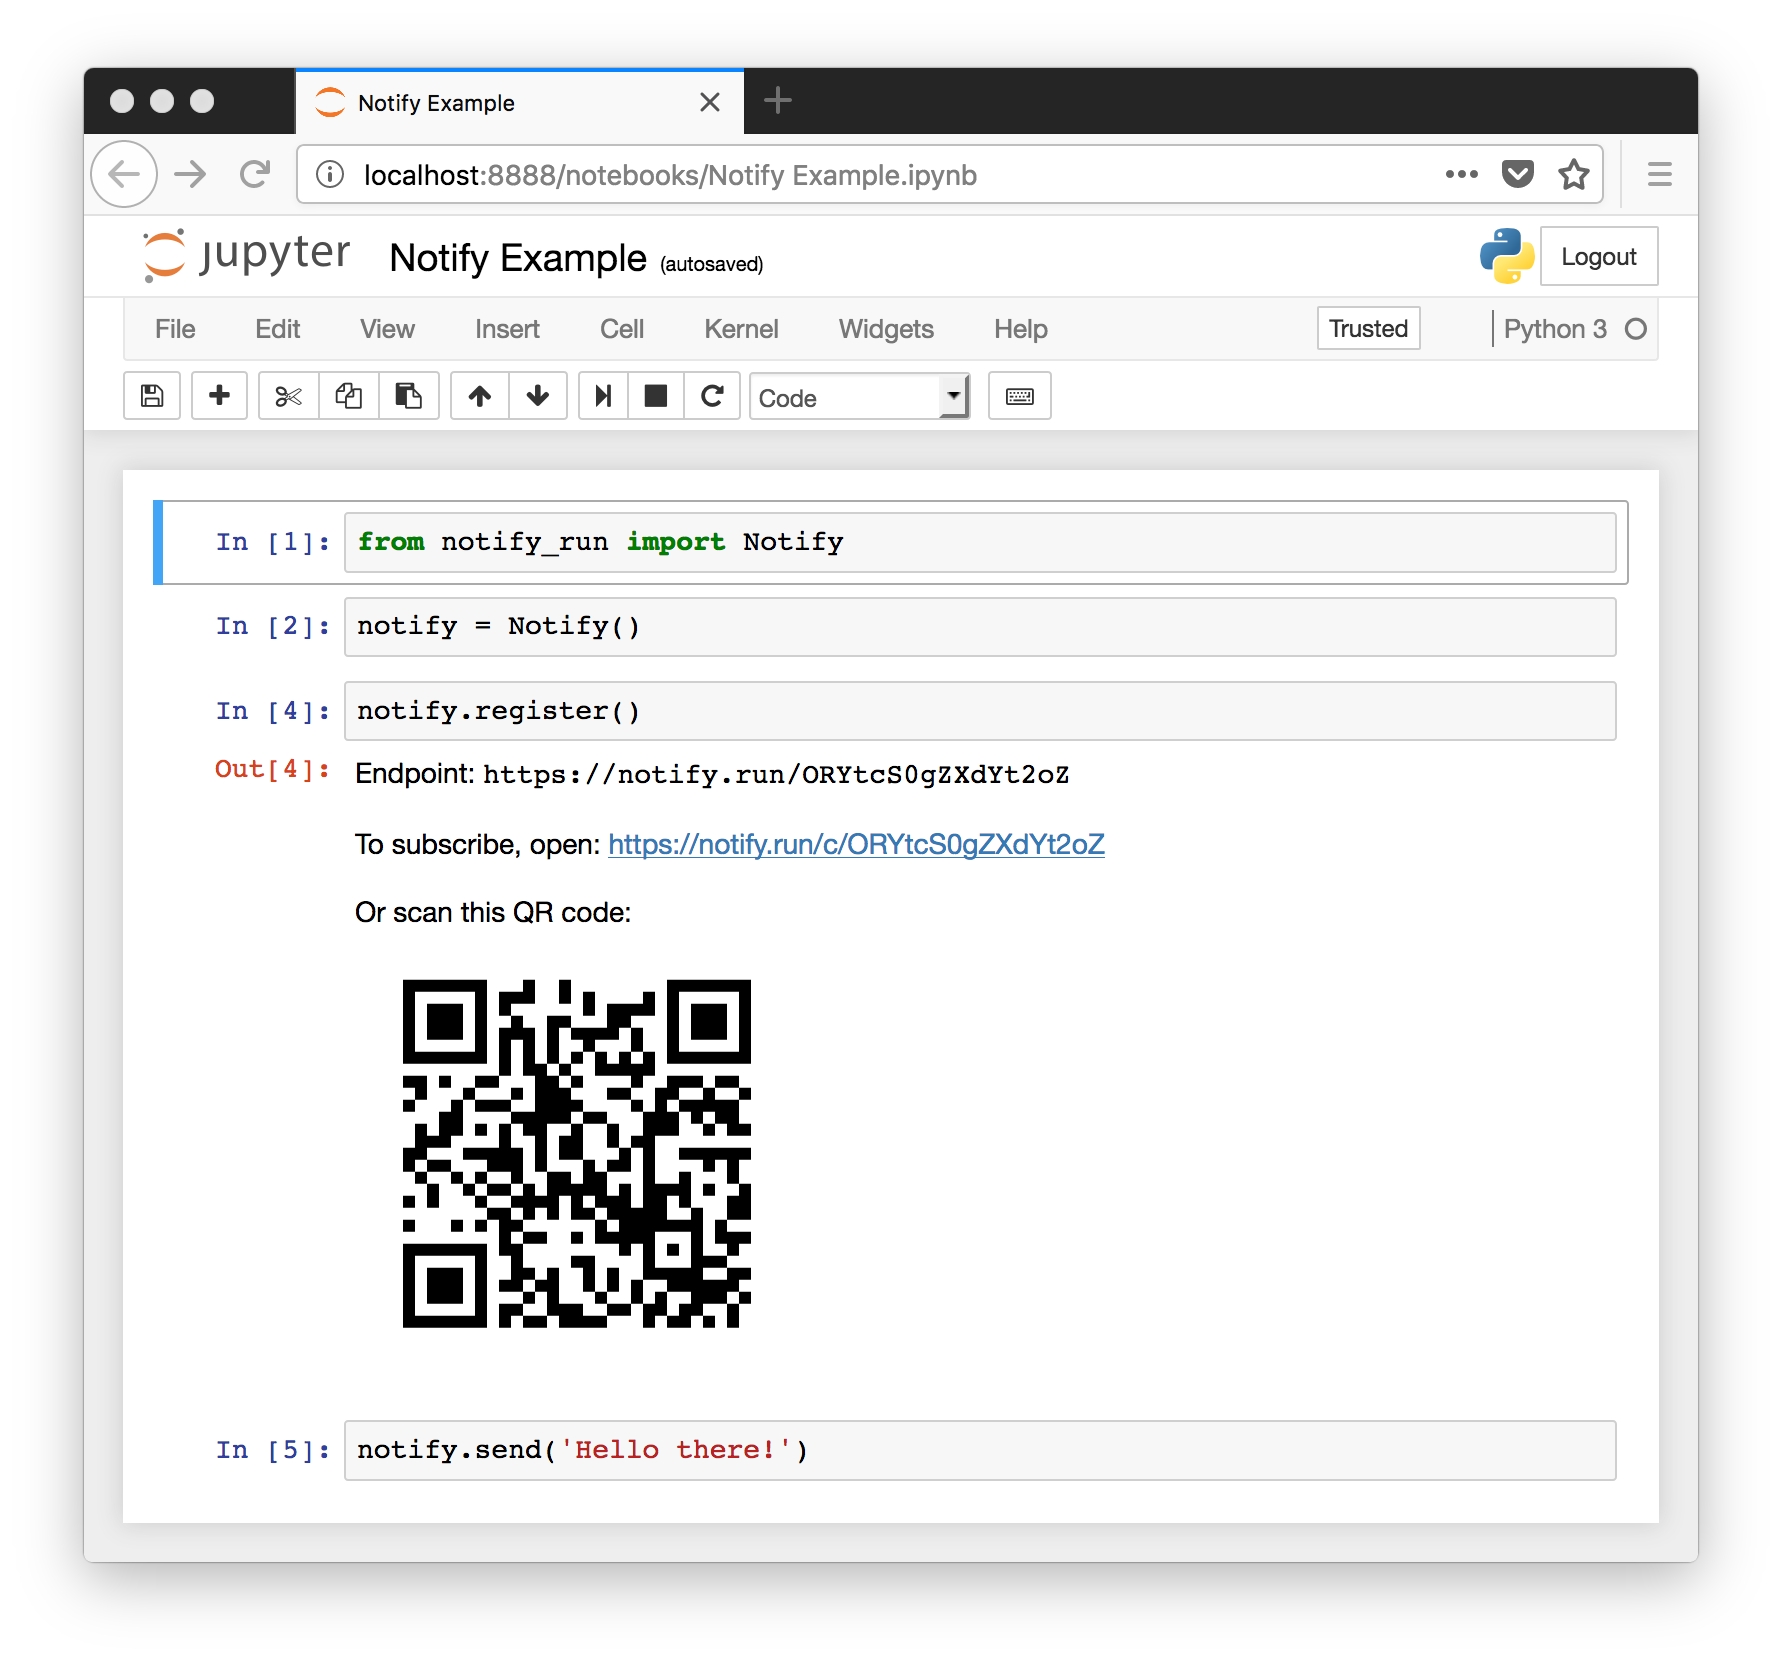
Python Interface
The commands above can also be used through a Python interface::
from notify_run import Notify
notify = Notify()
notify.register()
notify.send('Hi there!')
notify.send('Click to open notify.run!', 'https://notify.run')
To connect to a channel you have already created, pass it as the endpoint parameter to Notify():
notify = Notify(endpoint="https://notify.run/<channel_id>")
The notify.register() and notify.info() commands return an EndpointInfo object.
When rendered in a terminal, this prints the QR code in a terminal-friendly way. When used
in a Jupyter notebook, it displays the QR code inline.
.. image:: https://raw.githubusercontent.com/notify-run/notify.run/master/py_client/screenshots/notebook.png
:width: 490px
:height: 453px
:alt: Inline QR Code in Jupyter Notebook


