pyOpenRiverCam


pyorc, short for "pyOpenRiverCam" is a fully Open Source library for performing image-based river flow analysis. It is the underlying library for
computations on the fully open software stack OpenRiverCam. pyorc can only be successful if the underlying methods
are made available openly for all. Currently pyorc implements Large-scale Particle Image Velocimetry (LSPIV) based
flow analysis using the OpenPIV library and reprojections and image pre-processing with OpenCV. We wish to extend this
to Large-scale Particle Tracking Velocimetry (LSPTV) and Space-Time Image Velocimetry (STIV) for conditions that are less favourable for LSPIV using open
libraries or extensions to this code.
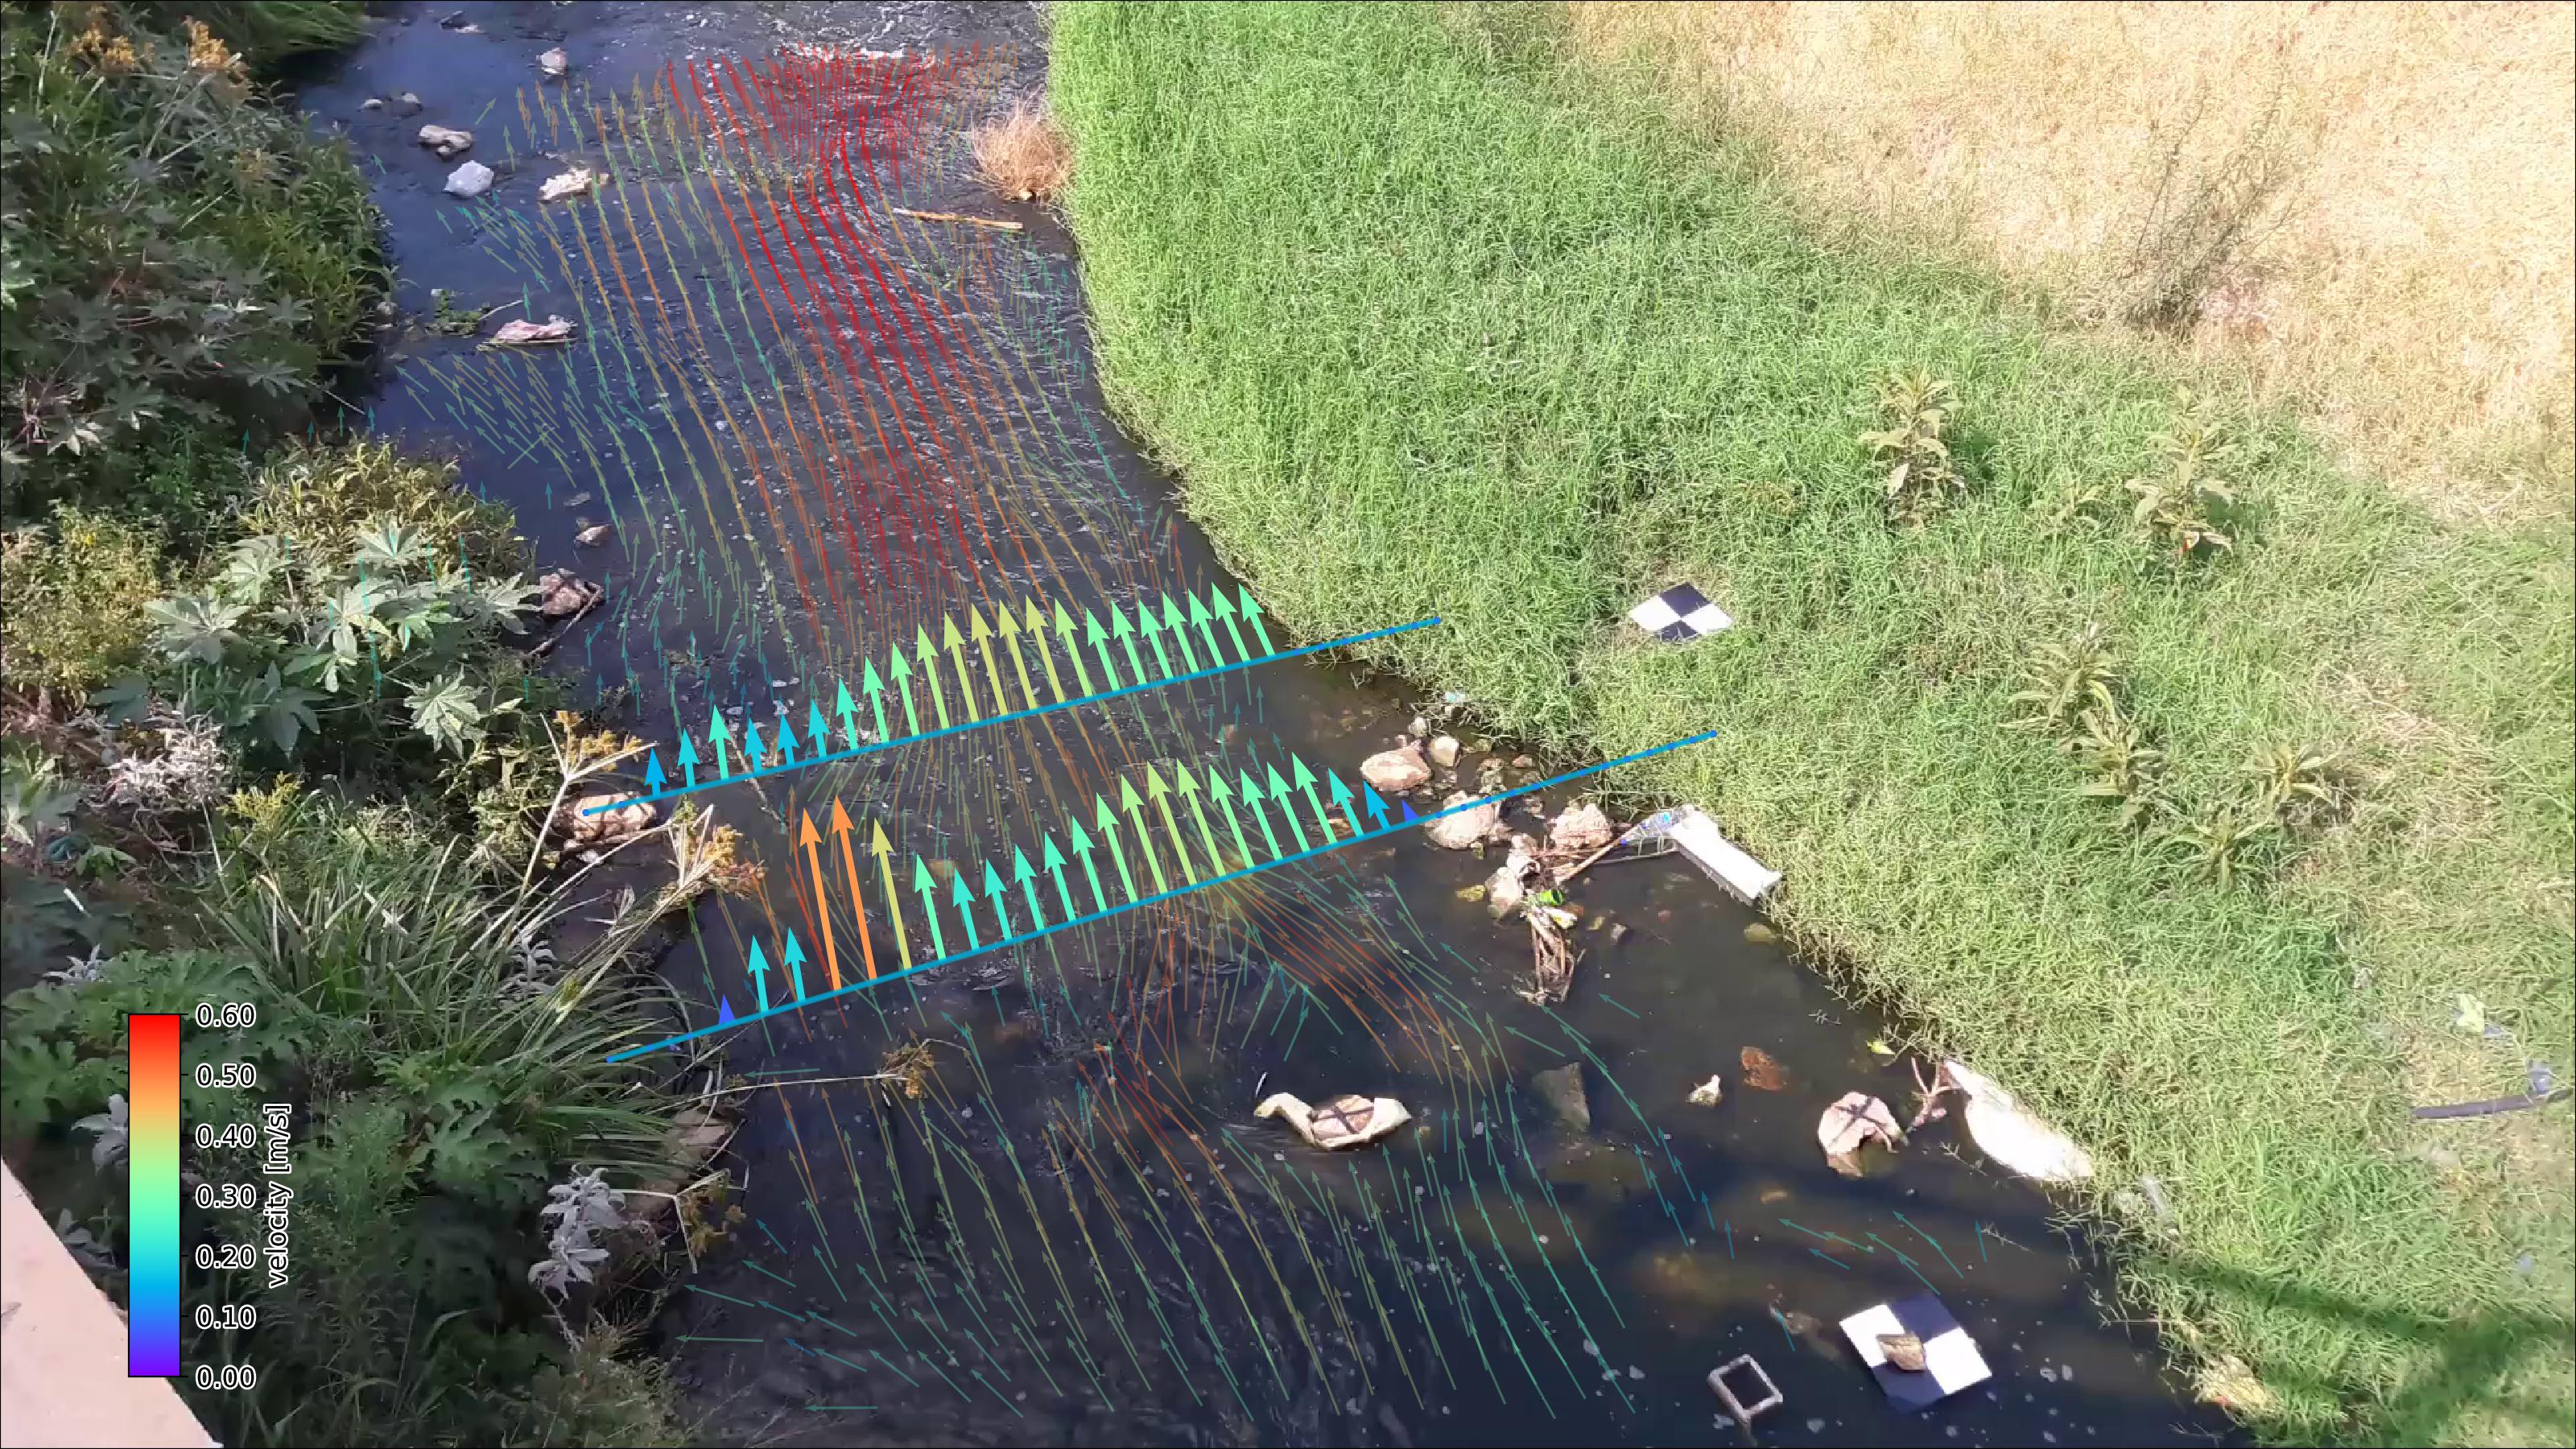 Image: Example of pyorc velocimetry over Ngwerere river at the Zambezi Road crossing - Lusaka, Zambia.
Current capabilities are:
- Reading of frames and reprojection to surface
- Velocimetry estimation at user-defined resolution
- Discharge estimation over provided cross-section
- Plotting of velocimetry results and cross-section flows in camera, geographical and orthoprojected perspectives.
We use the well-known xarray data models and computation pipelines (with dask) throughout the entire library to
guarantee an easy interoperability with other tools and methods, and allow for lazy computing.
We are seeking funding for the following frequently requested functionalities:
- A command-line interface for processing single or batch videos
- Implementation of better filtering in pre-processing
- Improved efficiency of processing
- Establishing on-site edge computation through a raspberry-pi camera setup
- Implementation of additional processing algorithms (STIV and LSPTV)
If you wish to fund this or other work on features, please contact us at info@rainbowsensing.com.
note: For instructions how to get Anaconda (with lots of pre-installed libraries) or Miniconda (light weight) installed, please go to https://docs.conda.io/projects/conda/en/latest/
manual: Please go to https://localdevices.github.io/pyorc for the latest documentation
compatibility: At this moment pyorc works with any video compatible with OpenCV as long as it has proper metadata.
Installation
To get started with pyorc, we recommend to setup a python virtual environment.
We recommend using a Miniconda or Anaconda environment as this will ease installation, and will allow you to use all
functionalities without any trouble. Especially geographical plotting with cartopy can be difficult to get installed.
With a conda environment and our conda-forge package this is solved. In the subsections below, you can find specific
instructions for different use cases.
Installation for direct use
If you simply want to add pyorc to an existing python installation or virtual environment, then follow these
instructions.
First activate the environment you want pyorc to be installed in (if you don't care about virtual environments, then
simply skip this step). You can simply install pyorc with all its dependencies as follows:
conda activate <name-of-your-environment>
conda install -c conda-forge pyopenrivercam
If you use mamba as a package mananager, then the steps are the same, except for the installation step, which is:
mamba install pyopenrivercam
Installation from latest code base
To install pyorc from scratch in a new virtual environment from the code base, go through these steps. Logical cases
when you wish to install from the code base are when you wish to have the very latest non-released version.
First, clone the code with git and move into the cloned folder.
git clone https://github.com/localdevices/pyorc.git
cd pyorc
Setup a virtual environment with all dependencies as follows:
conda env create -f envs/pyorc-dev.yml
conda activate pyorc-dev
then install pyorc from the code base as follows:
pip install .
note: pyorc is now installed in a virtual environment called pyorc-dev. This means that if you wish to run
python with pyorc. You need to always first activate this environment before running python (or jupyter). This is
done with the following command:
conda activate pyorc-dev
Installation from latest code base as developer
Clone the repository with ssh and move into the cloned folder.
git clone git@github.com:localdevices/pyorc.git
cd pyorc
Setup a virtual developers environment and install the package as follows:
conda env create -f envs/pyorc-dev.yml
conda activate pyorc-dev
pip install -e .
Using pyorc
To use pyorc, you can use the API for processing. A command-line interface is forthcoming pending funding.
A manual is also still in the making.
Acknowledgement
The first development of pyorc has been supported by the World Meteorological Organisation - HydroHub.
License
pyorc is licensed under AGPL Version 3 (see LICENSE file).
pyorc uses the following libraries and software with said licenses.
| Package | Version | License |
|---|
| numpy | 1.23.2 | BSD License |
| opencv2 | 4.6.0 | MIT License |
| openpiv | 0.23.8 | GPLv3 |
| matplotlib | 3.5.3 | Python Software Foundation License |
| geopandas | 0.10.2 | BSD License |
| pandas | 1.4.3 | BSD License |
Project organisation
.
├── README.md
├── LICENSE
├── setup.py            <- setup script compatible with pip
├── environment.yml     <- YML-file for setting up a conda environment with dependencies
├── docs                <- Sphinx documentation source code
    ├── ...             <- Sphinx source code files
├── examples            <- Jupyter notebooks with examples how to use the API
    ├── ...             <- individual notebooks and folder with example data files
├── pyorc               <- pyorc library
    ├── ...             <- pyorc functions and API files
├── tests               <- pytest suite
    ├── ...             <- pytest functions on API level