Research
PyPI Package Disguised as Instagram Growth Tool Harvests User Credentials
A deceptive PyPI package posing as an Instagram growth tool collects user credentials and sends them to third-party bot services.
simple-3dviz provides a set of simple and reusable tools for visualizing 3D data using Python and OpenGL. The goal of this library is to provide an easy way to visualize 3D objects with hundreds of thousands of vertices efficiently just with few lines of code. It can be used for visualizing various renderables such as meshes, point clouds, voxel grids, a set of geometric primitives etc.
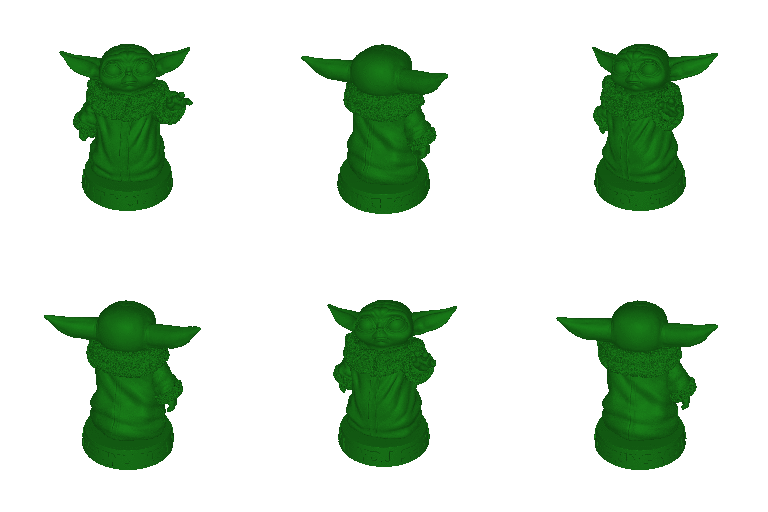
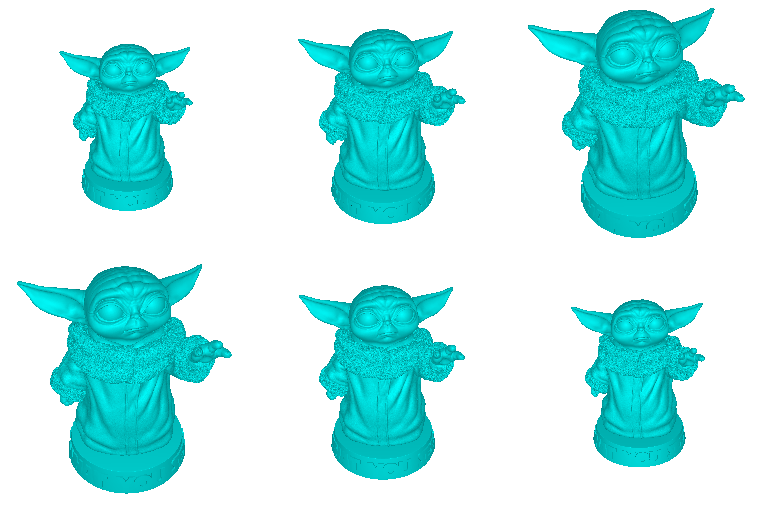
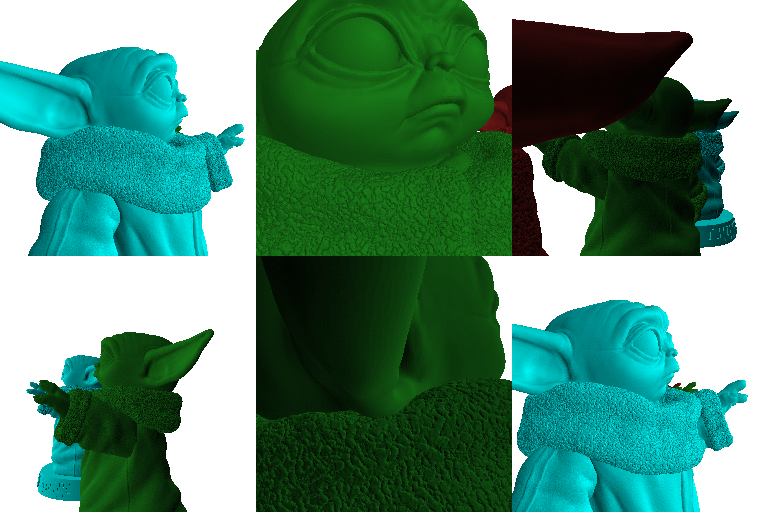

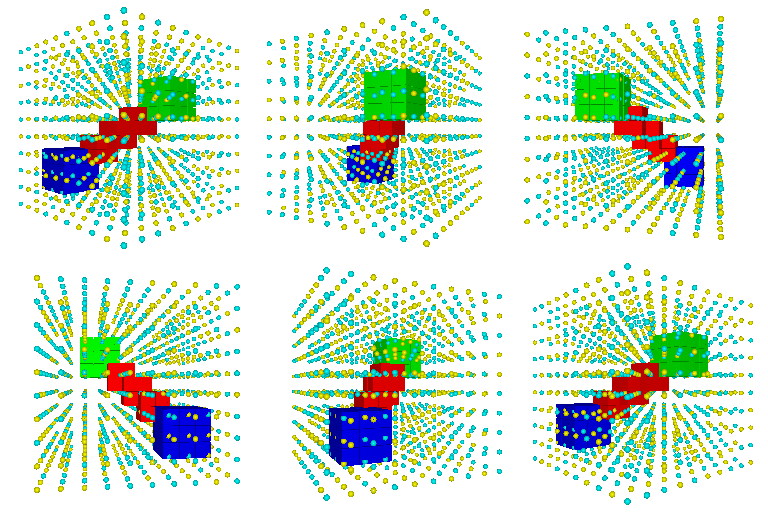
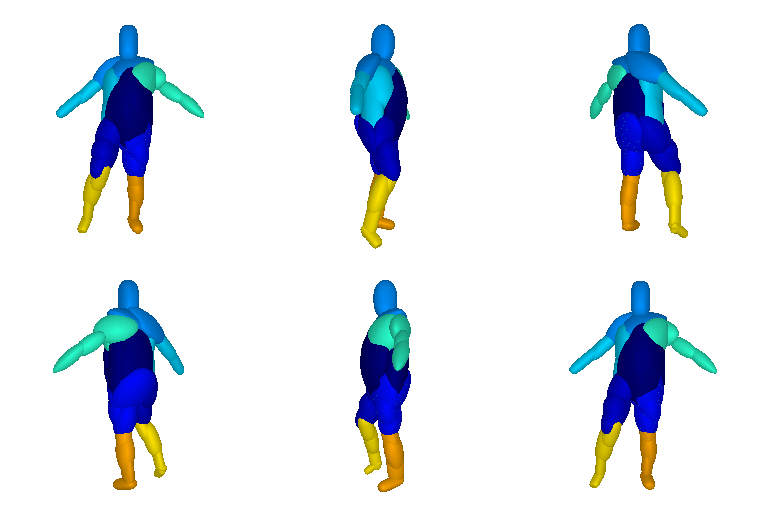
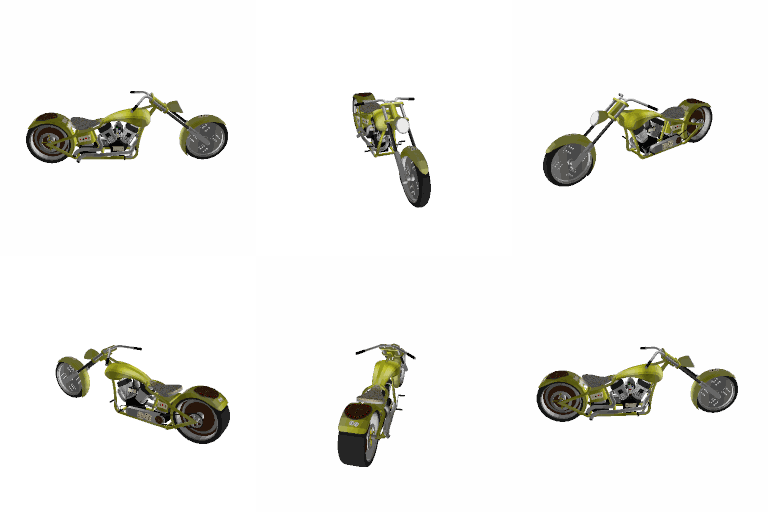
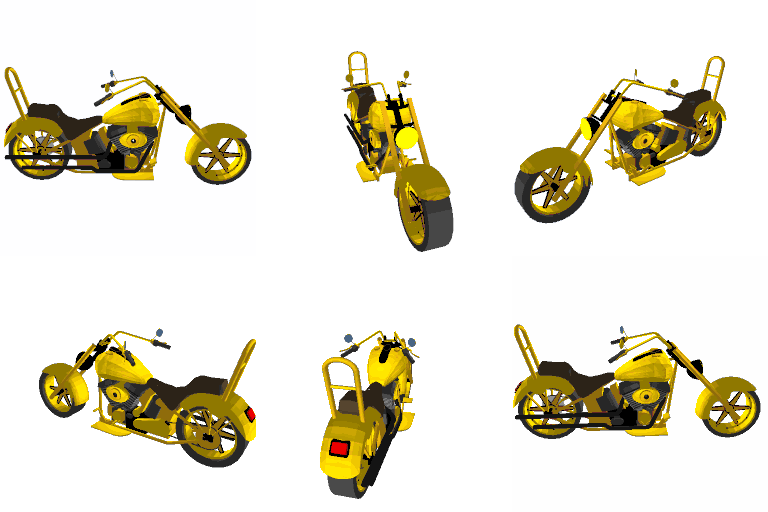
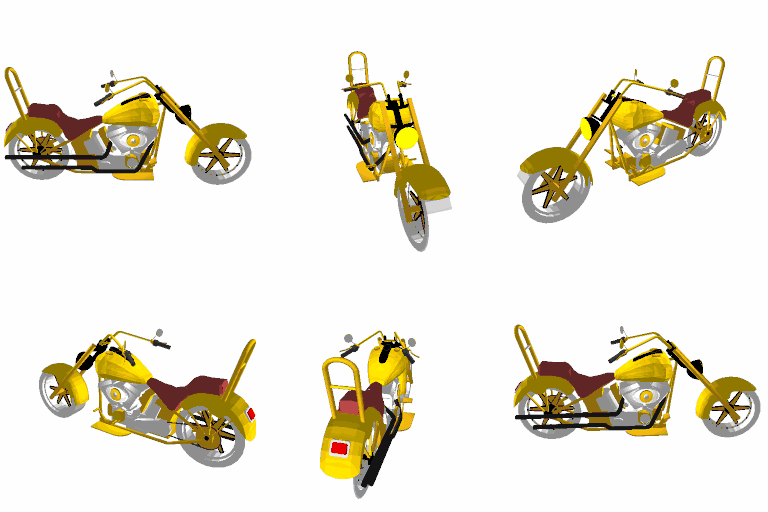
Key features include:
You can install simple-3dviz directly from pip.
pip install simple-3dviz
If you want to extend our code clone the repository and install it in development mode. In addition to the main library, we provide also two useful console applications that can be used for visualizing meshes (mesh_viewer) and 2D functions (func_viewer).
The dependencies of simple-3dviz are listed below:
You can find various examples of how to use our library in the provided
scripts and
examples.
Below we showcase some basic functionalities implemented in simple-3dviz.
from simple_3dviz import Mesh
from simple_3dviz.window import show
from simple_3dviz.utils import render

# We can load meshes from a file by specifying its path or by explicitely
# giving the vertices and the normals of the mesh you want to render
m = Mesh.from_file("models/baby_yoda.stl")

# You can easily extract the mesh vertices and faces
vertices, faces = m.to_points_and_faces()

# Preview the mesh in an OpenGL window if you installed wxpython with pip
# Note that you can specify the size (size) and the background color
# (background) of the rendered window as well as the position of the camera in
# the scene (camera_position), its viewing direction (camera_target) and the 3d
# direction that indicates which direction is "up" (up_vector). Finally you can
# also specify the location of the light source as well a set of behaviours to
# be performed.
show(m, camera_position=(-60., -160, 120), camera_target=(0., 0, 40),
     light=(-60, -160, 120))

# Our rendered mesh looks nice already but it is still not very accurate. This
# can be fixed by properly adjuasting the color of the input mesh through the
# color argument
m = Mesh.from_file("models/baby_yoda.stl", color=(0.1,0.5,0.1))

# We can specify various interesting behaviours while rendering our mesh
# Lets start by moving the camera around the object in a circular trajectory
from simple_3dviz.behaviours.movements import CameraTrajectory
from simple_3dviz.behaviours.trajectory import Circle

# The clockwise circular trajectory in 3D is defined by a 3D point that
# indicates the center of the circlular trajectory (center), a 3D point (point)
# and a 3D point that indicates the normal vector (normal). The 3D point point
# indicates the starting point of the trajectory
c = Circle(center=(0, 0, 120.), point=(-60, -160, 120.), normal=(0, 0, 1.))
ctrj = CameraTrajectory(c, speed=0.005)
show(m, camera_position=(-60., -160, 120), camera_target=(0., 0, 40),
     light=(-60, -160, 120), behaviours=[ctrj])

# Nice, but unfortunately the light remains at a fixed position, which means
# that when the camera looks at the back of the object it is not illuminated.
# To fix this we can add another behaviour called LightToCamera.
from simple_3dviz.behaviours.misc import LightToCamera
show(m, camera_position=(-60., -160, 120), camera_target=(0., 0, 40),
     light=(-60, -160, 120), behaviours=[ctrj, LightToCamera()])

# Note that we can also render the scene, without the need for any GUI
# environment using the render(...) function instead of the show(...) function.
# The render function takes the same arguments as the show function with an
# additional argument that indicates the number of frames to be rendered
# (n_frames).
# Saving the rendering results to the hard disk is implemented
# with a behaviour. This allows us to choose how to save the rendered frames
# and reuse the saving code for the show(...) pipeline.
from simple_3dviz.behaviours.io import SaveFrames
# To store the rendered frames to files, we can use the SaveFrames behaviour.
# We simply need to specify the path to save the rendered frames (path).
render(m,
       behaviours=[
            ctrj,
            LightToCamera(),
            SaveFrames("/tmp/frame_{:03d}.png", every_n=5)
       ],
       n_frames=512,
       camera_position=(-60., -160, 120), camera_target=(0., 0, 40),
       light=(-60, -160, 120)
)

# It is also possible to implement some more exciting motions, e.g. having the
# camera move back and forth across a line
from simple_3dviz.behaviours.trajectory import BackAndForth, Lines
render(m,
       behaviours=[
            CameraTrajectory(
                BackAndForth(Lines([-60, -160, 120], [-60, -80, 120])),
                speed=0.005
            )
            LightToCamera(),
            SaveFrames("/tmp/frame_{:03d}.png", every_n=5)
       ],
       n_frames=512,
       camera_position=(-60., -160, 120), camera_target=(0., 0, 40),
       light=(-60, -160, 120)
)

# Let's now try something more exciting! We start, by loading our baby Yoda
# mesh multiple times with different colors
m1 = Mesh.from_file("models/baby_yoda.stl", color=(0.1,0.5,0.1))
m2 = Mesh.from_file("models/baby_yoda.stl", color=(0,1.0,1.0))
m3 = Mesh.from_file("models/baby_yoda.stl", color=(0.5,0.1,0.1))

# We space the meshes across a line in the 3D space, by properly adjusting
# their offset parameter
m2.offset = (-100, 0, 0)
m3.offset = (100, 0, 0)

# We can have the camera moving between the three meshes, following a bezier
# curve, defined using the following control points
from simple_3dviz.behaviours.trajectory import QuadraticBezierCurves, Repeat
traj = Repeat(QuadraticBezierCurves(
    (-1.5*120, 0, 70),
    (-1*120, 80, 70),
    (-0.5*120, 0, 70),
    (0, -80, 70),
    (0.5*120, 0, 70),
    (1*120, 80, 70),
    (1.5*120, 0, 70),
    (1*120, -80, 70),
    (0.5*120, 0, 70),
    (0, 80, 70),
    (-0.5*120, 0, 70),
    (-1*120, -80, 70),
    (-1.5*120, 0, 70)
))

# We now render the three meshes as follows
render([m1, m2, m3],
       behaviours=[
            CameraTrajectory(traj, speed=0.001),
            SaveFrames("/tmp/frame_{:03d}.png", every_n=10)
       ],
       n_frames=999,
       camera_target=(0., 0., 70.0),
       light=(-60, -160, 120)
)

# Using simple-3dviz, we can also visualize point clouds and voxels, lines and
# primitives.
# Let us reproduce the voxel grid example from matplotlib that can be
# found here (https://matplotlib.org/3.2.1/gallery/mplot3d/voxels.html)
import numpy as np
x, y, z = np.indices((8, 8, 8))
cube1 = (x < 3) & (y < 3) & (z < 3)
cube2 = (x >= 5) & (y >= 5) & (z >= 5)
link = abs(x - y) + abs(y - z) + abs(z - x) <= 2
voxels = cube1 | cube2 | link

# Build a voxel grid from the voxels
m = Mesh.from_voxel_grid(
    voxels=voxels,
    sizes=(0.49,0.49,0.49),
    colors=[colormap[c] for c in colors[voxels]]
)

# Set the colors for evey object and visualize the screen
colors = np.empty(voxels.shape + (3,), dtype=np.float32)
colors[link] = (1, 0, 0)
colors[cube1] = (0, 0, 1)
colors[cube2] = (0, 1, 0)

show(
    Mesh.from_voxel_grid(voxels=voxels, colors=colors),
    light=(-1, -1, 1),
    behaviours=[
        CameraTrajectory(
            Circle(center=(0, 0, 0), point=(2, -1, 0), normal=(0, 0, -1)),
            speed=0.004)
    ]
)

# To visualize a pointloud we can simply use the Spherecloud object
# from simple_3dviz import Spherecloud
# We start by generating points uniformly distributed in the unit cube
x = np.linspace(-0.7, 0.7, num=10)
centers = np.array(np.meshgrid(x, x, x)).reshape(3, -1).T
spheres_colors = np.array([[1, 1, 0, 1],
                   [0, 1, 1, 1]])[np.random.randint(0, 2, size=centers.shape[0])]
spheres_sizes = np.ones(centers.shape[0])*0.02

# simple-3dviz also supports visualizing meshes with texture. You can simply
# load a mesh with texture using our TexturedMesh class
m = TexturedMesh.from_file("models/cat_1/12222_Cat_v1_l3.obj")
When using the scene viewer via the show() function, it is possible to
perform various actions either using the mouse of the keyboard.
The available keyboard commands are:
R: Reports the camera position, its viewing direction and the 3d
direction that indicates which direction is "up" at the current timestamp.T: Make sure that the triangles will be sorted so that the transparency
works as well.The module has a dedicated documentation site but you can also read the source code and the examples. to get an idea of how the library should be used and extended.
Our code is released under the MIT license, which practically allows anyone to do anything with it.
If you found simple-3dviz useful in your research please consider citing:
@misc{Katharopoulos2020simple3dviz,
     title = {simple-3dviz},
     author = {Katharopoulos Angelos and Paschalidou, Despoina},
     howpublished = {\url{https://simple-3dviz.com}},
     year = {2020}
}
FAQs
simple-3dviz is a simple visualization library for 3D
We found that simple-3dviz demonstrated a healthy version release cadence and project activity because the last version was released less than a year ago. It has 2 open source maintainers collaborating on the project.
Did you know?

Socket for GitHub automatically highlights issues in each pull request and monitors the health of all your open source dependencies. Discover the contents of your packages and block harmful activity before you install or update your dependencies.

Research
A deceptive PyPI package posing as an Instagram growth tool collects user credentials and sends them to third-party bot services.
Product
Socket now supports pylock.toml, enabling secure, reproducible Python builds with advanced scanning and full alignment with PEP 751's new standard.

Security News
Research
Socket uncovered two npm packages that register hidden HTTP endpoints to delete all files on command.