Guard
Authing 是一个企业级身份认证提供商,其集成了 OAuth、LDAP、OIDC 等多种身份认证和授权解决方案。
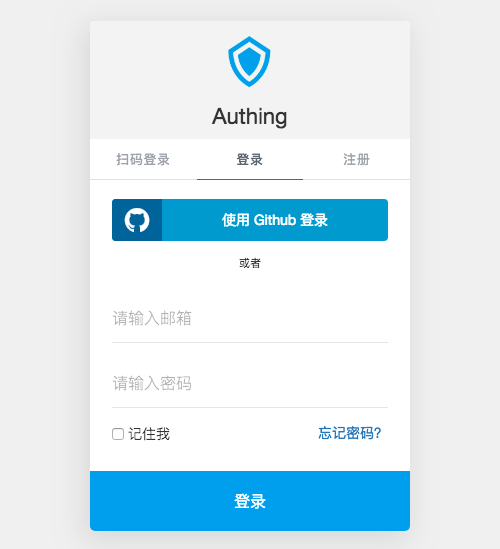
Guard 套件是 Authing 提供的浏览器端单点登录解决方案,开发者可基于此框架在浏览器端实现单点登录的页面及逻辑。
Guard 提供的表单拥有以下基本功能:
- 邮箱密码登录注册
- 手机验证码登录
- 用户名密码登录
- 忘记密码以及重置密码
- 记住账号功能(加密信息存储到浏览器本地)
- 社会化登录(微信、Github)
- 小程序扫码登录
- 响应式特性
- SSO(支持 SAML、LDAP、OIDC)
点击体验 或 在 jsfiddle 上尝试。
安装
通过 CDN 安装
<script src="https://cdn.jsdelivr.net/npm/@authing/guard/dist/Guard.umd.min.js"></script>
通过 NPM 安装
$ npm install @authing/guard --save
接着你可以使用以下方式引入 Guard:
import Guard from '@authing/guard';
非 SSO 场景
开发者直接从 Authing 的用户池中获取用户数据,不走 OAuth、OIDC 等协议流程。如果用户登录成功,你将在前端直接获取到他的数据。Guard 此场景下用于为开发者快速生成登录表单 UI,快速接入用户系统。
这里以一个简单的 HTML 为例:
<!DOCTYPE html>
<html>
<head>
<meta charset="utf-8">
<meta http-equiv="X-UA-Compatible" content="IE=edge">
<title>Guard Example</title>
<meta name="viewport" content="width=device-width, initial-scale=1">
<script src="https://cdn.jsdelivr.net/npm/@authing/guard/dist/Guard.umd.min.js"></script>
</head>
<body>
<div id="my-form"></div>
<script>
const clientId = "YOUR_AUTHING_USERPOOL_ID";
const guard = new Guard(clientId, {
logo: "https://usercontents.authing.cn/client/logo@2.png",
title: "Authing",
mountId: "my-form",
});
guard.on("authenticated", userInfo => {
console.log(userInfo);
});
guard.on("register", userInfo => {
console.log(userInfo);
});
guard.on("scanned-success", userInfo => {
console.log(userInfo);
});
</script>
</body>
</html>
点击查看用户信息示例
SSO 场景
你想为其他人提供身份服务或使用他人提供的身份服务。此部分供私有部署用户参考,使用 SaaS 的用户直接使用 Authing 云上部署的 Guard,无需操心 Guard 部署问题,只需关注如何发起 SSO 登录请求。
作为 IdP(身份提供商),对外提供身份服务,Guard 此场景下用于 IdP 确认用户身份。支持的协议有 OAuth 2.0,OIDC,SAML,LDAP。
作为与其他 IdP 通信的客户端,Guard 此场景下充当 SP 和其他 IdP 通信,用于完成相应登录协议发起授权的环节,例如向其他 SAML IdP 发送 SAML Request请求。
部署示例:
<!DOCTYPE html>
<html lang="zh-cn">
  <head>
    <meta charset="utf-8" />
    <meta http-equiv="X-UA-Compatible" content="IE=edge" />
    <meta name="viewport" content="width=device-width,initial-scale=1.0" />
    <link rel="icon" href="https://fe-static.authing.cn/dist/favicon.png" />
    <title>Authing SSO</title>
  </head>
  <body>
    <noscript>
      <strong>We're sorry but sso doesn't work properly without JavaScript enabled.
        Please enable it to continue.</strong>
    </noscript>
    <script src="https://cdn.jsdelivr.net/npm/@authing/guard/dist/Guard.umd.min.js"></script>
    <script>
      var appId = "YOUR_AUTHING_SSO_APPID";
      var clientId = "YOUR_AUTHING_USERPOOL_ID";
      var domain = "example.authing.cn";
      const guard = new Guard(clientId, {
        appId,
        domain,
        hideClose: true,
        isSSO: true,
        SSOHost: location.origin,
        qrcodeScanning: {
          redirect: false
        },
        host: {
          user: "私有部署的内部地址",
          oauth: "私有部署的内部地址"
        }
      });
    </script>
  </body>
</html>
API
构造函数 new Guard(clientId, options)
初始化一个新的 Guard 实例。SSO 场景和非 SSO 场景下传参方式有所不同。
非 SSO 场景
只需提供用户池 id。
- clientId: 用户池 id
- options {Object}: 允许你自定义表单的 UI,相关参数请参考 自定义
SSO 场景
供私有化部署用户参考,SaaS 用户无需操心 Guard SSO 场景部署。
需要提供用户池 id,在 options 对象中,传入你在 Authing 对应应用中的 appId 和域名信息。
- clientId: 用户池 id
- options {Object}: 允许你自定义表单的 UI,相关参数请参考 自定义
- options.appId {String}: Authing SSO 类应用的 appId;
- options.domain {String}: Authing 中配置的 域名. 通常是 <appDomain>.authing.cn;
authing 对象
如果你想获取 authing 对象以调用用户管理接口,请使用如下代码:
authing-load 事件是 Authing 对象初始化后的回调事件。
guard.on('authing-load', (authing) => {
console.log('Authing 实例初始化成功', authing);
});
show(mountId)
显示登录表单,同时允许覆盖初始化时的配置。
- mountId {String}: 指定 Guard 将在何处显示,接受一个 html 元素 id,不含 # 号,不指定则直接生成在网页中间。
示例
guard.show();
guard.show('mountId');
hide()
隐藏表单
示例
guard.hide();
on(event, callback)
Guard 会在以下生命周期中触发相应事件:
| 事件名称 | 事件说明 | 事件参数 | 事件参数说明 |
|---|
| authing-load | Authing Client ID 验证通过,加载完成 | authing | authing 对象,可直接操作 login,register 等方法 |
| authing-unload | Authing Client ID 验证失败 | error | 错误信息 |
| social-load | 社会化登录列表加载完成 | oauthList | 完整的 OAuth 列表,若用户未在后台配置过则为空 |
| social-unload | 社会化登录列表加载失败 | error | 错误信息 |
| login/authenticated | 用户登录成功 | user | 用户数据 |
| login-error/authenticated-error | 用户登录失败 | error | 错误信息,包含字段缺失/非法或服务器错误等信息 |
| register | 用户注册成功 | user | 用户数据 |
| register-error | 用户注册失败 | error | 错误信息,包含字段缺失/非法或服务器错误等信息 |
| email-sent | 忘记密码邮件发送成功 | data | 发送的结果 |
| email-sent-error | 忘记密码邮件发送失败 | error | 错误信息 |
| reset-password | 重置密码成功 | data | 重置密码结果 |
| reset-password-error | 重置密码失败 | error | 错误信息 |
| scanned-success | 扫码登录成功 | user | 用户数据 |
| scanned-error | 扫码登录失败 | error | 错误信息 |
| scanning-interval-starting | 开始监听扫码事件 | interval | 用户可使用 clearInterval 停止监听 |
| form-closed | Guard 关闭事件 | null | 用户按下 ESC 或点击右上方的关闭按钮后会触发此事件 |
自定义
UI 定制
以下是完整的参数列表:
| 参数名称 | 是否必填 | 默认值 | 类型 | 参数说明 |
|---|
| nonce | 否 | [Random] | Number | 随机数,用于防范网络攻击 |
| timpstamp | 否 | 当前时间戳 | Number | 初始化时的时间戳,用于防范网络攻击 |
| mountId | 否 | 无 | String | 指定 Guard 表单将在何处显示,接受一个 html 元素 id,不含 # 号。不指定则默认全屏弹出 Modal 登录框 |
| title | 否 | Authing | String | 产品名称 |
| logo | 否 | [Authing LOGO] | String | 产品logo,默认为 Authing 的官方 Logo |
| forceLogin | 否 | false | Boolean | 是否将注册和登录合并,合并后如果用户不存在将自动注册 |
| hideQRCode | 否 | false | Boolean | 是否隐藏小程序扫码登录,在开发者在 Authing 控制台开启小程序扫码登录后,若此项为 true 将不显示小程序扫码登录 |
| hideUP | 否 | false | Boolean | 是否隐藏用户名-密码登陆,隐藏后将不显示用户名-密码登录框 |
| hideUsername | 否 | false | Boolean | 是否隐藏注册时的用户名填写,隐藏后将不显示用户名输入框 |
| hideRegister | 否 | false | Boolean | 是否隐藏注册框,隐藏后将不显示注册框 |
| hideSocial | 否 | false | Boolean | 是否隐藏社会化登录,在开发者在 Authing 控制台开启社会化登录后,若此项为 true 将隐藏全部社会化登录 |
| hideClose | 否 | false | Boolean | 是否隐藏登录框右上角的关闭按钮,如果隐藏,用户将不能通过点击按钮或按 ESC 关闭登录框 |
| placeholder | 否 | {} | Object | 定制输入框的 paceholder |
| placeholder.username | 否 | 请输入用户名 | String | 定制输入框的 paceholder |
| placeholder.email | 否 | 请输入邮箱 | String | 用户名输入框的 paceholder |
| placeholder.password | 否 | 请输入密码 | String | 邮箱输入框的 paceholder |
| placeholder.confirmPassword | 否 | 请确认密码 | String | 密码输入框的 paceholder |
| placeholder.verfiyCode | 否 | 请输入验证码 | String | 验证码输入框的 paceholder |
| placeholder.newPassword | 否 | 请输入新密码 | String | 新密码输入框的 paceholder |
| placeholder.phone | 否 | 请输入手机号 | String | 手机号输入框的 paceholder |
| placeholder.phoneCode | 否 | 4 位验证码 | String | 手机验证码输入框的 paceholder |
| qrcodeScanning | 否 | {} | Object | 小程序扫码登录的配置项 |
| qrcodeScanning.redirect | 否 | true | Boolean | 是否执行跳转(在用户后台配置的URL),若值为false,用户数据会通过 onSuccess 回调函数返回 |
| qrcodeScanning.interval | 否 | 1500 | Number | 每隔多少秒检查一次是否扫码,默认1500 |
| qrcodeScanning.tips | 否 | 使用 微信 或小程序 身份管家 扫码登录 | String | 提示信息,可写HTML |
以下供私有部署用户查看
| 参数名称 | 是否必填 | 默认值 | 类型 | 参数说明 |
|---|
| useSelfWxapp | 否 | false | Boolean | 是否使用私有部署的小程序提供二维码,此选项仅供私有部署用户使用 |
| host | 否 | {} | Object | GraphqlQL 通讯地址配置项 |
| host.user | 否 | [Authing 官方链接] | String | GraphQL 链接,默认 Authing 官方链接,此处用于私有部署 Authing 的用户使用 |
| host.oauth | 否 | [Authing 官方链接] | String | GraphQL 链接,默认 Authing 官方链接,此处用于私有部署 Authing 的用户使用 |
| appId | 是 | 无 | String | SSO 应用的云上 ID |
| domain | 否 | 无 | String | SSO 类应用云上域名 |
| protocol | 否 | oauth | String | 用于显示指定 SSO 应用类型,可选值为 oauth、oidc、saml |
| SSOHost | 否 | https://sso.authing.cn | String | SSO 类应用的通讯地址,默认 Authing 官方链接,此处用于私有部署 Authing 的用户使用 |
| isSSO | 否 | false | Boolean | 用于标识当前是否为 SSO 模式,如果只是想简单生成登录表单,使用默认 false 即可 |
浏览器兼容性
兼容 Chrome、Safari、Firefox 和 Edge。
问题报告
如果你遇到问题,请打开 Issue 提出问题。
开发者信息
Authing
License
This project is licensed under the MIT license. See the LICENSE file for more info.