This module provide and usefull helper to use mongoose library.
See official documentation here.
Compatibility
The minimum supported version of Node.js is v8.
How to use it
To use the library you just need to follow the following steps
Install the library with npm
npm install @condor-labs/mongodb
Import the library:
const mongodb = require("@condor-labs/mongodb")(settings);
settings array of object properties
those are the properties for each connection object
| Property | Default | Description |
|---|
| connectionName (String) | | It is a unique value that will indentify the connection you are using |
| host (String) | 127.0.0.1 | The host name of the database you are connecting to. In case you want to connect to mongo Atlas via cluster.
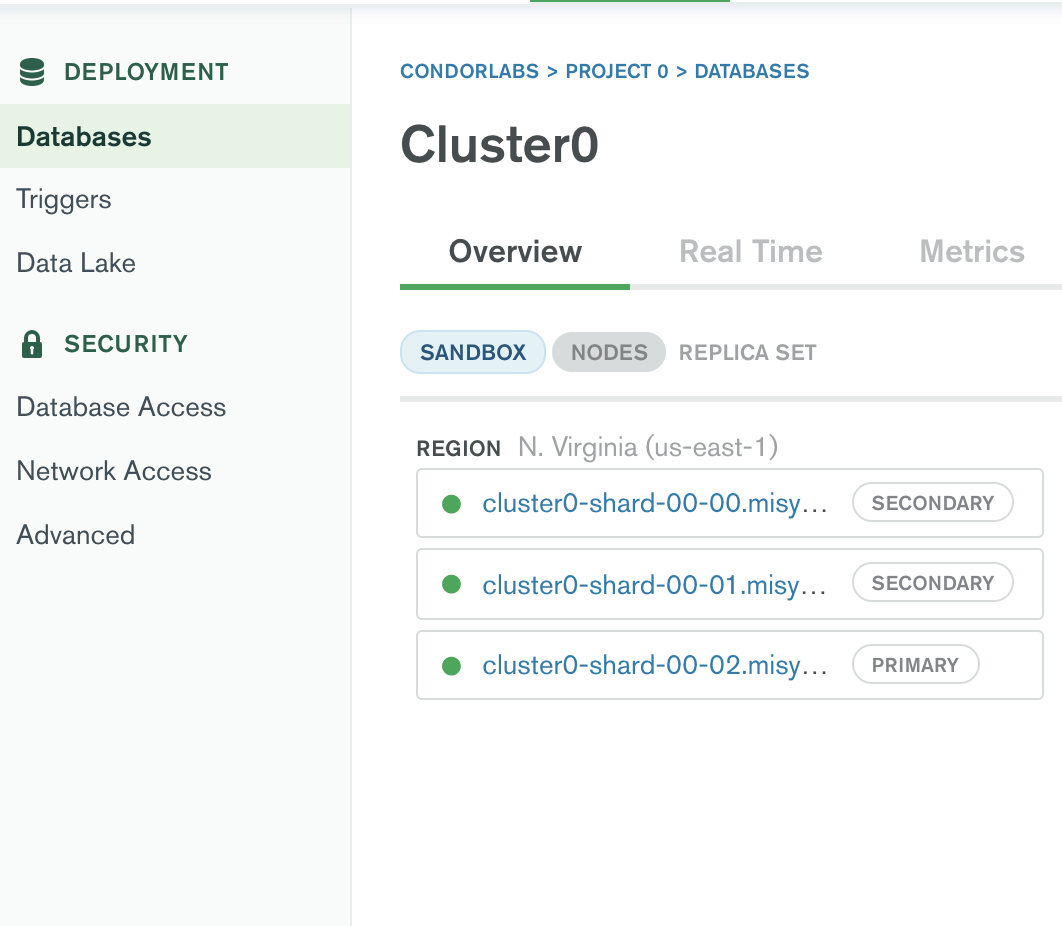
A) You must check the connection metrics of your cluster.
B) Copy the hosts of your metrics and concatenate them in the host property of your connection configuration to mongo example: in its connection parameters. host: 'cluster0-shard-00-00.ksccs.mongodbnet'cluster0-shard-00-01.ksccs.mongodb.net,cluster0-shard-00-02.ksccs.mongodb.net'
keep in mind which host property receives one or multiple hosts. |
| port (Number) | 27017 | The port number to connect to. |
| user (String) | | The username for authentication. This option is mongoose-specific, they are equivalent to the MongoDB driver's auth.username options. |
| password (String) | | The password for authentication. This option is mongoose-specific, they are equivalent to the MongoDB driver's auth.password options. |
| database (String) | | Specifies which database to connect to and overrides any database specified in the connection string. |
| replicaSet (String) | | To connect to a single node replica set, specify the replicaSet option, see Replica Set Host Names |
| ssl (Boolean) | false | Flag to indicate the connection will use SSL |
| authSource (String) | | See Replica Set Connections |
reconnectTries (Number) (Deprecrated) | 30000 | If you're connected to a single server or mongos proxy (as opposed to a replica set), the MongoDB driver will try to reconnect every reconnectInterval milliseconds for reconnectTries times, and give up afterward. When the driver gives up, the mongoose connection emits a reconnectFailed event. This option does nothing for replica set connections. |
reconnectInterval (Number) (Deprecated) | 1000 | See reconnectTries |
| readPreference (String) | secondaryPreferred | Read preference describes how MongoDB clients route read operations to the members of a replica set. Possibles values: primary, primaryPreferred, secondary, secondaryPreferred, nearest.
Docs: https://docs.mongodb.com/manual/core/read-preference/ |
ReadPreference Options
| Property | Description |
|---|
| primary | All operations read from the current replica set primary. |
| primaryPreferred | In most situations, operations read from the primary but if it is unavailable, operations read from secondary members. |
| secondary | All operations read from the secondary members of the replica set. |
| secondaryPreferred | In most situations, operations read from secondary members but if no secondary members are available, operations read from the primary. |
| nearest | Operations read from member of the replica set with the least network latency, irrespective of the member’s type. |
In case you want to connect to mongo Atlas via cluster,
-
You should check the connection metrics of your cluster.You must verify that this is your ip

-
Copy the hosts of your metrics and concatenate them in the host property of your connection configuration to mongo example: in its connection parameters.
Only the url of this section should be included, separated by commas.
host: 'cluster0-shard-00-00.ksccs.mongodb.net,cluster0-shard-00-01.ksccs.mongodb.net,cluster0-shard-00-02.ksccs.mongodb.net'
- You may have an authentication error, you must verify that your user has read and write permissions.

this error may also be due to not adding the authSource attribute in the configuration json.
Example Code
this is an example for multiple connections:
First we are going to create an array of connections
const mongoDbSettings = [
  {
    connectionName: "connection_mongo_1",
    host: "localhost",
    port: 27017,
    database: "development",
    user: "local-user",
    password: "superSecretPass",
    ssl: false,
  },
  {
    connectionName: "connection_mongo_2",
    host: "exapmle-shard-00-00-8burs.mongodb.net,exapmle-shard-00-01-8burs.mongodb.net,exapmle-shard-00-02-8burs.mongodb.net",
    port: 27017,
    database: "dev",
    user: "my-user-2",
    password: "superSecretPass",
    replicaSet: "compliance-support-shard-0",
    ssl: true,
    authSource: "admin",
  },
];
We are going to create a helper (mongoHelper.js) that will included the following logic
"use strict";
const mongo = require("@condor-labs/mongodb")(mongoDbSettings);
const helper = {
clients: {},
isConnected: (connectionName) => {
return mongo._isConnected(connectionName);
},
connect: async () => {
for (const item of mongoDbSettings) {
let client = await mongo.getClient(item.connectionName);
helper.clients[item.connectionName] = client;
}
},
};
module.exports = helper;
now we are going to create our models
model1.js
const mongodb = require("@condor-labs/mongodb")();
const helperMongo = require("./mongoHelper");
let userSchema = new mongodb.mongoose.Schema({
user: String,
token: String,
password: String,
});
const dbConnection = helperMongo.clients["connection_mongo_1"];
let userModel = dbConnection.model("User", userSchema);
module.exports = userModel;
my sencond model will be similar to the previeus one but instead of using connection_mongo_1 connection I will use connection_mongo_2
model2.js
const mongodb = require("@condor-labs/mongodb")();
const helperMongo = require("./mongoHelper");
let userSchema = new mongodb.mongoose.Schema({
user: String,
token: String,
password: String,
});
const dbConnection = helperMongo.clients["connection_mongo_2"];
let userModel = dbConnection.model("User", userSchema);
module.exports = userModel;
Finallly, after all those configuration we are going to test our connection on our server.js file that includes the following code.
server.js
mongoDbHelper.connect().then(async () => {
const userModelDB1 = require("./model1");
const userModelDB2 = require("./model2");
userModelDB1.findOne({}),
userModelDB2.findOne({}),
})
Contributors
The original author and current lead maintainer of this module is the
Condorlabs Development Team.
More about Condorlabs Here.
License
MIT