Product
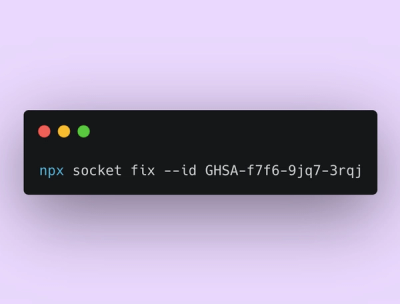
Announcing Socket Fix 2.0
Socket Fix 2.0 brings targeted CVE remediation, smarter upgrade planning, and broader ecosystem support to help developers get to zero alerts.
@croudtech/vue-connect-ui
Advanced tools
Vue plugin providing a suite of Croud UI components
yarn add @croudtech/vue-connect-ui
Croud UI components are built in Vue and styled using Fela—a CSS in JS library.
You will therefore need to add Vue, Fela and the Vue Fela Plugin to your project dependencies:
yarn add vue fela vue-fela
Fela will first need to be installed and configured:
import Vue from 'vue'
import VueFela from 'vue-fela'
import { createConfig, staticStyles } from '@croudtech/vue-connect-ui'
import { createRenderer } from 'fela'

// 1. Create the Croud Fela renderer config
const config = createConfig()

// 2. Create a Fela renderer passing the Croud config
const renderer = createRenderer(config)

// 3. Render Croud static styles
renderer.renderStatic(staticStyles)

// 4. Install the Fela plugin passing the renderer
Vue.use(VueFela, { renderer })
The createConfig method imported from @croudtech/vue-connect-ui accepts an options object as the first argument:
import { createConfig } from '@croudtech/vue-connect-ui'

// Default configuration
const config = createConfig({
  monolithic: false,
  custom: {},
  alias: {},
  unit: []
})
| Option | Type | Default | Description |
|---|---|---|---|
monolithic | Boolean | false | Whether or not to use monolithic class names over atomic ones. See here for more information. |
custom | Object | {} | Custom properties to merge into those setup by Vue Croud. See here for more information. |
alias | Object | {} | Aliased keys to merge into those setup by Vue Croud. See here for more information. |
unit | Array | [] | Arguments to pass to the fela unit plugin. |
If you are using Nuxt, the Fela Configuration code above should be placed in the plugins directory eg. plugins/fela.js:
// plugins/fela.js
import Vue from 'vue'
import VueFela from 'vue-fela'
import { createConfig, staticStyles } from '@croudtech/vue-connect-ui'
import { createRenderer } from 'fela'

const config = createConfig()
const renderer = createRenderer(config)

renderer.renderStatic(staticStyles)

Vue.use(VueFela, { renderer })
You will then need to register the plugin in the Nuxt config file:
// nuxt.config.js
module.exports = {
  plugins: [
    'plugins/fela'
  ]
}
The Croud UI uses three Google fonts:
However the Vue Croud plugin does not assume responsibility for embedding these fonts in your project.
The simplest way to embed these fonts is by adding a <link> tag to the <head> of your document:
<link href="https://fonts.googleapis.com/css?family=Material+Icons|Montserrat:400,600|Pathway+Gothic+One" rel="stylesheet">
If you are using Nuxt, you can do this via the head object in nuxt.config.js:
// nuxt.config.js
module.exports = {
  head: {
    link: [{
      rel: 'stylesheet',
      href: 'https://fonts.googleapis.com/css?family=Material+Icons|Montserrat:400,600|Pathway+Gothic+One'
    }]
  },
  plugins: [
    'plugins/fela'
  ]
}
Once both Fela and the Fonts are setup—you can install the Vue Croud plugin:
import Vue from 'vue'
import VueCroud from '@croudtech/vue-connect-ui'

Vue.use(VueCroud)
In exactly the same way that Fela was installed, place the installation code in the plugins directory:
// plugins/croud.js
import Vue from 'vue'
import VueCroud from '@croudtech/vue-connect-ui'

Vue.use(VueCroud)
Then register the plugin in the Nuxt config alongside fela:
// nuxt.config.js
module.exports = {
  plugins: [
    'plugins/fela',
    'plugins/croud'
  ]
}
The Vue Croud plugin provides a few configuration options:
import Vue from 'vue'
import VueCroud from '@croudtech/vue-connect-ui'

Vue.use(VueCroud, {
  register: true,
  namespace: 'cui',
  linkName: 'router-link'
})
| Option | Type | Default | Description |
|---|---|---|---|
register | Boolean | true | Whether or not to register all the Croud UI components in Vue's global scope. When disabled, components will need to be imported manually. |
namespace | String | cui | Component name prefix to use when registering the Croud UI components in Vue's global scope. |
linkName | String | router-link | Link component to wrap when using the <cui-link/> component.When using Nuxt, you can optionally set this to nuxt-link. |
If you set the register option to false when installing the Vue Croud plugin, you will need to import the components you require manually:
<template>
  <cui-icon name="menu"/>
</template>

<script>
import { components } from '@croudtech/vue-connect-ui'

export default {
  components: {
    cuiIcon: components.Icon
  }
}
</script>
For a list of available components set on this object, see here.
When the Croud plugin is installed a $con property is set on Vue's prototype and assigned to the Croud constants object.
This is very useful since it allows you to use these values within your components:
<template>
  <div>
    <cui-icon :color="iconColor" :name="iconName" @click.native="onClickIcon"/>
    <cui-text :color="$con.COLOR.SLATE" text="Slate is great"/>
  </div>
</template>

<script>
export default {
  data() {
    return {
      open: false
    }
  },
  computed: {
    iconName() {
      return this.open ? 'clear' : 'menu'
    },
    iconColor() {
      const { COLOR } = this.$con // Croud constants
      return this.open ? COLOR.CLAY : COLOR.TEAL
    }
  },
  methods: {
    onClickIcon() {
      this.open = !this.open
    }
  }
}
</script>
Since the Vue Croud plugin uses Fela to render component styles, "atomic class names" are generated at runtime.
Fela generates these atomic classes on a per-property basis:
.a { display: 'block'; }
.b { display: 'flex'; }
.c { color: 'blue'; }
.d { color: 'red'; }
Since these classes are non-deterministic, it is impossible for you to use them in your own CSS selectors.
To address this, every element within every component has a friendly class name alongside Fela's generated class names.
If you were to inspect the rendered output of a Croud Text component for example, you might see something like this:
<span class="cui-text a b c d e f">
Friendly class names are prefixed with the namespace property (cui by default) followed by the component name.
You can reliably use these friendly class names in your CSS selectors to override the styles set by Fela's atomic classes.
Google's Material Icons are integrated into the Icon component supplied by the Vue Croud plugin.
To render an icon in your project:
<cui-icon name="account_balance" color="green"/>
The name prop can be any icon specified on the Material Icons website. However the name must be specified in either snake_case or kebab-case.
For example, to use the 'add shopping cart' icon:
<cui-icon name="add_shopping_cart"/>
<cui-icon name="add-shopping-cart"/>
Form and input validation has been purposefully omitted from the UI Kit component logic since use cases are far too varied and complex to try and generalise a solution.
Subsequently the Input component has been designed to work with v-model to allow parent components to define and validate the data. The presentation of the Input component can then be controlled by setting the invalid prop based on some validation logic:
<template>
  <cui-input v-model="name" :invalid="invalid"/>
</template>

<script>
export default {
  data() {
    return {
      name: ''
    }
  },
  computed: {
    invalid() {
      return this.name === ''
    }
  }
}
</script>
For more complex validation logic, you can install the vuelidate plugin:
import Vue from 'vue'
import Vuelidate from 'vuelidate'

Vue.use(Vuelidate)
Vuelidate looks for a special validations key alongside your other component options. Keys declared within the validations object are setup to watch the respective properties on the component instance and validate their values each time they change:
import {
  alphaNum,
  required,
  minLength
} from 'vuelidate/lib/validators'

export default {
  data() {
    return {
      password: ''
    }
  },
  validations: {
    password: {
      required,
      alphaNum,
      minLength: minLength(8)
    }
  }
}
Various validation states can then be used within your component logic via a $v instance property:
<template>
  <cui-input type="password" v-model="password" :invalid="$v.password.$invalid"/>
</template>
For a more complete example, please see the Form page source code in the style guide.
FAQs
Vue plugin providing a suite of Croud UI components
We found that @croudtech/vue-connect-ui demonstrated a not healthy version release cadence and project activity because the last version was released a year ago. It has 3 open source maintainers collaborating on the project.
Did you know?

Socket for GitHub automatically highlights issues in each pull request and monitors the health of all your open source dependencies. Discover the contents of your packages and block harmful activity before you install or update your dependencies.

Product
Socket Fix 2.0 brings targeted CVE remediation, smarter upgrade planning, and broader ecosystem support to help developers get to zero alerts.

Security News
Socket CEO Feross Aboukhadijeh joins Risky Business Weekly to unpack recent npm phishing attacks, their limited impact, and the risks if attackers get smarter.

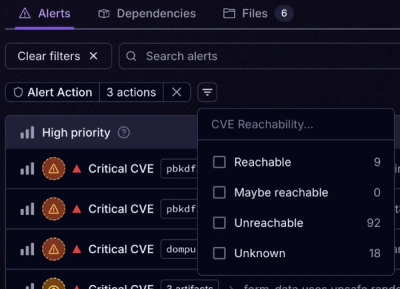
Product
Socket’s new Tier 1 Reachability filters out up to 80% of irrelevant CVEs, so security teams can focus on the vulnerabilities that matter.