Product
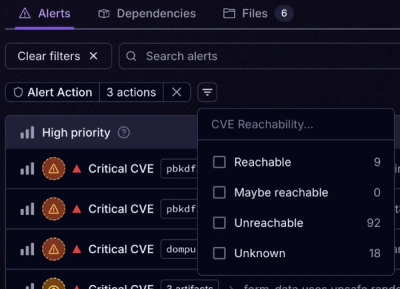
Introducing Tier 1 Reachability: Precision CVE Triage for Enterprise Teams
Socket’s new Tier 1 Reachability filters out up to 80% of irrelevant CVEs, so security teams can focus on the vulnerabilities that matter.
@sassoftware/esp-connect
Advanced tools
The esp-connect package enables you to communicate with a SAS Event Stream Processing (ESP) server using Javascript objects.
The API works with ESP standalone servers (such as simple command line startup) as well as with the ESP Kubernetes Cloud Ecosystem.
NOTE While esp-connect should work with an ESP 6.2 server, it was designed specifically to work with the ESP 7.x+ websocket interface.
In order to communicate with an ESP server, you need to create a ServerConnection object. This is a persistent connection to the ESP server. If you are running under a browser, you do this as shown below (make sure you call the init() function on page load):
...
<script type="text/javascript">
var _esp = null;
</script>
<!-- Run from an esp-connect install -->
<link rel="stylesheet" href="../../style/connect.css" />
<script type="module">
import {connect} from "../../js/connect/connect.js";
_esp = connect;
</script>
<script type="text/javascript">
function
init()
{
_esp.connect("http://espsrv01:7777",{ready:initialize});
}
function
initialize(connection)
{
// you can use the connection now
}
..
It is slightly different if you are running under Nnde.js:
import {connect as esp} from "@sassoftware/esp-connect";

esp.connect("http://espsrv01:7777",{ready:initialize});

function
initialize(connection)
{
    // you can use the connection now
}
The API uses this connection to communicate with the ESP server. You must provide a connection delegate to the connect call so that the the system can notify you when the connection has been established. The connection delegate can implement the following methods:
This connection is used to monitor the health of the server. If the server goes down while the connection is active, the API will wait for the server to return. When the server comes back, the ready property of the connection delegate will be called so that the client can use the new connection to perform initialization.
getEventCollection(options)
conn.getEventCollection({window:"secondary/cq/brokerAlertsAggr"}).then(
    function(collection) {
        // now use the collection.
    },
    function(error) {
        console.log(error);
    }
);

conn.getEventCollection({window:"secondary/cq/venueAlertsAggr",filter:"in($city,'raleigh','atlanta')}).then
    function(collection) {
        // now use the collection.
    },
    function(error) {
        console.log(error);
    }
);
getEventStream(options)
conn.getEventStream({window:"primary/cq/counter",maxevents:20}).then(
    function(stream) {
        // now use the stream.
    },
    function(error) {
        console.log(error);
    }
);
getPublisher(options)
conn.getPublisher({window:"primary/cq/trades"}).then(
    function(publisher) {
        // now publish something
    },
    function(error) {
        console.log(error);
    }
);
getStats(options)
var stats = conn.getStats({mincpu:5,memory:true,counts:true});
getLog()
An event collection is a view into a stateful ESP window. The view of the collection into the ESP window is defined by the current page. When an event collection is created, it sets the page size for that collection. This determines the maximum number of events that will be sent from the server to the client. In addition, the server sets up an internal pub/sub instance to receive events for that window. If an event occurs that is not in the current page, that event is ignored. Otherwise, the event is delivered to the client.
You create event collections through the ServerConnection object.
conn.getEventCollection({window:"secondary/cq/brokerAlertsAttr"}).then(
    function(alerts) {
        ...
    }
);
The event collection manages itself and delivers change events to its delegates. If you are interested in receiving collection change notifications, you must register a delegate that implements the dataChanged method:
function
handle(collection,data,clear)
{
    console.log("data changed: " + JSON.stringify(data,null,"\t"));
}

conn.getEventCollection({window:"secondary/cq/brokerAlertsAttr"}).then(
    function(alerts) {
        alerts.addDelegate({dataChanged:handle});
    }
);
The dataChanged method receives the collection that changed along with the new data in the data parameter. If the collection was cleared of data, the clear parameter is set to true.
coll.setFilter("gt($price,200)");
An event stream is a flow of events similar to a UNIX tail. When an event occurs in the ESP model in the server, it is placed into the stream. The clients can read this stream and see the events as they occur. If a window produces a huge number of events, you can throttle the number of events that get put into the stream by specifying maxevents and interval. The maxevents property limits the number of events that will get put into the stream at any one time. The interval property specifies a time, in milliseconds, that the ESP server will wait before putting events into the stream. So, if you set maxevents to 1000, and interval to 1000 ms (or 1 second), then the server will collect events from the pub/sub interface for 1 second. If more than maxevents events occur in that time, the oldest are dropped and will not be put into the stream. At the end of 1 second, the server puts all events it has into the stream. For clients that have heavy processing duties (graph rendering for example), this allows the client to limit the number of events it must process (as long as a sampling of events is sufficient).
If you are not interested in delete events, you can specify ignore_delete=true when creating the event stream. This will throw away any delete events the stream receives.
You create event streams through the ServerConnection object.
conn.getEventStream({window:"primary/cq/counter",maxevents:20}).then(
    function(alerts) {
        ...
    }
);
The event stream delivers change events to its delegates. If you are interested in receiving stream change notifications, you must register a delegate that implements the dataChanged method:
function
handle(collection,data,clear)
{
    console.log("data changed: " + JSON.stringify(data,null,"\t"));
}

conn.getEventStream({window:"secondary/cq/brokerAlertsAttr"}).then(
    function(alerts) {
        alerts.addDelegate({dataChanged:handle});
    }
);
The dataChanged method receives the collection that changed along with the new data in the data parameter. If the collection was cleared of data, the clear parameter is set to true
coll.setFilter("gt($price,200)");
The Publisher object allows you to publish events into an ESP source window. You can add data to the send queue either by one or more sequences of begin(), set(), end() calls, or by using the add() method which adds an object to the send queue directly. The publisher stores the objects to be published until the publish() method is called.
The first method:
conn.getPublisher({window:"p/cq/uievents"}).then(
    function(publisher) {
        publisher.begin();
        publisher.set("x",mouse.x);
        publisher.set("y",mouse.y);
        publisher.set("type","click");
        publisher.end();
        publisher.publish();
        publisher.close();
    }
);
and the second:
conn.getPublisher({window:"p/cq/uievents"}).then(
    function(publisher) {
        publisher.add({"x":mouse.x,"y":mouse.y,"type":"move");
        publisher.add({"x":mouse.x,"y":mouse.y,"type":"click");
        publisher.publish();
        publisher.close();
    }
);
The Stats object allows you to monitor ESP server stats such as memory usage and CPU usage on a per window basis.
There are several properties you can set which determine how the Stats object reports data:
function
handle(stats)
{
    console.log("windows");
    console.log("\t" + JSON.stringify(stats.getWindows(),null,"\t"));
    console.log("memory");
    console.log("\t" + JSON.stringify(stats.getMemory(),null,"\t"));
}

conn.getStats().addDelegate({dataChanged:handle});
[{
    'project': 'primary',
    'contquery': 'cq',
    'window': 'transform',
    'cpu': 100.598,
    'interval': 1101676.0,
    'count': 0,
    '@key': 'primary.cq.transform'
}, {
    'project': 'primary',
    'contquery': 'cq',
    'window': 'rawTrades',
    'cpu': 31.9233,
    'interval': 1101676.0,
    'count': 0,
    '@key': 'primary.cq.rawTrades'
}]
{
    'system': 386696,
    'virtual': 1452,
    'resident': 241
}
The stats array contains cpu and window count information for any window that has CPU usage greater than the minimum value and/or a window event count that is greater than 0.
The memory object contains values for system, virtual, and resident memory currently being consumed in the ESP server.
The Log object allows you to monitor ESP server logs.
In order to receive notifications when the stats data changes, you must add a delegate object which implements the handleLog(log,message) method:
function
handleLog(log,message)
{
    console.log("got a message: " + message);
}

conn.getLog().addDelegate({handleLog:handle});
The parameters are:
log - the Log instance.
message - the log message.
Methods
It is very easy to use the esp-connect package in a Kubernetes (K8S) environment. For starters you must create the ESP K8S ecosystem described here.
You will need to communicate with a K8S API server in order to perform operations such as project creation and deletion. The preferred way to do this is to use a K8S proxy server.
The proxy enables web-based components to communicate with K8S without experiencing issues with CORS (Cross Origin Resource Sharing).
NOTE You will need to download and install the kubectl command to run the proxy as well as perform other K8s-related tasks.
The kubectl command is used to start the proxy. The following starts a proxy which can be used to serve up the ESP connect web-based components including the examples, the model viewer, and the log viewer.
$ kubectl proxy --disable-filter
The proxy reads your K8S configuration so it handles the authentication with the API server. You can communicate directly with the server (from command line not web page) but you will need to provide any necessary authentication info.
ESP server connections are initiated with URLs. For example, to retrieve the model for project trades from an ESP server running on espsrv01 at port 2222:
_esp.connect("http://espsrv01:2222",{ready:initialize});
Since this points directly to an ESP server it will not suffice in a K8S environment. A couple new protocols can be used to communicate with ESP servers in a K8S cluster.
_esp.connect("k8s://10.104.16.129:6443/myns/trades",{ready:initialize});
_esp.connect("k8s-proxy://localhost:8001/myns/trades",{ready:initialize});
The K8S url contains the host and port of the K8S server (or proxy) and the K8S namespace and ESP project name. The different protocols are necessary because communications with the proxy server do not use TLS whereas those with the API server do.
Using these protocols tells the connect API that it is working with K8S which will allow it to send any necessary requests to the K8S server.
FAQs
Package used to connect to an ESP server (version 6.2+)
We found that @sassoftware/esp-connect demonstrated a not healthy version release cadence and project activity because the last version was released a year ago. It has 13 open source maintainers collaborating on the project.
Did you know?

Socket for GitHub automatically highlights issues in each pull request and monitors the health of all your open source dependencies. Discover the contents of your packages and block harmful activity before you install or update your dependencies.

Product
Socket’s new Tier 1 Reachability filters out up to 80% of irrelevant CVEs, so security teams can focus on the vulnerabilities that matter.

Research
/Security News
Ongoing npm supply chain attack spreads to DuckDB: multiple packages compromised with the same wallet-drainer malware.

Security News
The MCP Steering Committee has launched the official MCP Registry in preview, a central hub for discovering and publishing MCP servers.