Research
Security News
Malicious npm Package Typosquats react-login-page to Deploy Keylogger
Socket researchers unpack a typosquatting package with malicious code that logs keystrokes and exfiltrates sensitive data to a remote server.
@tencentcloud/chat-uikit-engine
Advanced tools
Readme
chat-uikit-engine 是基于腾讯云 Chat SDK 的封装服务于 Chat UI 的 service(服务)、model(模块) 和 store(数据管理中心),它提供了一些通用的 TUIModel,包含 ConversationModel、MessageModel 等。
npm install @tencentcloud/chat-uikit-engine
import TUIChatEngine from '@tencentcloud/chat-uikit-engine';

// login TUIChatEngine
TUIChatEngine.login({
 SDKAppID: xxx,
 userID: 'xxx',
 userSig: 'xxx',
 useUploadPlugin: true, // 是否开启上传插件,true 为开启。即时通信 Chat SDK 发送图片、语音、视频、文件等消息需要使用上传插件,将文件上传到腾讯云对象存储。
 useProfanityFilterPlugin: false, // 是否开启本地审核,true 为开启。使用本地审核功能需要您单独购买该服务,详情参考:https://cloud.tencent.com/document/product/269/79139
});
import { TUIStore, StoreName, IConversationModel } from '@tencentcloud/chat-uikit-engine';

// 当触发 conversationList 增/删/置顶/消息免打扰等功能,导致 conversationList 发生变化时,都可以 watch 到新的 conversationList
TUIStore.watch(StoreName.CONV, {
  conversationList: (list: Array<IConversationModel>) => {
    console.log("conversationList", list); // conversationList<IConversationModel>
  },
});
创建会话后,步骤1 可以监听到更新后的会话列表
import { TUIConversationService } from '@tencentcloud/chat-uikit-engine';

TUIConversationService.getConversationProfile("C2Cuser1")
  .then((res) => {
    TUIConversationService.switchConversation(
      res.data.conversation.conversationID
    );
  })
  .catch((error) => {
    console.log(error);
  });
import { TUIStore, StoreName, IMessageModel } from '@tencentcloud/chat-uikit-engine';

// 当接受到新的消息、发送消息、消息删除等,导致 messageList 发生变化时,都可以 watch 获取到新的 messageList
TUIStore.watch(StoreName.CHAT, {
  messageList: (list: Array<IMessageModel>) => {
    console.log("messageList", list); // messageList<IMessageModel>
  },
});
发送第一条消息后,可以通过 步骤1 获取更新后的消息列表
import { TUIChatService } from '@tencentcloud/chat-uikit-engine';

TUIChatService.sendTextMessage({
  payload: {
    text: "Hello world!",
  },
}).catch((error) => {
  console.log(error);
});
UserSig 是用户登录即时通信 IM 的密钥,其本质是对 UserID 等信息加密后得到的密文。
UserSig 签发方式是将 UserSig 的计算代码集成到您的服务端,并提供面向项目的接口,在需要 UserSig 时由您的项目向业务服务器发起请求获取动态 UserSig。更多详情请参见 服务端生成 UserSig。
本文示例代码采用的获取 UserSig 的方案是在客户端代码中配置 SECRETKEY,该方法中 SECRETKEY 很容易被反编译逆向破解,一旦您的密钥泄露,攻击者就可以盗用您的腾讯云流量,因此该方法仅适合本地跑通功能调试。 正确的 UserSig 签发方式请参见上文。
FAQs
Unknown package
We found that @tencentcloud/chat-uikit-engine demonstrated a healthy version release cadence and project activity because the last version was released less than a year ago. It has 10 open source maintainers collaborating on the project.
Did you know?

Socket for GitHub automatically highlights issues in each pull request and monitors the health of all your open source dependencies. Discover the contents of your packages and block harmful activity before you install or update your dependencies.

Research
Security News
Socket researchers unpack a typosquatting package with malicious code that logs keystrokes and exfiltrates sensitive data to a remote server.

Security News
The JavaScript community has launched the e18e initiative to improve ecosystem performance by cleaning up dependency trees, speeding up critical parts of the ecosystem, and documenting lighter alternatives to established tools.

Product
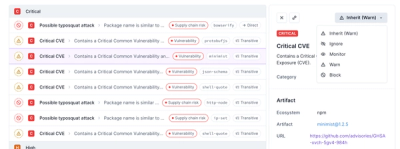
Socket now supports four distinct alert actions instead of the previous two, and alert triaging allows users to override the actions taken for all individual alerts.