Product
Introducing Enhanced Alert Actions and Triage Functionality
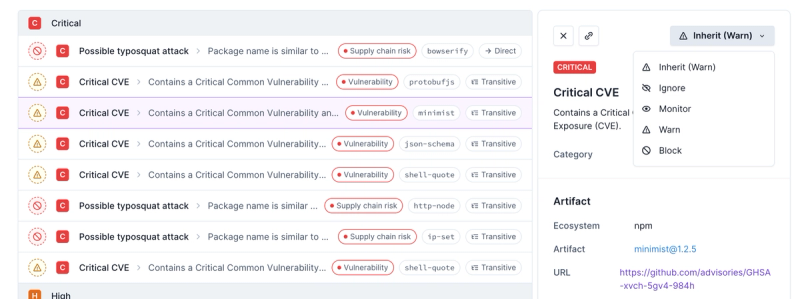
Socket now supports four distinct alert actions instead of the previous two, and alert triaging allows users to override the actions taken for all individual alerts.
@xsolla/login-sdk
Advanced tools
Readme
The library allows you to use the login widget or Login SDK API methods separately. Currently, SDK supports the following types of authorization:
This page contains:
See Login documentation to find more.
Connect Xsolla Login Widget SDK using one of the following methods:
npm, launch the console and runnpm i @xsolla/login-sdk
<head> tag of the HTML-page where the widget will be placed:<script src="https://login-sdk.xsolla.com/latest/">
</script>
Before you integrate the Xsolla Login widget, you can see it in the preview mode. The preview uses default settings, style, and language. To see it, use the following URL with your own values for query parameters:
https://login-widget.xsolla.com/latest/?projectId={LOGIN_PROJECT_ID}&login_url={CALLBACK_URL}
You can also add the locale query parameter to the URL. Possible values are available in the preferredLocale parameter.
This library allows you to quickly integrate Xsolla Login widget with your website in following steps:
Add the widget initialization code to the <body> tag.
<script>
const xl = new XsollaLogin.Widget({
  projectId: '[Login ID]',
  preferredLocale: 'en_US'
});
</script>
Version for npm:
import { Widget } from '@xsolla/login-sdk';
const xl = new Widget({
  projectId: '[Login ID]',
  preferredLocale: 'en_US'
});
string
Login project ID from Publisher Account. Required.
string
URL to redirect the user to after registration/authentication/password reset. Must be identical to one of the Callback URL specified in Publisher Account in Login settings. Required if there are several Callback URLs.
You can pass several URLs of the local server to make the widget available to the local build. For example https://localhost:9000.
string
Your custom data. The value of the parameter will be returned in the user JWT > payload claim.
string
Language of the widget interface and region in the <language code>_<country code> format where:
string
Widget background color in the fullscreen mode. The value can be in any of the CSS color formats. Default is RGBA(50, 150, 150, 0.1).
string
The stack order of the widget in the fullscreen mode. Default is 9000.
Choose the widget placing on the website start page:
Add the button with the on-click event and the xl.show() function to the site.
<div id="xl_auth" style="display: none"></div>
<button onclick="xl.open()">Fullscreen widget</button>
Add the code for inserting the widget into the block.
<script type="text/javascript">
  xl.mount('xl_auth');
</script>
The fullscreen mode is closed by clicking outside the widget area.
Add the block with the widget to the <body> tag and set the block ID.
<div id="xl_auth" style="height: 700px"></div>
Add the code for inserting the widget into the block.
<script type="text/javascript">
  xl.mount('xl_auth');
</script>
If you have already integrated Login, you can also try additional features of Xsolla Login Widget:
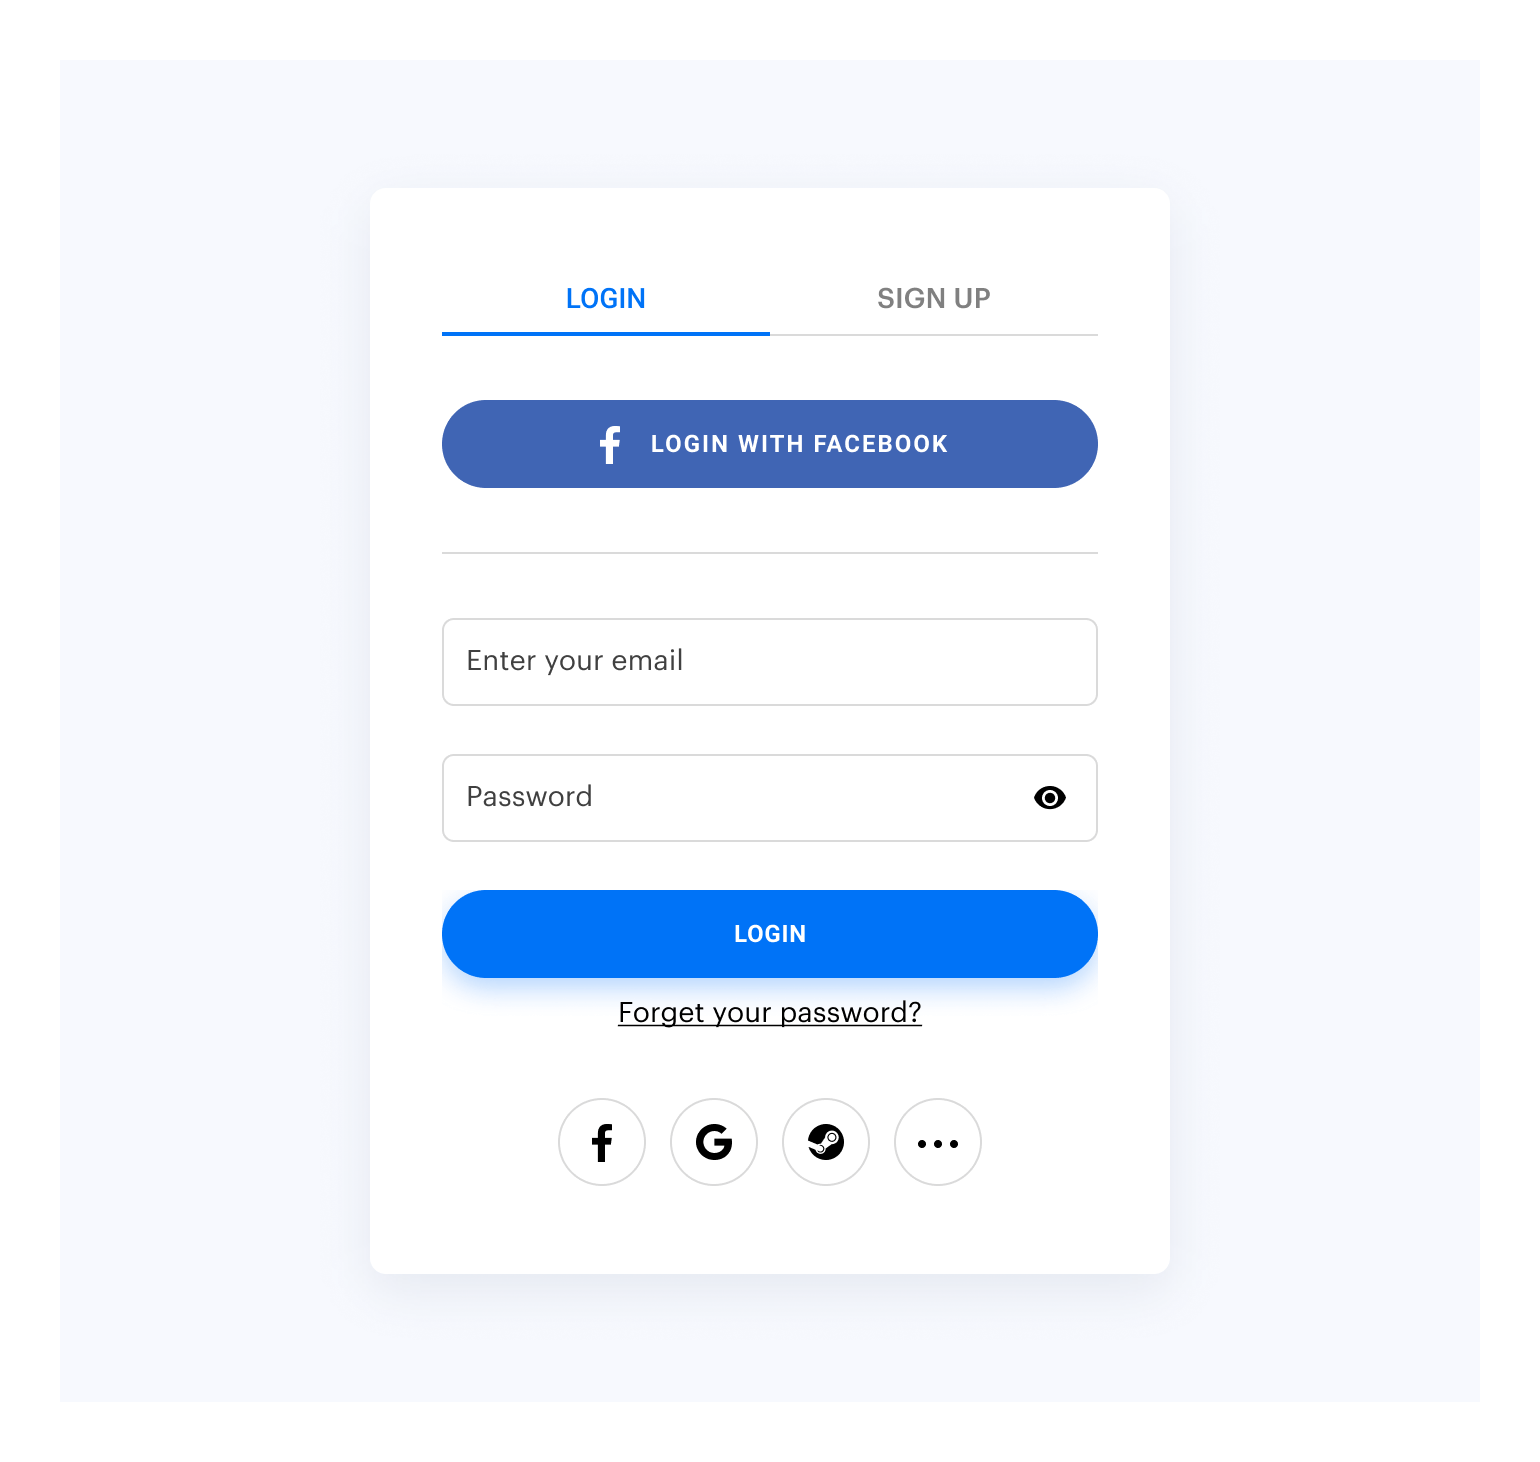
By default, the widget looks like this:

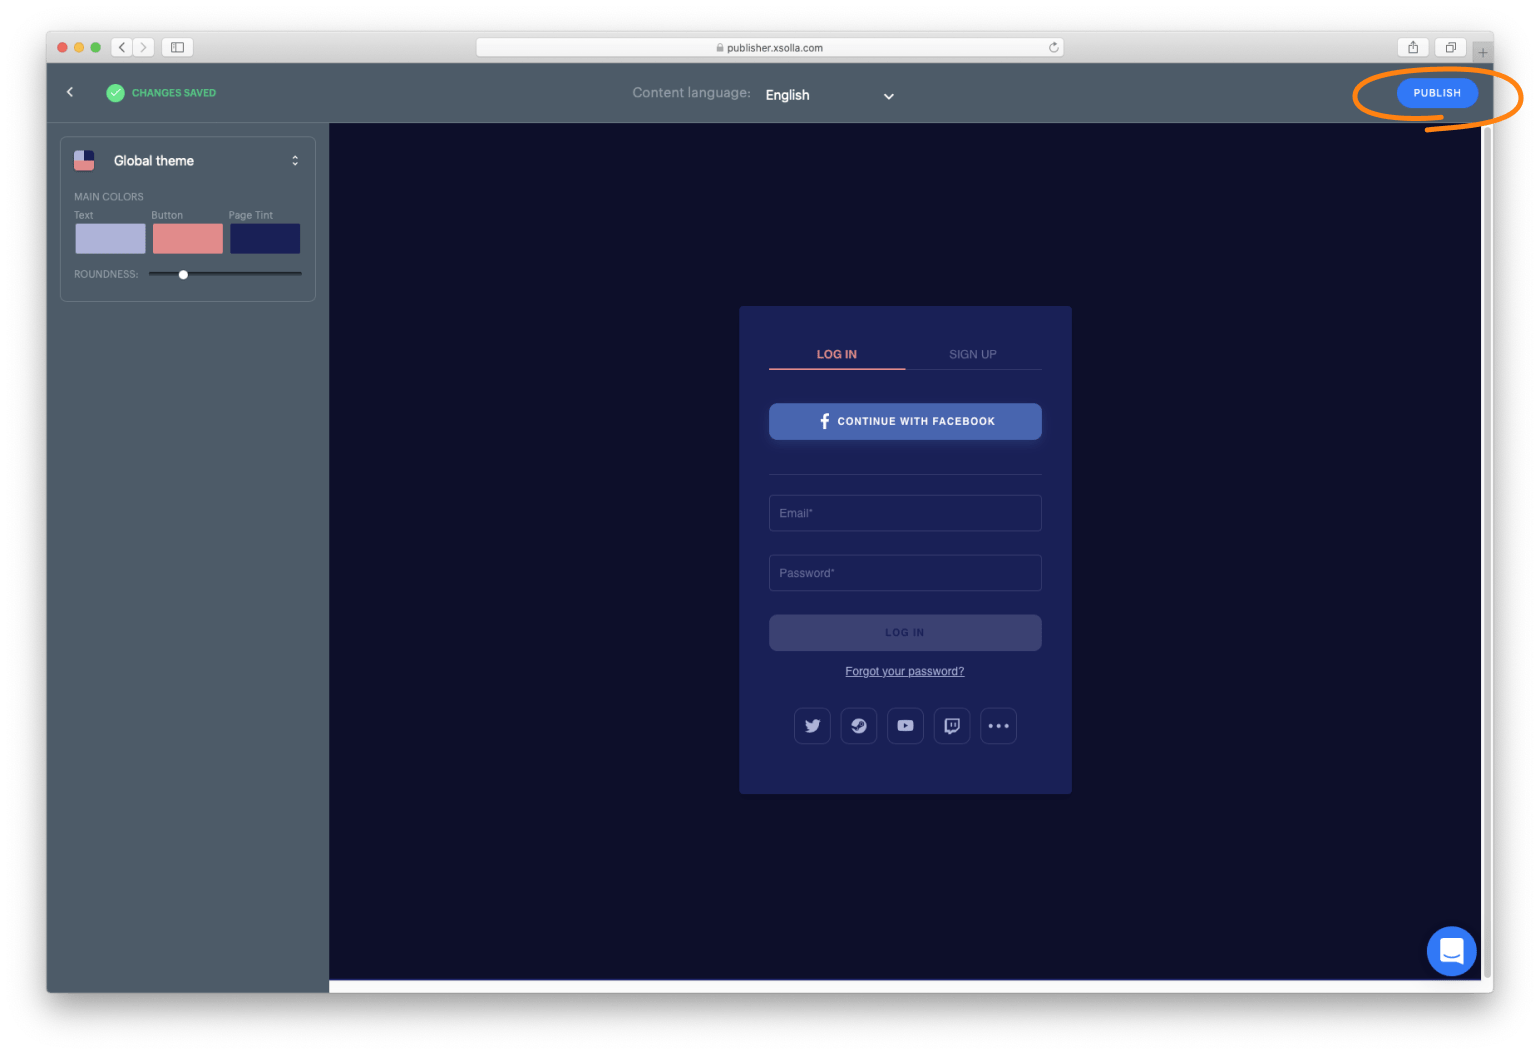
Customize the widget style by changing the following parameters in Publisher Account:
To customize:
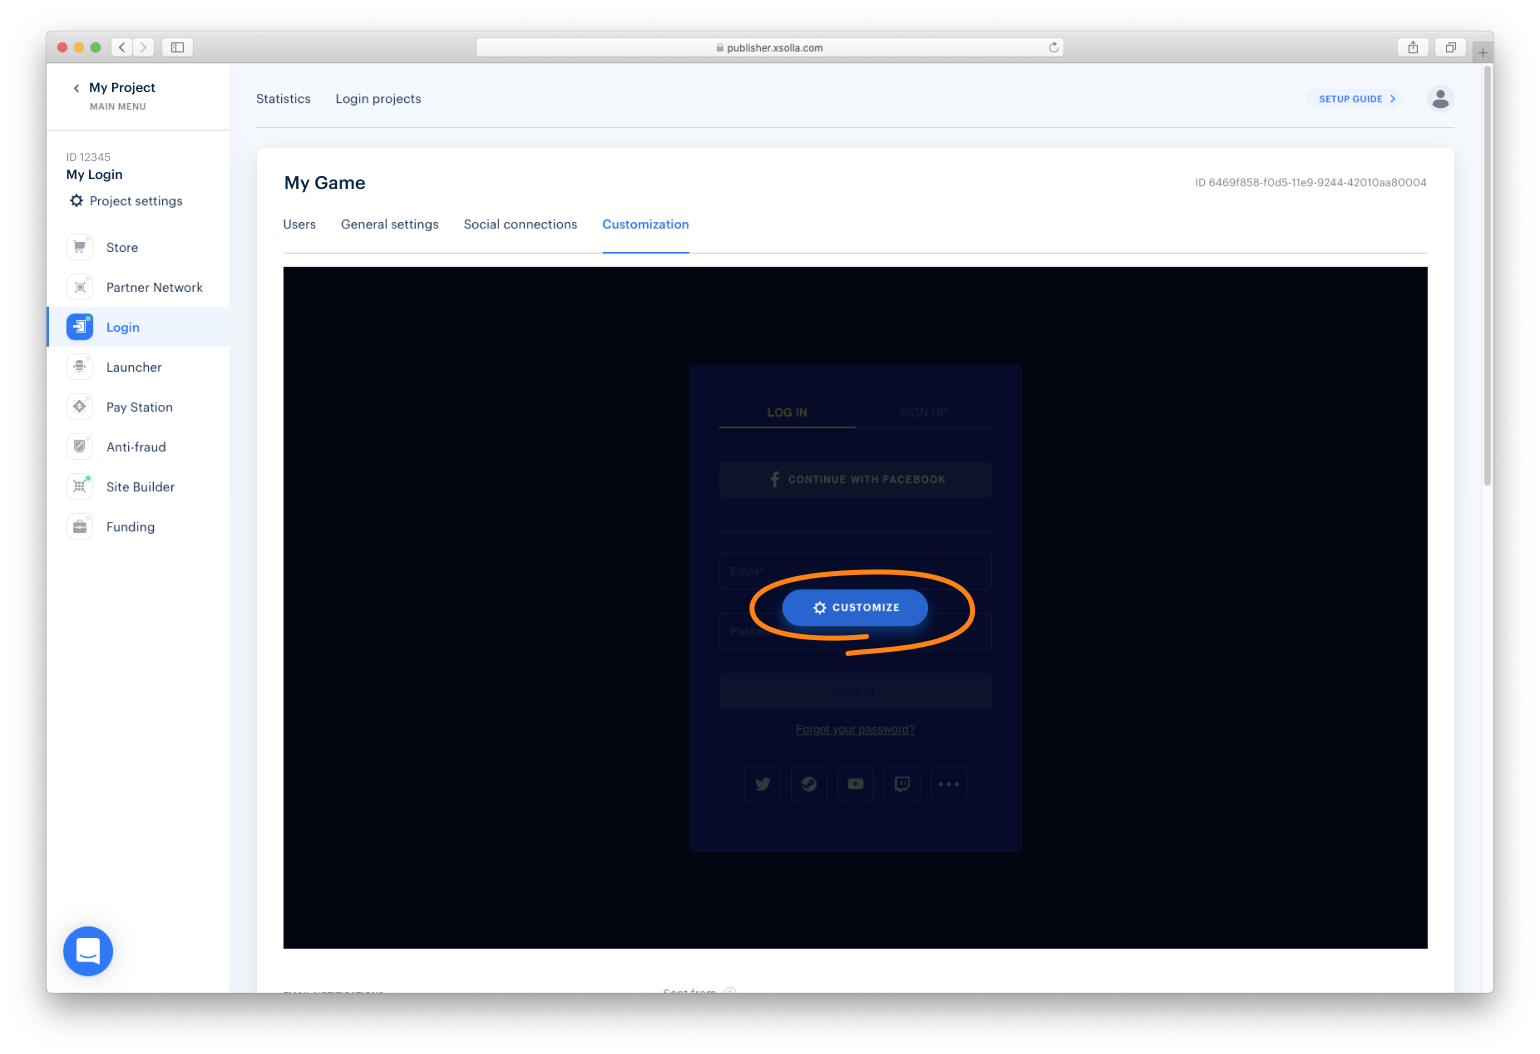
Go to the Customization page in Publisher Account.
Move your mouse cursor to the editing area and click Customize. It will open the widget builder.

Set up the widget style and click Publish.

NOTE
After publication, the widget will be changed for all the projects it was connected to.
You can collect widget statistics on the following events:
To start tracking the event, initialize and process the action as described below.
xl.on(xl.events.Open, function () {
    console.log('user has opened the widget');
});
xl.on(xl.events.Close, function () {
    console.log('user has closed the widget');
});
Xsolla Login widget supports the OAuth 2.0 protocol-based user authentication. Follow the Connecting OAuth 2.0 instruction to set it up.
You can open Xsolla Login widget on other pages, in addition to the authentication (Login) page. The following pages available to you include:
To open the page, initialize and process the action as described below.
const pages = XsollaLogin.WidgetPages;
const page = pages.SignUpPage;
xl.setPage(page);
const pages = XsollaLogin.WidgetPages;
const page = pages.SocialsPage;
xl.setPage(page);
const pages = XsollaLogin.WidgetPages;
const page = pages.ResetPasswordPage;
xl.setPage(page);
To be able to use the Login SDK API methods without using a widget, it is possible to initialise in the following way:
Add the API initialization code to the <body> tag.
<script>
const api = new XsollaLogin.Api({
  projectId: '[Login ID]',
});
</script>
Version for npm:
import { Api } from '@xsolla/login-sdk';
const api = new Api({
  projectId: '[Login ID]',
});
The following properties may also be set during initialisation:
string
Login project ID from Publisher Account. Required.
string
URL to redirect the user to after registration/authentication/password reset. Must be identical to one of the Callback URL specified in Publisher Account in Login settings. Required if there are several Callback URLs.
You can pass several URLs of the local server to make the widget available to the local build. For example https://localhost:9000.
string
Your custom data. The value of the parameter will be returned in the user JWT > payload claim.
string
Language of the widget interface and region in the <language code>_<country code> format where:
string
Used as the name of the project from which emails are sent.
boolean
Allows previous tokens to be switched off during a new authorisation.
string
The default setting is https://cdn.xsolla.net/login-widget/.
object (Theme)
Widget visual appearance settings.
string
Customer Id. Transmitted only in case of OAuth 2.0 authorization.
string
URL that the server will handle when authorisation or registration is successful via the OAuth 2.0 method..
string
Allows you to specify the API response type.
boolean
Allows you to disable passwordless email/phone number authentication confirmation via a link in an email.
boolean
Allows you to select how the user is authenticated by OAuth 2.0.
The following are API methods that can be used without the use of a widget:
The properties that must be specified are marked with a *.
Returns a promis in response with the actual object with the widget's global settings.
Also updates the API configuration which could have been set during initialization.
api.fetchConfig()
Used to register a new user.
let result
api.signup({
  // user details on registration.
  userInfo: {
    email: "john-email@email.com", // *
    fields: {
      nickname: "Johny"
    },
    password: "password123", // *
    username: "John" // *
  }
}).then((res) => {
  result = res;
})

// Return:
result === {
  login_url: "http://someurl.com?token=XXXXXXX"
}
The method is used to authorise a user with a password.
let result
api.login({
  // user details on registration.
  credentials: {
    password: "password123", // *
    remember_me: false,

    // Username or email address.
    username: "John" или 'john@gmail.com' // *
  }
}).then((res) => {
  result = res;
})

// If need to request additional fields it will return:
result === {
  ask_fields: [{
    confirmation_type: "code" || "link"
    name: "phone_number"
    required: false
    step: 0 // Displays the position of the field in the data retrieval queue.
    type: "phone"
    validation: {} // Custom validation
  }]
  login_url: "http://someurl.com?token=XXXXXXX",
  token: "sometoken"
}

// Return:
result === {
  login_url: "http://someurl.com?token=XXXXXXX"
}
Sends the European user's consent to the processing of their personal data, indicated on a special page.
let result
api.agreement({
  // JWT user token
  token: 'sometoken', // *

  // Flag indicating whether the user has consented to the processing of their personal data.
  isAccepted: true, // *

  consentId: 'someid'
}).then((res) => {
  result = res;
})

// Return:
result === {
  url: "https://www.someurl.com"
}
Sends the European user's consent to the processing of their personal data, indicated on a special page.
let result
api.otpLogin({
  // code required for two-factor authorisation
  code: 'sometoken', // *

  remeber_me: false
}).then((res) => {
  result = res;
})

// Return:
result === {
  url: "https://www.someurl.com"
}
Resets the old otp code.
api.otpResendCode()
Re-sends an account confirmation email to the user.
To complete the account confirmation, the user must click on the link in the email.
api.resendEmail(
  // email required to resend the letter
  username: 'JohnLogin123@mail.com' // *
)
The user enters phone number / email and depending on the type of data entered calls the following methods:
api.phoneGetCode / api.emailGetCode.
The server receives the sent data and sends a message to the phone number / email number with a code (optionally with a link if disableConfirmByLink was not set to true during API initialization)
If link data validation process was enabled, use api.getConfirmCode (see below) for auto-redirect after following the link.
api.phoneGetCode / api.emailGetCode will return operation_id which will be required for phone number / email number validation.
The api.loginWithPhoneCode / api.loginWithEmailCode methods are used to validate the phone number / email.
On successful phone number / email verification returns a URL with the token as a parameter, which is used in requests for additional user data.
Methods:
let result
api.phoneGetCode({
  // phone number which will be used for passwordless authorisation
  phone_number: '+somenumber',

  // URL which can be forwarded if you need the link confirmation functionality.
  // Necessary for further redirection from the email.
  link_url: 'https://someurl.com',

  // Allows you to select how the user is authenticated by OAuth 2.0.
  isOauth2: true // *
}).then((res) => {
  result = res;
})

// Returns the operation_id required for the further authorisation process:
result === {
  operation_id: '2334j255fdf13d515fgd1'
}
let result
api.emailGetCode({
  // the email under which you will be logged in without a password.
  email: 'somemail@gmail.com',

  // URL which can be forwarded if you need the link confirmation functionality.
  // Necessary for further redirection from the email.
  link_url: 'https://someurl.com',

  // Allows you to select how the user is authenticated by OAuth 2.0.
  isOauth2: true // *
}).then((res) => {
  result = res;
})

// Returns the operation_id required for the further authorisation process:
result === {
  operation_id: '2334j255fdf13d515fgd1'
}
let result
api.loginWithPhoneCode({
  // the email under which you will be logged in without a password.
  phone_number: 'somemail@gmail.com',

  // the code you receive by text message to confirm your phone number.
  code: '3423',

  // unique id required for one session of phone number verification.
  operation_id: '334j255fdf13d515fgd1',

  // Allows you to select how the user is authenticated by OAuth 2.0.
  isOauth2: true // *
}).then((res) => {
  result = res;
})

// If need to request additional fields it will return:
result === {
  ask_fields: [{
    confirmation_type: "code" || "link"
    name: "email"
    required: false
    step: 0 // Displays the position of the field in the data retrieval queue.
    type: "email"
    validation: {} // Custom validation
  }]
  login_url: "http://someurl.com?token=XXXXXXX",
  token: "sometoken"
}

// Returns a URL with the token as a parameter:
result === {
  login_url: "http://someurl.com?token=XXXXXXX"
}
let result
api.loginWithEmailCode({
  // the email under which you will be logged in without a password.
  email: 'somemail@gmail.com',

  // the code you receive by email message to confirm your email.
  code: '3423',

  // unique id required for one email verification session.
  operation_id: '334j255fdf13d515fgd1',

  // Allows you to select how the user is authenticated by OAuth 2.0.
  isOauth2: true // *
}).then((res) => {
  result = res;
})

// If need to request additional fields it will return:
result === {
  ask_fields: [{
    confirmation_type: "code" || "link"
    name: "phone_number"
    required: false
    step: 0 // Displays the position of the field in the data retrieval queue.
    type: "phone"
    validation: {} // Custom validation
  }]
  login_url: "http://someurl.com?token=XXXXXXX",
  token: "sometoken"
}

// Returns a URL with the token as a parameter:
result === {
  login_url: "http://someurl.com?token=XXXXXXX"
}
The user enters phone number / email and depending on the type of data entered calls the following methods api.phoneGetCode / api.emailGetCode.
The server receives the sent data and sends a message to the phone number / email with a code (optionally with a link if disableConfirmByLink was not set to true during API initialization)
If link data validation is enabled, use api.getConfirmCode (see below) for auto-redirect after following the link.
api.phoneGetCode / api.emailGetCode will return operation_id which will be required for phone number / email validation.
The api.loginWithPhoneCode / api.loginWithEmailCode methods are used to validate the phone number / email.
Methods:
A method of data preprocessing that is used after authorisation and, depending on PA settings, allows additional data, such as phone number / email, to be sent.
let result
api.ask({
  // the email under which you will be logged in without a password.
  fields: {  // *
    // to make an additional request for a telephone number.
    phone_number: "+somenumber"

    // or
    // to make an additional request for a email.
    email: "example@gmail.com"
  },

  // URL which can be forwarded if you need the link confirmation functionality.
  // Necessary for further redirection from the email.
  link_url: 'https://someurl.com',

  // JWT user token
  token: 'sometoken' // *
}).then((res) => {
  result = res;
})

// If it is necessary to confirm the requested phone number, the following will be returned:
result === {
  error: {
    code: "003-014"
    description: "Confirm phone number."
    details: { operation_id: "BPaBScLM44GesoOYSxT5I8QfgIrTSURd" }
  }
}
// In the case of email:
result === {
  error: {
    code: "003-011"
    description: "Confirm email."
    details: { operation_id: "BPaBScLM44GesoOYSxT5I8QfgIrTSURd" }
  }
}

// If the confirmation is not needed the next response will be returned:
result === {
  redirect_url: "<login_url>?token=<token>"
}
A method that allows you to request the additional fields that are required by the PA settings.
let result
api.getAskFields({
  // JWT user token
  token: 'sometoken' // *
}).then((res) => {
  result = res;
})

// Returns the array of data needed for the additional query:
result === [
  {
    confirmation_type: "code" || "link"
    name: "phone_number" || "email"
    required: false
    step: 0 // Displays the position of the field in the data retrieval queue.
    type: "phone" || "email"
    validation: {} // Custom validation
  }
]
A method which is required if the PA has been selected to prompt for mail retrieval via a link or if the disableConfirmByLink property was not set to true during widget initialization. It sends a long pooling request that waits for a link from an email sent to the email / phone number. This method uses cancel token to terminate the request prematurely.
let result
const axiosCancelToken = Axios.CancelToken.source();

api.getConfirmCode({
  // A special token that allows a request session to be closed.
  cancelToken: axiosCancelToken, // *

  // phone number or email depending on the case.
  login: '+343423425252' || 'example@gmail.com' // *

  // unique id required for verification session.
  operation_id: '334j255fdf13d515fgd1', // *
}).then((res) => {
  result = res;
})

// Returns when the link has been successfully clicked:
result === {
  // Code required to verify email/phone number when making an additional request or passworless authorising.
  code: "string"
}

// If the waiting time has elapsed, returns:
result === {
  error: {
    code: "010-050",
    description: "Deadline exceeded."
  }
}

// If you no longer need to wait for verification through the link you can close the request waiting period:
axiosCancelToken.cancel();
The application opens a form where the user can enter their email address or username.
The user enters their email address or username using api.reset.
The server sends the user a confirmation email.
The user clicks the link in the email and is taken to a form to set a new password.
The user enters the new password and uses api.set method.
Methods:
Resets the password of the user specified in username with user confirmation.
api.reset({
  username: 'john' // *
}).then((res) => {
  res.code === 204;
})
A confirmation method for resetting the user's password. Resetting the password has a little flow to follow:
api.set({
  new_password: 'newpass', // *

  // Code to verify the user who changed their password.
  // Generated by the server and sent to the URL to which the email was redirected.
  reset_code: '3423', // *

  // Also generated by the server and passed to the URL to which the email was redirected.
  user_id: '324324234' // *
}).then((res) => {
  res.code === 204;
})
FAQs
Xsolla Login Javascript SDK
The npm package @xsolla/login-sdk receives a total of 291 weekly downloads. As such, @xsolla/login-sdk popularity was classified as not popular.
We found that @xsolla/login-sdk demonstrated a healthy version release cadence and project activity because the last version was released less than a year ago. It has 1 open source maintainer collaborating on the project.
Did you know?

Socket for GitHub automatically highlights issues in each pull request and monitors the health of all your open source dependencies. Discover the contents of your packages and block harmful activity before you install or update your dependencies.

Product
Socket now supports four distinct alert actions instead of the previous two, and alert triaging allows users to override the actions taken for all individual alerts.

Security News
Polyfill.io has been serving malware for months via its CDN, after the project's open source maintainer sold the service to a company based in China.

Security News
OpenSSF is warning open source maintainers to stay vigilant against reputation farming on GitHub, where users artificially inflate their status by manipulating interactions on closed issues and PRs.