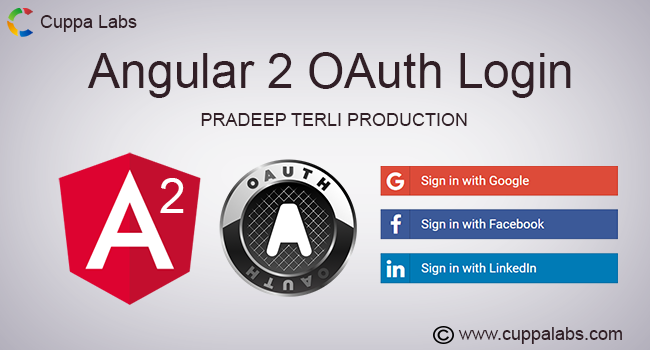
Cuppa Angular2 OAuth
Social Login Script for Facebook, Google, LinkedIn
It is often required that, a user register's or sign up to login to a particular website or application. It is a tedious job to fill those long forms with user basic details. To avoid filling long forms, Cuppa Angular 2 OAuth provides a module to login using social OAuth services like google OAtuh, Facebook OAuth and LinkedIn OAuth. Using this your application will be able to recieve basic details of the user from social networking sites and you can store in your application environment.
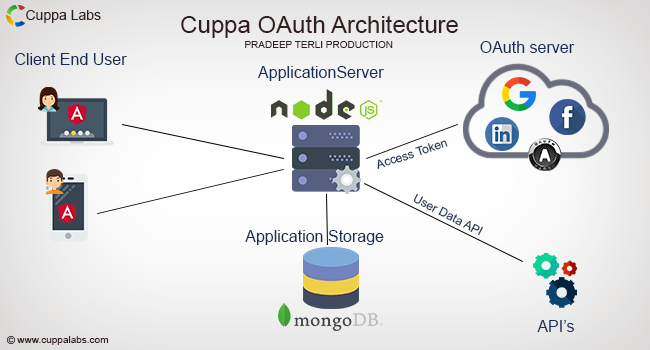
Architecture
Getting Started
To get started using the Cuppa OAuth Social Login, the following pre requisites needs to be met with.
-
Knowledge of Angular 2 and latest Angular 2 version. Refer Setup AngularJS
-
Knowledge of NodeJS and latest version installed in your environment. Refer Setup NodeJS
-
Installed MongoDB and knowledge of setting up. Refer Setup MongoDB
-
Set up Angular Client, App Server(your node server), Mongo DB.
Installation
Follow the steps to install the Cuppa OAuthcode in your environment.
-
Clone https://github.com/CuppaLabs/angular2-social-login.git repository from github.
-
$ npm install - To install all the dependencies
-
$ npm run auth-server - To start the server (Run only when the entire application is setup).
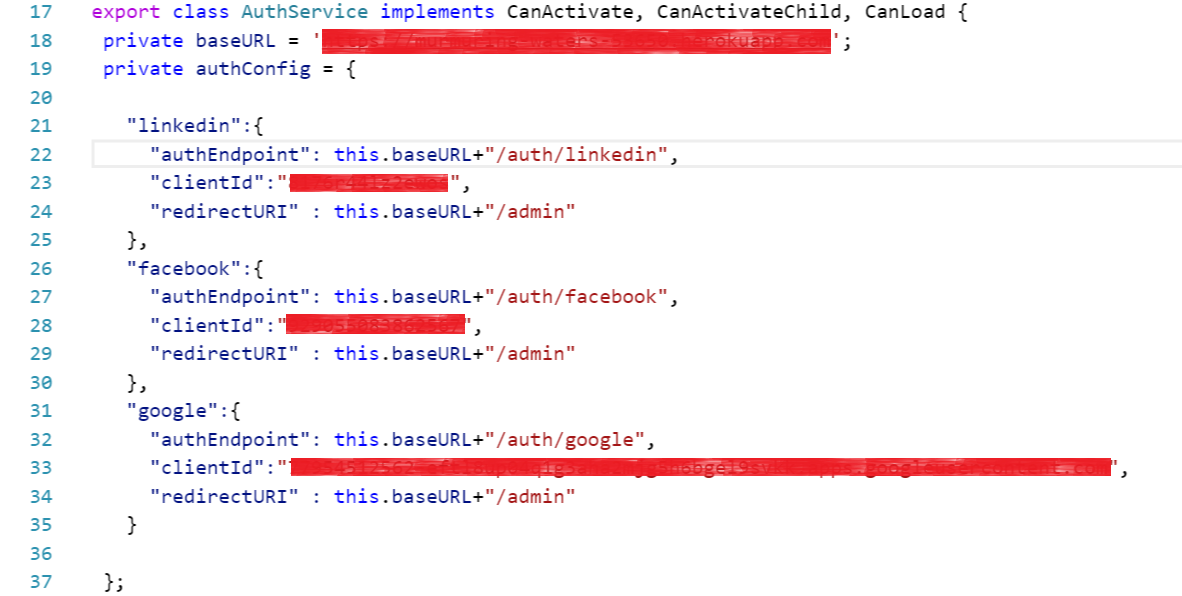
Angular 2 Configuration
Angular Configuration
To configure angular, the urls need to be changed to your environment url endpoints.
-
Go to src/app/auth.service.ts
-
Replace the baseURL with your endpoint(http://localhost:500, to run locally), as shown in the below snippet
-
Create your social app with Google/Facebook/LinkedIn and get you client ID
-
Replace the Client ID in the authConfig Object as shown below in the snippet.(blurred area)
-
redirectURI - the redirect url configured in the social networking app which redirects to your page on that URL, on successful login
-
authEndpoint - Your application server endpoint where it hits for authentication.
Node Server Configuration
To configure Node Server, follow the below steps
-
Go to /auth-config.js
-
Create your social app with Google/Facebook/LinkedIn and get the client secret.
-
Replace the client secret with your app's client secret as show in the below snippet. (Blurred my credentials). Place your credentials there.
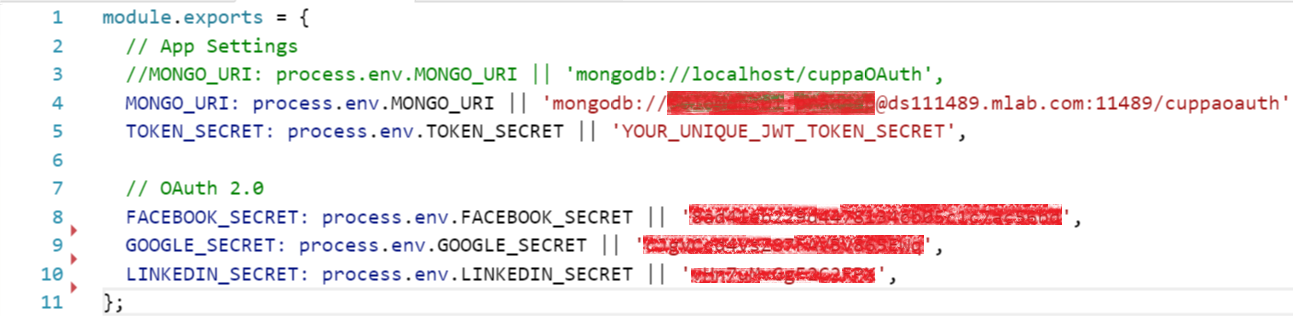
Mongo DB Configuration
To configure Node Server with mongo DB details, follow the below steps
-
Install Mongo DB locally and start or deploy on any cloud platform
-
Go to /auth-config.js
-
Replace the username, password, mongo url and DB name. Form the url as follows and replcae as shown in the below snippet.
Build, Deploy and Run
Ahh !!! Now you are ready to make your app up and running.
-
Start MongoDB Server
-
$ npm run build
-
$ npm run auth-server
-
Visit http://localhost:5000 to access your app running in your local. This should be the baseURL you configured in the angular configuration section.
Deploy to your application server or any cloud platform.
Licence
This project is licensed under the MIT license. See the LICENSE file for more info.
--
The MIT License (MIT)
Copyright (c) 2016 Cuppa Labs
Permission is hereby granted, free of charge, to any person obtaining a copy
of this software and associated documentation files (the "Software"), to deal
in the Software without restriction, including without limitation the rights
to use, copy, modify, merge, publish, distribute, sublicense, and/or sell
copies of the Software, and to permit persons to whom the Software is
furnished to do so, subject to the following conditions:
The above copyright notice and this permission notice shall be included in
all copies or substantial portions of the Software.
THE SOFTWARE IS PROVIDED "AS IS", WITHOUT WARRANTY OF ANY KIND, EXPRESS OR
IMPLIED, INCLUDING BUT NOT LIMITED TO THE WARRANTIES OF MERCHANTABILITY,
FITNESS FOR A PARTICULAR PURPOSE AND NONINFRINGEMENT. IN NO EVENT SHALL THE
AUTHORS OR COPYRIGHT HOLDERS BE LIABLE FOR ANY CLAIM, DAMAGES OR OTHER
LIABILITY, WHETHER IN AN ACTION OF CONTRACT, TORT OR OTHERWISE, ARISING FROM,
OUT OF OR IN CONNECTION WITH THE SOFTWARE OR THE USE OR OTHER DEALINGS IN
THE SOFTWARE.
Credits
Thanks to Font Awesome the library.
Author
Pradeep Kumar Terli