Security News
tea.xyz Spam Plagues npm and RubyGems Package Registries
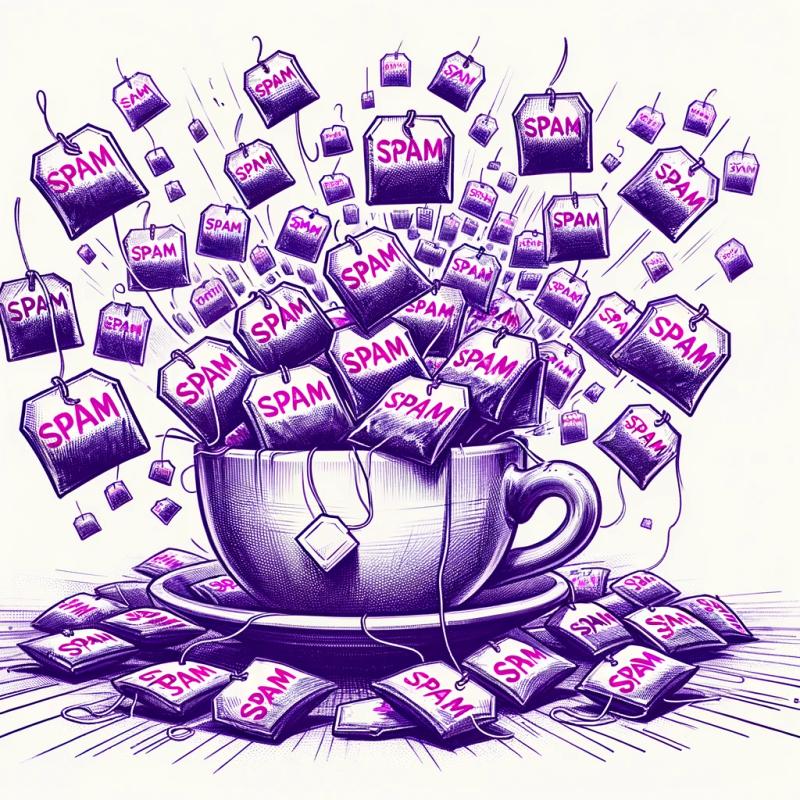
Tea.xyz, a crypto project aimed at rewarding open source contributions, is once again facing backlash due to an influx of spam packages flooding public package registries.
quickblox-react-ui-kit
Advanced tools
Readme
The QuickBlox UIKit for React is a comprehensive user interface kit specifically designed for building chat applications. It provides a collection of pre-built components, modules, and utilities that simplify the process of creating chat applications.
The main goal of the QuickBlox UIKit for React is to offer developers a streamlined and efficient way to implement chat functionality within their React applications.
The QuickBlox UIKit for React offers modules that encapsulate complex chat functionalities, such as dialogs and chat management and real-time updates. These modules provide a simplified interface for integrating chat features into applications without the need for extensive knowledge of the underlying protocols or server-side infrastructure.
You can view and interact with the interface components of the UI Kit using Storybook. In fact, this provides an interactive environment showcasing different scenarios that UI components might encounter in a live application. To view these, visit our documentation.
Chat dashboard with list of dialogs and create new chat dialog;

QuickBlox UIKit for React provides next functionality:
The QuickBlox UIKit for React comprises a collection of pre-assembled UI components that enable effortless creation of an in-app chat equipped with all the necessary messaging functionalities. Our development kit encompasses light and dark themes, colors, and various other features. These components can be personalized to fashion an engaging messaging interface that reflects your brand's distinct identity.
The QuickBlox UIKit fully supports both private and group dialogs. To initiate the process of sending a message from the ground up using Java or Kotlin, please refer to the instructions provided in the guide below. Additional information with sample
The minimum requirements for QuickBlox UIKit for React are:
Register a new account following this link. Type in your email and password to sign in. You can also sign in with your Google or Github accounts. Create the app clicking New app button. Configure the app. Type in the information about your organization into corresponding fields and click Add button. Go to Dashboard => YOUR_APP => Overview section and copy your Application ID, Authorization Key, Authorization Secret, and Account Key .
npm install quickblox
npm install quickblox-react-ui-kit
To init QuickBlox SDK you need to pass Application ID, Authorization Key, Authorization Secret, and Account Key to the init() method.
var APPLICATION_ID = 41;
var AUTH_KEY = "lkjdueksu7392kj";
var AUTH_SECRET = "iiohfdija792hj";
var ACCOUNT_KEY = "sdjfnksnlk2bk1k34kb";
var CONFIG = { debug: true };

QB.init(APPLICATION_ID, AUTH_KEY, AUTH_SECRET, ACCOUNT_KEY, CONFIG);
Before sending your first message you need to authenticate users in the QuickBlox system. You can read more about different ways of authentication by this link. In our example we show how to authenticate user with login and password.
import * as QB from "quickblox/quickblox";
import {
  QuickBloxUIKitProvider,
  qbDataContext,
  QuickBloxUIKitDesktopLayout,
  LoginData,
  AuthorizationData,
  QBDataContextType,
} from 'quickblox-ui-kit-react/dist/index-ui';

var params = { login: "garry", password: "garry5santos" };

QB.login(params, function(error, result) {
  if(error){
  } else {
    // Navigate User to the UIKit
});

const qbUIKitContext: QBDataContextType = React.useContext(qbDataContext);
To order to config quickblox ui kit provider if you use SDK without session token:
 <QuickBloxUIKitProvider
            maxFileSize={100 * 1000000} //set max size for attachments
            accountData={{ ...QBConfig.credentials }}
            loginData={{
              login: params.login,
              password: params.password,
            }}
        >
  <QuickBloxUIKitDesktopLayout /> // container for DesktopLayout
</QuickBloxUIKitProvider>
To order to config quickblox ui kit provider if you use SDK with session token:
 <QuickBloxUIKitProvider
            maxFileSize={100 * 1000000} //set max size for attachments
            accountData={{ ...QBConfig.credentials }} // sessionToken was used in QBConfig
        >
  <QuickBloxUIKitDesktopLayout /> // container for DesktopLayout
</QuickBloxUIKitProvider>
The QuickBlox UIKit for React allows you to create your own unique view of the UIKit.
The QuickBlox UIKit for React has 2 built in themes: Dark and Light. Default theme for UIKit is Light. To set theme you need to set value 'dark' to key data-theme in global styles (html[data-theme="dark”]). For example, you can use pure JavaScript:
document.documentElement.setAttribute('data-theme', 'dark');
There are two options how you can create your own theme:
To customize the current theme you just need to set the new colors in css variables.
Or you can create your own theme. To do this you need to create a new class that implements the UiKitTheme interface.
To use your own theme using css you need to create _theme_colors_scheme.scss and set colors
$background-overlay-light: rgba(19, 29, 40, .80);
$background-overlay-dark: rgba(144, 151, 159, .80);
$primary-50: #E7EFFF;
$primary-100: #C4D7FE;
$primary-200: #9CBCFE;
$primary-300: #74A1FD;
$primary-400: #578CFC;
$primary-500: #3978FC;
$primary-600: #3370FC;
$primary-700: #2C65FB;
$primary-800: #245BFB;
$primary-900: #1748FA;
$primary-a-100: #FFFFFF;
$primary-a-200: #F7F9FF;
$primary-a-400: #C4CFFF;
$primary-a-700: #ABBAFF;
$secondary-50: #E4E6E8;
$secondary-100: #BCC1C5;
$secondary-200: #90979F;
$secondary-300: #636D78;
$secondary-400: #414E5B;
$secondary-500: #202F3E;
$secondary-600: #1C2A38;
$secondary-700: #182330;
$secondary-800: #131D28;
$secondary-900: #0B121B;
$secondary-a-100: #74A1FD;
$secondary-a-200: #3978FC;
$secondary-a-400: #245BFB;
$secondary-a-700: #0050DC;
$system-green-100: #C8F1D6;
$system-green-200: #A4E7BB;
$system-green-300: #80DDA0;
$system-green-400: #64D68B;
$system-green-500: #49CF77;
$error-100: #FFC4C1;
$error-200: #FF9D98;
$error-300: #FF766E;
$error-400: #FF584F;
$error-500: #FF3B30;
$information: #FDB0FF;
$highlight: #FFFDC1;
To use your own new theme colors create _theme_dark.scss and _theme_light.scss files and set color variable.
// _theme_dark.scss:

html[data-theme="dark"]{
  --color-background-info: #{$primary-500};
  --tertiary-elements: #{$background-overlay-dark};
  --main-elements: #{$primary-300};
  --secondary-elements: #{$primary-a-100};
  --input-elements: #{$secondary-200};
  --disabled-elements: #{$secondary-300};
  --field-border: #{$secondary-200};
  --main-text: #{$primary-a-100};
  --secondary-text: #{$secondary-200};
  --caption: #{$secondary-100};
  --main-background: #{$secondary-500};
  --secondary-background: #{$secondary-800};
  --incoming-background: #{$secondary-400};
  --outgoing-background: #{$primary-500};
  --dropdown-background: #{$secondary-400};
  --chat-input: #{$secondary-800};
  --divider: #{$secondary-400};
  --error: #{$error-300};
  --hightlight: #{$highlight};
}

// _theme_light.scss:
:root{
  --color-background-info:#{$primary-100};
  --tertiary-elements: #{$secondary-300};
  --main-elements: #{$primary-500};
  --secondary-elements: #{$secondary-500};
  --input-elements: #{$secondary-500};
  --disabled-elements: #{$secondary-100};
  --field-border: #{$secondary-200};
  --main-text: #{$secondary-900};
  --secondary-text: #{$secondary-300};
  --caption: #{$secondary-200};
  --main-background: #{$primary-a-100};
  --secondary-background: #{$primary-a-100};
  --secondary-background-modal: #{$background-overlay-light};
  --incoming-background: #{$secondary-50};
  --outgoing-background: #{$primary-50};
  --dropdown-background: #{$primary-a-100};
  --chat-input: #{$primary-a-200};
  --divider: #{$primary-50};
  --error: #{$error-500};
  --hightlight: #{$highlight};
}
To create your own theme to customize selected components you need to create a new class that implements the UiKitTheme interface.
//DefaultTheme implements UiKitTheme
export default class CustomTheme extends DefaultTheme {
  divider = (): string => 'var(--divider)';
  mainText = (): string => '#FFFFFF';
  fontFamily = (): string => 'Roboto';
  /*
  The DefaultTheme contains other theme methods :
  caption = (): string => 'var(--caption)';
  chatInput = (): string => 'var(--chat-input)';
  disabledElements = (): string => 'var(--disabled-elements)';
  dropdownBackground = (): string => 'var(--dropdown-background)';
  error = (): string => 'var(--error)';
  fieldBorder = (): string => 'var(--field-border)';
  hightlight = (): string => 'var(--hightlight)';
  incomingBackground = (): string => 'var(--incoming-background)';
  inputElements = (): string => 'var(--input-elements)';
  mainBackground = (): string => 'var(--main-background)';
  mainElements = (): string => 'var(--main-elements)';
  outgoingBackground = (): string => 'var(--outgoing-background)';
  secondaryBackground = (): string => 'var(--secondary-background)';
  secondaryElements = (): string => 'var(--secondary-elements)';
  secondaryText = (): string => 'var(--secondary-text)';
  */
}
and specify selected components:
<QuickBloxUIKitDesktopLayout theme={new CustomTheme()}>
<HeaderDialogs title="Dialog 2" theme={new CustomTheme()} />
<PreviewDialog
  theme={{ selected: true, muted: true, colorTheme={new CustomTheme()} }}
  title="Dialog with states"
  unreadMessageCount={9}
  message_date_time_sent="5 min ago"
/>
The source code of the sample is available on GitHub: https://github.com/QuickBlox/quickblox-javascript-sdk/tree/gh-pages/samples/react-chat-ui-kit-init-sample You can view and interact with the interface components of the UI Kit using Storybook. In fact, this provides an interactive environment showcasing different scenarios that UI components might encounter in a live application. To view these, visit our documentation.
Youtube video about AI Assistant
MIT License here.
Copyright © 2023 QuickBlox.
Permission is hereby granted, free of charge, to any person obtaining a copy of this software and associated documentation files (the "Software"), to deal in the Software without restriction, including without limitation the rights to use, copy, modify, merge, publish, distribute, sublicense, and/or sell copies of the Software, and to permit persons to whom the Software is furnished to do so, subject to the following conditions:
The above copyright notice and this permission notice shall be included in all copies or substantial portions of the Software.
THE SOFTWARE IS PROVIDED "AS IS", WITHOUT WARRANTY OF ANY KIND, EXPRESS OR IMPLIED, INCLUDING BUT NOT LIMITED TO THE WARRANTIES OF MERCHANTABILITY, FITNESS FOR A PARTICULAR PURPOSE AND NONINFRINGEMENT. IN NO EVENT SHALL THE AUTHORS OR COPYRIGHT HOLDERS BE LIABLE FOR ANY CLAIM, DAMAGES OR OTHER LIABILITY, WHETHER IN AN ACTION OF CONTRACT, TORT OR OTHERWISE, ARISING FROM, OUT OF OR IN CONNECTION WITH THE SOFTWARE OR THE USE OR OTHER DEALINGS IN THE SOFTWARE.
FAQs
Unknown package
The npm package quickblox-react-ui-kit receives a total of 216 weekly downloads. As such, quickblox-react-ui-kit popularity was classified as not popular.
We found that quickblox-react-ui-kit demonstrated a healthy version release cadence and project activity because the last version was released less than a year ago. It has 3 open source maintainers collaborating on the project.
Did you know?

Socket for GitHub automatically highlights issues in each pull request and monitors the health of all your open source dependencies. Discover the contents of your packages and block harmful activity before you install or update your dependencies.

Security News
Tea.xyz, a crypto project aimed at rewarding open source contributions, is once again facing backlash due to an influx of spam packages flooding public package registries.

Security News
As cyber threats become more autonomous, AI-powered defenses are crucial for businesses to stay ahead of attackers who can exploit software vulnerabilities at scale.

Security News
UnitedHealth Group disclosed that the ransomware attack on Change Healthcare compromised protected health information for millions in the U.S., with estimated costs to the company expected to reach $1 billion.