Security News
VulnCon 2025: NVD Scraps Industry Consortium Plan, Raising Questions About Reform
At VulnCon 2025, NIST scrapped its NVD consortium plans, admitted it can't keep up with CVEs, and outlined automation efforts amid a mounting backlog.
react-discussionview
Advanced tools
A pure frontend react component that can be used for developing the discussions functionality in your app. It uses AWS DynamoDB as the backend database.
A responsive, reusable & customizable react component that can be used integrate group chat, messenger or discussion functionality into your application. It is a pure front-end component and does not require backend coding.

React |

AWS Serverless |

Bootstrap |

Use this flexible, customizable and reusable React component to develop group chat, messenger or discussion functionality into your application. It is packed with functionality, keeping the basic usage simple. It is designed in Bootstrap, is responsive and renders nicely on all screen sizes. Customizable color scheme allows it to seamlessly blend in to any UI. It depends on AWS serverless technologies for certain functionalities such as uploading & processing attachments and for database store. However, it is a pure front-end component and does not need backend coding.
Possible usage of this component includes but is not limited to the following use-cases:
and many more.
This component provides the following functionality:
Read this section to get started with the implementation and the basic usage. After you become familiar, you can move on to explore props, further features and customization.
Install Dependencies
This module depends on the following packages. Install them first.
npm install --save aws-sdk
npm install --save bootstrap
npm install --save react-bootstrap
npm install --save react-bootstrap-icons
npm install --save react-ui-components-superflows
npm install --save react-ui-themes-superflows
npm install --save react-upload-to-s3
npm install --save react-commentview
AWS Configuration
Following AWS services are used by this component:
The configuration section will help you in your AWS setup.
npm install --save react-discussionview
Use this component to quickly add a discussion or a chat / group feature into your application. After you become familiar with the basic usage, you can move on to exploring the props, further features and customization.
import React from 'react'

import { Col, Row, Container } from 'react-bootstrap';
import { DiscussionView } from 'react-discussionview'
import Themes from 'react-ui-themes-superflows'
import 'bootstrap/dist/css/bootstrap.min.css';

const App = () => {

  const theme = Themes.getTheme("Default");

  return (
    <Container className='mt-5'>
      <Row className='justify-content-center'>
        <Col sm={12} xs={12} md={8} xl={6} xxl={6} >
          <DiscussionView
            awsRegion="your_aws_region_where_s3_bucket_and_table_is_hosted"
            awsKey="your_aws_access_key"
            awsSecret="your_aws_secret"
            awsMediaConvertEndPoint="your_aws_mediaconvert_endpoint"
            mediaConvertRole="your_aws_mediaconvert_role"
            topicId="4"
            table="your_dynamodb_table_name"
            bucket="your_aws_s3_bucket_name"
            userId="23"
            userName="Kaushiki M"
            userPicture="https://superflows-myuploads.s3.ap-south-1.amazonaws.com/profile_girl_100.png"
            theme={theme}
          />
        </Col>
      </Row>
    </Container>
  )
}

export default App
Immediately after initialization, your discussion will not have any data. So you will only see the editor.

Type in something and submit it.

Whatever you have entered and submitted, will be reflected as a chat box just above the editor. Type in something more!

Your second chat is also now visible. What if you wish to add a new user to chat? It's quite simple actually, just change the user-related props! See the below example.
import React from 'react'

import { Col, Row, Container } from 'react-bootstrap';
import { DiscussionView } from 'react-discussionview'
import Themes from 'react-ui-themes-superflows'
import 'bootstrap/dist/css/bootstrap.min.css';

const App = () => {

  const theme = Themes.getTheme("Default");

  return (
    <Container className='mt-5'>
      <Row className='justify-content-center'>
        <Col sm={12} xs={12} md={8} xl={6} xxl={6} >
          <DiscussionView
            awsRegion="your_aws_region_where_s3_bucket_and_table_is_hosted"
            awsKey="your_aws_access_key"
            awsSecret="your_aws_secret"
            awsMediaConvertEndPoint="your_aws_mediaconvert_endpoint"
            mediaConvertRole="your_aws_mediaconvert_role"
            topicId="4"
            table="your_dynamodb_table_name"
            bucket="your_aws_s3_bucket_name"
            userId="21"
            userName="Hrushi M"
            userPicture="https://superflows-myuploads.s3.ap-south-1.amazonaws.com/profile_boy_100.jpeg"
            theme={theme}
          />
        </Col>
      </Row>
    </Container>
  )
}

export default App

You'll see that the chat has remained the same but the user at the bottom editor has changed. This essentially means that you are now using the chat as a different user. This is achieved by changing the user-related props - userId, userName, userPicture.
Go ahead, type in something with the new user!

You'll see that your chat input from the new user is now showing in the chatroom!
The quickstart section ends here. You can now move on to the props section, to understand the props in detail.
Use the table below to understand the props and how they can be set to customize the appearance and behaviour of this component. For AWS related props, please refer to the AWS configuration section to know how to obtain your values for these props.
| Prop | Type | Description |
|---|---|---|
| bucket | string | name of your s3 bucket where attachments will be uploaded (aws) |
| awsRegion | string | name of the aws region where s3 bucket is hosted (aws) |
| awsKey | string | aws access key (recommended that it should be stored in environment variables) (aws) |
| awsSecret | string | aws secret (recommended that it should be stored in environment variables) (aws) |
| awsMediaConvertEndPoint | url string | aws media convert endpoint (aws) |
| mediaConvertRole | string | name of aws media convert role (aws) |
| cdnPrefix | url string | prefix in case your s3 bucket is behind cdn (aws) |
| table | string | dynamodb table name, which stores the discussion / chat data |
| topicId | string | topic id, chats are grouped by topicId |
| bucket | string | name of the s3 bucket that stores attachments such as images, videos and pdfs |
| userId | string | id of the current user |
| userName | string | name of the current user |
| userPicture | string | picture of the current user |
| enableLikes | boolean | flag, which enables or disables the like functionality |
| enableDisLikes | boolean | flag, which enables or disables the dislike functionality |
| enableVotes | boolean | flag, which enables or disables the votes functionality |
| enableFilters | boolean | flag, which enables or disables the filter functionality |
| enableSearch | boolean | flag, which enables or disables the search functionality |
See the below examples to know the various features of this component.
Likes functionality can be enabled by setting the enableLikes prop.
  <DiscussionView
    awsRegion="your_aws_region_where_s3_bucket_and_table_is_hosted"
    awsKey="your_aws_access_key"
    awsSecret="your_aws_secret"
    awsMediaConvertEndPoint="your_aws_mediaconvert_endpoint"
    mediaConvertRole="your_aws_mediaconvert_role"
    topicId="4"
    table="your_dynamodb_table_name"
    bucket="your_aws_s3_bucket_name"
    userId="21"
    userName="Hrushi M"
    enableLikes={true}
    userPicture="https://superflows-myuploads.s3.ap-south-1.amazonaws.com/profile_boy_100.jpeg"
    theme={theme}
  />

Dislike functionality can be enabled by setting the enableDisLikes prop.
  <DiscussionView
    awsRegion="your_aws_region_where_s3_bucket_and_table_is_hosted"
    awsKey="your_aws_access_key"
    awsSecret="your_aws_secret"
    awsMediaConvertEndPoint="your_aws_mediaconvert_endpoint"
    mediaConvertRole="your_aws_mediaconvert_role"
    topicId="4"
    table="your_dynamodb_table_name"
    bucket="your_aws_s3_bucket_name"
    userId="21"
    userName="Hrushi M"
    enableLikes={true}
    enableDisLikes={true}
    userPicture="https://superflows-myuploads.s3.ap-south-1.amazonaws.com/profile_boy_100.jpeg"
    theme={theme}
  />

Voting functionality can be enavbled by setting the enableVotes prop.
  <DiscussionView
    awsRegion="your_aws_region_where_s3_bucket_and_table_is_hosted"
    awsKey="your_aws_access_key"
    awsSecret="your_aws_secret"
    awsMediaConvertEndPoint="your_aws_mediaconvert_endpoint"
    mediaConvertRole="your_aws_mediaconvert_role"
    topicId="4"
    table="your_dynamodb_table_name"
    bucket="your_aws_s3_bucket_name"
    userId="21"
    userName="Hrushi M"
    enableVotes={true}
    userPicture="https://superflows-myuploads.s3.ap-south-1.amazonaws.com/profile_boy_100.jpeg"
    theme={theme}
  />

Filter your chats based on predefined time intervals. Enable this option by setting the enableFilters prop.
  <DiscussionView
    awsRegion="your_aws_region_where_s3_bucket_and_table_is_hosted"
    awsKey="your_aws_access_key"
    awsSecret="your_aws_secret"
    awsMediaConvertEndPoint="your_aws_mediaconvert_endpoint"
    mediaConvertRole="your_aws_mediaconvert_role"
    topicId="4"
    table="your_dynamodb_table_name"
    bucket="your_aws_s3_bucket_name"
    userId="21"
    userName="Hrushi M"
    enableVotes={true}
    enableFilters={true}
    userPicture="https://superflows-myuploads.s3.ap-south-1.amazonaws.com/profile_boy_100.jpeg"
    theme={theme}
  />

Search feature can be enabled by setting the enableSearch prop.
  <DiscussionView
    awsRegion="your_aws_region_where_s3_bucket_and_table_is_hosted"
    awsKey="your_aws_access_key"
    awsSecret="your_aws_secret"
    awsMediaConvertEndPoint="your_aws_mediaconvert_endpoint"
    mediaConvertRole="your_aws_mediaconvert_role"
    topicId="4"
    table="your_dynamodb_table_name"
    bucket="your_aws_s3_bucket_name"
    userId="21"
    userName="Hrushi M"
    enableVotes={true}
    enableFilters={true}
    enableSearch={true}
    userPicture="https://superflows-myuploads.s3.ap-south-1.amazonaws.com/profile_boy_100.jpeg"
    theme={theme}
  />

Appearance customization can be done by modifying the theme object that is passed as a prop. Customizable properties of this component are listed below.
Before passing the theme object as prop to the component, you can change these colors as you wish so that component blends in perfectly in your user interface.
This example demonstrates how the theme object can be modified to change the color scheme to night mode.
import React from 'react'

import { Col, Row, Container } from 'react-bootstrap';
import { DiscussionView } from 'react-discussionview'
import Themes from 'react-ui-themes-superflows'
import 'bootstrap/dist/css/bootstrap.min.css';

const App = () => {

  const theme = Themes.getTheme("Default");
  theme.commentViewBorderColor = '#dddddd'
  theme.commentViewBackgroundColor = '#000000'
  theme.commentViewMyBackgroundColor = '#002200'
  theme.commentViewUserColor = '#ffffff'
  theme.commentViewColor = '#dddddd'
  theme.commentViewReplyToBackgroundColor = '#222222';
  theme.commentViewReplyToTitleColor = '#cccccc';
  theme.commentViewDecorationColor = '#999999';
  theme.commentViewDecorationHighlightColor = '#dddddd';
  theme.uploadToS3BackgroundColor = '#efefef';
  theme.discussionViewBackgroundColor = '#333333';

  return (
    <Container className='mt-5'>
      <Row className='justify-content-center'>
        <Col sm={12} xs={12} md={8} xl={6} xxl={6} >
          <DiscussionView
            awsRegion="your_aws_region_where_s3_bucket_and_table_is_hosted"
            awsKey="your_aws_access_key"
            awsSecret="your_aws_secret"
            awsMediaConvertEndPoint="your_aws_mediaconvert_endpoint"
            mediaConvertRole="your_aws_mediaconvert_role"
            topicId="4"
            table="your_dynamodb_table_name"
            bucket="your_aws_s3_bucket_name"
            userId="21"
            userName="Hrushi M"
            userPicture="https://superflows-myuploads.s3.ap-south-1.amazonaws.com/profile_boy_100.jpeg"
            enableVotes={true}
            enableFilters={true}
            enableSearch={true}
            theme={theme}
          />
        </Col>
      </Row>
    </Container>
  )
}

export default App

{
    "Version": "2012-10-17",
    "Statement": [
        {
            "Sid": "PublicListGet",
            "Effect": "Allow",
            "Principal": "*",
            "Action": [
                "s3:List*",
                "s3:Get*"
            ],
            "Resource": [
                "arn:aws:s3:::myuploads",
                "arn:aws:s3:::myuploads/*"
            ]
        }
    ]
}
[
    {
        "AllowedHeaders": [
            "*"
        ],
        "AllowedMethods": [
            "PUT",
            "POST",
            "DELETE",
            "GET"
        ],
        "AllowedOrigins": [
            "*"
        ],
        "ExposeHeaders": []
    }
]
{
    "Version": "2012-10-17",
    "Statement": [
        {
            "Effect": "Allow",
            "Action": [
                "s3:*",
                "s3-object-lambda:*"
            ],
            "Resource": "arn:aws:s3:::myuploads"
        }
    ]
}
AWS mediaconvert is required for video processing. The clip selection happens at the client end, whereas the actual clipping is done by an AWS mediaconvert job. This requires a region specific endpoint and can be easily obtained from the aws cli (aws commandline).
aws mediaconvert describe-endpoints --region <region>
Remember that this region specific endpoint also has to be provided as a prop to the upload-to-s3 component. (Refer to the Usage Section)
Once you are through with installing the dependencies and the AWS configuration, using the component becomes fairly simple. Please refer to the Usage below.
This component uses dynamodb as the backend. Please create a table as follows. You can use a name of your choice but remember to use the same name in the props.
Name: Discussions / "your_dynamodb_table_name" Partition Key: topicId (String) Sort Key: timestamp (number)
As mentioned above, don't forget to provide CRUD access to this table to your SDK user.
PASS src/index.test.js (74.1s)
-------------------|----------|----------|----------|----------|-------------------|
| File | % Stmts | % Branch | % Funcs | % Lines | Uncovered Line #s |
|---|---|---|---|---|---|
| All files | 80.95 | 55.24 | 86.67 | 82.71 | |
| Constants.js | 100 | 100 | 100 | 100 | |
| DiscussionView.js | 93.75 | 74.18 | 92.86 | 93.44 | ... 11,559,642,712 |
| Services.js | 7.69 | 100 | 0 | 7.69 | ... 40,44,45,46,47 |
| Util.js | 0 | 0 | 0 | 0 | ... 21,22,23,24,25 |
| index.js | 0 | 0 | 0 | 0 | |
| ------------------- | ---------- | ---------- | ---------- | ---------- | ------------------- |
| Test Suites: 1 passed, 1 total | |||||
| Tests: 23 passed, 23 total | |||||
| Snapshots: 0 total | |||||
| Time: 76.165s | |||||
| Ran all test suites. |
MIT © superflows-dev
FAQs
A pure frontend react component that can be used for developing the discussions functionality in your app. It uses AWS DynamoDB as the backend database.
The npm package react-discussionview receives a total of 0 weekly downloads. As such, react-discussionview popularity was classified as not popular.
We found that react-discussionview demonstrated a not healthy version release cadence and project activity because the last version was released a year ago. It has 1 open source maintainer collaborating on the project.
Did you know?

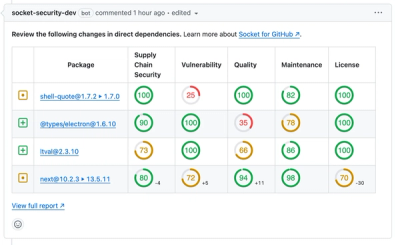
Socket for GitHub automatically highlights issues in each pull request and monitors the health of all your open source dependencies. Discover the contents of your packages and block harmful activity before you install or update your dependencies.

Security News
At VulnCon 2025, NIST scrapped its NVD consortium plans, admitted it can't keep up with CVEs, and outlined automation efforts amid a mounting backlog.

Product
We redesigned our GitHub PR comments to deliver clear, actionable security insights without adding noise to your workflow.

Product
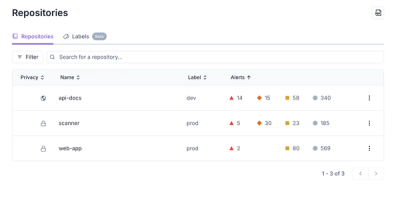
Our redesigned Repositories page adds alert severity, filtering, and tabs for faster triage and clearer insights across all your projects.