Product
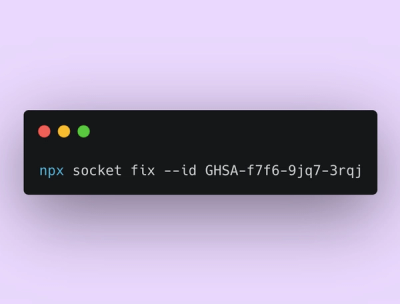
Announcing Socket Fix 2.0
Socket Fix 2.0 brings targeted CVE remediation, smarter upgrade planning, and broader ecosystem support to help developers get to zero alerts.
Dash tabulator is a Dash / Plotly component providing Tabulator capabilities. This is not a fully comprehensive implementation of Tabulator just the basics necessary to get the application working. Under the covers this uses react-tabulator

This is built on the shoulders of the Dash Plotly team, the Tabulator team, and the React Tabulator team. This readme is probably longer than the code, due to the work of those individuals!
Installation can be done with pip in your dash project
pip install dash_tabulator
pip install dash_extensions
Sample usage
import dash_tabulator
import dash
from dash.dependencies import Input, Output
import dash_html_components as html
import dash_core_components as dcc
from textwrap import dedent as d
import json

# 3rd party js to export as xlsx
external_scripts = ['https://oss.sheetjs.com/sheetjs/xlsx.full.min.js']

# bootstrap css
external_stylesheets = ['https://stackpath.bootstrapcdn.com/bootstrap/4.1.3/css/bootstrap.min.css']

# initialize your dash app as normal
app = dash.Dash(__name__, external_scripts=external_scripts, external_stylesheets=external_stylesheets)

styles = {
            'pre': {
                'border': 'thin lightgrey solid',
                'overflowX': 'scroll'
            }
        }

# Setup some columns
# This is the same as if you were using tabulator directly in js
# Notice the column with "editor": "input" - these cells can be edited
# See tabulator editor for options http://tabulator.info/docs/4.8/edit
columns = [
                { "title": "Name", "field": "name", "width": 150, "headerFilter":True, "editor":"input"},
                { "title": "Age", "field": "age", "hozAlign": "left", "formatter": "progress" },
                { "title": "Favourite Color", "field": "col", "headerFilter":True },
                { "title": "Date Of Birth", "field": "dob", "hozAlign": "center" },
                { "title": "Rating", "field": "rating", "hozAlign": "center", "formatter": "star" },
                { "title": "Passed?", "field": "passed", "hozAlign": "center", "formatter": "tickCross" }
              ]

# Setup some data
data = [
                {"id":1, "name":"Oli Bob", "age":"12", "col":"red", "dob":""},
                {"id":2, "name":"Mary May", "age":"1", "col":"blue", "dob":"14/05/1982"},
                {"id":3, "name":"Christine Lobowski", "age":"42", "col":"green", "dob":"22/05/1982"},
                {"id":4, "name":"Brendon Philips", "age":"125", "col":"orange", "dob":"01/08/1980"},
                {"id":5, "name":"Margret Marmajuke", "age":"16", "col":"yellow", "dob":"31/01/1999"},
                {"id":6, "name":"Fred Savage", "age":"16", "col":"yellow", "rating":"1", "dob":"31/01/1999"},
                {"id":6, "name":"Brie Larson", "age":"30", "col":"blue", "rating":"1", "dob":"31/01/1999"},
              ]

# Additional options can be setup here
# these are passed directly to tabulator
# In this example we are enabling selection
# Allowing you to select only 1 row
# and grouping by the col (color) column

options = { "groupBy": "col", "selectable":1}

# downloadButtonType
# takes
#       css     => class names
#       text    => Text on the button
#       type    => type of download (csv/ xlsx / pdf, remember to include appropriate 3rd party js libraries)
#       filename => filename prefix defaults to data, will download as filename.type

downloadButtonType = {"css": "btn btn-primary", "text":"Export", "type":"xlsx"}


# clearFilterButtonType
# takes
#       css     => class names
#       text    => Text on the button
clearFilterButtonType = {"css": "btn btn-outline-dark", "text":"Clear Filters"}


# Add a dash_tabulator table
# columns=columns,
# data=data,
# Can be setup at initialization or added with a callback as shown below
# thank you @AnnMarieW for that fix


app.layout = html.Div([
    dash_tabulator.DashTabulator(
        id='tabulator',
        #columns=columns,
        #data=data,
        options=options,
        downloadButtonType=downloadButtonType,
        clearFilterButtonType=clearFilterButtonType
    ),
    html.Div(id='output'),
    dcc.Interval(
                id='interval-component-iu',
                interval=1*10, # in milliseconds
                n_intervals=0,
                max_intervals=0
            )

])


# dash_tabulator can be populated from a dash callback
@app.callback([ Output('tabulator', 'columns'),
                Output('tabulator', 'data')],
                [Input('interval-component-iu', 'n_intervals')])
def initialize(val):
    return columns, data

# dash_tabulator can register a callback on rowClicked,
#   cellEdited => a cell with a header that has "editor":"input" etc.. will be returned with row, initial value, old value, new value
# dataChanged => full table upon change (use with caution)
# dataFiltering => header filters as typed, before filtering has occurred (you get partial matching)
# dataFiltered => header filters and rows of data returned
# to receive a dict of the row values
@app.callback(Output('output', 'children'),
    [Input('tabulator', 'rowClicked'),
    Input('tabulator', 'cellEdited'),
    Input('tabulator', 'dataChanged'),
    Input('tabulator', 'dataFiltering'),
    Input('tabulator', 'dataFiltered')])
def display_output(row, cell, dataChanged, filters, dataFiltered):
    print(row)
    print(cell)
    print(dataChanged)
    print(filters)
    print(dataFiltered)
    return 'You have clicked row {} ; cell {}'.format(row, cell)


if __name__ == '__main__':
    app.run_server(debug=True)
Be aware registering a callback for dataChanged will send the entire table back each time a change occurs Make sure you are conscious of the amount of data you are round tripping.
dataFiltering will return the filters before a match has occurred, usually a partial match
[{'field': 'col', 'type': 'like', 'value': 'yello'}]
dataFiltered will return the header filter and the row data e.g.
{
    'filters': [{'field': 'col', 'type': 'like', 'value': 'yellow'}],
    'rows': [
              None,
              None,
              {'id': 5, 'name': 'Margret Marmajuke', 'age': '16', 'col': 'yellow', 'dob': '31/01/1999'},
              {'id': 6, 'name': 'Fred Savage', 'age': '16', 'col': 'yellow', 'rating': '1', 'dob': '31/01/1999'}
              ]
}
React-Tabulator comes with several themes that can be used in Dash-Tabulator Dash-Tabulator uses the default theme tabulator.min.css The theme can be set in the Dash-Tabulator constructor e.g.
app.layout = html.Div([
    dash_tabulator.DashTabulator(
        id='tabulator',
        theme='tabulator_simple',  #optional
        options=options,
        downloadButtonType=downloadButtonType,
        clearFilterButtonType=clearFilterButtonType,
    ),
    ....
])
The following are the built in react-tabulator themes
Tabulator supports multiple row selection To Enable the table option selectable must be set to the STRING true
options = { "selectable":"true", ....}
Once selectable is set
@app.callback(Output('output', 'children'),
    [Input('tabulator', 'rowClicked'),
    Input('tabulator', 'multiRowsClicked')]
def clickedRows(rowClicked, multiRowsClicked):
  ......
  ......
multiRowsClicked will now contain an array of all the rows selected e.g.
 [
    {'id': 6, 'name': 'Fred Savage', 'age': '16', 'col': 'yellow', 'rating': '1', 'dob': '31/01/1999', 'print': 'foo'},
    {'id': 5, 'name': 'Margret Marmajuke', 'age': '16', 'col': 'yellow', 'dob': '31/01/1999', 'print': 'foo'},
    {'id': 4, 'name': 'Brendon Philips', 'age': '125', 'col': 'orange', 'dob': '01/08/1980', 'print': 'foo'},
    {'id': 3, 'name': 'Christine Lobowski', 'age': '42', 'col': 'green', 'dob': '22/05/1982', 'print': 'foo'}
]
Select all / deselect all can be accomplished with a header formatter called rowSelection.
columns = [
                {"formatter":"rowSelection", "titleFormatter":"rowSelection", "hozAlign":"center", "headerSort":"false"},
                { "title": "Name", "field": "name", "width": 150, "headerFilter":True, "editor":"input"},
For more options check out http://tabulator.info/docs/4.8/select
Tabulator offers a significate amount of callbacks that allow for interactivity with tables to be captured and modified http://tabulator.info/docs/4.8/callbacks To enable this functionality we can use Dash-Extensions
Create an assets folder, add a javascript file with your custom functions An example is provided in assets/custom_tabulator.js Please follow the examples below
Contributed in https://github.com/preftech/dash-tabulator/pull/11 Tabulator offers Javascript formatting of cells http://tabulator.info/docs/3.4?#formatting This a browser side javascript method attached to a header colum.
Python code:
from dash_extensions.javascript import Namespace
...
ns = Namespace("myNamespace", "tabulator")
...
columns = [{"formatter": ns("printIcon")}, ...]
Javascript code:
window.myNamespace = Object.assign({}, window.myNamespace, {
    tabulator: {
        printIcon: function (cell, formatterParams, onRendered) {
            return "<i class='fa fa-print'></i>";
        }
    }
});
Capturing a column resize, when a user drags a column width From tabulators callbacks page http://tabulator.info/docs/4.8/callbacks#column We see there's a columnsResized callback in our python code in the options dict we can specify a javascript method
assets/custom_tabulator.js
window.myNamespace = Object.assign({}, window.myNamespace, {
    tabulator: {
        columnResized : function (column, table) {
            // column is the tabulator column component
            // table is the tabulator instance, can be used for table.setProps() to send data back to dash
            console.log("Column is resized");
            console.log(column)

            // send data back to dash, still under work, only updates when state changes
            // be aware of table rendering and resetting back to original display
            table.props.setProps({"columnResized": column._column.field})
        }
    }
});
Within your python code, you can register this method as a tabulator option
from dash_extensions.javascript import Namespace
...
ns = Namespace("CustomNamespace", "tabulator")
...
options = { "groupBy": "col", "selectable":"true", "columnResized" : ns("columnResized")}
A full list of callbacks available exists http://tabulator.info/docs/4.8/callbacks
FAQs
Dash Plotly component providing Tabulator tables
We found that dash-tabulator demonstrated a healthy version release cadence and project activity because the last version was released less than a year ago. It has 2 open source maintainers collaborating on the project.
Did you know?

Socket for GitHub automatically highlights issues in each pull request and monitors the health of all your open source dependencies. Discover the contents of your packages and block harmful activity before you install or update your dependencies.

Product
Socket Fix 2.0 brings targeted CVE remediation, smarter upgrade planning, and broader ecosystem support to help developers get to zero alerts.

Security News
Socket CEO Feross Aboukhadijeh joins Risky Business Weekly to unpack recent npm phishing attacks, their limited impact, and the risks if attackers get smarter.

Product
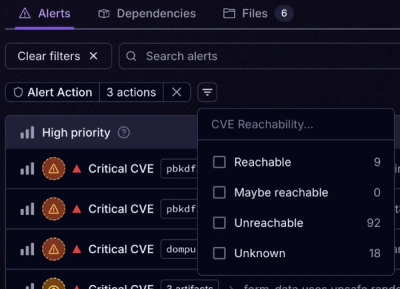
Socket’s new Tier 1 Reachability filters out up to 80% of irrelevant CVEs, so security teams can focus on the vulnerabilities that matter.