Product
A Fresh Look for the Socket Dashboard
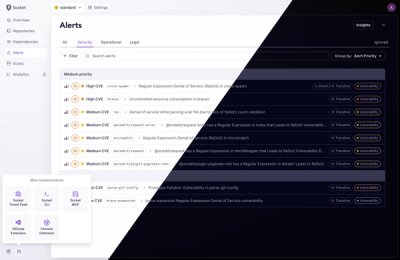
We’ve redesigned the Socket dashboard with simpler navigation, less visual clutter, and a cleaner UI that highlights what really matters.
By André Staltz, Jeppe Hasseriis, Nolan Lawson - Jun 23, 2025
LocalLab: A lightweight AI inference server for running LLMs locally or in Google Colab with a friendly API.


Run ChatGPT-like AI on your own computer! LocalLab is a server that runs AI models locally and makes them accessible from anywhere.
LocalLab is like having your own personal ChatGPT that runs on your computer. Here's how it works:
No complicated setup, no monthly fees, and your data stays private. Perfect for developers, students, researchers, or anyone who wants to experiment with AI.
Think of LocalLab as having two parts:
The Server (what you install with pip install locallab)
locallab startThe Client (what you install with pip install locallab-client)
client = SyncLocalLabClient("http://localhost:8000")graph TD
A[Your Python Code] -->|Uses| B[LocalLab Client Package]
B -->|Connects to| C[LocalLab Server]
C -->|Runs| D[AI Models]
C -->|Optional| E[Ngrok for Remote Access]
style C fill:#f9f,stroke:#333,stroke-width:2px
style D fill:#bbf,stroke:#333,stroke-width:2px
The Magic Part: With the --use-ngrok option, you can access your AI from anywhere - your phone, another computer, or share with friends!
📦 Easy Setup         🔒 Privacy First       🎮 Free GPU Access
🤖 Multiple Models    💾 Memory Efficient    🔄 Auto-Optimization
🌐 Local or Colab    ⚡ Fast Response       🔧 Simple Server
🌍 Access Anywhere   🔌 Client Package      🛡️ Secure Tunneling
Two-Part System:
pip install locallab-client) that connects to the serverAccess From Anywhere: With built-in ngrok integration, you can securely access your LocalLab server from any device, anywhere in the world - perfect for teams, remote work, or accessing your models on the go.
On Your Computer (Local Mode)
💻 Your Computer
└── 🚀 LocalLab Server
    └── 🤖 AI Model
        └── 🔧 Auto-optimization
On Google Colab (Free GPU Mode)
☁️ Google Colab
└── 🎮 Free GPU
    └── 🚀 LocalLab Server
        └── 🤖 AI Model
            └── ⚡ GPU Acceleration
Latest Package Versions:
- LocalLab Server:
- LocalLab Client:
Install Required Build Tools
Install Packages
pip install locallab locallab-client
Verify PATH
locallab command isn't found, add Python Scripts to PATH:
# Find Python location
where python
# This will show something like: C:\Users\YourName\AppData\Local\Programs\Python\Python311\python.exe
Adding to PATH in Windows:
Press Win + X and select "System"
Click "Advanced system settings" on the right
Click "Environment Variables" button
Under "System variables", find and select "Path", then click "Edit"
Click "New" and add your Python Scripts path (e.g., C:\Users\YourName\AppData\Local\Programs\Python\Python311\Scripts\)
Click "OK" on all dialogs
Restart your command prompt
python -m locallab start🔍 Having issues? See our Windows Troubleshooting Guide
# Install both server and client packages
pip install locallab locallab-client
# Run interactive configuration
locallab config

# This will help you set up:
# - Model selection
# - Memory optimizations
# - GPU settings
# - System resources
# Start with saved configuration
locallab start

# Or start with specific options
locallab start --model microsoft/phi-2 --quantize --quantize-type int8
After starting your LocalLab server (either locally or on Google Colab), you'll need to connect to it using the LocalLab client package. This is how your code interacts with the AI models running on the server.
from locallab_client import SyncLocalLabClient

# Connect to server - choose ONE of these options:
# 1. For local server (default)
client = SyncLocalLabClient("http://localhost:8000")

# 2. For remote server via ngrok (when using Google Colab or --use-ngrok)
# client = SyncLocalLabClient("https://abc123.ngrok.app")  # Replace with your ngrok URL

try:
    print("Generating text...")
    # Generate text
    response = client.generate("Write a story")
    print(response)

    print("Streaming responses...")
    # Stream responses
    for token in client.stream_generate("Tell me a story"):
       print(token, end="", flush=True)

    print("Chat responses...")
    # Chat with AI
    response = client.chat([
        {"role": "system", "content": "You are helpful."},
        {"role": "user", "content": "Hello!"}
    ])
    print(response.choices[0]["message"]["content"])

finally:
    # Always close the client
    client.close()
💡 Important: When connecting to a server running on Google Colab or with ngrok enabled, always use the ngrok URL (https://abc123.ngrok.app) that was displayed when you started the server.
import asyncio
from locallab_client import LocalLabClient

async def main():
    # Connect to server - choose ONE of these options:
    # 1. For local server (default)
    client = LocalLabClient("http://localhost:8000")

    # 2. For remote server via ngrok (when using Google Colab or --use-ngrok)
    # client = LocalLabClient("https://abc123.ngrok.app")  # Replace with your ngrok URL

    try:
        print("Generating text...")
        # Generate text
        response = await client.generate("Write a story")
        print(response)

        print("Streaming responses...")
        # Stream responses
        async for token in client.stream_generate("Tell me a story"):
            print(token, end="", flush=True)

        print("\nChatting with AI...")
        # Chat with AI
        response = await client.chat([
            {"role": "system", "content": "You are helpful."},
            {"role": "user", "content": "Hello!"}
        ])
        # Extracting Content
        content = response['choices'][0]['message']['content']
        print(content)
    finally:
        # Always close the client
        await client.close()

# Run the async function
asyncio.run(main())
First, you'll set up the LocalLab server on Google Colab to use their free GPU:
# In your Colab notebook:

# 1. Install the server package
!pip install locallab

# 2. Configure with CLI (notice the ! prefix)
!locallab config

# 3. Start server with ngrok for remote access
!locallab start --use-ngrok

# The server will display a public URL like:
# 🚀 Ngrok Public URL: https://abc123.ngrok.app
# COPY THIS URL - you'll need it to connect!
After setting up your server on Google Colab, you'll need to connect to it using the LocalLab client package. The server will display a ngrok URL that you'll use for the connection.
You can now use the client connection examples from the Client Connection & Usage section above.
Just make sure to:
For example:
# In another cell in the same Colab notebook:

# 1. Install the client package
!pip install locallab-client

# 2. Import the client
from locallab_client import SyncLocalLabClient

# 3. Connect to your ngrok URL (replace with your actual URL from Step 1)
client = SyncLocalLabClient("https://abc123.ngrok.app")  # ← REPLACE THIS with your URL!

# 4. Now you can use any of the client methods
response = client.generate("Write a poem about AI")
print(response)

# 5. Always close when done
client.close()
The power of using ngrok is that you can connect to your Colab server from anywhere:
# On your local computer, phone, or any device with Python:
pip install locallab-client

from locallab_client import SyncLocalLabClient
client = SyncLocalLabClient("https://abc123.ngrok.app")  # ← REPLACE THIS with your URL!
response = client.generate("Hello from my device!")
print(response)
client.close()
💡 Remote Access Tip: The ngrok URL lets you access your LocalLab server from any device - your phone, tablet, another computer, or share with teammates. See the Client Connection & Usage section above for more examples of what you can do with the client.
graph LR
    A[Your Application] -->|Uses| B[LocalLab Client]
    B -->|API Requests| C[LocalLab Server]
    C -->|Runs| D[AI Models]
    C -->|Optional| E[Ngrok Tunnel]
    E -->|Remote Access| F[Any Device, Anywhere]
    style E fill:#f9f,stroke:#333,stroke-width:2px
    style F fill:#bbf,stroke:#333,stroke-width:2px
If you find LocalLab helpful, please star our repository! It helps others discover the project.
FAQs
LocalLab: A lightweight AI inference server for running LLMs locally or in Google Colab with a friendly API.
We found that locallab demonstrated a healthy version release cadence and project activity because the last version was released less than a year ago. It has 1 open source maintainer collaborating on the project.
Did you know?

Socket for GitHub automatically highlights issues in each pull request and monitors the health of all your open source dependencies. Discover the contents of your packages and block harmful activity before you install or update your dependencies.
Product
We’ve redesigned the Socket dashboard with simpler navigation, less visual clutter, and a cleaner UI that highlights what really matters.

Industry Insights
Terry O’Daniel, Head of Security at Amplitude, shares insights on building high-impact security teams, aligning with engineering, and why AI gives defenders a fighting chance.

Security News
MCP spec updated with structured tool output, stronger OAuth 2.1 security, resource indicators, and protocol cleanups for safer, more reliable AI workflows.