
Product
Introducing Webhook Events for Alert Changes
Add real-time Socket webhook events to your workflows to automatically receive software supply chain alert changes in real time.
By Phil Gates-Idem - Nov 21, 2025
uiautomator2
Advanced tools


![]()
A simple, easy-to-use, and stable Android automation library.
Users still on version 2.x.x, please check 2to3 before deciding to upgrade to 3.x.x (Upgrade is highly recommended).
This framework mainly consists of two parts:
Simply put, it exposes Android automation capabilities to Python through HTTP interfaces. This design makes Python-side code writing simpler and more intuitive.
pip install uiautomator2
# Check if installation was successful, normally it will output the library version
uiautomator2 version
# or: python -m uiautomator2 version
Install element inspection tool (optional, but highly recommended):
For more detailed usage instructions, refer to: https://github.com/codeskyblue/uiautodev QQ:536481989
pip install uiautodev

# After starting from the command line, it will automatically open the browser
uiautodev
# or: python -m uiautodev
Alternatives: uiautomatorviewer, Appium Inspector
Prepare an Android phone with Developer options enabled, connect it to the computer, and ensure that adb devices shows the connected device.
Open a Python interactive window. Then, input the following commands into the window.
import uiautomator2 as u2

d = u2.connect() # Specify device serial number if multiple devices are connected
print(d.info)
# Expected output
# {'currentPackageName': 'net.oneplus.launcher', 'displayHeight': 1920, 'displayRotation': 0, 'displaySizeDpX': 411, 'displaySizeDpY': 731, 'displayWidth': 1080, 'productName': 'OnePlus5', 'screenOn': True, 'sdkInt': 27, 'naturalOrientation': True}
Example script:
import uiautomator2 as u2

d = u2.connect('Q5S5T19611004599')
d.app_start('tv.danmaku.bili', stop=True) # Start Bilibili
d.wait_activity('.MainActivityV2')
d.sleep(5) # Wait for splash screen ad to disappear
d.xpath('//*[@text="我的"]').click() # Click "My"
# Get fan count
fans_count = d.xpath('//*[@resource-id="tv.danmaku.bili:id/fans_count"]').text
print(f"Fan count: {fans_count}")
Method 1: Connect using device serial number, e.g., Q5S5T19611004599 (seen from adb devices)
import uiautomator2 as u2

d = u2.connect('Q5S5T19611004599') # alias for u2.connect_usb('123456f')
print(d.info)
Method 2: Serial number can be passed via environment variable ANDROID_SERIAL
# export ANDROID_SERIAL=Q5S5T19611004599
d = u2.connect()
Method 3: Specify device via transport_id
$ adb devices -l
Q5S5T19611004599       device 0-1.2.2 product:ELE-AL00 model:ELE_AL00 device:HWELE transport_id:6
Here you can see transport_id:6.
You can also get all connected transport_ids via
adbutils.adb.list(extended=True)Refer to https://github.com/openatx/adbutils
import adbutils # Requires version >=2.9.1
import uiautomator2 as u2
dev = adbutils.device(transport_id=6)
d = u2.connect(dev)
What is XPath:
XPath is a query language for locating content in XML or HTML documents. It uses simple syntax rules to establish a path from the root node to the desired element.
Basic Syntax:
/ - Select from the root node// - Select from any position starting from the current node. - Select the current node.. - Select the parent of the current node@ - Select attributes[] - Predicate expression, used for filtering conditionsYou can quickly generate XPath using UIAutoDev.
Common Usage:
d.xpath('//*[@text="私人FM"]').click() # Click element with text "私人FM"

# Syntactic sugar
d.xpath('@personal-fm') # Equivalent to d.xpath('//*[@resource-id="personal-fm"]')

sl = d.xpath("@com.example:id/home_searchedit") # sl is an XPathSelector object
sl.click()
sl.click(timeout=10) # Specify timeout, throws XPathElementNotFoundError if not found
sl.click_exists() # Click if exists, returns whether click was successful
sl.click_exists(timeout=10) # Wait up to 10s

# Wait for the corresponding element to appear, returns XMLElement
# Default wait time is 10s
el = sl.wait()
el = sl.wait(timeout=15) # Wait 15s, returns None if not found

# Wait for element to disappear
sl.wait_gone()
sl.wait_gone(timeout=15)

# Similar to wait, but throws XPathElementNotFoundError if not found
el = sl.get()
el = sl.get(timeout=15)

sl.get_text() # Get component text
sl.set_text("") # Clear input field
sl.set_text("hello world") # Input "hello world" into input field
For more usage, refer to XPath Interface Document
Set element search wait time (default 20s)
d.implicitly_wait(10.0) # Can also be modified via d.settings['wait_timeout'] = 10.0
print("wait timeout", d.implicitly_wait()) # get default implicit wait

# Throws UiObjectNotFoundError if "Settings" does not appear in 10s
d(text="Settings").click()
Wait timeout affects the following functions: click, long_click, drag_to, get_text, set_text, clear_text.
Information obtained via UiAutomator:
d.info
# Output
{'currentPackageName': 'com.android.systemui',
 'displayHeight': 1560,
 'displayRotation': 0,
 'displaySizeDpX': 360,
 'displaySizeDpY': 780,
 'displayWidth': 720,
 'naturalOrientation': True,
 'productName': 'ELE-AL00',
 'screenOn': True,
 'sdkInt': 29}
Get device information (based on adb shell getprop command):
print(d.device_info)
# output
{'arch': 'arm64-v8a',
 'brand': 'google',
 'model': 'sdk_gphone64_arm64',
 'sdk': 34,
 'serial': 'EMULATOR34X1X19X0',
 'version': 14}
Get screen physical size (depends on adb shell wm size):
print(d.window_size())
# device upright output example: (1080, 1920)
# device horizontal output example: (1920, 1080)
Get current App (depends on adb shell):
print(d.app_current())
# Output example 1: {'activity': '.Client', 'package': 'com.netease.example', 'pid': 23710}
# Output example 2: {'activity': '.Client', 'package': 'com.netease.example'}
# Output example 3: {'activity': None, 'package': None}
Wait for Activity (depends on adb shell):
d.wait_activity(".ApiDemos", timeout=10) # default timeout 10.0 seconds
# Output: true or false
Get device serial number:
print(d.serial)
# output example: 74aAEDR428Z9
Get device WLAN IP (depends on adb shell):
print(d.wlan_ip)
# output example: 10.0.0.1 or None
Set or get clipboard content.
clipboard/set_clipboard
# Set clipboard
d.clipboard = 'hello-world'
# or
d.set_clipboard('hello-world', 'label')

# Get clipboard
# Depends on input method (com.github.uiautomator/.AdbKeyboard)
d.set_input_ime()
print(d.clipboard)
Turn on/off screen
d.screen_on() # turn on the screen
d.screen_off() # turn off the screen
Get current screen status
d.info.get('screenOn')
Press hard/soft key
d.press("home") # press the home key, with key name
d.press("back") # press the back key, with key name
d.press(0x07, 0x02) # press keycode 0x07('0') with META ALT(0x02)
These key names are currently supported:
You can find all key code definitions at Android KeyEvent
Unlock screen
d.unlock()
# This is equivalent to
# 1. press("power")
# 2. swipe from left-bottom to right-top
Click on the screen
d.click(x, y)
Double click
d.double_click(x, y)
d.double_click(x, y, 0.1) # default duration between two clicks is 0.1s
Long click on the screen
d.long_click(x, y)
d.long_click(x, y, 0.5) # long click 0.5s (default)
Swipe
d.swipe(sx, sy, ex, ey)
d.swipe(sx, sy, ex, ey, 0.5) # swipe for 0.5s (default)
SwipeExt (Extended functionality)
d.swipe_ext("right") # Swipe right, 4 options: "left", "right", "up", "down"
d.swipe_ext("right", scale=0.9) # Default 0.9, swipe distance is 90% of screen width
d.swipe_ext("right", box=(0, 0, 100, 100)) # Swipe within the area (0,0) -> (100, 100)

# In practice, starting swipe from the midpoint for up/down swipes has a higher success rate
d.swipe_ext("up", scale=0.8)

# Can also use Direction as a parameter
from uiautomator2 import Direction

d.swipe_ext(Direction.FORWARD) # Scroll down page, equivalent to d.swipe_ext("up"), but easier to understand
d.swipe_ext(Direction.BACKWARD) # Scroll up page
d.swipe_ext(Direction.HORIZ_FORWARD) # Scroll page horizontally right
d.swipe_ext(Direction.HORIZ_BACKWARD) # Scroll page horizontally left
Drag
d.drag(sx, sy, ex, ey)
d.drag(sx, sy, ex, ey, 0.5) # drag for 0.5s (default)
Swipe points
# swipe from point(x0, y0) to point(x1, y1) then to point(x2, y2)
# time will be 0.2s between two points
d.swipe_points([(x0, y0), (x1, y1), (x2, y2)], 0.2)
Often used for pattern unlock, get relative coordinates of each point beforehand (supports percentages). For more detailed usage, refer to this post Using u2 to implement pattern unlock
Touch and drag (Beta)
This is a lower-level raw interface, feels incomplete but usable. Note: percentages are not supported here.
d.touch.down(10, 10) # Simulate press down
time.sleep(.01) # Delay between down and move, control it yourself
d.touch.move(15, 15) # Simulate move
d.touch.up(10, 10) # Simulate release
Note: click, swipe, drag operations support percentage position values. Example:
d.long_click(0.5, 0.5) means long click center of screen.
Retrieve/Set device orientation
The possible orientations:
natural or nleft or lright or rupsidedown or u (cannot be set)# retrieve orientation. the output could be "natural" or "left" or "right" or "upsidedown"
orientation = d.orientation
# WARNING: did not pass testing on my TT-M1
# set orientation and freeze rotation.
# notes: setting "upsidedown" requires Android>=4.3.
d.set_orientation('l') # or "left"
d.set_orientation("r") # or "right"
d.set_orientation("n") # or "natural"
Freeze/Un-freeze rotation
# freeze rotation
d.freeze_rotation()
# un-freeze rotation
d.freeze_rotation(False)
Take screenshot
# take screenshot and save to a file on the computer, requires Android>=4.2.
d.screenshot("home.jpg")

# get PIL.Image formatted images. Naturally, you need Pillow installed first
image = d.screenshot() # default format="pillow"
image.save("home.jpg") # or home.png. Currently, only png and jpg are supported

# get OpenCV formatted images. Naturally, you need numpy and cv2 installed first
import cv2
image = d.screenshot(format='opencv')
cv2.imwrite('home.jpg', image)

# get raw jpeg data
imagebin = d.screenshot(format='raw')
with open("some.jpg", "wb") as f:
    f.write(imagebin)
Dump UI hierarchy
# get the UI hierarchy dump content
xml = d.dump_hierarchy()

# compressed=True: include non-important nodes (default False)
# pretty: format xml (default False)
# max_depth: limit xml depth, default 50
xml = d.dump_hierarchy(compressed=False, pretty=True, max_depth=30)
Open notification or quick settings
d.open_notification()
d.open_quick_settings()
Selector is a handy mechanism to identify a specific UI object in the current window.
# Select the object with text 'Clock' and its className is 'android.widget.TextView'
d(text='Clock', className='android.widget.TextView')
Selector supports the below parameters. Refer to UiSelector Java doc for detailed information.
text, textContains, textMatches, textStartsWithclassName, classNameMatchesdescription, descriptionContains, descriptionMatches, descriptionStartsWithcheckable, checked, clickable, longClickablescrollable, enabled,focusable, focused, selectedpackageName, packageNameMatchesresourceId, resourceIdMatchesindex, instancechildren
# get the children or grandchildren
d(className="android.widget.ListView").child(text="Bluetooth")
siblings
# get siblings
d(text="Google").sibling(className="android.widget.ImageView")
children by text or description or instance
# get the child matching the condition className="android.widget.LinearLayout"
# and also its children or grandchildren with text "Bluetooth"
d(className="android.widget.ListView", resourceId="android:id/list") \
 .child_by_text("Bluetooth", className="android.widget.LinearLayout")

# get children by allowing scroll search
d(className="android.widget.ListView", resourceId="android:id/list") \
 .child_by_text(
    "Bluetooth",
    allow_scroll_search=True, # default False
    className="android.widget.LinearLayout"
  )
child_by_description is to find children whose grandchildren have
the specified description, other parameters being similar to child_by_text.
child_by_instance is to find children which have a child UI element anywhere
within its sub-hierarchy that is at the instance specified. It is performed
on visible views without scrolling.
See below links for detailed information:
getChildByDescription, getChildByText, getChildByInstancegetChildByDescription, getChildByText, getChildByInstanceAbove methods support chained invoking, e.g. for the below hierarchy:
<node index="0" text="" resource-id="android:id/list" class="android.widget.ListView" ...>
  <node index="0" text="WIRELESS & NETWORKS" resource-id="" class="android.widget.TextView" .../>
  <node index="1" text="" resource-id="" class="android.widget.LinearLayout" ...>
    <node index="1" text="" resource-id="" class="android.widget.RelativeLayout" ...>
      <node index="0" text="Wi‑Fi" resource-id="android:id/title" class="android.widget.TextView" .../>
    </node>
    <node index="2" text="ON" resource-id="com.android.settings:id/switchWidget" class="android.widget.Switch" .../>
  </node>
  ...
</node>
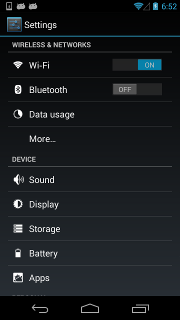
To click the switch widget right to the TextView 'Wi‑Fi', we need to select the switch widget first. However, according to the UI hierarchy, more than one switch widget exists and has almost the same properties. Selecting by className will not work. Alternatively, the below selecting strategy would help:
d(className="android.widget.ListView", resourceId="android:id/list") \
  .child_by_text("Wi‑Fi", className="android.widget.LinearLayout") \
  .child(className="android.widget.Switch") \
  .click()
relative positioning
Also, we can use the relative positioning methods to get the view: left, right, up, down.
d(A).left(B), selects B on the left side of A.d(A).right(B), selects B on the right side of A.d(A).up(B), selects B above A.d(A).down(B), selects B under A.So for the above cases, we can alternatively select it with:
## select "switch" on the right side of "Wi‑Fi"
d(text="Wi‑Fi").right(className="android.widget.Switch").click()
Multiple instances
Sometimes the screen may contain multiple views with the same properties, e.g. text. Then you will have to use the "instance" property in the selector to pick one of the qualifying instances, like below:
d(text="Add new", instance=0) # which means the first instance with text "Add new"
In addition, uiautomator2 provides a list-like API (similar to jQuery):
# get the count of views with text "Add new" on current screen
print(d(text="Add new").count)

# same as count property
print(len(d(text="Add new")))

# get the instance via index
obj = d(text="Add new")[0]
obj = d(text="Add new")[1]
# ...

# iterator
for view in d(text="Add new"):
    print(view.info)  # ...
Notes: when using selectors in a code block that walks through the result list, you must ensure that the UI elements on the screen remain unchanged. Otherwise, an Element-Not-Found error could occur when iterating through the list.
Check if the specific UI object exists
if d(text="Settings").exists: # True if exists, else False
    print("Settings button exists")

# alias of above property.
if d.exists(text="Settings"):
    print("Settings button exists")

# advanced usage
if d(text="Settings").exists(timeout=3): # wait for Settings to appear in 3s, same as .wait(3)
    print("Settings button appeared within 3 seconds")
Retrieve the info of the specific UI object
info = d(text="Settings").info
print(info)
Below is a possible output:
{
    "contentDescription": "",
    "checked": false,
    "scrollable": false,
    "text": "Settings",
    "packageName": "com.android.launcher",
    "selected": false,
    "enabled": true,
    "bounds": {
        "top": 385,
        "right": 360,
        "bottom": 585,
        "left": 200
    },
    "className": "android.widget.TextView",
    "focused": false,
    "focusable": true,
    "clickable": true,
    "childCount": 0,
    "longClickable": true,
    "visibleBounds": {
        "top": 385,
        "right": 360,
        "bottom": 585,
        "left": 200
    },
    "checkable": false
}
Get/Set/Clear text of an editable field (e.g., EditText widgets)
text_content = d(className="android.widget.EditText").get_text()  # get widget text
d(className="android.widget.EditText").set_text("My text...")  # set the text
d(className="android.widget.EditText").clear_text()  # clear the text
Get Widget center point
x, y = d(text="Settings").center()
# x, y = d(text="Settings").center(offset=(0, 0)) # left-top x, y
Take screenshot of widget
im = d(text="Settings").screenshot()
im.save("settings.jpg")
Perform click on the specific object
# click on the center of the specific ui object
d(text="Settings").click()

# wait for element to appear for at most 10 seconds and then click
d(text="Settings").click(timeout=10)

# click with offset(x_offset_ratio, y_offset_ratio) from top-left of the element
# click_x = x_offset_ratio * width + x_left_top
# click_y = y_offset_ratio * height + y_left_top
d(text="Settings").click(offset=(0.5, 0.5)) # Default: center
d(text="Settings").click(offset=(0, 0)) # click left-top
d(text="Settings").click(offset=(1, 1)) # click right-bottom

# click if exists within 10s, default timeout 0s
clicked = d(text='Skip').click_exists(timeout=10.0) # returns bool

# click until element is gone, return bool
is_gone = d(text="Skip").click_gone(maxretry=10, interval=1.0) # maxretry default 10, interval default 1.0s
Perform long click on the specific UI object
# long click on the center of the specific UI object
d(text="Settings").long_click()
# long click with duration
d(text="Settings").long_click(duration=1.0) # duration in seconds, default 0.5s
Drag the UI object towards another point or another UI object
# notes : drag cannot be used for Android<4.3.
# drag the UI object to a screen point (x, y), in 0.5 seconds
d(text="Settings").drag_to(x, y, duration=0.5)
# drag the UI object to (the center position of) another UI object, in 0.25 seconds
d(text="Settings").drag_to(text="Clock", duration=0.25)
Swipe from the center of the UI object to its edge
Swipe supports 4 directions:
leftrightup (Previously 'top')down (Previously 'bottom')d(text="Settings").swipe("right")
d(text="Settings").swipe("left", steps=10) # steps control smoothness/speed
d(text="Settings").swipe("up", steps=20) # 1 step is about 5ms, so 20 steps is about 0.1s
d(text="Settings").swipe("down", steps=20)
Two-point gesture from one pair of points to another (for pinch/zoom)
# ((start_x1, start_y1), (start_x2, start_y2)) are initial touch points
# ((end_x1, end_y1), (end_x2, end_y2)) are final touch points
# steps is the number of move steps to take
d(text="Settings").gesture((sx1, sy1), (sx2, sy2), (ex1, ey1), (ex2, ey2), steps=100)
Two-point gesture on the specific UI object (pinch in/out)
Supports two gestures:
in: from edge to center (pinch in)out: from center to edge (pinch out)# notes : pinch cannot be set until Android 4.3.
# from edge to center.
d(text="Settings").pinch_in(percent=100, steps=10) # percent of object size, steps for smoothness
# from center to edge
d(text="Settings").pinch_out(percent=100, steps=10)
Wait until the specific UI appears or disappears
# wait until the ui object appears
appeared = d(text="Settings").wait(timeout=3.0) # return bool
if appeared:
    print("Settings appeared")

# wait until the ui object is gone
gone = d(text="Settings").wait_gone(timeout=1.0) # return bool
if gone:
    print("Settings disappeared")
The default timeout is 20s. See Global Settings for more details.
Perform fling on the specific UI object (scrollable)
Possible properties:
horizontal or vertical (or horiz, vert)forward or backward or toBeginning or toEnd# fling forward(default) vertically(default)
d(scrollable=True).fling()
# fling forward horizontally
d(scrollable=True).fling.horizontal.forward()
# fling backward vertically
d(scrollable=True).fling.vertical.backward()
# fling to beginning horizontally
d(scrollable=True).fling.horizontal.toBeginning(max_swipes=1000)
# fling to end vertically
d(scrollable=True).fling.vertical.toEnd()
Perform scroll on the specific UI object (scrollable)
Possible properties:
horizontal or vertical (or horiz, vert)forward or backward or toBeginning or toEnd, or to(selector)# scroll forward(default) vertically(default)
d(scrollable=True).scroll(steps=10)
# scroll forward horizontally
d(scrollable=True).scroll.horizontal.forward(steps=100)
# scroll backward vertically
d(scrollable=True).scroll.vertical.backward()
# scroll to beginning horizontally
d(scrollable=True).scroll.horizontal.toBeginning(steps=100, max_swipes=1000)
# scroll to end vertically
d(scrollable=True).scroll.vertical.toEnd()
# scroll forward vertically until specific ui object appears
d(scrollable=True).scroll.vertical.to(text="Security")
IME APK: https://github.com/openatx/android-uiautomator-server/releases (Install this for reliable text input)
d.send_keys("Hello123abcEFG") # Send text
d.send_keys("Hello123abcEFG", clear=True) # Clear existing text then send

d.clear_text() # Clear all content in the input field

# Automatically performs Enter, Search, etc., based on input field requirements. Added in version 3.1
d.send_action()
# Can also specify the IME action, e.g., d.send_action("search"). Supports go, search, send, next, done, previous.

d.hide_keyboard() # Hide the soft keyboard
When send_keys is used, it prioritizes using the clipboard for input. If the clipboard interface is unavailable, it will attempt to install and use an auxiliary IME.
print(d.current_ime()) # Get current IME ID (package/class)
For more, refer to: IME_ACTION_CODE
last_toast_message = d.toast.get_message(wait_timeout=5, default=None) # Get last toast message text within 5s
print(last_toast_message)
d.toast.reset() # Clear last toast message cache
# d.toast.show("Hello", duration=3) # Show a toast (requires special permissions)
Note: This interface is not highly recommended. It's better to check for pop-ups before clicking elements.
The current watch_context uses threading and checks every 2 seconds.
Currently, only click is a trigger operation.
with d.watch_context() as ctx:
    # When "Download Now" or "Update Now" and "Cancel" buttons appear simultaneously, click "Cancel"
    ctx.when("^(立即下载|立即更新)$").when("取消").click()
    ctx.when("同意").click()
    ctx.when("确定").click()
    # The above three lines execute immediately without waiting.

    ctx.wait_stable() # Start pop-up monitoring and wait for the interface to stabilize (stable if no pop-ups in two check cycles)

    # Use the call function to trigger a callback
    # call supports two parameters, d and el, order doesn't matter, can be omitted. If passed, variable names must be correct.
    # e.g., When an element matching "Midsummer Night" appears, click the back button
    ctx.when("仲夏之夜").call(lambda d: d.press("back"))
    ctx.when("确定").call(lambda el: el.click())

    # Other operations

# For convenience, you can also use the default pop-up monitoring logic in the code
# Below is the current built-in default logic. You can join the group and @ the owner to add new logic, or submit a PR directly.
    # when("继续使用").click()
    # when("移入管控").when("取消").click()
    # when("^(立即下载|立即更新)$").when("取消").click()
    # when("同意").click()
    # when("^(好的|确定)$").click()
with d.watch_context(builtin=True) as ctx:
    # Add on top of existing logic
    ctx.when("@tb:id/jview_view").when('//*[@content-desc="图片"]').click()

    # Other script logic
Alternative way:
ctx = d.watch_context()
ctx.when("设置").click()
ctx.wait_stable() # Wait until the interface no longer has pop-ups

ctx.start() # if not using with statement
# ... do something ...
ctx.stop() # or ctx.close()
import uiautomator2 as u2
u2.settings['HTTP_TIMEOUT'] = 60 # Default 60s, http default request timeout
Other configurations are mostly centralized in d.settings. Configurations may be added or removed based on future needs.
print(d.settings)
# Output example:
# {'operation_delay': (0, 0), # (before_op_delay, after_op_delay) in seconds
#  'operation_delay_methods': ['click', 'swipe'], # methods to apply delay
#  'wait_timeout': 20.0, # default element wait timeout (native operations, xpath plugin wait time)
#  'xpath_debug': False, # enable xpath debug
#  'xpath_timeout': 10.0 # default xpath wait timeout
# }


# Configure 0.5s delay before click, 1s delay after click
d.settings['operation_delay'] = (0.5, 1)

# Modify methods affected by delay
# double_click, long_click correspond to 'click'
d.settings['operation_delay_methods'] = ['click', 'swipe', 'drag', 'press']
d.settings['wait_timeout'] = 20.0 # Default control wait time

d.settings['max_depth'] = 50 # Default 50, limits dump_hierarchy returned element depth
When settings are deprecated due to version upgrades, a DeprecatedWarning will be shown, but no exception will be raised.
>>> d.settings['click_before_delay'] = 1
# [W 200514 14:55:59 settings:72] d.settings['click_before_delay'] is deprecated: Use operation_delay instead
UiAutomator timeout settings (hidden methods):
>>> d.jsonrpc.setConfigurator({"waitForIdleTimeout": 100, "waitForSelectorTimeout": 0})
# Check current configurator settings
>>> print(d.jsonrpc.getConfigurator())
# {'actionAcknowledgmentTimeout': 3000,
#  'keyInjectionDelay': 0,
#  'scrollAcknowledgmentTimeout': 200,
#  'waitForIdleTimeout': 100,
#  'waitForSelectorTimeout': 0}
To prevent client program timeouts, waitForIdleTimeout and waitForSelectorTimeout are currently set to 0 by default by uiautomator2 itself (not by the underlying uiautomator server).
Refs: Google uiautomator Configurator
This part showcases how to perform app management.
We only support installing an APK from a URL or local path.
# From URL
d.app_install('http://some-domain.com/some.apk')

# From local path
# d.app_install('/path/to/your/app.apk') # This functionality might depend on adbutils or direct adb calls.
# For local path, usually you'd use adbutils:
# adb = adbutils.AdbClient(host="127.0.0.1", port=5037)
# device = adb.device(serial=d.serial)
# device.install("/path/to/your/app.apk")
# Or ensure atx-agent is installed and use its features if available.
# The simplest way with uiautomator2 if atx-agent is present:
# d.shell(['pm', 'install', '/path/to/app.apk']) # if apk is already on device
# d.push('/local/path/app.apk', '/data/local/tmp/app.apk')
# d.shell(['pm', 'install', '/data/local/tmp/app.apk'])
# Default method: first parses APK's mainActivity via atx-agent, then calls am start -n $package/$activity
d.app_start("com.example.hello_world")

# Use monkey -p com.example.hello_world -c android.intent.category.LAUNCHER 1 to start
# This method has a side effect: it automatically turns off the phone's rotation lock.
d.app_start("com.example.hello_world", use_monkey=True) # start with package name

# Start app by specifying main activity, equivalent to calling am start -n com.example.hello_world/.MainActivity
d.app_start("com.example.hello_world", ".MainActivity")

# Stop app before starting
d.app_start("com.example.hello_world", stop=True)
# equivalent to `am force-stop`, thus you could lose data
d.app_stop("com.example.hello_world")
# equivalent to `pm clear` (clears app data)
d.app_clear('com.example.hello_world')
# stop all
d.app_stop_all()
# stop all apps except for com.examples.demo
d.app_stop_all(excludes=['com.examples.demo'])
info = d.app_info("com.example.demo")
print(info)
# expect output
# {
#    "mainActivity": "com.github.uiautomator.MainActivity",
#    "label": "ATX",
#    "versionName": "1.1.7",
#    "versionCode": 1001007,
#    "size": 1760809 # size in bytes
# }

# save app icon
img = d.app_icon("com.example.demo") # Returns a PIL.Image object
if img:
    img.save("icon.png")
running_apps = d.app_list_running()
print(running_apps)
# expect output
# ["com.xxxx.xxxx", "com.github.uiautomator", "xxxx"]
pid = d.app_wait("com.example.android") # Wait for app to run, returns pid (int) or 0 if timeout
if not pid:
    print("com.example.android is not running")
else:
    print(f"com.example.android pid is {pid}")

# Wait for app to be in the foreground
pid = d.app_wait("com.example.android", front=True)
if pid:
    print("com.example.android is in foreground")

# Set custom timeout (default 20.0 seconds)
pid = d.app_wait("com.example.android", timeout=10.0)
Push a file to the device
# push to a folder (src can be local path or BytesIO)
d.push("foo.txt", "/sdcard/") # Pushes foo.txt to /sdcard/foo.txt
# push and rename
d.push("foo.txt", "/sdcard/bar.txt")
# push fileobj
import io
with io.BytesIO(b"file content") as f:
    d.push(f, "/sdcard/from_io.txt")
# push and change file access mode (mode is int, e.g., 0o755)
d.push("foo.sh", "/data/local/tmp/", mode=0o755) # Pushes to /data/local/tmp/foo.sh
Pull a file from the device
# pull /sdcard/tmp.txt to local file tmp.txt
d.pull("/sdcard/tmp.txt", "tmp.txt")

# FileNotFoundError will raise if the file is not found on the device
try:
    d.pull("/sdcard/some-file-not-exists.txt", "tmp.txt")
except FileNotFoundError:
    print("File not found on device")

# Pull file content as bytes
# content_bytes = d.pull("/sdcard/tmp.txt") # This is not a standard feature, use sync.read_bytes for this
# For reading content directly, use the sync object:
# content = d.sync.read_bytes("/sdcard/tmp.txt")
# Grant all runtime permissions (requires Android 6.0+ and atx-agent)
# d.app_auto_grant_permissions("io.appium.android.apis") # This might be an older or specific helper

# A more common way to grant permissions is via adb shell:
# d.shell(['pm', 'grant', 'io.appium.android.apis', 'android.permission.READ_CONTACTS'])

# Open URL scheme
d.open_url("appname://appnamehost")
# same as
# adb shell am start -a android.intent.action.VIEW -d "appname://appnamehost"
Session represents an app lifecycle. Can be used to start app, detect app crash.
Launch and close app
sess = d.session("com.netease.cloudmusic") # Starts NetEase Cloud Music
# ... perform operations within the session context ...
# sess(text="Play").click()
sess.close() # Stops NetEase Cloud Music
# sess.restart() # Cold starts NetEase Cloud Music (stops then starts)
Use python with to launch and close app
with d.session("com.netease.cloudmusic") as sess:
    # sess(text="Play").click()
    # App will be closed automatically when exiting the 'with' block
    pass
Attach to the running app
# Launch app if not running, skip launch if already running
sess = d.session("com.netease.cloudmusic", attach=True)
Detect app crash
# When app is still running
# sess(text="Music").click() # operation goes normal

# If app crashes or quits
# sess(text="Music").click() # raises SessionBrokenError
# other function calls under session will raise SessionBrokenError too
# check if session is ok.
# Warning: function name may change in the future
if sess.running(): # True or False
    print("Session is active")
else:
    print("Session is not active (app might have crashed or closed)")
Normally, when the Python program exits, the UiAutomator service on the device also exits. However, you can also stop the service via an API call.
d.uiautomator.stop() # Stops the uiautomator service on the device
# or d.service("uiautomator").stop()
Print out the HTTP request information behind the code.
>>> d.debug = True # This enables logging for uiautomator2 library
>>> print(d.info)
# Example output showing HTTP request/response
# 12:32:47.182 $ curl -X POST -d '{"jsonrpc": "2.0", "id": "...", "method": "deviceInfo"}' 'http://127.0.0.1:PORT/jsonrpc/0'
# 12:32:47.225 Response >>>
# {"jsonrpc":"2.0","id":"...","result":{...}}
# <<< END
For more structured logging:
import logging
from uiautomator2 import set_log_level

set_log_level(logging.DEBUG) # or logging.INFO

# Or configure manually
# logger = logging.getLogger("uiautomator2")
# logger.setLevel(logging.DEBUG)
# # setup handler, formatter etc.
$device_ip represents the device's IP address.
To specify a device, pass --serial, e.g., python -m uiautomator2 --serial bff1234 <SubCommand>. SubCommand can be screenshot, current, etc.
1.0.3 Added:
python -m uiautomator2is equivalent touiautomator2
screenshot: Take a screenshot
uiautomator2 screenshot screenshot.jpg
# With specific device
uiautomator2 --serial <YOUR_DEVICE_SERIAL> screenshot screenshot.jpg
copy-assets: Copy assets/ to current directory
Used for pyinstaller、nuitka
current: Get current package name and activity
uiautomator2 current
# Output example:
# {
#     "package": "com.android.settings",
#     "activity": ".Settings",
#     "pid": 12345
# }
uninstall: Uninstall app
uiautomator2 uninstall <package-name> # Uninstall one package
uiautomator2 uninstall <package-name-1> <package-name-2> # Uninstall multiple packages
# uiautomator2 uninstall --all # Uninstall all third-party apps (Be careful!)
stop: Stop app
uiautomator2 stop com.example.app # Stop one app
# uiautomator2 stop --all # Stop all apps (Be careful!)
doctor: Check uiautomator2 environment
uiautomator2 doctor
# Example output:
# [I 2024-04-25 19:53:36,288 __main__:101 pid:15596] uiautomator2 is OK
install: Install APK from URL or local path
uiautomator2 install http://example.com/app.apk
uiautomator2 install /path/to/local/app.apk
clear: Clear app data
uiautomator2 clear <package-name>
start: Start app
uiautomator2 start <package-name>
uiautomator2 start <package-name>/<activity-name>
version: Show uiautomator2 version
uiautomator2 version
Reference: https://www.cnblogs.com/insist8089/p/6898181.html (Chinese)
com.android.uiautomator.core.* is deprecated. Use android.support.test.uiautomator.* (now androidx.test.uiautomator.*).adb shell uiautomator runtest UiTest.jar -c package.name.ClassNameadb shell am instrument -w -r -e debug false -e class package.name.ClassName#methodName package.name.test/androidx.test.runner.AndroidJUnitRunnerSystem.out.print echoes to the execution terminal; 2.0: Output to Logcat.UiAutomatorTestCase, test methods must start with test.(Note: uiautomator2 Python library abstracts away many of these Java-level differences, but understanding the underlying UiAutomator evolution can be helpful.)
(Order matters, additions welcome)
FAQs
uiautomator for android device
We found that uiautomator2 demonstrated a healthy version release cadence and project activity because the last version was released less than a year ago. It has 1 open source maintainer collaborating on the project.
Did you know?

Socket for GitHub automatically highlights issues in each pull request and monitors the health of all your open source dependencies. Discover the contents of your packages and block harmful activity before you install or update your dependencies.
Product
Add real-time Socket webhook events to your workflows to automatically receive software supply chain alert changes in real time.

Security News
ENISA has become a CVE Program Root, giving the EU a central authority for coordinating vulnerability reporting, disclosure, and cross-border response.

Product
Socket now scans OpenVSX extensions, giving teams early detection of risky behaviors, hidden capabilities, and supply chain threats in developer tools.