benoitfreslon-layoutmanager
A visual layout manager. Build with Flash IDE for the Starling framework and compatible with the CitrusEngine framework.
Usefull to build simple game interfaces, huds, menus, popups, etc.
Flash Pro IDE to Starling in one click

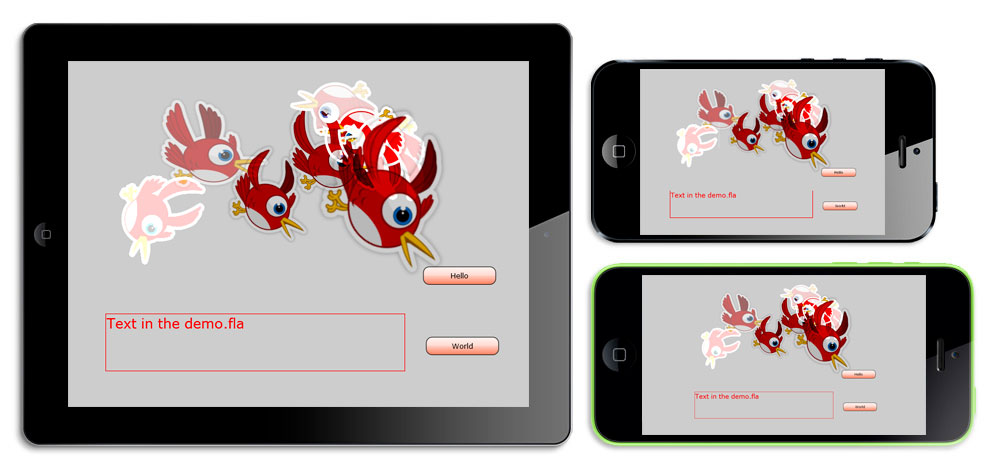
Multiresolution support

Description
- Use Flash IDE to build visual layouts.
- Build your layouts with native Starling objects (Sprite, Image, TextField, Button).
- Use the custom Flash components and use the LayoutManager class to display the layout in real time in your game.
- Use the basic class of Starling or use your own classes.
- Use native properties of Starling classes (texture, text, color, font, etc.).
- Use instance name in Flash IDE and get objects in your class.
- Add custom parameters in your own visual objects.
- Use the Sprite container to embed several objects in one visual object.
- Just build one lightweight .SWC file with Flash IDE with all your layouts.
- [NEW] Multiresolution support: All layouts are scaled according the screen size and the screen format. Useful for mobile applications.
TODO
- Build AIR Application.
- Display assets in the layout editor.
Default values
For all objects, including the layouts, the origin is in the center of the MovieClip.
All objects has a default className (eg: BFImage > starling.display.Image).
Custom parameters
Set a className parameter that extends the current class or use the basic class
(Eg: If MyTextField extends starling.text.TextField your can set the className parameter : MyTextField).
You also can create a new MovieClip in the layout editor in Flash IDE that extends a BFObject to set default parameters.
var params:Object = {className:"MyCustomClass", upState: "btn_start_upState", downState: "btn_start_downState"};
Add parameters variables if you want to set default parameters and additional parameters in the MovieClip in Flash IDE:
var params:Object = {myCustomParam: 42};
Then add customs parameters in your custom class MyCustomClass like this:
public var myCustomParam:int;
Set the instance name of all objects in Flash IDE.
Then the name of the variables should match with the instance name.
Finally declare public variables in your class and use the variable type you set.
public var btn_start:Button;
All parameter values are defined when the Layout is loaded.
BFSprite - starling.display.Sprite
A sprite container. Add objects inside this Sprite with Flash IDE.
BFImage - starling.display.Image
Set the texture name in the component parameter to load the Image with a texture.
Parameters:
BFButton - startling.display.ButtonExtented
The simple Button from Starling extended.
Set the onTouch method in the layout editor to automatically add a touch event.
Parameters:
- upState
- downState
- onTouch
- text
- fontName
- fontSize
- color
- ...
BFTextField - startling.text.TextField
Parameters:
- text
- fontName
- fontSize
- color
- ...
INSTALLATION
- Create an ActionScript 3.0 project
- Add the Starling framework or the CitrusEngine framework with the Starling library in your project
- Add the benoitfreslon-layoutmanager/src and the benoitfreslon-layoutmanager/srceditor in the source path of your ActionScript 3.0 project
- Copy the sample.fla file from the benoitfreslon-layoutmanager/sample folder in your own folder
- Open the sample.fla file with Flash IDE and set the source path to the src folder: benoitfreslon-layoutmanager/srceditor
- Build the sample.swc with Flash IDE
- Add the sample.swc in the library project
USAGE
In Flash IDE
- In the sample.fla create a new MovieClip symbol
- Check Add to AciontScript
- Set a class name like MainMenuLayout that extends MovieClip
- Click OK
- Add instances of BFImage, BFButton, BFTextField, etc.
- Set an instance name if you want and set the onTouch method if you want in the BFButton instance
- Move or rotate objects
- Customize the components in the Component parameters panel
- When it's done compile the swc
Source example
In your code source ;
- Create a starling.display.Sprite class or a citrus.core.starling.StarlingState
- Import the LayoutManager class in your class:
import com.benoitfreslon.layoutmanager.LayoutManager;
- Add all your assets in your AssetManager instance like this :
import starling.utils.AssetManager;
and
var assets:AssetManager = new AssetManager();
- Create an instance of the LayoutManager class to load a layout.
- (Optional) Define the callBack method
onLoad in your class.
var ll:LayoutManager = new LayoutManager();
ll.loadLayout(this, MainMenuLayout, assets, onLoad);
Source code example
package
{
	import starling.display.Sprite;
	import com.benoitfreslon.layoutmanager.LayoutManager;
	import starling.events.Event;

	/**
	 * ...
	 * @author Benoît Freslon
	 */

    public class Game extends Sprite
    {
		// Embed the Atlas XML
		[Embed( source="../../demo/assets/atlas.xml",mimeType="application/octet-stream" )]
		static public const AtlasXml : Class;

		// Embed the Atlas Texture:
		[Embed( source="../../demo/assets/atlas.png" )]
		static public const AtlasTexture : Class;

		private var assets:AssetManager;

        public function Game()
        {
			super();
			// Define baseWidth and baseHeight in order to scale all layouts according the screen size. Useful for mobile applications.
			LayoutManager.baseWidth = 800;
			LayoutManager.baseHeight = 600;

			var texture : Texture = Texture.fromBitmap( new AtlasTexture() );
			var xml : XML = XML( new AtlasXml() );
			var atlas : TextureAtlas = new TextureAtlas( texture, xml );
			assets = new AssetManager();
			assets.addTextureAtlas( "assets", atlas );

			var ll:LayoutManager = new LayoutManager()
			ll.loadLayout(this, DemoLayout, assets, onLoad);
        }

		private function onLoad():void
		{
			// Layout loaded a displayed
		}
    }
}


