
Security News
MCP Steering Committee Launches Official MCP Registry in Preview
The MCP Steering Committee has launched the official MCP Registry in preview, a central hub for discovering and publishing MCP servers.
By Sarah Gooding - Sep 09, 2025
@cds-au/holder-sdk
Advanced tools
NodeJS middleware to handle error generation in line with Australian Consumer Data Standards technical specifications
In accordance with the Australian Consumer Data Rights (CDR) legislation, the Data Standards Body (DSB) specifies the Consumer Data Standards (CDS), which detail technical requirements for API endpoints across various industry sectors. In particular, these standards mandate that error payloads conform to a specific format and include specific error codes, among other requirements. Because these error handling requirements across a large number of endpoints, coding these can be repetitive and therefore error prone.
The JS Holder SDK is a boilerplate implementation designed to streamline compliance with the CDS. Designed for use in NodeJS/ExpressJS applications, this SDK provides essential middleware functions that automate the generation of compliant error payloads and ensure robust error handling. By integrating this SDK, developers can significantly reduce the complexity and potential for error in their API implementations, ensuring that error payloads and other API responses adhere to mandated formats and error handling protocols.
This SDK is intended for developers implementing CDR-compliant APIs in NodeJS/ExpressJS applications. It reduces the complexity and repetition involved in coding compliant APIs by providing ready-to-use middleware that handles common requirements such as error checking, header validation, and endpoint verification.
The DSB offers the JS Holder SDK as an npm package available in the NPM registry. You can easily install this package in your project using npm. For more information, refer to the Quick Start section below.
You can also set up the JS Holder SDK repository locally to customise and enhance the SDK by adding new features or adapting existing functionality to better suit your specific project needs. For more information, refer to the Local Setup and Customisation section below.
Explore the key middleware functions provided by the JS Holder SDK in the Middleware Functions section below.
To integrate the SDK into your NodeJS/ExpressJS application, ensure npm is installed on your system and run the following command:
npm install @cds-au/holder-sdk
Import the necessary middleware functions and configure them as needed:
import { cdrHeaderValidator, cdrResourceValidator, cdrScopeValidator, cdrEndpointValidator } from '@cds-au/holder-sdk';

// Example configuration
const dsbOptions = {
    // configuration details here
};

app.use(cdrHeaderValidator(dsbOptions));
The middleware functions cdrEndpointValidator, cdrHeaderValidator, cdrTokenValidator, and cdrJwtScopes can optionally accept a configuration object (CdrConfig) that specifies each endpoint the application implements, defined by the request type (GET/POST/DELETE) and path as outlined in the CDS. If the config parameter is not provided, the middleware defaults to using predefined endpoints (DefaultEnergyEndpoints, DefaultBankingEndpoints, and DefaultCommonEndpoints) specified in this repository.
const implementedEndpoints = [
    {
        "requestType":
        "GET",
        "requestPath": "/banking/payments/scheduled",
        "minSupportedVersion": 1,
        "maxSupportedVersion": 1
    },
    {
        "requestType": "GET",
        "requestPath": "/banking/accounts/{accountId}/balance",
        "minSupportedVersion": 1,
        "maxSupportedVersion": 1
    }
]

const config: CdrConfig = {
    endpoints: implementedEndpoints
}

app.use(cdrHeaderValidator(config))
The middleware functions cdrResourceValidator and cdrScopeValidator mandate an implementation of IUserInterface as a parameter, requiring access to scopes from the access token generated by the Identity and Access Management System (IdAM), which requires passing an implementation of IUserService by the consumer application.
The js-holder-sdk-demo project provides a basic implementation illustrating how the middleware can be used in a NodeJS/ ExpressJS application.
Note: The demo project with this library was tested with NodeJS v18.12.1
Below is a detailed overview of the key middleware functions provided by the JS Holder SDK:
Validates request headers and constructs CDR-compliant error responses as necessary.
| Scenario | Description |
|---|---|
| No x-v header is provided in the request | - Http status code 400- An ErrorList is returned with Header/Missing. |
| Invalid x-v header is provided with the request, eg alpha character | - Http status code 400- An ErrorList is returned with Header/Invalid. |
| Invalid x-min-v header is provided with the request | Http status code 400- An ErrorList is returned with Header/Invalid. |
| A requested version is not supported | - Http status code 406- An ErrorList is returned with Header/UnsupportedVersion. |
| No x-fapi-interaction-id in the request | An x-fapi-interaction-id header is set in the response header |
| Request has x-fapi-interaction-id header | The x-fapi-interaction-id from the request is returned with the response header |
| Invalid x-fapi-interaction-id header is provided with the request | - Http status code 400- An ErrorList is returned with Header/Invalid. |
Checks if the request URL corresponds to a CDR endpoint and constructs CDR-compliant error responses as necessary.
| Scenario | Description |
|---|---|
| Endpoint not implemented | - Http status code 404- An ErrorList is returned with Resource/NotImplemented. |
| Endpoint not is not a CDR endpoint | - Http status code 404- An ErrorList is returned with Resource/NotFound. |
Performs scope validation against the API endpoint requirements using the scopes available in the access token.
| Scenario | Description |
|---|---|
| Invalid scope in access token | - Http status code 403- An ErrorList is returned with Authorisation/InvalidScope |
Alternative Scope Validation: The combination of cdrJwtScopes and cdrTokenValidator functions can be used to validate scopes, and therefore performs a function similar to the cdrScopeValidator. It does however make assumptions on the Identity Provider implementation. Nevertheless, depending on the precise data holder implementation this may be more suitable than the IUsserInterface.
Ensures that the resource-specific identifiers like account IDs have proper consent for access within API calls.
| Scenario | Description |
|---|---|
| Access to the resource url has not been consented to | Http status code 404 |
Handles some basic authorisation checks and constructs CDR-compliant error responses as necessary.
Note that the functionality here requires access to the scopes contained from access token generated by the IdAM (Identity and Access Management System). For a common scenario where the access token is being issued as a JWT, the cdrJwtScopes middleware can be utilised to extend the Request object accordingly.
| Scenario | Description |
|---|---|
| No authorisation header present in Request | Http status code 401 |
| Authorisation header is present, invalid scope in access token | - Http status code 403- An ErrorList is returned with Authorisation/InvalidScope |
Extends the Request object and make the scopes contained in the access token accessible from the Request object.
This can be used for any IdAM which returns the access token as an JWT and the scopes property is either an array of strings or a space separated string. The middleware will expect a configuration object.
| Scenario | Description |
|---|---|
| The access token from the IdAM is a JWT and scopes are an array of strings | The request object will be extended |
| The access token from the IdAM is a JWT and scopes are a space separated string | The request object will be extended |
This function will return a ReponseErrorListV2. It will use the standard DSB error code (eg urn:au-cds:error:cds-banking:
Authorisation/InvalidBankingAccount) depending on the errorMessageId being passed in
| Parameter | Description |
|---|---|
| errorMessageId | an identifier as per DsbStandardError defintions |
| errorDetail | which will be the details property on the returned error object |
| errorList (optional) | an existing error list. The error object wil be appendd to that list |
| metaData (optional) | options metadata object |
Example:
let msg = buildErrorMessage(DsbStandardError.INVALID_BANK_ACCOUNT, "123456");

// returns this as msg
    "errors": [
        {
            "code": "urn:au-cds:error:cds-banking:Authorisation/InvalidBankingAccount",
            "title": "Invalid Banking Account",
            "detail": "123456"
        }
    ]
| Parameter | Description |
|---|---|
| req | The request object |
| totalRecords | The total number of records in the dataset |
Example:
if the req object has a url https://www.dsb.gov.au/cds-au/v1/energy/plans?category=ALL&page=4&page-size=2
getLinksPaginated(req, 1000)
will return
{
    self: "https://www.dsb.gov.au/cds-au/v1/energy/plans?category=ALL&page=4&page-size=2",
    next: "https://www.dsb.gov.au/cds-au/v1/energy/plans?category=ALL&page=5&page-size=2",
    prev: "https://www.dsb.gov.au/cds-au/v1/energy/plans?category=ALL&page=3&page-size=2",
    first: "https://www.dsb.gov.au/cds-au/v1/energy/plans?category=ALL&page=1&page-size=2",
    last: "https://www.dsb.gov.au/cds-au/v1/energy/plans?category=ALL&page=500&page-size=2"
}
Will return a MetaPaginated object
| Parameter | Description |
|---|---|
| totalRecords | The total number of records in the dataset |
| query (optional) | The query property from the Request object |
Example:
getMetaPaginated(1000)
This use the default page-size=25 since no query parameters are passes in.
Therefore, this will return
{
    totalRecords: 1000,
    totalPages: 40
}
This will return a subset of data depending on the page-size and page properties from the Request query object
| Parameter | Description |
|---|---|
| data | an array of data objects. |
| query | typycally this will be the query property from the Request object |
Example:
let data: any = [
            {
                "amount": "4439.65",
                "description": "payment transaction at Durgan and Sons using card ending with ***(...6407) for XAU 365.41 in account ***06028839",
            },
            {

                "accountId": "d339f6db-cd8d-413f-95e4-ec9e8e9d806f",
                "amount": "318.99",
                "description": "payment transaction at Gleason - Fadel using card ending with ***(...6904) for SYP 219.10 in
            },
            {
                "extendedData": {
                    "service": "X2P1.01",
                    "payer": "Angelica Beatty"
                },
            },
            {
                "amount": "4013.89",
                "description": "payment transaction at Watson, Braun and Bartell using card ending with ***(...6802) for GEL 281.13 in account ***74872985",
                "isDetailAvailable": true,
            },
            {
                "executionDateTime": "2024-01-20T12:49:36.782Z",
                "apcaNumber": "572618"
            },
]
and a query object
let query: any = {
   "page-size": "2",
   "page" : "2"
}
then paginateData(data, query) returns
    [
            {
                "extendedData": {
                    "service": "X2P1.01",
                    "payer": "Angelica Beatty"
                },
            },
            {
                "amount": "4013.89",
                "description": "payment transaction at Watson, Braun and Bartell using card ending with ***(...6802) for GEL 281.13 in account ***74872985",
                "isDetailAvailable": true,
            }
    ]
Before you begin, ensure you have the following installed:
Create a fork of this repository. To do this, click the "Fork" button on the top right corner of this page.
After forking the repository, clone it to your local machine. You can do this by running the following command in your terminal or command prompt:
git clone https://github.com/your-username/project-name.git
Replace your-username with your GitHub username and project-name with the name of your repository.
Once the repository is cloned, navigate to the project directory by running:
cd project-name
Replace project-name with the name of the repository.
To build the repository and use the library without installing it globally:
npm installnpm run buildnpm linkTo test your changes:
npm run testWe welcome contributions from the community! If you'd like to contribute to this project, please follow these simple steps:
Create a new branch for your work from the master branch:
git checkout -b feature/your-feature-name
Begin making your changes or contributions.
Follow the instructions in the project repository to run and test your changes locally.
Commit your changes with clear and concise commit messages.
Push your changes to your forked repository.
Open a pull request (PR) using the master branch in the original repository as the destination branch. Include a detailed description of your changes and the problem you are addressing.
Engage in the discussion on your PR and make any necessary adjustments based on feedback from maintainers and other contributors.
Once your PR is approved and all tests pass, it will be merged into the project.
To ensure your implementation works as expected, please test the integrated middleware within your application context. Example tests can be run using any JavaScript testing framework, such as Jest or Mocha.
Encountered an issue? We're here to help. Please visit our issue reporting guidelines for submitting an issue.
Join our newsletter to receive the latest updates, release notes, and alerts. Subscribe here.
The artefact is released under the MIT License, which allows the community to use and modify it freely.
The artefacts in this repository are offered without warranty or liability, in accordance with the MIT licence.
The Data Standards Body (DSB) develops these artefacts in the course of its work, in order to perform quality assurance on the Australian Consumer Data Right Standards (Data Standards).
The DSB makes this repository, and its artefacts, public on a non-commercial basis in the interest of supporting the participants in the CDR ecosystem.
The resources of the DSB are primarily directed towards assisting the Data Standards Chair for developing the Data Standards.
Consequently, the development work provided on the artefacts in this repository is on a best-effort basis, and the DSB acknowledges the use of these tools alone is not sufficient for, nor should they be relied upon with respect to accreditation, conformance, or compliance purposes.
FAQs
NodeJS middleware to handle error generation in line with Australian Consumer Data Standards technical specifications
The npm package @cds-au/holder-sdk receives a total of 0 weekly downloads. As such, @cds-au/holder-sdk popularity was classified as not popular.
We found that @cds-au/holder-sdk demonstrated a healthy version release cadence and project activity because the last version was released less than a year ago. It has 0 open source maintainers collaborating on the project.
Did you know?

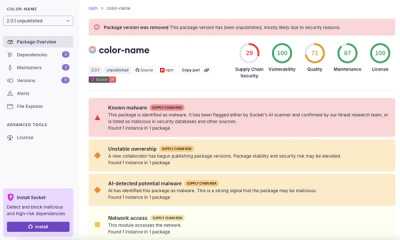
Socket for GitHub automatically highlights issues in each pull request and monitors the health of all your open source dependencies. Discover the contents of your packages and block harmful activity before you install or update your dependencies.
Security News
The MCP Steering Committee has launched the official MCP Registry in preview, a central hub for discovering and publishing MCP servers.
Product
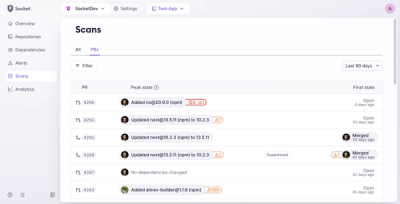
Socket’s new Pull Request Stories give security teams clear visibility into dependency risks and outcomes across scanned pull requests.
Research
/Security News
npm author Qix’s account was compromised, with malicious versions of popular packages like chalk-template, color-convert, and strip-ansi published.