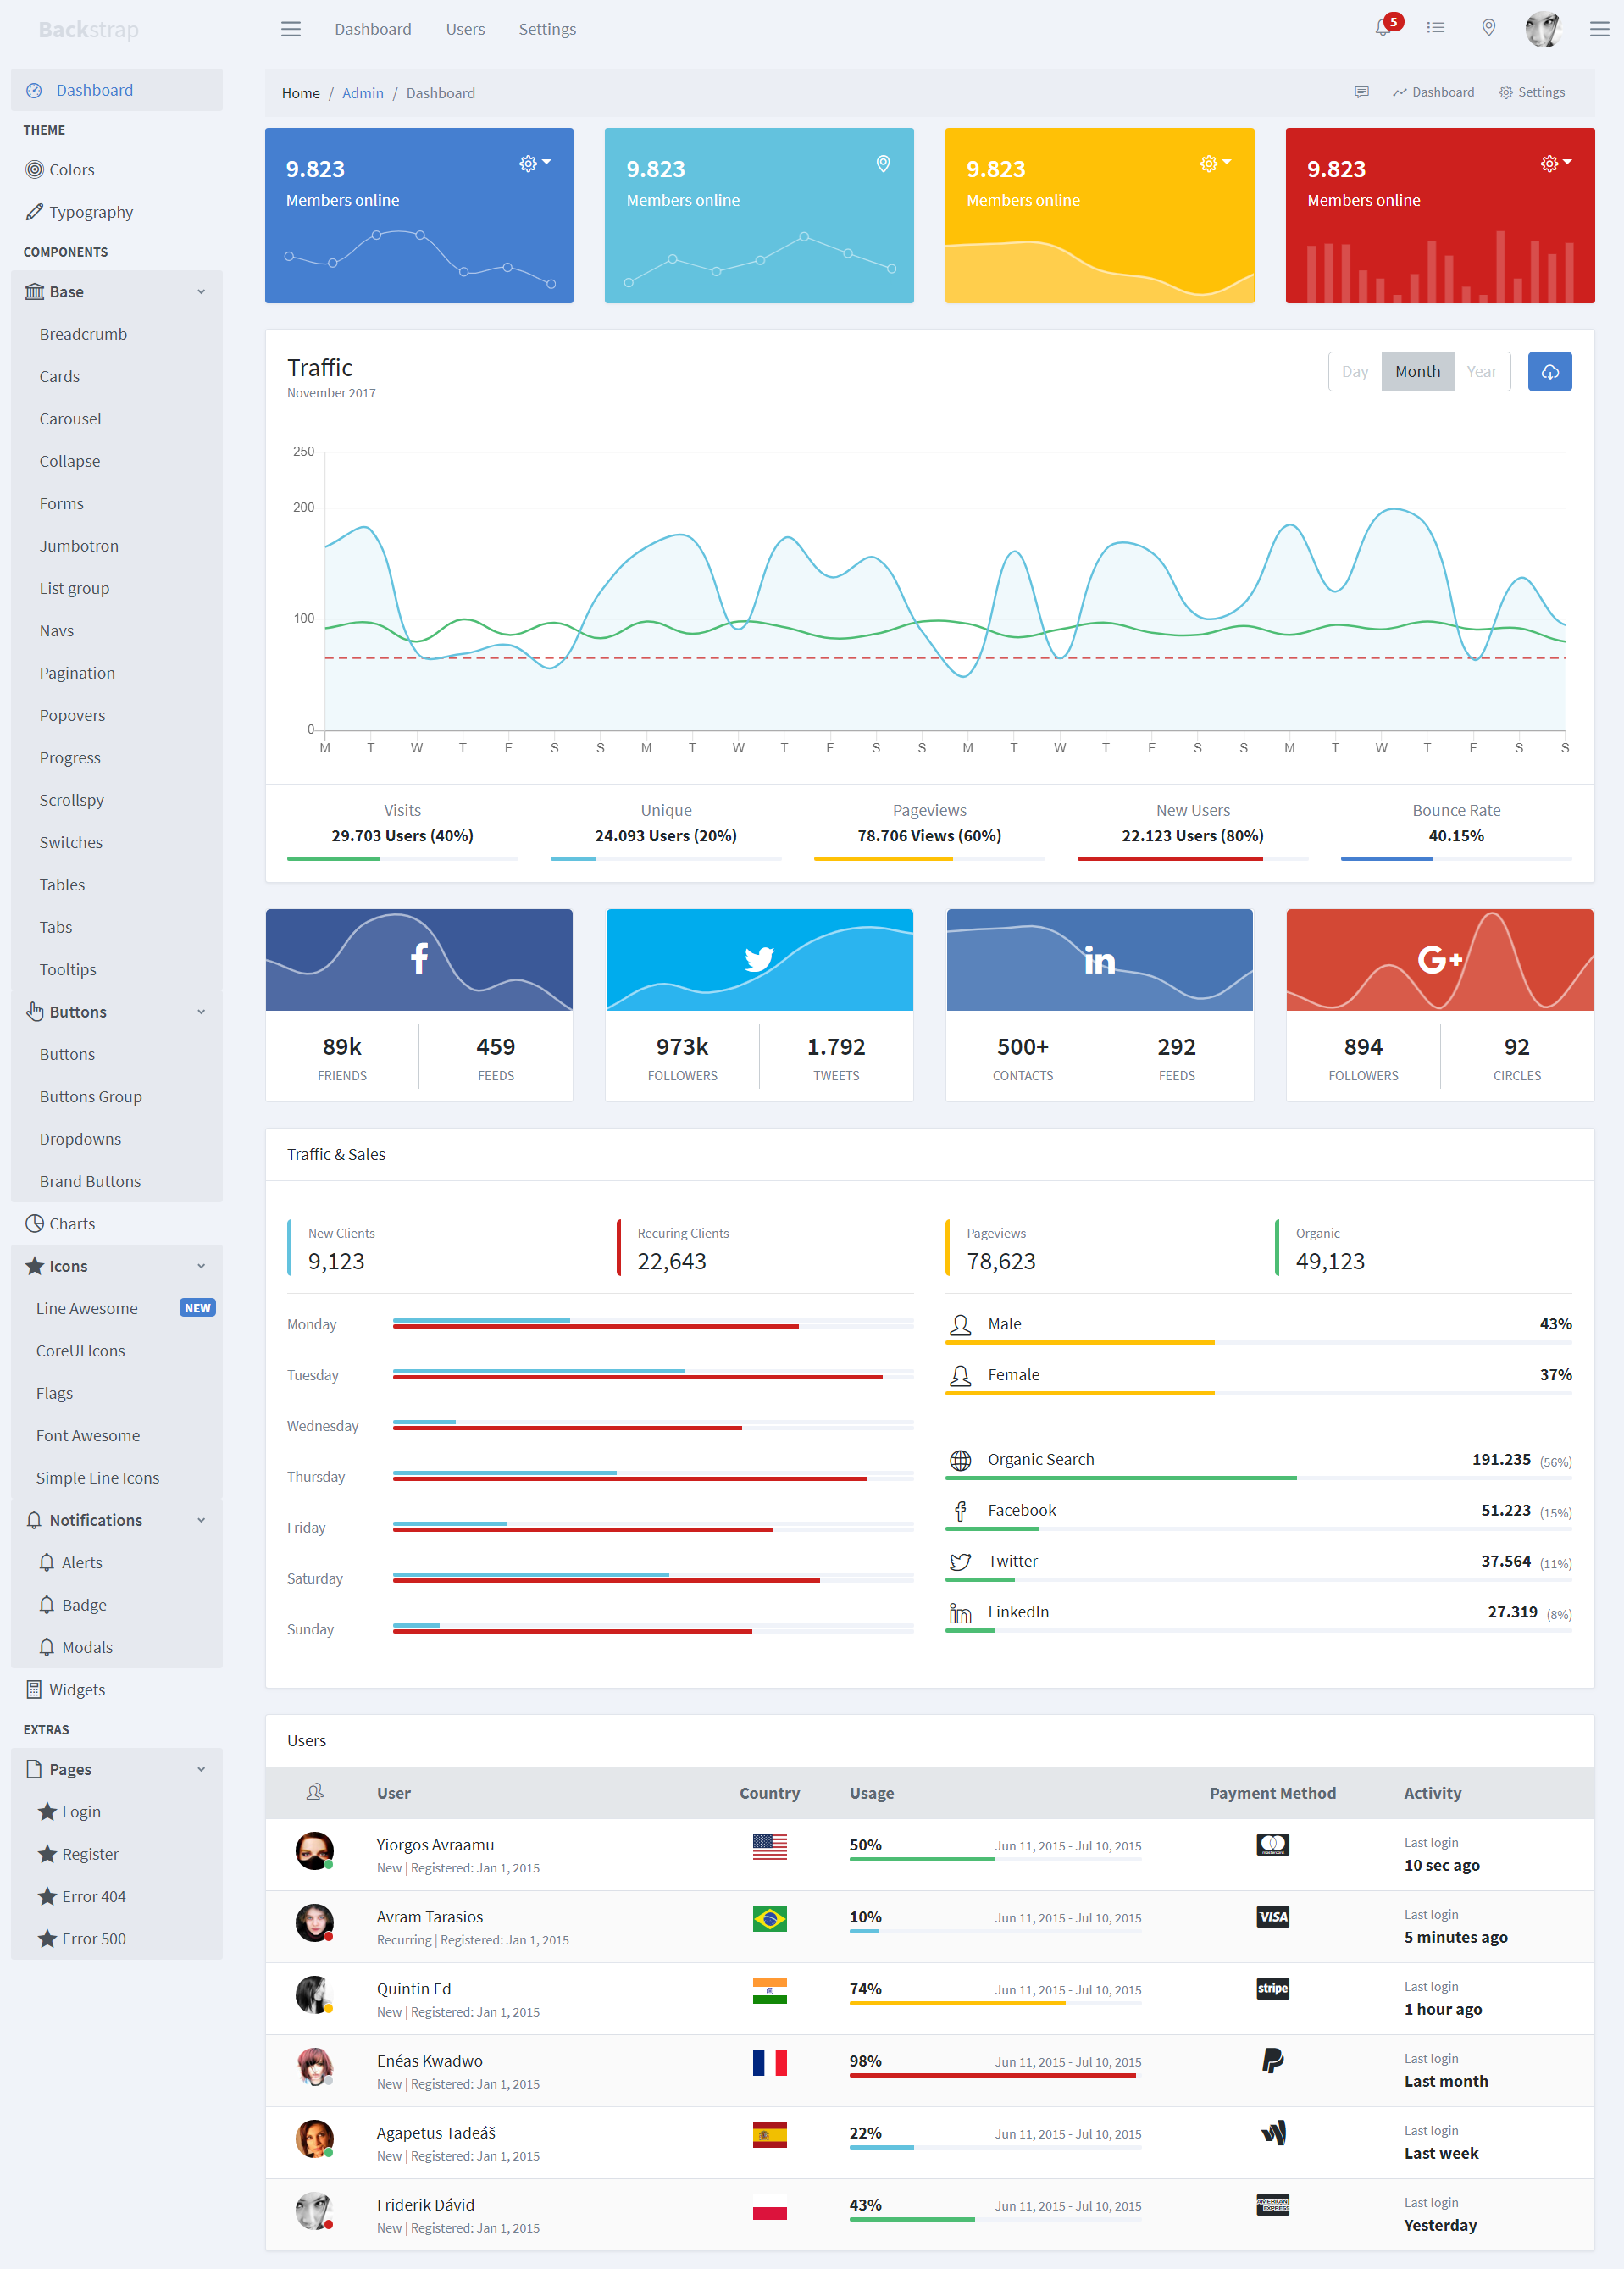
BackStrap - Free HTML Admin Template, using Bootstrap 4

We've added our learnings from 10+ years of building admins to the CoreUI HTML template (which we considered the best starting point for admin panel HTML in 2019). Now, we can build good-looking admin panels using Bootstrap 4, just by copy-pasting HTML blocks.
Uses:
Can be used inside Backpack for Laravel v4 (due July 2019), or outside of it.

Preview
You can see all page components on backstrap.net
How to Use
If you don't think you'll need to customize its look&feel, we recommend you use our minified files directly. Click Download and use our files in your HTML:
<!DOCTYPE html>
<html lang="en">
<head>
<meta charset="utf-8">
<meta http-equiv="X-UA-Compatible" content="IE=edge">
<meta name="viewport" content="width=device-width, initial-scale=1.0, shrink-to-fit=no">
<title>Your Page Title</title>
<link href="https://maxcdn.icons8.com/fonts/line-awesome/1.1/css/line-awesome-font-awesome.min.css" rel="stylesheet">
<link href="../node_modules/@coreui/icons/css/coreui-icons.min.css" rel="stylesheet">
<link href="../node_modules/flag-icon-css/css/flag-icon.min.css" rel="stylesheet">
<link href="../node_modules/simple-line-icons/css/simple-line-icons.css" rel="stylesheet">
<link href="css/style.css" rel="stylesheet">
<link href="vendors/pace-progress/css/pace.min.css" rel="stylesheet">
<link href="css/backstrap.css" rel="stylesheet">
</head>
<body class="app aside-menu-fixed sidebar-lg-show">
<script src="../node_modules/jquery/dist/jquery.min.js"></script>
<script src="../node_modules/popper.js/dist/umd/popper.min.js"></script>
<script src="../node_modules/bootstrap/dist/js/bootstrap.min.js"></script>
<script src="../node_modules/pace-progress/pace.min.js"></script>
<script src="../node_modules/perfect-scrollbar/dist/perfect-scrollbar.min.js"></script>
<script src="../node_modules/@coreui/coreui/dist/js/coreui.min.js"></script>
<script src="../node_modules/chart.js/dist/Chart.min.js"></script>
<script src="../node_modules/@coreui/coreui-plugin-chartjs-custom-tooltips/dist/js/custom-tooltips.min.js"></script>
<script src="js/main.js"></script>
</body>
</html>
Installation
Only if you need to change the design. If you're happy with our look & feel, read How to use above.
If you want to change how it looks or works, install the theme on your machine, change whatever you want, then re-compile it.
$ git clone https://github.com/digitallyhappy/BackStrap.git custom-backstrap
$ cd custom-backstrap
$ npm install
$ npm run serve
$ npm run build
Within the download you'll find the following directories and files, logically grouping common assets and providing both compiled and minified variations. You'll see something like this:
backstrap/
├── build/
├── dist/          --> DON'T CHANGE; this is just a copy of the "src/" folder, to be used in production; don't make changes here - they will be overwritten by the build process; this folder will only show up after npm run build;
├── pug/           --> YES CHANGE; this is where the preview file code lives; these files get turned into the HTML files inside the "src/" folder one runs npm run pug;
├── src/           --> YES CHANGE; this is where the actual source code lies, and where changes should be made;
│   ├── css/       --> DON'T CHANGE; these files are generated; modify the SCSS files instead;
│   ├── img/
│   ├── js/
│   ├── scss/      --> YES CHANGE; this is where you'll want to make CSS changes; these files get bundled and compiled, and inserted automatically inside the "src/css" folder; then the build process will copy all "src" contents inside the "dist/css" folder, so in the end your changes inside the "src/scss" folder will end up in "dist/css";
│   ├── vendors/
│   ├── ...
│   ├── index.html --> DON'T CHANGE; the HTML files are only used for previewing the template; they get generated from the "pug" folder, so don't modify them directly, your changes will get overwritten by the build process; modify the pug files instead;
│   └── ...
└── package.json
After you've run npm run build you'll also find a dist folder in the root. That's the one you should copy to your project, to use what's inside it.
Documentation
TODO: soon
Until then, you can check out the documentation for the CoreUI Free Bootstrap Admin Template, which is what this HTML template uses underneath. It's hosted at their website CoreUI
Contributing
If you encounter any bugs that are NOT design-related, please submit a ticket to the CoreUI repository. We regularly merge their new releases. So all fixes there will shortly be pulled into BackStrap.
The way this works is that:
- preview (HTML) changes should be done inside the
pug directory; then run npm run pug to turn those PUG files into HTML files inside the src folder; - design (CSS) changes should be done inside the
src/scss directory; - after you're happy with the changes you've made, you should run
npm run build to compile the changes you've made inside the src folder to the dist folder, which includes the files people actually use in production;
Process for the maintainer to publish a new version to NPM:
- bump the package version inside
package.json; - commit the changes to git;
- push the changes to the master branch;
npm publish
Support Development
This HTML Template is just a layer on top of CoreUI, that customizes how it looks & feels. They've done the heavy lifting, so your and I don't have to. To show your gratitude for this free HTML template, please consider:


