Product
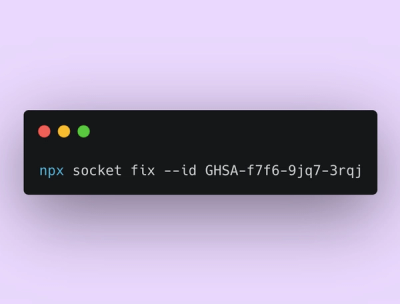
Announcing Socket Fix 2.0
Socket Fix 2.0 brings targeted CVE remediation, smarter upgrade planning, and broader ecosystem support to help developers get to zero alerts.
@timluo465/react-dev-inspector
Advanced tools
dev-tool for inspect react components and jump to local IDE for component code.
dev-tool for inspect react components and jump to local IDE for component code.
Online demo: https://react-dev-inspector.zthxxx.me
Screen record (gif 8M):
npm i -D react-dev-inspector
There are 3 steps required to use react-dev-inspector, here will list some typical manual config of webpack, and this lib also provide some integrated plugins to make you easy to use
Step 1 - Compile Time
Step 2 - Web React Runtime
Inspector Component in react, for listen hotkeys, and request api to dev-server for open IDEStep 3 - Dev-server Side
[middleware] createLaunchEditorMiddleware in webpack dev-server (or other dev-server), to open file in IDE according to the request.
Only need in development mode,and you want to open IDE when click a component element.
Not need in prod mode, or you just want inspect dom without open IDE (set disableLaunchEditor={false} to Inspector component)
Include step-1 and step-3, compile Time and dev-server Side
import { Configuration, DefinePlugin } from 'webpack'
import { createLaunchEditorMiddleware } from 'react-dev-inspector/plugins/webpack'


const config: Configuration = {
  // ...

  /**
   * [compile time] for inject source code file info
   */
  module: {
    rules: [
      {
        test: /\.[jt]sx$/,
        exclude: [
          /node_modules/,
          /file-you-want-exclude/,
        ],
        use: [
          {
            loader: 'react-dev-inspector/plugins/webpack/inspector-loader',
            options: [{
              // loader options type and docs see below
              exclude: [
                'xxx-file-will-be-exclude',
                /regexp-to-match-file /,
              ],
              babelPlugins: [],
              babelOptions: {},
            }],
          },
        ],
      },
    ],
  },

  /**
   * [compile time] for inject current working directory which used in web page runtime
   */
  plugins: [
    new DefinePlugin({
      'process.env.PWD': JSON.stringify(process.cwd()),
    }),
  ],

  /**
   * [server side] webpack dev server side middleware for launch IDE app
   */
  devServer: {
    before: (app) => {
      app.use(createLaunchEditorMiddleware())
    },
  },
}
Include step 1 and step 3, it's almost equivalent to Typical webpack config above,
but it will NOT override devServer.before, just add middleware before origin devServer.before
import { inspectorChainWebpack } from 'react-dev-inspector/plugins/webpack'


webpackChainConfig = inspectorChainWebpack(webpackChainConfig, {
  // loader options type and docs see below
  exclude: [],
  babelPlugins: [],
  babelOptions: {},
})
Include step 1 and step 3, also equivalent to Usage with Webpack Chain
Example .umirc.dev.ts:
// https://umijs.org/config/
import { defineConfig } from 'umi'

export default defineConfig({
  plugins: [
    'react-dev-inspector/plugins/umi/react-inspector',
  ],
  inspectorConfig: {
    // loader options type and docs see below
    exclude: [],
    babelPlugins: [],
    babelOptions: {},
  },
})
Include step 1 and step 3
Example .umirc.dev.js:
import { inspectorChainWebpack } from 'react-dev-inspector/plugins/webpack'

export default {
  // ...
  chainWebpack(config) {
    inspectorChainWebpack(config, {
      // ... options
    })
    return config
  },

  /**
   * And you need to set `false` to `dll` in `umi-plugin-react`,
   * becase these is a umi2 bug that `dll` cannot work with `devServer.before`
   *
   * https://github.com/umijs/umi/issues/2599
   * https://github.com/umijs/umi/issues/2161
   */
}
Include step-2, react runtime
import React from 'react'
import { Inspector, InspectParams } from 'react-dev-inspector'

const InspectorWrapper = process.env.NODE_ENV === 'development'
  ? Inspector
  : React.Fragment

export const Layout = () => {
  // ...

  return (
    <InspectorWrapper
      // props docs see below
      keys={['control', 'shift', 'command', 'c']}
      disableLaunchEditor={false}
      onHoverElement={(params: InspectParams) => {}}
      onClickElement={(params: InspectParams) => {}}
    >
     <YourComponent>
       ...
     </YourComponent>
    </InspectorWrapper>
  )
}
after <Inspector> component was mounted,you can use window.__REACT_DEV_INSPECTOR_TOGGLE__() to toggle inspector.
// import type { ParserPlugin, ParserOptions } from '@babel/parser'
// import type { InspectorConfig } from 'react-dev-inspector/plugins/webpack'

interface InspectorConfig {
  /** patterns to exclude matched files */
  exclude?: (string | RegExp)[],
  /**
   * add extra plugins for babel parser
   * default is ['typescript', 'jsx', 'decorators-legacy', 'classProperties']
   */
  babelPlugins?: ParserPlugin[],
  /** extra babel parser options */
  babelOptions?: ParserOptions,
}
<Inspector> Component Propstypescript define you can see in react-dev-inspector/es/Inspector.d.ts
| Property | Description | Type | Default |
|---|---|---|---|
| keys | inspector toggle hotkeys supported keys see: https://github.com/jaywcjlove/hotkeys#supported-keys | string[] | ['control', 'shift', 'command', 'c'] |
| disableLaunchEditor | whether disable click react component to open IDE for view component code (launchEditor by default only support be used with react-dev-inpector plugins in dev) | boolean | false |
| onHoverElement | triggered while inspector start and mouse hover in a HTMLElement | (params: InspectParams) => void | - |
| onClickElement | triggered while inspector start and mouse click on a HTMLElement | (params: InspectParams) => void | - |
// import type { InspectParams } from 'react-dev-inspector'

interface InspectParams {
  /** hover / click event target dom element */
  element: HTMLElement,
  /** nearest named react component fiber for dom element */
  fiber?: React.Fiber,
  /** source file line / column / path info for react component */
  codeInfo?: {
    lineNumber: string,
    columnNumber: string,
    relativePath: string,
  },
  /** react component name for dom element */
  name?: string,
}
this lib use react-dev-utils to launch your local IDE app, but which one app will be open?
In fact, it uses an environment variable named REACT_EDITOR, but if you not set this variable, it will guess a IDE in what you opened now or what you installed.
For example, if you want it always open VSCode when inspect clicked, set export REACT_EDITOR=code in your shell.
install VSCode command line tools, see the official docs

set env to shell, like .bashrc or .zshrc
export REACT_EDITOR=code
.bashrc or .zshrc (only MacOS)
export REACT_EDITOR='/Applications/WebStorm.app/Contents/MacOS/webstorm'
OR
install WebStorm command line tools

then set env to shell, like .bashrc or .zshrc
export REACT_EDITOR=webstorm
yes, you can also use vim if you prefer it, just set env to shell
export REACT_EDITOR=vim
code see: https://github.com/zthxxx/react-dev-inspector/tree/master/site
project preview: https://react-dev-inspector.zthxxx.me
FAQs
dev-tool for inspect react components and jump to local IDE for component code.
We found that @timluo465/react-dev-inspector demonstrated a not healthy version release cadence and project activity because the last version was released a year ago. It has 1 open source maintainer collaborating on the project.
Did you know?

Socket for GitHub automatically highlights issues in each pull request and monitors the health of all your open source dependencies. Discover the contents of your packages and block harmful activity before you install or update your dependencies.

Product
Socket Fix 2.0 brings targeted CVE remediation, smarter upgrade planning, and broader ecosystem support to help developers get to zero alerts.

Security News
Socket CEO Feross Aboukhadijeh joins Risky Business Weekly to unpack recent npm phishing attacks, their limited impact, and the risks if attackers get smarter.

Product
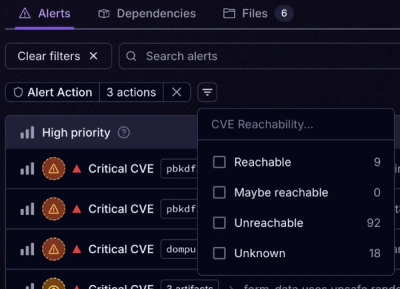
Socket’s new Tier 1 Reachability filters out up to 80% of irrelevant CVEs, so security teams can focus on the vulnerabilities that matter.