Product
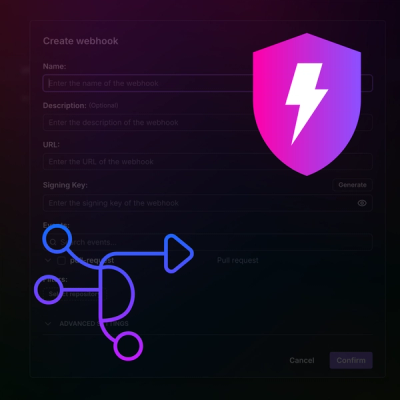
Introducing Webhook Events for Pull Request Scans
Add real-time Socket webhook events to your workflows to automatically receive pull request scan results and security alerts in real time.
By Jeppe Hasseriis - Oct 22, 2025
@zappar/zappar
Advanced tools
Zappar's computer vision for JavaScript, supporting image, face and instant world tracking, and barcode scanning.
This library allows you to use Zappar's best-in-class AR technology in the browser. It supports image, face and instant world tracking.
This library provides the low-level tools you need to build an AR experience directly with WebGL, or to integrate AR into a JavaScript 3D platform of your choice. If you're building AR content you may find it easier to start with one of our existing 3D platform integrations:
You can use this library by downloading a standalone zip containing the necessary files, by linking to our CDN, or by installing from NPM for use in a webpack project.
Download the bundle from this link: https://libs.zappar.com/zappar-js/4.1.0/zappar-js.zip
Unzip into your web project and reference from your HTML like this:
<script src="zappar.js"></script>
Reference the zappar.js library from your HTML like this:
<script src="https://libs.zappar.com/zappar-js/4.1.0/zappar.js"></script>
Run the following NPM command inside your project directory:
npm install --save @zappar/zappar
Then import the library into your JavaScript or TypeScript files:
import * as Zappar from "@zappar/zappar";
Please note - this library supports Webpack 5 and later.
Before we jump in, here's a run down of the different bits and bobs of terminology we use:
You can integrate the Zappar library with the existing requestAnimationFrame loop of your WebGL project. A typical project may look like this. The remainder of this document goes into more detail about each of the component elements of this example.
// The Zappar library uses a 'pipeline' to manage data flowing in (e.g. camera frames)
// with the output from the various computer vision algorithms
// Most projects will just have one pipline
let pipeline = new Zappar.Pipeline();

// The Zappar library needs the WebGL context to process camera images
// Use this function to tell the pipeline about your context
pipeline.glContextSet(gl);

// We want to process images from the user's camera, so create a camera_source object
// for our pipeline, with the device's default camera
let source = new Zappar.CameraSource(pipeline, Zappar.cameraDefaultDeviceID());

// Request camera permissions and start the camera
Zappar.permissionRequestUI().then(granted => {
    if (granted) source.start();
    else Zappar.permissionDeniedUI();
});

// Set up a tracker, in this case an image tracker
let imageTracker = new Zappar.ImageTracker(pipeline);
imageTracker.loadTarget("myImage.zpt");

function animate() {
    // Ask the browser to call this function again next frame
    requestAnimationFrame(animate);

    // Your pipeline uses this function to prepare camera frames for processing
    pipeline.processGL();

    // This function allows to us to use the tracking data from the most recently processed camera frame
    pipeline.frameUpdate();

    // Upload the current camera frame to a WebGL texture for us to draw
    pipeline.cameraFrameUploadGL();

    // Draw the camera to the screen - width and height here should be those of your canvas
    pipeline.cameraFrameDrawGL(width, height);

    // Get our 3D projection matrix
    let projectionMatrix = pipeline.projectionMatrix(canvas.width, canvas.height);

    // Get our camera's pose
    let cameraPoseMatrix = pipeline.cameraPoseDefault();
    let inverseCameraPoseMatrix = Zappar.invert(cameraPoseMatrix);

    // Loop through visible image tracker anchors, rendering some content
    for (let anchor of imageTracker.visible) {
        let anchorPoseMatrix = anchor.pose(cameraPoseMatrix);

        // Render content using the following ModelViewProjection matrix:
        // projectionMatrix * inverseCameraPoseMatrix * anchorPoseMatrix
    }
}

// Start things off
animate();
Due to browser restrictions surrounding use of the camera, you must use HTTPS to view or preview your site, even if doing so locally from your computer. If you're using webpack, consider using webpack-dev-server which has an https option to enable this.
Alternatively you can use the ZapWorks command-line tool to serve a folder over HTTPS for access on your local computer, like this:
zapworks serve .
The command also lets you serve the folder for access by other devices on your local network, like this:
zapworks serve . --lan
This library works well on the browsers that enjoy the vast majority of mobile market-share. That said, there are a number of web browsers available across the mobile and desktop device landscape.
Best support:
Functional but not our primary support target (support quality):
Known to not work:
* Browsers without motion sensor access (e.g desktop browsers) don't support instant world tracking or attitude-based camera poses.
To make it easy to detect if your page is running in a browser that's not supported, we've provided the browserIncompatible() and browserIncompatibleUI() functions:
if (Zappar.browserIncompatible()) {
    Zappar.browserIncompatibleUI();
    throw new Error("Unsupported browser");
}
The browserIncompatibleUI() function shows a full-page dialog that informs the user they're using an unsupported browser, and provides a button to 'copy' the current page URL so they can 'paste' it into the address bar of a compatible alternative.
Once you've built your site, you have a number of options for hosting your site:
You need to maintain an activate subscription at ZapWorks in order to use this library.
If you are self-hosting your experience, you will have to register the full domain name with ZapWorks in order for the license check to complete successfully. Contact support@zappar.com to find out more.
You do not need to register if you're hosting your experience:
*.zappar.io domain name); or,0.0.0.0, 127.*); or,192.*, 10.*); or,*.ngrok.io domain name).ZapWorks provides an easy-to-use and robust hosting solution for your AR experiences as part of your subscription. To get started, head over to zap.works.
Once you've logged in, you can create a new 'Universal AR' project using the + button.
Having created a 'Universal AR' project, head over to the "Experience" tab where you can either:
For more information, head over to our Publishing and Hosting docs article.
If you'd like to self-host your content, there are a number of recommendations we make to ensure the best experience for end-users:
.wasm file extension should be served with the application/wasm mime-typeContent-Encoding: gzip. In particular you should serve files with the following extensions with gzip content-encoding: .wasm, .js, .zbin, .zptIn the Zappar library, a pipeline is used to manage the flow of data coming in (i.e. the frames) through to the output from the different tracking types and computer vision algorithms. It's straightforward to construct a new pipeline:
let pipeline = new Zappar.Pipeline();
The Zappar library needs to use your WebGL context in order to process camera frames. You can set it on your pipeline immediately after it's been created:
pipeline.glContextSet(gl);
While most projects will only need one pipeline, it is possible to create as many as you like. Each pipeline can only have one active source of frames (i.e. one camera, or one video), so if you'd like to simultaneously process frames from multiple sources then you'll need a pipeline for each. These pipelines can share the same GL context (if you're drawing the camera frames from multiple sources onto the same canvas), or use different contexts if you have multiple canvases on your page.
To start the user's camera, first create a new camera source for your pipeline:
let deviceId = Zappar.cameraDefaultDeviceID();
let source = new Zappar.CameraSource(pipeline, deviceId);
If you'd like to use the user-facing 'selfie' camera, pass true to the cameraDefaultDeviceID function:
let deviceId = Zappar.cameraDefaultDeviceID(true);
let source = new Zappar.CameraSource(pipeline, deviceId);
User-facing cameras are normally shown mirrored to users so if you start one, please check out the options for mirroring the view later in this document.
Alternatively you can pass any device ID obtained from the browser's navigator.mediaDevices.enumerateDevices() function as the second parameter of the CameraSource constructor.
The library needs to ask the user for permission to access the camera and motion sensors on the device.
To do this, you can use the following function to show a built-in UI informing the user of the need and providing a button to trigger the browser's permission prompts. The function returns a promise that lets you know if the user granted the permissions or not.
// Show Zappar's built-in UI to request camera permissions
Zappar.permissionRequestUI().then(granted => {
    if (granted) {
        // User granted the permissions so start the camera
        source.start();
    } else {
        // User denied the permissions so show Zappar's built-in 'permission denied' UI
        Zappar.permissionDeniedUI();
    }
});
If you'd rather show your own permissions UI, you can use the following function to trigger the browser's permission prompts directly. The function returns a promise that resolves to true if the user granted all the necessary permissions, otherwise false. Please note - due to browser restrictions, this function must be called from within a user event, e.g. in the event handler of a button click.
Zappar.permissionRequest().then(granted => {
    if (granted) {
        // User granted the permissions so start the camera
    } else {
        // User denied the permissions
        // You can show your own 'permission denied' UI here or use Zappar's built-in one
        Zappar.permissionDeniedUI();
    }
});
Once the user has granted the necessary permissions, you can start the camera on the device with the following function:
source.start();
If you'd like to switch between cameras after the source has started you can do that with this function:
// Switch to the self-facing camera:
source.setDevice(Zappar.cameraDefaultDeviceID(true));
If you'd like to pause camera processing (and shutdown the camera device), just call the pause() function:
source.pause();
Camera processing can be started again using start().
Pipelines can only have one source running at a time, so if you create and start a second source, it will pause the first one. If you'd like to let the user switch between the rear and user facing cameras, just have two sources and call start() on each as appropriate.
In addition to CameraSource, we also provide HTMLElementSource which you can use to process frames from an HTML video element, or an img element. If you're processing a video element, you must remember to call play() on that element - the start() and pause() functions of the source only control if frames are being supplied to the pipeline, not the play state of the video itself.
Users may switch tabs away from your page during their experience (and hopefully return!). It's good practice to detect these events and pause/start the camera as appropriate. This avoids doing unnecessary computation when the user is not watching, and ensures that the camera is correctly restarted should the browser choose to stop it while the user is away. It's possible using the document's visibilitychange event:
document.addEventListener("visibilitychange", () => {
    switch(document.visibilityState) {
        case "hidden":
            source.pause();
            break;
        case "visible":
            source.start();
            break;
    }
});
Call the following function on your pipeline once an animation frame (e.g. during your requestAnimationFrame function) in order to process incoming camera frames:
pipeline.processGL();
After calling processGL(), call the following function to ask the Zappar library to return results from the most recently processed camera frame:
pipeline.frameUpdate();
The platform provides the most recent camera frame as a WebGL texture that you can draw to the screen. To make this texture available, call the following function after your frameUpdate() call:
pipeline.cameraFrameUploadGL();
Once uploaded, there are two ways to draw the camera:
cameraFrameDrawGL convenience functionYou can use the following function:
pipeline.cameraFrameDrawGL(renderWidth: number, renderHeight: number, mirror?: boolean)
It will automatically draw the camera to the screen as a full screen quad. Please note this function modifies some GL state during its operation so you may need to reset the following GL state if you use it:
null (e.g. gl.bindTexture(gl.TEXTURE_2D, null))null (e.g. gl.bindBuffer(gl.ARRAY_BUFFER, null);)null (e.g. gl.useProgram(null))gl.TEXTURE0 (e.g. gl.activeTexture(gl.TEXTURE0))gl.SCISSOR_TEST, gl.DEPTH_TEST, gl.BLEND, gl.CULL_FACEAlternatively, you can draw the camera manually to a full screen quad. To do so, you can use the following functions:
pipeline.cameraFrameTextureGL() : WebGLTexture | undefined: returns a WebGLTexture containing the current camera image (or undefined if none are available)
pipeline.cameraFrameTextureMatrix(renderWidth : number, renderHeight : number, mirror?: boolean) : Float32Array: pass in your canvas' width and height and it returns a 4x4 column-major matrix that you can use to transform the UV coordinates of the following quad:
Vertex 0: -1, -1, 0
UV 0: 0, 0
Vertex 1: -1, 1, 0
UV 1: 0, 1
Vertex 2: 1, -1, 0
UV 1: 1, 0
Vertex 3: 1, 1, 0
UV 1: 1, 1
Here's an example vertex shader to show how this can be accomplished:
attribute vec4 position; // Bound to a buffer with the vertex data above
attribute vec4 texCoord; // Bound to a buffer with the UV data above
uniform mat4 texTransform; // Set to the matrix returned by cameraFrameTextureMatrix(...)

varying vec4 texVarying; // Used to pass the UV coordinates to the fragment shader

void main()
{
    gl_Position = position;
    texVarying = texTransform * texCoord;
}
And the corresponding fragment shader:
varying vec4 texVarying; // The UV coordinate from the vertex shader
uniform sampler2D texSampler; // Bound to the texture returned by cameraFrameTextureGL()

void main()
{
    gl_FragColor = texture2DProj(texSampler, texVarying);
}
The Zappar library models the 3D space of an AR experience using three transformations:
To render content relative to an anchor, the following transformation (the ModelViewProjection matrix) is computed, typically in the vertex shader:
mat4 modelViewProjection = projectionMatrix * inverseCameraPoseMatrix * anchorPoseMatrix;
gl_Position = modelViewProjection * vertexPosition;
The following sections show how to compute these various constituent transformation matrices.
When rendering an AR experience, it's important that the projection matrix used to render the virtual 3D content matches the parameters of the physical camera (e.g. focal length) being processed and displayed. The Zappar library provides a function to get the projection matrix for the current frame:
let projectionMatrix = pipeline.projectionMatrix(renderWidth, renderHeight);
Pass the dimensions of your canvas for renderWidth, renderHeight and if needed zNear and zFar clipping plane parameters. The resulting projectionMatrix is a Float32Array containing a 4x4 column-wise matrix that you can use directly as a uniform in your vertex shader.
You should call these functions every frame after your pipeline.frameUpdate() call since the Zappar library may change the camera model over time as it learns more about the physical camera.
The Zappar library provides multiple functions for obtaining a camera pose. Each function defines a different world space and thus differing behavior for the camera as the user moves their device in space and around any anchors that are being tracked. Each of the functions return a Float32Array containing a 4x4 column-major matrix.
pipeline.cameraPoseDefault() returns a transformation where the camera sits, stationary, at the origin of world space, and points down the negative Z axis. Tracked anchors move in world space as the user moves the device or tracked objects in the real world.pipeline.cameraPoseWithAttitude(mirror?: boolean) returns a transformation where the camera sits at the origin of world space, but rotates as the user rotates the physical device. When the Zappar library initializes, the negative Z axis of world space points forward in front of the user.pipeline.cameraPoseWithOrigin(o: Float32Array) returns a transformation with the (camera-relative) origin specified by the supplied parameter. This is used with the poseCameraRelative(...) : Float32Array functions provided by the various anchor types to allow a given anchor (e.g. a tracked image or face) to be the origin of world space. In this case the camera moves and rotates in world space around the anchor at the origin.The correct choice of camera pose with depend on your given use case and content. Here are some examples you might like to consider when choosing which is best for you:
cameraPoseWithAttitude and simulate a light shining down the negative Y axis is world space.cameraPoseWithOrigin would allow the blocks to rest on a tracked image regardless of how the image is held by the user, while using cameraPoseWithAttitude would allow the user to tip the blocks off the image by tilting it.The matrices returned by these functions represent the transformation of the camera relative to a world space, but if you're forming a full ModelViewProjection matrix in order to render content, then you need to use the inverse of the camera transformation. For this purpose, the Zappar library provides a convenience function to compute the inverse:
let inverseCameraPoseMatrix = Zappar.invert(cameraPose);
Each of the tracking types provided by the Zappar library expose anchors with a function to obtain an anchor pose for a given camera pose, e.g.:
let cameraPoseMatrix = pipeline.cameraPoseDefault();
let anchorPoseMatrix = myFaceAnchor.pose(cameraPose);
It's best to use this structure, even if you're using cameraPoseWithOrigin and the anchor is forming the origin of your world space, like this:
let cameraPoseMatrix = pipeline.cameraPoseWithOrigin(myFaceAnchor.poseCameraRelative());
let anchorPoseMatrix = myFaceAnchor.pose(cameraPose);
This pose matrix forms the final transformation for a complete ModelViewProjection matrix for rendering:
mat4 modelViewProjection = projectionMatrix * inverseCameraPoseMatrix * anchorPoseMatrix;
gl_Position = modelViewProjection * vertexPosition;
The following section gives more details about the various tracking types and their associated anchors.
The Zappar library offers three types of tracking for you to use to build augmented reality experiences:
To track content from a flat or curved image in the camera view, create a new ImageTracker object, passing in your pipeline:
let imageTracker = new Zappar.ImageTracker(pipeline);
ImageTrackers use a special 'target file' that's been generated from the source image you'd like to track. You can generate them using the ZapWorks command-line utility like this:
zapworks train myImage.png
For more information on generating target files, including how to build them for curved or cylindrical surfaces, check out the ZapWorks CLI documentation.
The resulting file can be loaded into an image tracker object by passing it to the loadTarget(...) function as either a URL or an ArrayBuffer. The function returns a promise that resolves when the target file has been loaded successfully, which you may wish to use to show a 'loading' screen to the user while the file is downloaded.
let imageTracker = new Zappar.ImageTracker(pipeline);
imageTracker.loadTarget("myImage.zpt").then(() => {
    // Image target has been loaded
});
Each ImageTracker exposes anchors for images detected and tracked in the camera view. At this time, ImageTrackers only track one image in view at a time.
Anchors have the following parameters:
id: a string that's unique for this anchorvisible: a boolean indicating if this anchor is visible in the current camera frameonVisible and onNotVisible: event handlers that emit when the anchor becomes visible, or disappears in the camera view. These events are emitted during your call to pipeline.frameUpdate()pose(cameraPose: Float32Array, mirror?: boolean): a function that returns the pose matrix for this anchorposeCameraRelative(mirror?: boolean): a function that returns the pose matrix (relative to the camera) for this anchor, for use with cameraPoseWithOriginThe transformation returned by the pose(...) function provides a coordinate system that has its origin at the center of the image, with positive X axis to the right, the positive Y axis towards the top and the positive Z axis coming up out of the plane of the image. For curved targets, the origin is in the center of the cylinder defined by the curve. If the physical size of the image was included when the target file was generated (e.g. using the inputWidth, inputHeight, or dpi parameters), then the units of the coordinate system are meters. If no physical size was specified, then the scale of the coordinate system is such that a Y value of +1 corresponds to the top of the image, and a Y value of -1 corresponds to the bottom of the image. The X axis positions of the left and right edges of the target image therefore depend on the aspect ratio of the image.
You can access the anchors of a tracker using its anchors parameter - it's a JavaScript Map keyed with the IDs of the anchors. Trackers will reuse existing non-visible anchors for new images that appear and thus, until ImageTracker supports tracking more than one image at a time, there is never more than one anchor managed by each ImageTracker.
Each tracker exposes a JavaScript Set of anchors visible in the current camera frame as its visible parameter. Thus a frame loop for rendering content on images might look like this:
// Not shown - initialization, pipeline and source setup & permissions

let imageTracker = new Zappar.ImageTracker(pipeline);
imageTracker.loadTarget("myTarget.zpt");

function animate() {
    // Ask the browser to call this function again next frame
    requestAnimationFrame(animate);

    // Zappar's library uses this function to prepare camera frames for processing
    pipeline.processGL();

    // This function allows to us to use the tracking data from the most recently processed camera frame
    pipeline.frameUpdate();

    // Upload the current camera frame to a WebGL texture for us to draw
    pipeline.cameraFrameUploadGL();

    // Draw the camera to the screen - width and height here should be those of your canvas
    pipeline.cameraFrameDrawGL(width, height);

    let projectionMatrix = pipeline.projectionMatrix(canvas.width, canvas.height);
    let cameraPoseMatrix = pipeline.cameraPoseDefault();

    for (let anchor of imageTracker.visible) {
        let anchorPoseMatrix = anchor.pose(cameraPoseMatrix);

        // Render content using projectionMatrix, cameraPoseMatrix and anchorPoseMatrix
    }
}

// Start things off
animate();
In addition to using the anchors and visible parameters, ImageTrackers expose event handlers that you can use to be notified of changes in the anchors or their visibility. The events are emitted during your call to pipeline.frameUpdate().
onNewAnchor - emitted when a new anchor is created by the trackeronVisible - emitted when an anchor becomes visible in a camera frameonNotVisible - emitted when an anchor goes from being visible in the previous camera frame, to being not visible in the current frameHere's an example of using these events:
imageTracker.onNewAnchor.bind(anchor => {
    console.log("New anchor has appeared:", anchor.id);
});

imageTracker.onVisible.bind(anchor => {
    console.log("Anchor is visible:", anchor.id);
});

imageTracker.onNotVisible.bind(anchor => {
    console.log("Anchor is not visible:", anchor.id);
});
To place content on or around a user's face, create a new FaceTracker object when your page loads, passing in your pipeline:
let faceTracker = new Zappar.FaceTracker(pipeline);
The face tracking algorithm requires a model file of data in order to operate - you can call loadDefaultModel() to load the one that's included by default with the library. The function returns a promise that resolves when the model has been loaded successfully, which you may wish to use to show a 'loading' screen to the user while the file is downloaded.
let faceTracker = new Zappar.FaceTracker(pipeline);
faceTracker.loadDefaultModel().then(() => {
    // The model has been loaded successfully
});
Each FaceTracker exposes anchors for faces detected and tracked in the camera view. By default a maximum of one face is tracked at a time, however you can change this using the maxFaces parameter:
faceTracker.maxFaces = 2;
Note that setting a value of two or more may impact the performance and framerate of the library, so we recommend sticking with one unless your use case requires tracking multiple faces.
Anchors have the following parameters:
id: a string that's unique for this anchorvisible: a boolean indicating if this anchor is visible in the current camera frameidentity and expression: Float32Arrays containing data used for rendering a face-fitting mesh (see below)onVisible and onNotVisible: event handlers that emit when the anchor becomes visible, or disappears in the camera view. These events are emitted during your call to Zappar.frameUpdate()pose(cameraPose: Float32Array, mirror?: boolean): returns the pose matrix for this anchorposeCameraRelative(mirror?: boolean): returns the pose matrix (relative to the camera) for this anchor, for use with cameraPoseWithOriginThe transformation returned by the pose(...) function provides a coordinate system that has its origin at the center of the head, with positive X axis to the right, the positive Y axis towards the top and the positive Z axis coming forward out of the user's head.
You can access the anchors of a tracker using its anchors parameter - it's a JavaScript Map keyed with the IDs of the anchors. Trackers will reuse existing non-visible anchors for new faces that appear and thus there are never more than maxFaces anchors handled by a given tracker.
Each tracker exposes a JavaScript Set of anchors visible in the current camera frame as its visible parameter. Thus a frame loop for rendering content on faces might look like this:
// Not shown - initialization, camera setup & permissions

let faceTracker = new Zappar.FaceTracker(pipeline);
faceTracker.loadDefaultModel();

function animate() {
    // Ask the browser to call this function again next frame
    requestAnimationFrame(animate);

    // Zappar's library uses this function to prepare camera frames for processing
    pipeline.processGL();

    // This function allows to us to use the tracking data from the most recently processed camera frame
    pipeline.frameUpdate();

    // Upload the current camera frame to a WebGL texture for us to draw
    pipeline.cameraFrameUploadGL();

    // Draw the camera to the screen - width and height here should be those of your canvas
    pipeline.cameraFrameDrawGL(width, height);

    let projectionMatrix = pipeline.projectionMatrix(canvas.width, canvas.height);
    let cameraPoseMatrix = pipeline.cameraPoseDefault();

    for (let anchor of faceTracker.visible) {
        let anchorPoseMatrix = anchor.pose(cameraPoseMatrix);

        // Render content using projectionMatrix, cameraPoseMatrix and anchorPoseMatrix
    }
}

// Start things off
animate();
Note that users typically expect to see a mirrored view of any user-facing camera feed. Please see the section on mirroring the camera view later in this document.
In addition to using the anchors and visible parameters, FaceTrackers expose event handlers that you can use to be notified of changes in the anchors or their visibility. The events are emitted during your call to pipeline.frameUpdate().
onNewAnchor - emitted when a new anchor is created by the trackeronVisible - emitted when an anchor becomes visible in a camera frameonNotVisible - emitted when an anchor goes from being visible in the previous camera frame, to being not visible in the current frameHere's an example of using these events:
faceTracker.onNewAnchor.bind(anchor => {
    console.log("New anchor has appeared:", anchor.id);
});

faceTracker.onVisible.bind(anchor => {
    console.log("Anchor is visible:", anchor.id);
});

faceTracker.onNotVisible.bind(anchor => {
    console.log("Anchor is not visible:", anchor.id);
});
In addition to poses for the center of the head, you can use FaceLandmark to obtain poses for various points on the user's face. These landmarks will remain accurate, even as the user's expression changes.
To get the pose for a landmark, construct a new FaceLandmark object, passing the name of the landmark you'd like to track:
let faceLandmark = new Zappar.FaceLandmark(Zappar.FaceLandmarkName.CHIN);
The following landmarks are available: EYE_LEFT, EYE_RIGHT, EAR_LEFT, EAR_RIGHT, NOSE_BRIDGE, NOSE_TIP, NOSE_BASE, LIP_TOP, LIP_BOTTOM, MOUTH_CENTER, CHIN, EYEBROW_LEFT, and EYEBROW_RIGHT. Note that 'left' and 'right' here are from the user's perspective.
Each frame, after pipeline.frameUpdate(), call one of the following functions to update the face landmark to be accurately positioned according to the most recent identity and expression output from a face anchor:
// Update directly from a face anchor
faceLandmark.updateFromFaceAnchor(myFaceAnchor);

// Or, update from identity and expression Float32Arrays:
faceLandmark.updateFromIdentityExpression(identity, expression);
Once this is done, the pose of the landmark can accessed using the pose parameter:
// This is a Float32Array 4x4 matrix
faceLandmark.pose
This pose is relative to the center of the head so, to obtain a modelview matrix to use for drawing your content, make sure to include the pose from your face anchor in addition to that from the landmark:
mat4 modelViewProjection = projectionMatrix * inverseCameraPoseMatrix * anchorPoseMatrix * landmarkPoseMatrix;
gl_Position = modelViewProjection * vertexPosition;
In addition to getting a pose for the center of the face using FaceTracker, the Zappar library provides a number of meshes that will fit to the face/head and deform as the user's expression changes. This can be used to apply a texture to the user's skin, much like face paint, or to mask out the back of 3D models so the user's head is not occluded where it shouldn't be.
To use the face mesh, first construct a new FaceMesh object and load its data file. The loadDefaultFace function returns a promise that resolves when the data file has been loaded successfully. You may wish to use to show a 'loading' screen to the user while this is taking place.
let faceMesh = new Zappar.FaceMesh();
faceMesh.loadDefaultFace().then(() => {
    // Face mesh loaded
});
Each frame, after pipeline.frameUpdate(), call one of the following functions to update the face mesh to the most recent identity and expression output from a face anchor:
// Update directly from a face anchor
faceMesh.updateFromFaceAnchor(myFaceAnchor);

// Or, update from identity and expression Float32Arrays:
faceMesh.updateFromIdentityExpression(identity, expression);
Once this is done, you can use the following parameters of the FaceMesh object to get mesh data that can be directly uploaded to WebGL arraybuffer objects and rendered using gl.TRIANGLES with gl.drawElements(...):
// These are Float32Arrays of the raw mesh data
faceMesh.vertices
faceMesh.uvs
faceMesh.normals

// This is a Uint16Array of the vertex indices
faceMesh.indices
The mesh vertices are relative to center of the head so, when rendering any geometry, your modelview matrix should incorporate the latest pose from your FaceTracker anchor.
At this time there are two meshes included with the library. The default mesh covers the user's face, from the chin at the bottom to the forehead, and from the sideburns on each side. There are optional parameters that determine if the mouth and eyes are filled or not:
loadDefaultFace(fillMouth?: boolean, fillEyeLeft?: boolean, fillEyeRight?: boolean)
The full head simplified mesh covers the whole of the user's head, including some neck. It's ideal for drawing into the depth buffer in order to mask out the back of 3D models placed on the user's head. There are optional parameters that determine if the mouth, eyes and neck are filled or not:
loadDefaultFullHeadSimplified(fillMouth?: boolean, fillEyeLeft?: boolean, fillEyeRight?: boolean, fillNeck?: boolean)
This type of tracking allows users to position content on surfaces in their immediate environment. You can create a new WorldTracker like this:
let worldTracker = new Zappar.WorldTracker(pipeline);
When the WorldTracker is first created, a short 'initialization' process must take place where the user moves their device in space for a few seconds. This allows the world tracking technology to build an understanding of the structure of the space in front of the user.
In order to help the user with this process, a simple UI is provided by this library. You're welcome to use it directly, or to build your own UI as you see fit.
Here's an example of its use:
import { WorldTrackerUI } from "@zappar/zappar";

// ...

// Construct the UI, passing in the <canvas> of my experience
const ui = new WorldTrackerUI(canvas);

// Update the UI to position it over the canvas. You should call this
// function at the start and then again any time that the canvas
// position or dimensions change.
ui.update();

// When initialization is taking place, show the UI
ui.show();

// ...
// Later, once you consider the system to be initialized, hide the UI
ui.hide();
The WorldTracker has a quality parameter that indicates how well it's able to track the environment. It has three states:
WORLD_TRACKER_QUALITY_INITIALIZING is the value when the WorldTracker is constructed, and while the system is waiting for the user to move their device to build an initial understanding of the environment. It's typical to show the initialization UI (see above) during this step.
WORLD_TRACKER_QUALITY_GOOD is the value once the system has successfully understood the user's environment. At this point the world anchor (see below) is well defined, but other anchors may still be initializing.
WORLD_TRACKER_QUALITY_LIMITED is the value if the system has lost tracking, perhaps due to a large change in the environment, or if the user has closed their browser and returned later. It's typical to show the initialization UI (see above) in this state.
The WorldTracker emits a number of events that you can listen for to know when the quality changes.
Note that in most cases you'll want to use the status of an actual anchor, or the presence of detected planes, to determine when to hide the initialization UI - there's more details on this below.
The WorldTracker exposes a number of anchors for attaching content to:
The world anchor corresponds to the point in 3D space where the users' camera is when world tracker has initialized. It can be accessed at worldTracker.worldAnchor.
The ground anchor tracks the system's best understanding of the floor beneath the user. When the system initializes it's located 1.5 meters below the world anchor. Subsequently, the system will periodically update the ground anchor to be aligned with the lowest detected horizontal plane in the environment. It can be accessed at worldTracker.groundAnchor.
The WorldTracker regularly analyses the environment in front of the user to detect flat, horizontal surfaces, known as planes. These planes are exposed as anchors in the worldTracker.planes map.
The origin (and other parameters) of plane anchors can change from frame to frame as the system's understanding of the world evolves. As a result it's best to use plane anchors to help choose the initial location of content then use a custom anchor (see below) for subsequent tracking.
In addition to the usual anchor functions (e.g pose), planes expose polygon and polygonVersion properties. The polygon property is an array of 2D points on the boundary of the detected plane. It's useful for displaying a visualization of a plane to the user, and to detect intersections of the plane with a ray from the camera or a user tap for the purposes of choosing a location for content.
The provided generateMeshForPlanePolygon function makes it easy to generate a regular vertex mesh from the polgon.
When positioning content in the world, it's generally best to use a CustomAnchor. This allows the system to focus on the specific area around origin of the custom anchor to improve the consistency and quality of tracking.
You can create a CustomAnchor like this, passing in your WorldTracker instance:
const customAnchor = new Zappar.CustomAnchor(worldTracker);
You then choose the location of the anchor in 3D space using one of two functions.
The setPoseFromAnchorOffset(relativeAnchor, x, y, z) function will position the custom anchor at the specified offset from the anchor you pass in. Here's an example that positions a custom anchor at the center of a detected plane:
// Create a custom anchor
const customAnchor = new Zappar.CustomAnchor(worldTracker);

// Find a plane in the map from the world tracker
const plane = m.values().next().value;

// Make sure that the system has detected a plane
if (plane) {
    // If so, set our custom anchor to the origin of this plane
    customAnchor.setPoseFromAnchorOffset(plane, 0, 0, 0);
}
Alternatively you can position the custom anchor relative to the camera, like this:
customAnchor.setPoseFromCameraOffset(x, y, z);
Each of setPoseFromAnchorOffset and setPoseFromCameraOffset take an optional final parameter - an orientation. By default the custom anchor's rotation in space (around the Y 'up' axis) us unchanged when the function is called. Specifying TransformOrientation.Z_TOWARDS_CAMERA will mean that the anchor will be rotated about its Y axis so that its +Z axis is in the direction of the camera. This can be useful for object placement user experiences.
Each anchor produced by a WorldTracker has a status property. It allows you to tailor your user experience depending on how well the anchors you're using are being tracked. The possible values are:
ANCHOR_STATUS_INITIALIZING: the anchor has had a new pose set but isn't yet tracking itANCHOR_STATUS_TRACKING: the anchor is being actively trackedANCHOR_STATUS_PAUSED: the system is not able to actively track this anchor but can still update the pose on a 'best effort' basis. This can happen if, for example, the user moves rapidly to a new location. The anchor may return to the TRACKING state in the future if the system can re-detect the original anchor positionANCHOR_STATUS_STOPPED: the anchor is no longer being actively tracked and will not be recovered in the future unless a set function is called. In this state the pose is no longer meaningful.As with all the anchors supported by this library, the world tracking anchors' pose(...) functions allow you to choose where the origin of your 3D space is, and therefore the relative positions of the camera and anchors in that space.
In most cases, it makes sense to use the world anchor or the ground anchor for the origin of your space and this will mean any lighting or physics work as expected. A typical setup therefore may look like this:
// Get the pose of the camera relative to the ground anchor and use it as the camera's matrix
let cameraPoseMatrix = pipeline.cameraPoseWithOrigin(worldTracker.groundAnchor.poseCameraRelative());

// Get the pose of any custom anchor you have using the `pose(...)` function, passing in the
// camera's pose
let customAnchorMatrix = myCustomAnchor.pose(cameraPose);
To track content from a point on a surface in front of the user, create a new InstantWorldTracker, passing in your pipeline:
let instantTracker = new Zappar.InstantWorldTracker(pipeline);
Each InstantWorldTracker exposes a single anchor from its anchor parameter. That anchor has the following parameters of its own:
pose(cameraPose: Float32Array, mirror?: boolean): a function that returns the pose matrix for this anchorposeCameraRelative(mirror?: boolean): a function that returns the pose matrix (relative to the camera) for this anchor, for use with cameraPoseWithOriginTo choose the point in the user's environment that the anchor tracks from, use the setAnchorPoseFromCameraOffset(...) function, like this:
instantTracker.setAnchorPoseFromCameraOffset(0, 0, -5);
The parameters passed in to this function correspond to the X, Y and Z coordinates (in camera space) of the point to track. Choosing a position with X and Y coordinates of zero, and a negative Z coordinate, will select a point on a surface directly in front of the center of the screen.
The transformation returned by the pose(...) function provides a coordinate system that has its origin at the point that's been set, with the positive Y coordinate pointing up out of the surface, and the X and Z coordinates in the plane of the surface. How far the chosen point is from the camera (i.e. how negative the Z coordinate provided to setAnchorPoseFromCameraOffset is) determines the scale of the coordinate system exposed by the anchor.
A typical application will call setAnchorPoseFromCameraOffset each frame until the user confirms their choice of placement by tapping a button, like this:
// Not shown - initialization, camera setup & permissions

let instantTracker = new Zappar.InstantWorldTracker(pipeline);

let hasPlaced = false;

myConfirmButton.addEventListener("click", () => { hasPlaced = true });

function animate() {
    // Ask the browser to call this function again next frame
    requestAnimationFrame(animate);

    // Zappar's library uses this function to prepare camera frames for processing
    pipeline.processGL();

    // This function allows to us to use the tracking data from the most recently processed camera frame
    pipeline.frameUpdate();

    // Upload the current camera frame to a WebGL texture for us to draw
    pipeline.cameraFrameUploadGL();

    // Draw the camera to the screen - width and height here should be those of your canvas
    pipeline.cameraFrameDrawGL(width, height);

    if (!hasPlaced) instantTracker.setAnchorPoseFromCameraOffset(0, 0, -5);

    let projectionMatrix = pipeline.projectionMatrix(canvas.width, canvas.height);
    let cameraPoseMatrix = pipeline.cameraPoseDefault();
    let anchorPoseMatrix = instantTracker.anchor.pose(cameraPoseMatrix);

    // Render content using projectionMatrix, cameraPoseMatrix and anchorPoseMatrix
}

// Start things off
animate();
For a user experience featuring the user-facing camera to feel natural, the camera view must be mirrored. The Zappar library support two ways to provide a mirrored view:
In either case, the Zappar library provides the pipeline.cameraFrameUserFacing() function that returns true if the current camera frame came from a user-facing camera. You can use this to apply mirroring on a frame-by-frame basis, simplifying the process of building experiences that allow the user to switch between the cameras.
Perhaps the simplest approach, applying the following CSS to your canvas HTML element will correctly mirror the view:
canvas {
    transform: scaleX(-1);
}
Note that any AR content rendered will also be mirrored, including any text that's been rendered into your scene.
This approach allows you to mirror the camera image, without mirroring the AR content itself.
The following functions take optional final parameters that, if set to true will achieve this effect:
pipeline.cameraFrameDrawGL(renderWidth: number, renderHeight: number, mirror?: boolean): if you use this convenience function to render the camera image, pass true as the final parameter to render the camera image mirroredpipeline.cameraFrameTextureMatrix(renderWidth : number, renderHeight : number, mirror?: boolean) : Float32Array: if you are rendering the camera yourself, pass true to this function to get a UV matrix that mirrors the camera texture rendered to the full screen quadpipeline.cameraPoseWithAttitude(mirror?: boolean) : Float32Array: pass true as the parameter to this function if you use camera poses with device attitude. The other options for the camera pose do not require any extra parameter and the poses returned by them are appropriate for both mirrored and non-mirrored contentpose(cameraPose: Float32Array, mirror?: boolean) : Float32Array: pass true as the final parameter of anchors' pose functions to get poses that have the X-axis flipped but are otherwise non-invertedposeCameraRelative(mirror?: boolean) : Float32Array: if you use an anchor pose as the camera origin, pass true as the parameter of your call to the anchor's poseCameraRelative function to get a matrix that's consistent with mirror mode.FAQs
Zappar's computer vision for JavaScript, supporting image, face and instant world tracking, and barcode scanning.
The npm package @zappar/zappar receives a total of 914 weekly downloads. As such, @zappar/zappar popularity was classified as not popular.
We found that @zappar/zappar demonstrated a healthy version release cadence and project activity because the last version was released less than a year ago. It has 9 open source maintainers collaborating on the project.
Did you know?

Socket for GitHub automatically highlights issues in each pull request and monitors the health of all your open source dependencies. Discover the contents of your packages and block harmful activity before you install or update your dependencies.
Product
Add real-time Socket webhook events to your workflows to automatically receive pull request scan results and security alerts in real time.

Research
The Socket Threat Research Team uncovered malicious NuGet packages typosquatting the popular Nethereum project to steal wallet keys.

Product
A single platform for static analysis, secrets detection, container scanning, and CVE checks—built on trusted open source tools, ready to run out of the box.