Product
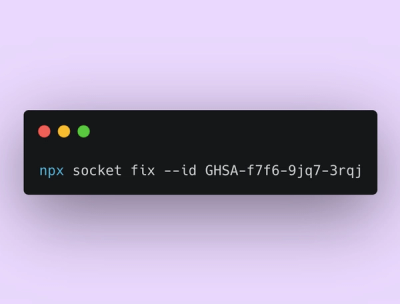
Announcing Socket Fix 2.0
Socket Fix 2.0 brings targeted CVE remediation, smarter upgrade planning, and broader ecosystem support to help developers get to zero alerts.
bt-admin-pj
Advanced tools
这不仅是一篇教程,还是通过命令行输出我自己简历的一个工具O(∩_∩)O哈哈哈~,很有趣的样子哦。
# 全局安装,安装报错是需要前面加上sudo
$ sudo npm install -g wcj
# 输出帮助
$ wcj -h
Usage: wcj 这里是我私人玩耍的命令哦![options] <package>
Commands:
resume|rs [options] [cmd] 这里是我的简历详情!
Options:
-h, --help output usage information
-V, --version output the version number
# 输出子命令帮助
$ wcj rs -h
Usage: resume|rs [options] [cmd]
这里是我的简历详情!
Options:
-h, --help output usage information
-b, --basicinfo [type] 基本信息
-e, --education [type] 教育经历
basicinfo 说明:
preview 预览简历
-b, --basicinfo 基本信息
name : 名字
height : 身高
dateOfBirth : 出生日期
workExperience : 工作经验
mobile : 手机号码
telephone : 电话号码
email : 邮箱地址
residency : 居住地点
currentSituation : 现状
currentCity : 当前城市
nation : 国家
region : 地区
postalCode : 邮编地址
ID : 身份证ID
website : 个人网赚
maritalStatus : 婚姻状况
politicalStatus : 政治面貌
-e, --education 教育经历
在使用 Nodejs 过程中,有很多包都支持全局安装,提供一个命令,然后在命令行我们就可以完成一些任务。有时候我们也需要开发这样的命令工具。在Node.js 中发现弄个命令行工具特别轻松,我来学习如何使用 Node.js 生成自己的command命令,在未来的项目中方便自己。
开始编写之前需要确认的一件事情是你已经安装了Node.js。你可以在命令行中运行 which node 来确认是否已经安装,或者运行 node -v 查看 node 的版本 。如果你已经安装了node,你可以看到类似于下面的输出结果,一般情况安装了node.js 顺带npm工具自动安装了。
$ which node
/usr/local/bin/node

$ node -v
v0.10.36
首先任意创建一个文件夹,初始化 package.json 文件,在该文件夹下创建bin目录:
$ mkdir wcj #创建一个文件夹
$ cd wcj && mkdir bin
$ npm init #初始化 `package.json` 文件
cd到 bin 目录下,新建一个 wcj.js 文件(名字自取),编写如下代码,在js文件顶部加上 #!/usr/bin/env node 这段代码:
#!/usr/bin/env node
var fs = require("fs"),
    path = process.cwd();

var run= function (obj) {
    if(obj[0] === '-v'){
        console.log('version is 1.0.0');
    }else if(obj[0] === '-h'){
        console.log('Useage:');
        console.log('  -v --version [show version]');
    }else{
        fs.readdir(path, function(err, files){
            if(err){
                return console.log(err);
            }
            for(var i = 0; i < files.length; i += 1){
                console.log(files[i]);
            }
        });
    }
};
//获取除第一个命令以后的参数,使用空格拆分
run(process.argv.slice(2));
上面的 #!/usr/bin/env node 被成为 shebang ,表示用后面的路径所示的程序来执行当前文件夹。还需要一个 package.json 文件
{
  "name": "wcj",
  "version": "1.0.0",
  "description": "wcj ---",
  "repository": {
    "type": "git",
    "url": "https://github.com/jaywcjlove/wcj.git"
  },
  "main": "index.js",
  "bin": { "wcj": "bin/wcj.js" },
  "author": "kenny wang <wowohoo@qq.com> ",
  "license": "MIT"
}
运行 node bin/wcj.js 会显示当前文件夹下的所以文件和文件夹名。这个玩意儿真的跑起来了。更多npm link的信息请查看
package.json 文件中 bin 里面的内容表示这个字段将 wcj 命令映射到了你的 bin/wcj.js 脚本。bin参考
此工具采用 npm版本号采用的 semver 规则
"bin": { "wcj": "bin/wcj.js" }
确保你在
package.json文件中添加了bin节点。然后打开命令了工具进入wcj目录
如果在项目目录下运行没有问题,可以将当前目录模块安装到全局,也可以采用此方法来更新你的命令行工具
sudo npm install . -g
或者目录输入 npm link 会自动添加全局的 symbolic link ,然后就可以使用自己的命令了。
$ wcj
#README.md
#bin
#package.json

$ wcj -v
# version is 1.0.0

$ wcj -h
#Useage:
#  -v --version [show version]
在运行 sudo npm install . -g 会有一堆警告可以忽视
如果你已经 npm link 搞了一遍你再 link 一遍,会报如下错误。即使你 npm unlink 也会报如下错误:
npm link
npm ERR! Darwin 14.3.0
npm ERR! argv "node" "/usr/local/bin/npm" "link"
npm ERR! node v0.10.36
npm ERR! npm  v2.7.1
npm ERR! path /usr/local/bin/wcj
npm ERR! code EEXIST

npm ERR! Refusing to delete: /usr/local/bin/wcj not in /Applications/XAMPP/xamppfiles/htdocs/git/github.com/myJS/wcj
File exists: /usr/local/bin/wcj
Move it away, and try again.
让你删除 /usr/local/bin/wcj 再 npm link , 删除此目录运行 rm -rf /usr/local/bin/wcj
发布必须注册 npm 账号,还有 github 账号,具体怎么玩儿问 谷歌大婶吧。在JSLite.io 中也有教程哦。
npm publish
前提你发布到了npm中,你就可以运行下面的命令了。
sudo npm install -g wcj
例子下载:v1.0.1
依赖 nodejs 原生开发命令工具比较麻烦,Commander.js 可以帮助我们简化命令行开发。Commander 是一款重量轻,表现力和强大的命令行框架。提供了用户命令行输入和参数解析强大功能。Commander 源自一个同名的Ruby项目。Commander.js 是 TJ 写的一个帮助快速开发Nodejs命令行工具的package。TJ这货是Nodejs社区里非常知名的高产作者。方便的定义option(包括option的描述和其回调函数)和子命令。
Commander的方便之处在于:
自记录代码、自动生成帮助、合并短参数(“ABC”==“-A-B-C”)、默认选项、强制选项、命令解析、提示符
Option(): 初始化自定义参数对象,设置“关键字”和“描述”
Command(): 初始化命令行参数对象,直接获得命令行输入
Command#command(): 定义一个命令名字
Command#action(): 注册一个callback函数
Command#option(): 定义参数,需要设置“关键字”和“描述”,关键字包括“简写”和“全写”两部分,以”,”,”|”,”空格”做分隔。
Command#parse(): 解析命令行参数argv
Command#description(): 设置description值
Command#usage(): 设置usage值
参考:官方文档例子
安装commander
sudo npm install commander
内置选项Built-in option,Commander 会为程序提供给一个默认的 -h option。
#!/usr/bin/env node
var program = require("commander");
program
  .version('0.0.1')
  .option('-r, --resume', '简历');
program.parse(process.argv);
其中parse函数是处理定义的option和sub-command, 解析命令行参数并触发相应的回调(下文会说)。
./bin/wcj.js -h
## 输出下面内容
  Usage: wcj [options]

  Options:

    -h, --help     output usage information
    -V, --version  output the version number
    -r, --resume   简历
可以看到默认就有个 -h 参数,传入后会输出 wcj 命令的帮助信息。
为 wcj 命令增加一个 option,展示说明是我的简历。
program
  .version('0.0.1')
  .option('-r| --resume', '简历');
program.parse(process.argv);

if (program.resume) {
    console.log('简历 - '
        + '这个是我的简历!'
    );
}
option() 接收四个参数
-r 为short option,--resume为对应的long option, 二者的分割符是|或者,。在命令行里使用时,这两个是等价的。 区别是后者可以在程序里通过 program.resume 的方式取到该 option 的值,此处 option 的值为 bool,也可以为字符串。option 描述, 会在 help 信息里展示出来当接收到未定义的option时,程序会自动抛出错误
./bin/wcj.js --res

## 输出下面内容
error: unknown option '--res'
Commander同时提供了api来取消这个自动报错机制, .allowUnknownOption()。
#!/usr/bin/env node
program
    .allowUnknownOption()
    .version('0.0.1')
    .option('-r, --resume', '简历');

program.parse(process.argv);
//省略一些细节...
Command支持以下两种类型的option: required 、 optional 和 bool
在option的第一个参数里, 除了short,long option,还可以指定option类型,分隔符也是|和, 其中
<lang> required参数,使用时后边必须跟参数值, 否则程序会报错[db] optional参数,后面可以选择是否跟参数值#!/usr/bin/env node
var program = require('commander');
program
.allowUnknownOption()
.version('0.0.1')
.option('-r, --resume', '简历')
.option('-l, --language <lang>', '这个语言是我擅长的语言。')
.option('-d, --database [db]', '这个是我擅长的数据库', 'MySQL')
.parse(process.argv);
if (program.resume) {
console.log('简历'
+ '-'
+ '这个是我的简历!'
);
}
if (program.language) console.log('language: 我擅长的语言`' + program.language + '`');
if (program.database) console.log('db: 我擅长的语言`' + program.database + '`');
看下效果
./bin/wcj.js -l python
## 输出
language: 我擅长的语言`python`
db: 我擅长的语言`MySQL`

./bin/wcj.js -l
## 输出
  error: option '-l, --language <lang>' argument missing
选项值为布尔型, 像上面的--date, 默认是false,当使用此参数时,program.date 为true, 否则为false
bool型option有个变种,当long option定义为no-*时默认值为true, 将
var program = require('commander');
program
  .option('-d, --no-date', 'don‘t display current date')
  .parse(process.argv);

var dt = new Date();
if (program.date) {
    console.log(dt.getFullYear()
        + '-'
        + (dt.getMonth() + 1)
        + '-'
        + dt.getDate()
    );
}
不带-d 参数时, 参数的默认值为true
Commander会根据配置的option,sub-command等信息,自动生成help信息。
可以通过监听--help事件来输出额外的帮助信息,如下面给fe命令添加了一些examples
// must be before .parse() since node's emit() is immediate
program.on('--help', function () {
    console.log('  自定义的例子:')
    console.log('')
    console.log('    输出命令  wcj -d')
    console.log('    输出命令  wcj -l python')
    console.log('')
})

program.parse(process.argv);
效果如下:
./bin/wcj.js -h

  Usage: wcj [options]

  Options:

    -h, --help             output usage information
    -d, --no-date          display current time
    -l, --language <lang>  这个语言是我擅长的语言。
    -b, --database [db]    该数据库为我最擅长数据库

  自定义的例子:

    输出命令  wcj -d
    输出命令  wcj -l python
#!/usr/bin/env node
var program = require('commander');
var appInfo = require('./../package.json');

program
    .version(appInfo.version)
    .usage('这里是我私人玩耍的命令哦![options] <package>')

//像git风格一样的子命令
program
    //子命令
    .command('resume <cmd>')
    //短命令 - 简写方式
    .alias('rs')
    //说明
    .description('这里是我的简历详情!')
    //resume的子命令
    .option("-n, --name <mode>", "输出我的名字")
    //注册一个callback函数
    .action(function(cmd, options){
        var nm = typeof options.name=='string'?options.name:""

        console.log('resume "%s" 使用 %s 模式', cmd, nm);
    }).on('--help', function() {
        //这里输出子命令的帮助
        console.log('  Examples:');
        console.log('    运行方法:');
        console.log('    $ ./bin/wcj.js resume ss -n aaaaa');
        console.log('    $ ./bin/wcj.js resume ss');
        console.log();
    });

program.parse(process.argv);
上面实例运行输出方式
$ ./bin/wcj.js resume ss -n aaaaa

#输出:
resume "ss" 使用 aaaaa 模式

$ ./bin/wcj.js resume ss
#输出:
resume "aa" 使用  模式
命名多少个命令就监听多少命令,--help 为默认监听事件。
program.on('--help', function(argv,test){
    process.exit(1);
});
命令行框架 yargs 和你的程序实现交互 yargs for github
var argv = require('yargs').argv;
if (argv.l == 'zh-cn') {
    console.log('Chinese site!');
}else if(argv.l == 'en') {
    console.log('English website!');
}
使用
var argv = require('yargs').argv;
if (argv.l == 'zh-cn') {
    console.log('Chinese site!');
}else if(argv.l == 'en') {
    console.log('English website!');
}
第一个小实例看了很多文章,记录一下,感觉非常简单的样子。
FAQs
Node.js make command-line tool for learning .
We found that bt-admin-pj demonstrated a not healthy version release cadence and project activity because the last version was released a year ago. It has 1 open source maintainer collaborating on the project.
Did you know?

Socket for GitHub automatically highlights issues in each pull request and monitors the health of all your open source dependencies. Discover the contents of your packages and block harmful activity before you install or update your dependencies.

Product
Socket Fix 2.0 brings targeted CVE remediation, smarter upgrade planning, and broader ecosystem support to help developers get to zero alerts.

Security News
Socket CEO Feross Aboukhadijeh joins Risky Business Weekly to unpack recent npm phishing attacks, their limited impact, and the risks if attackers get smarter.

Product
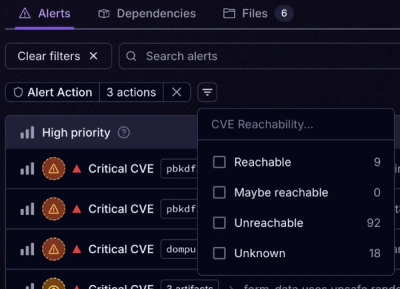
Socket’s new Tier 1 Reachability filters out up to 80% of irrelevant CVEs, so security teams can focus on the vulnerabilities that matter.