Security News
Feross on Risky Business Weekly Podcast: npm’s Ongoing Supply Chain Attacks
Socket CEO Feross Aboukhadijeh joins Risky Business Weekly to unpack recent npm phishing attacks, their limited impact, and the risks if attackers get smarter.
electron-shortcut-capture-patch
Advanced tools
**electron-shortcut-capture 是一个用在 electron 上使用的截图工具。**
electron-shortcut-capture 是一个用在 electron 上使用的截图工具。
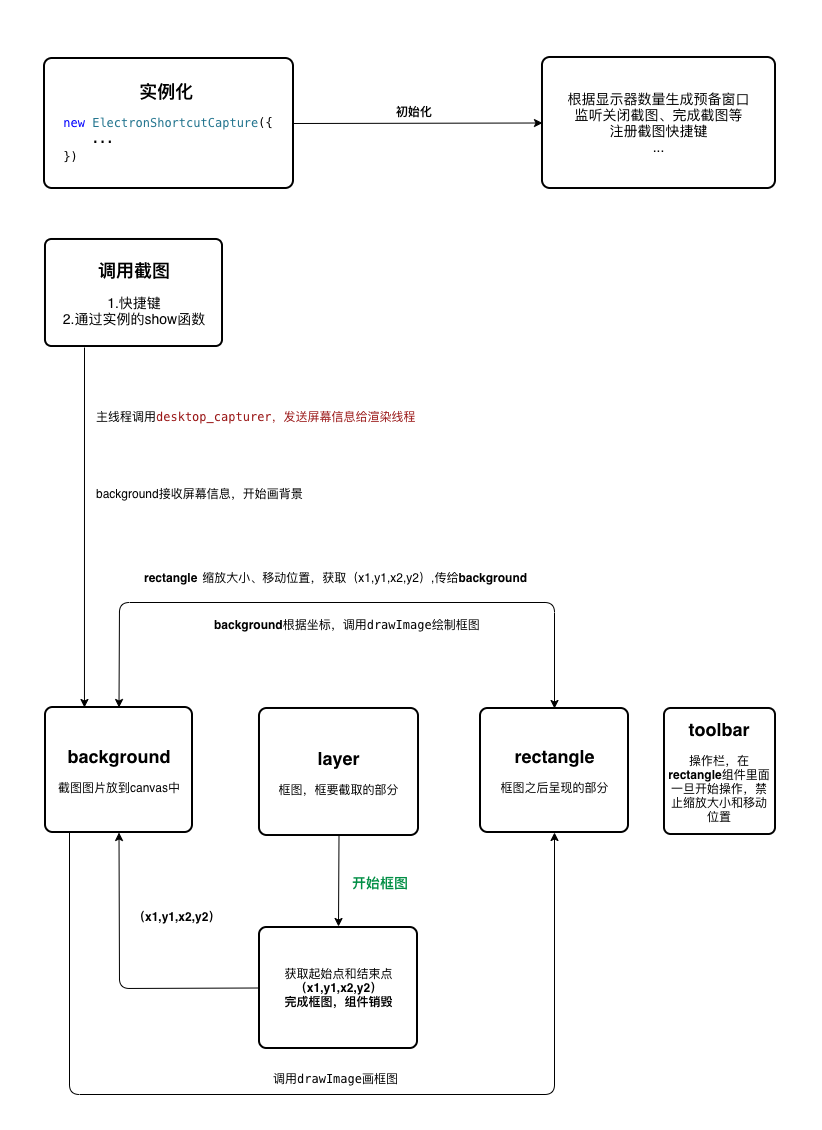
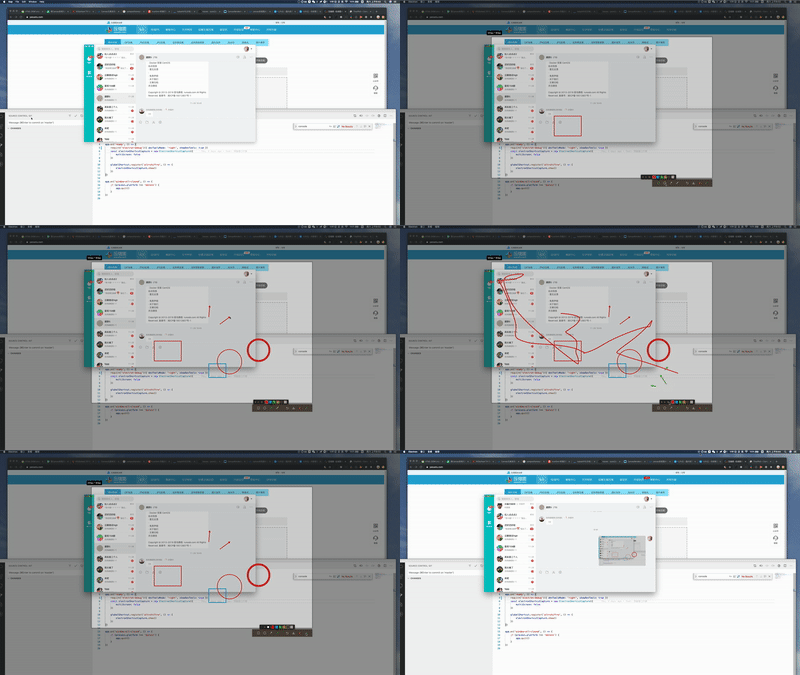
###工具原理

###已知问题:
...
import ElectronShortcutCapture from 'electron-shortcut-capture'
const electronShortcutCapture = new ElectronShortcutCapture({
multiScreen: false
})
electronShortcutCapture.show()
...
new ShortcutCapture({
	multiScreen: false
})
| 名称 | 类型 | 说明 | 默认值 |
|---|---|---|---|
| multiScreen | boolean | 是否使用多显示器截图,默认关闭 | false |
| downloadFileprefix | string | 下载文件前缀 | ' ' |
| key | string | 快捷键 | ' ' |
| onClipboard | (data: Electron.NativeImage) => void | 点击完成返回剪贴板内容 | |
| onHide | () => void | 关闭截图回调 | |
| onShow | () => void | 打开截图回调 | |
| onShowByKey | () => Promise | 快捷键打开截图回调 | |
| getLogger | (logger:string) => void | 截图 logger 回调,可以用来排查问题 |
| 名称 | 说明 | 参数 | 返回值 |
|---|---|---|---|
| show | 调用截图 | - | - |
| hide | 关闭截图 | autoRunReopen?: boolean 是否重新出初始化打开 | - |
| updateBindKey | 更新快捷键 | key: string | - |

1. 主线程主动获取图片资源。
desktopCapturer 方法是个渲染线程使用的方法,他通知主线程获取显示器资源然后再返回给渲染线程使用。那么如果我可以直接在主线程调用的话,就可以省掉渲染线程通知主线程的步骤了。网上查资料,发现是的确是可以通过主线程进行调用,也可以在 github 上看看 electron 的源码同样可以发现主线程调用 desktopCapturer 的写法。
  	/**
  	 * 获取显示器资源
  	 */
  	private getScreenSources: (
  		width: number,
  		height: number
  	) => Promise<Electron.DesktopCapturerSource[]> = (
  		width: number,
  		height: number
  	) => {
  		return new Promise((resolve, reject) => {
  			let desktopCapture = (process as any)
  				.electronBinding('desktop_capturer')
  				.createDesktopCapturer()

  			const stopRunning = () => {
  				if (desktopCapture) {
  					desktopCapture.emit = null
  					desktopCapture = null
  				}
  			}
  			const emitter = new EventEmitter()
  			emitter.once(
  				'finished',
  				(_, sources: Electron.DesktopCapturerSource[]) => {
  					stopRunning()
  					resolve(sources)
  				}
  			)
  			desktopCapture.emit = emitter.emit.bind(emitter)
  			desktopCapture.startHandling(
  				false,
  				true,
  				{ width: width, height: height },
  				true
  			)
  		})
  	}
2. 只执行一次获取显示器资源操作。
当你使用 desktopCapturer 获取显示器资源的时候,每次调用都会返回每个显示器的资源, 当我有多个显示器时,如果每个显示器都去请求一个资源的话会造成一定的资源浪费,由于我是在主线程调用 desktopCapturer 的,所以我可以在打开截图的时候获取所有显示器的资源,传给对应的渲染线程。
我的做法是,初始化备用窗口时,拿到没测窗口的大小,计算出长度最大值,宽度最大值,用来截取完整的窗口,最后用resize调整得到正确大小的图片资源。
	/**
	 * 初始化窗口,打开预备窗口供使用,不用每次重新创建
	 */
	private async initWin() {
		// 获取设备所有显示器
		this.displays = screen.getAllDisplays()
		this.captureWins = this.displays.map(display => {
			this.setScreenInfo(display)
			const captureWin = new BrowserWindow(browserWindowProps(display))
			captureWin['displayId'] = display.id
			return captureWin
		}) as IBrowserWindow[]
		this.captureWins.forEach(v => {
			v.loadURL(electronShortcutCapture.URL)
		})
	}

	/**
	 * 设置屏幕大小以及获取屏幕资源的宽高
	 */
	setScreenInfo = (display: Electron.Display) => {
		this.screenInfo[display.id] = {}
		this.screenInfo['cutWidth'] =
			!!this.screenInfo['cutWidth'] &&
			this.screenInfo['cutWidth'] > display.size.width
				? this.screenInfo['cutWidth']
				: display.size.width
		this.screenInfo['cutHeight'] =
			!!this.screenInfo['cutHeight'] &&
			this.screenInfo['cutHeight'] > display.size.height
				? this.screenInfo['cutHeight']
				: display.size.height
	}

	/**
	 * 获取图片资源
	 */
	getSourcePng = (
		source?: Electron.DesktopCapturerSource,
		width: number,
		height: number
	) => {
		return source.thumbnail.resize({ width, height }).toJPEG(100)
	}
3. 只初始化一次窗口。
程序初始化的时候,就根据显示器数量去创建预备窗口,关闭截图不用 close() 用 hide(),这样每次打开截图就省去了初始化的时间。当中要做好以下判断
	/**
	 * 打开截图
	 */
	async show() {
		if (this.shortcuting && this.shortCutScreenIsOpened()) {
			return console.log('正在截图')
		}
		if (this.isDownloading) {
			return console.log('正在执行下载操作')
		}
		if (!this.captureWins.length) {
			return console.log('当前没有窗口')
		}
		if (this.loadedPageDisplayIds.length !== this.captureWins.length) {
			return console.log('页面没完全加载')
		}

		...
4. 图片用 JPEG。
一次在win7上面调试,发觉获取显示器资源真的慢,于是从获取资源的方法入手,看网上方案一帮用到获取图片的方法 toPNG() 、toDataURL(),但是发现效率差不多,后面改用toJPEG(100),发现效率提高了不少。而且清晰度等也相差不大。于是改用*toJPEG(100)*方法。
对比
// mac 13.3英寸(2560 x 1600)
JPEG(100)   耗时 89.417ms
PNG()       耗时 2243.330ms
toDataURL() 耗时 2270.047ms
保存的图片大小6.5M左右差别不大,清晰度看不出明显差别。

// win10 GeForce gtx 1060 3GB
JPEG(100) 68.023ms
PNG() 344.477ms
toDataURL() 344.337ms
保存的图片大小6.5M左右差别不大,清晰度看不出明显差别。
300多毫秒其实还可以接受的
(PS: 采用toPNG()或toDataURL()在我的外接显示器上是不清晰一点,但在 mac 上面清晰度又一样,综合考虑使用toJPEG(100))
issue,还在 open 状态的,一开始只在 win7 上面发现,后面再小米的 win10 上面也发现,而且时有时无才恶心。我现在的处理是发现存在 display_id 为空的情况一律当做当显示器情况进行处理,只在鼠标所在显示器开启截图。
    ...

    /**
     * 判断获取DisplayId是否为空,
     * 有些电脑获取到的id为空的,就将截图操作重置为单显示器方式
     */
    const displayIdEmpty = sources.some(v => !v.display_id)

    ...
无法通过 display_id 去判断获取哪个显示器资源的话,就根据显示器索引查找
    ...

	/**
	 * 不能通过displayId获取屏幕资源的话
	 * 就根据显示器的索引去找对应的屏幕资源
	 * screenInfo在程序初始化时,保存了每个显示器的信息
	 */
	if (!source) {
		const sourceIndex = Object.keys(this.screenInfo).findIndex(
			displayId => displayId === currentFocusDisplayId
		)
		source = sources[sourceIndex]
	}

	...
issue,单个显示器正常,多个显示器情况就不大正常了。X 轴坐标可以理解为相对第一个显示器的位置,但 Y 轴坐标不知如何计算的。作者给出的答复是
The x and y coords are based on a coordinates system who's origin depends on the layout and configuration of your monitors. You shouldn't be trying to translate these coordinates like this, they are already in the correct coordinates system.

x和y坐标基于坐标系,坐标系的原点取决于显示器的布局和配置。您不应该尝试像这样平移这些坐标,因为它们已经在正确的坐标系中。
通过测试,发现的确坐标系统不同鼠标位置都会不同。


想要得到当前屏幕的鼠标位置,可以

const mouseX = mousePoint.x - currDisplay.bounds.x
const mouseY = mousePoint.y - currDisplay.bounds.y
因为我只初始化一次,所以屏幕数量、布局发生变化时,需要重新初始化。
...

screen.on('display-metrics-changed', () => {
	console.log('重新初始化')
	this.screenInfo = {}
	this.loadedPageDisplayIds = []
	this.captureWins.forEach(v => {
		v.close()
	})
	this.initWin()
})

...
FAQs
**electron-shortcut-capture 是一个用在 electron 上使用的截图工具。**
We found that electron-shortcut-capture-patch demonstrated a not healthy version release cadence and project activity because the last version was released a year ago. It has 1 open source maintainer collaborating on the project.
Did you know?

Socket for GitHub automatically highlights issues in each pull request and monitors the health of all your open source dependencies. Discover the contents of your packages and block harmful activity before you install or update your dependencies.

Security News
Socket CEO Feross Aboukhadijeh joins Risky Business Weekly to unpack recent npm phishing attacks, their limited impact, and the risks if attackers get smarter.

Product
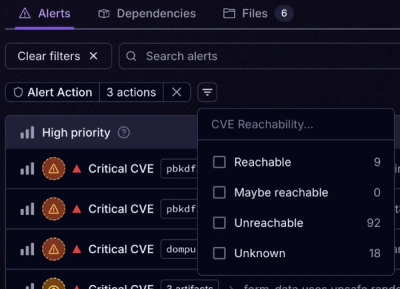
Socket’s new Tier 1 Reachability filters out up to 80% of irrelevant CVEs, so security teams can focus on the vulnerabilities that matter.

Research
/Security News
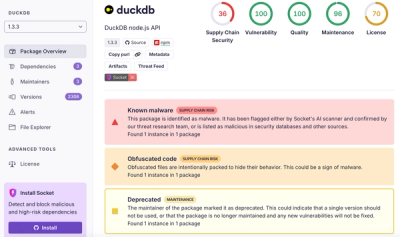
Ongoing npm supply chain attack spreads to DuckDB: multiple packages compromised with the same wallet-drainer malware.