Security News
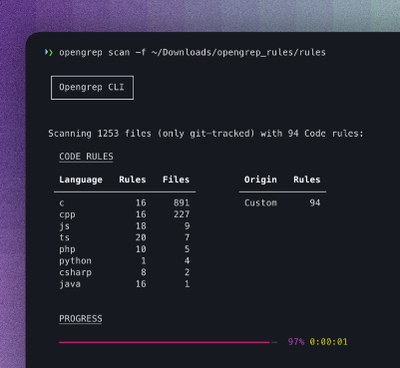
Opengrep Emerges as Open Source Alternative Amid Semgrep Licensing Controversy
Opengrep forks Semgrep to preserve open source SAST in response to controversial licensing changes.
lfr-amd-loader
Advanced tools
Supports loading modules via combo URL. Modules can be loaded automatically when some other module is being triggered, but only if some condition is met.
[sudo] npm install -g gulp.npm install in the cloned/forked repository.gulp to build it.This will build the loader in 'dist' directory. There will be two versions:
Both versions have minified versions too.
node combo.js. This will run a combo handler on port 3000.brew just do brew install mongoose, then navigate to Loader folder and run mongoose with the following params:
mongoose -listening_port 8080 -document_root dist.http://localhost:8080/demo/. Open the console and look for the messages. You will see that resouces are being loaded.Use define function:
define('aui-dialog', ['aui-node', 'aui-plugin-base'], function(node, pluginBase) {
    return {
        log: function(text) {
            console.log('module aui-dialog: ' + text);
        }
    };
});
You may specify that the module should be loaded on triggering some other module and only of some condition is being met:
define('aui-dialog', ['aui-node', 'aui-plugin-base'], function(node, pluginBase) {
    return {
        log: function(text) {
            console.log('module aui-dialog: ' + text);
        }
    };
}, {
    condition: {
        trigger: 'aui-test',
        test: function() {
            var el = document.createElement('input');

            return ('placeholder' in el);
        }
    },
    path: 'aui-dialog.js'
});
Here it is specified, that this module should be loaded automatically if developer requests 'aui-test' module, but only if some condition is being met.
'use strict';

import {log as logBase} from 'aui-base';
import {log as logCore} from 'aui-core';
import {log as logEvent} from 'aui-event';

function log(text) {
    logEvent('module aui-dialog says via aui-event: ' + text);
    logBase('in module aui-dialog logBase is available: ' + text);
    logCore('in module aui-dialog logCore is available: ' + text);
}

export {log};

/**
 * The code below is meta configuration, in this case it includes module condition only.
 * You may delete the whole function statement if you don't need it.
 */
(function META() {
    return {
        condition: {
            test: function() {
                return true;
            },
            trigger: 'nate'
        },
        path: 'nate.js'
    };
});


/**
 * There is another way to define META. Liferay Config Generator recognizes both.
 * It is up to you to choose one.
 */
META: ({
    condition: {
        test: function() {
            return true;
        },
        trigger: 'nate'
    },
    path: 'nate.js'
});
Transpile the above using Babel to AMD syntax. If you transpile using Babel, be sure you added the option for generating module IDs, or you use Liferay AMD modules config generator, which will generate the module name in "define" function, if not already available.
Use require method:
require('aui-base', 'aui-test', function(base, test) {
	    // your code here
	}, function(error) {
	    console.error(error);
	});
You can map parts of module's path with another value and the path will be replaced accordingly. Example:
__CONFIG__.paths = {
    'jquery': 'http://code.jquery.com/jquery-2.1.3.min.js',
    'aui': 'html/js'
};
In this case a module, specified as "jquery" will be loaded from "http://code.jquery.com/jquery-2.1.3.min.js" and a module, specified as "aui/loader.js" will be loaded from:
URL + basePath + "html/js/loader.js" where URL and basePath will be retrieved from config.js. Here is an exaple:
If the URL is "http://localhost:3000/modules" and basePath is "/base", the final path will look like this:
"http://localhost:3000/modules/base/html/js/loader.js"
You can map module names. Example:
__CONFIG__.maps = {
    'liferay': 'liferay@1.0.0',
    'liferay2': 'liferay@1.0.0'
};
Mapping a module will change its name in order to match the value, specified in the map. Examples:
require('liferay/html/js/autocomplete'...)
Under the hood, it will be the same as if the user specified:
require('liferay@1.0.0y/html/js/autocomplete'...)
Module mapping works in module dependencies too:
define('liferay@2.0.0', ['exports', 'liferay/test.js'], function (__exports__, liferay) {
    'use strict';

    function log(text) {
        console.log('liferay@2.0.0 says', text);
    }

    __exports__.log = log;
});
The module 'liferay/test.js' in the dependencies will be transparently changed to:
'liferay@1.0.0/test.js'
In order to load the modules via combo URL, a special config file have to be created first. You can do that manually or using a special tool, which comes together with the loader. It is called config-generator. See the next section for more details:
In order to generate the configuration, there is a separate project, called Liferay AMD modules config generator. You may use it to generate the configuration file automatically.
Here is an example usage:
$ lfr-cfgen -b src/config/config-base.js -o src/config/config.js src/modules
A preferable way to work with the loader would be to generate a separate, base config file and pass it to the config generator as in the code above. In the base file you may define the URLs, combine flags, etc. and then leave config generator to add the modules. Look on the example modules and the demo for more information. Then, just load the generated configuration to the browser and the Loader will do the rest.
Enjoy!
FAQs
AMD Loader with support for combo URL and conditional loading
The npm package lfr-amd-loader receives a total of 81 weekly downloads. As such, lfr-amd-loader popularity was classified as not popular.
We found that lfr-amd-loader demonstrated a not healthy version release cadence and project activity because the last version was released a year ago. It has 1 open source maintainer collaborating on the project.
Did you know?

Socket for GitHub automatically highlights issues in each pull request and monitors the health of all your open source dependencies. Discover the contents of your packages and block harmful activity before you install or update your dependencies.

Security News
Opengrep forks Semgrep to preserve open source SAST in response to controversial licensing changes.

Security News
Critics call the Node.js EOL CVE a misuse of the system, sparking debate over CVE standards and the growing noise in vulnerability databases.

Security News
cURL and Go security teams are publicly rejecting CVSS as flawed for assessing vulnerabilities and are calling for more accurate, context-aware approaches.