loop-task
Loop engineering for your terminal. Run any command on a cadence.
loop-task is a cross-platform CLI that runs shell commands at human-readable intervals. Create loops in the background, manage them from an interactive TUI board, or run them in the foreground. It is the heartbeat primitive for loop engineering: instead of running a task by hand every time, you schedule it once and let it run.
loop.ckgrafico.com




Loop engineering
Loop engineering is designing systems that run work on a cadence instead of triggering each run yourself. A loop is a recurring goal: you define a purpose, give it an interval, and let it iterate. It applies to ordinary engineering work just as much as to AI agents: health checks, sync jobs, test watches, data pulls, deploy polls, and report generation are all loops.
loop-task is that heartbeat as a tiny local primitive. Some examples:
loop-task new 30m -- npm test
loop-task new 10s -- curl -sf https://example.com/health
loop-task new 1h --project etl -- ./scripts/sync.sh
loop-task new 30m -- opencode run "find missing translations and translate them, 3 max"
No cron files to maintain and no daemon to babysit: loops persist across reboots, run in the background, and you watch them from a terminal board. The idea is described well in Addy Osmani's Loop Engineering, where scheduled automations are the first of the five pieces of a working loop.
Stay in control. A loop running unattended is also a loop failing unattended. Use --max-runs, watch the run history on the board, and review what each loop produces. The leverage moves to the loop; the responsibility stays with you.
Quick start
npm install -g loop-task
loop-task
loop-task start
loop-task new 30m -- npm test
loop-task run --now 10s -- echo hi
loop-task stop <id>
loop-task restart
loop-task api
Or run it directly:
npx loop-task
npx loop-task new 30m -- npm test
Agent skills
Install the public Loop Task skills with:
npx skills add ckgrafico/loop-task
The repository also contains internal development skills under .agents/skills/.
They are marked internal automatically by the repository pre-commit hook and are
not intended for installation by Loop Task users.
Requirements
- Node.js >= 20 - required for all commands including the board
npm install -g loop-task
All commands (start, new, run, board) work with Node alone.
Concepts
Loops
A loop is a schedule - it defines when something runs. Loops trigger tasks.
| Interval | How often to run (30s, 5m, 1h, 1d, 1w) |
| Task | Inline command or a reference to a previously defined task |
| Description | Optional label shown in the list; defaults to the task name |
| Run immediately? | Run once now, then every interval, or wait the first interval |
| Max runs | Stop after N runs, or leave blank to run forever |
Tasks
A task is an executable unit - it defines what runs. Tasks can chain to other tasks on success or failure.
| Name | A short label for the task |
| Command | The full command line |
| On success | Optional task to run when this one exits with code 0 |
| On failure | Optional task to run when this one exits with a non-zero code |
Tasks are reusable - the same task can be referenced by multiple loops or by other tasks' success/failure chains.
Projects
A project is an organizational scope for loops. Every loop belongs to exactly one project. The board shows only loops in the currently selected project.
| Name | A short label for the project |
| Color | One of six colors: white, cyan, orange, green, red, yellow |
Key behaviors:
- Default project - always present, cannot be renamed or deleted. New loops are assigned here when no other project is selected.
- Color bullets - each loop in the navigator displays a colored bullet (●) matching its project color.
- Project filter - the board shows only loops belonging to the currently active project. The selection persists across sessions via
localStorage.
To use projects from the board:
- Press
c to open the Project selector (switch between projects)
- Click Manage Projects in the filter bar (or use the keyboard shortcut) to open the Manage Projects page
- From the Manage Projects page:
n creates a new project, e renames the selected project, d deletes it, Esc returns to the board
From the CLI:
loop-task project list - list all projectsloop-task project new <name> [--color <color>] - create a projectloop-task project rename <id|name> <new-name> - rename a projectloop-task project color <id|name> <color> - change a project's colorloop-task project delete <id|name> - delete a project (loops move to Default)loop-task new <interval> --project <name> -- <command> - create a loop assigned to a project
Colors can be a name (white, cyan, green, yellow, orange, pink) or a #rrggbb hex value.
Commands
loop-task | Open the interactive board |
loop-task start | Start the background daemon, restore persisted loops |
loop-task new <interval> -- <command> | Create a background loop (creates an inline task) |
loop-task new <interval> --project <name> -- <command> | Create a loop assigned to a project |
loop-task run <interval> -- <command> | Run a loop in the foreground |
loop-task stop <id> | Stop a loop and interrupt its running child process |
loop-task restart | Kill the daemon and all running loops, then restart fresh |
loop-task status [--json] | Show status of all loops (JSON optional for scripting) |
loop-task export [file] | Export all configs to JSON file (or stdout) |
loop-task import <file> | Import configs from file (triggers hot-reload) |
loop-task api | Show HTTP API endpoints (base URL, Swagger UI, OpenAPI spec) |
loop-task http-host [address] | Show or set the HTTP API bind host (default 0.0.0.0; local to lock to loopback) |
loop-task project list | List all projects |
loop-task project new <name> [--color <color>] | Create a project |
loop-task project rename <id|name> <new-name> | Rename a project |
loop-task project color <id|name> <color> | Change project color |
loop-task project delete <id|name> | Delete a project (loops move to Default) |
Options (for new and run)
--now | Run immediately before waiting |
--max-runs <n> | Stop after N executions |
--cwd <dir> | Working directory for the command |
--verbose | Show execution details |
-h, --help | Display help |
-V, --version | Display version |
Examples
loop-task new 30m -- npm test
loop-task new --now 1h -- npm test
loop-task run --max-runs 5 5m -- npm test
loop-task new 30m --now -- opencode run "search missing translations and translate them, 3 maximum" --model "opencode/big-pickle"
loop-task new 30m --cwd ./packages/api -- npm test
loop-task run --verbose 30m -- npm test
When the command has its own flags, use -- to stop argument parsing:
loop-task new 30m -- node -e "console.log('hello')"
The board
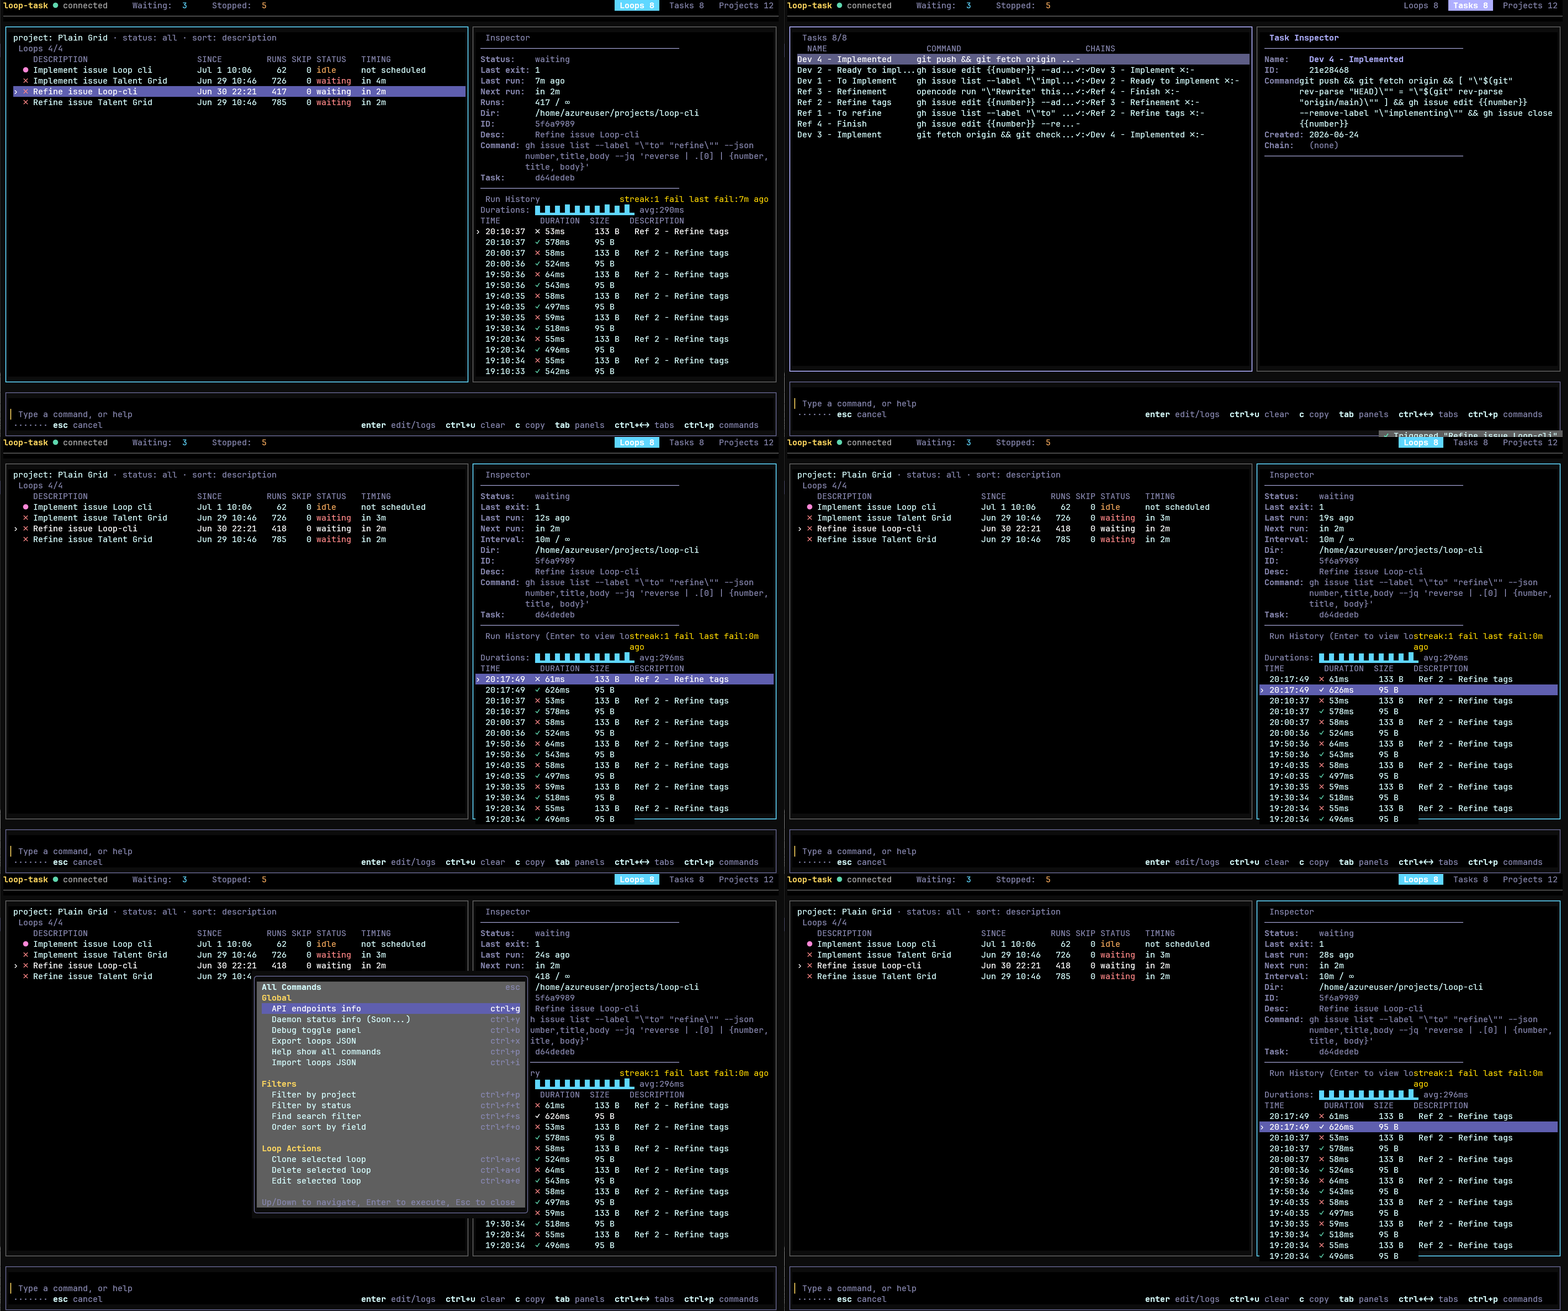
The board is the primary way to manage loops and tasks. It shows all loops, their status, run history, and logs in a single terminal interface.
Board controls
↑/↓, j/k    move selection
Enter       edit selected loop
e           edit loop
d/del       delete loop
p           pause (when waiting) / play (when idle/paused)
s           stop loop (resets schedule)
n           create a new loop
t           create a new task
o           cycle sort mode (order by)
←/→         switch between panels
/           search loops
h           toggle help
esc         quit
Destructive actions (pause, force run, delete) prompt a confirmation before executing.
Copy & paste in the command bar
The bottom command bar is a normal terminal input, so use your terminal's own clipboard gestures, they work in every terminal (including the VS Code integrated terminal, where Ctrl+C/V are captured by the editor):
- Paste with Ctrl+Shift+V (Windows/Linux), Cmd+V (macOS), or right-click. Multi-line pastes collapse to a single line.
- Ctrl+U clears the command bar (select-all + delete).
c copies the selected loop/task's command to the clipboard.- To copy arbitrary text, drag-select in the terminal and use its native copy (Ctrl+Shift+C / right-click).
Pause vs Stop
- Pause (
p) - temporarily halts the loop. Resuming continues the original schedule (e.g., a loop that runs every 6h at :00 paused at 12:00 and resumed at 14:00 will still fire at 16:00).
- Stop (
s) - halts the loop and clears the schedule. Playing starts a fresh interval from now (e.g., the same loop stopped at 12:00 and played at 14:00 will fire at 20:00).
How it works
loop-task (board)  ──IPC──►  daemon ──► loop 1 ──► task (command)
HTTP client (curl) ──HTTP──►       ├──► loop 2 ──► task ──► on-success task
browser (Swagger)  ──HTTP──►       └──► loop 3 ──► task ──► on-failure task
- The daemon is a background process that manages all loops and tasks. It starts automatically when you run
loop-task start or any command that needs it.
- The board is a terminal UI that connects to the daemon via IPC.
- Loops define schedules and reference tasks. Tasks define commands and optional success/failure chains.
- Loops and tasks persist to disk - they survive daemon restarts and system reboots. When the daemon starts, it restores all loops and accounts for elapsed time.
Lifecycle
loop-task start or loop-task new ... spawns the daemon if not running- The daemon creates a loop and a task, and persists their state to disk
loop-task opens the board for interactive management- Closing the board or terminal does not stop loops - the daemon keeps running
- After a reboot,
loop-task start restores all persisted loops with correct timing
Supported intervals
10s | 10 seconds |
5m | 5 minutes |
1h | 1 hour |
1d | 1 day |
1w | 1 week |
Behavior
- No overlapping - waits for the command to finish before starting the next interval
- Resilient - continues looping even if a command exits with a non-zero code
- Persistent - loop and task state is saved after every run; survives restarts
- Graceful shutdown - background loops are daemon-managed; foreground loops finish the current execution on Ctrl+C
Chain Context Sharing
When tasks are arranged in a chain (on-success or on-failure), context flows between them automatically. This lets later tasks reference output from earlier ones without custom glue.
How it works
- Auto-capture - stdout from every task in the chain is captured before the next task starts.
- Parse rules - captured output is parsed by content type:
- JSON object (
{"key": "value"}) - each key is merged into the shared context.
- JSONL (one JSON object per line) - each line's keys are merged in order.
- Plain text - stored under a single
output key.
- Empty output - no change to context.
- Template interpolation - use
{{key}} in the command or arguments of any task. Before spawning, {{key}} is replaced with the current value of key from the shared context.
- Merge semantics - keys accumulate across the chain. Task 1 produces
{ "id": "42" }, task 2 can use {{id}} and also add { "status": "ok" }. Task 3 sees both.
- Output clobbering - plain text tasks overwrite the
output key. Use JSON with named keys when data must survive across multiple downstream tasks.
- Context lifecycle - context is built fresh each loop iteration and exists only in memory. It is never persisted to disk.
Example: Issue Refinement Chain
A four-task chain that finds an issue, marks it in-progress, rewrites it with AI, and relabels it - all without re-querying:
Task 1 (primary): Find an issue to refine
gh issue list --label "to refine" --json number,title,body --jq '{number: .[0].number, title: .[0].title, body: .[0].body}'
stdout: {"number":123,"title":"Fix login","body":"It doesn't work"}
context: { number: 123, title: "Fix login", body: "It doesn't work" }
Task 2 (chain, onSuccess): Mark as in-progress
gh issue edit {{number}} --add-label "refining" --remove-label "to refine"
interpolated: gh issue edit 123 --add-label "refining" --remove-label "to refine"
Task 3 (chain, onSuccess): Rewrite with AI (edits the issue directly)
opencode run "Rewrite this GitHub issue as a detailed user story using project context. Update the issue title and body directly using gh issue edit. Issue number: {{number}} Original title: {{title}} Original body: {{body}}" --model "opencode/big-pickle"
interpolated: opencode run "Rewrite this GitHub issue as a detailed user story using project context. Update the issue title and body directly using gh issue edit. Issue number: 123 Original title: Fix login Original body: It doesn't work" --model "opencode/big-pickle"
Task 4 (chain, onSuccess): Relabel as ready to implement
gh issue edit {{number}} --remove-label "refining" --add-label "to implement"
interpolated: gh issue edit 123 --remove-label "refining" --add-label "to implement"
How it works
- Task 1 queries the issue and emits a JSON object with
number, title, and body via --jq. The primary task cannot use {{key}} interpolation because the chain context is empty when it runs.
- Task 2 receives
{{number}} interpolated from task 1's context. It relabels the issue from "to refine" to "refining" - no re-query needed.
- Task 3 runs opencode, which finds the issue by the "refining" label and rewrites it in place using
gh issue edit. The AI agent edits the issue directly - no need to parse its stdout as JSON.
- Task 4 receives
{{number}} (still 123 from task 1) and relabels the issue as "to implement" - no re-query needed.
Wrapping values with --jq
To avoid the plain-text output clobbering, wrap any value in a named JSON key using --jq (requires --json before --jq):
gh issue list --label "to refine" --json number,title --jq '{number: .[0].number, title: .[0].title}'
This stores { "number": 123, "title": "Fix login" } in context instead of overwriting output.
Example: Issue Implementation Chain
A four-task chain that finds an issue to implement, marks it in-progress, runs an AI agent to implement it, then closes it - all without re-querying:
Task 1 (primary): Find an issue to implement (or exit if one is already in progress)
gh issue list --label "implementing" --json number --jq 'length == 0' | grep -q true && gh issue list --label "to implement" --json number,title,body --jq '{number: .[0].number, title: .[0].title, body: .[0].body}'
stdout: {"number":456,"title":"Add dark mode toggle","body":"Users want a dark theme"}
context: { number: 456, title: "Add dark mode toggle", body: "Users want a dark theme" }
If an issue with the "implementing" label already exists, length == 0 returns false, grep -q true fails, and the && short-circuits - the chain does not fire. The loop waits for the next iteration.
Task 2 (chain, onSuccess): Mark as in-progress
gh issue edit {{number}} --add-label "implementing" --remove-label "to implement"
interpolated: gh issue edit 456 --add-label "implementing" --remove-label "to implement"
Task 3 (chain, onSuccess): Implement with AI agent
git fetch origin && git checkout main && git reset --hard origin/main && opencode run "Implement this GitHub issue using /ob-autopilot and return only JSON with fields title and body after implementation is completed, merged to main, pushed to origin and the issue has been referenced in GitHub. Issue title: {{title}} Issue body: {{body}}" --model "opencode/big-pickle"
interpolated: git fetch origin && git checkout main && git reset --hard origin/main && opencode run "Implement this GitHub issue using /ob-autopilot ... Issue title: Add dark mode toggle Issue body: Users want a dark theme" --model "opencode/big-pickle"
stdout: {"title":"Add dark mode toggle","body":"Implemented dark mode toggle with CSS variables..."}
context: { number: 456, title: "Add dark mode toggle", body: "Implemented dark mode toggle..." }
Task 4 (chain, onSuccess): Verify sync and close the issue
git push && git fetch origin && [ "$(git rev-parse HEAD)" = "$(git rev-parse origin/main)" ] && gh issue edit {{number}} --remove-label "implementing" && gh issue close {{number}}
interpolated: git push && git fetch origin && [ "$(git rev-parse HEAD)" = "$(git rev-parse origin/main)" ] && gh issue edit 456 --remove-label "implementing" && gh issue close 456
The git rev-parse check ensures local and remote are in sync before closing - if the push failed or remote is ahead, the command fails and the issue stays open.
Docker
docker run -it -v ~/.loop-cli:/root/.loop-cli loop-task
docker run -v ~/.loop-cli:/root/.loop-cli loop-task status --json
docker run -v ~/.loop-cli:/root/.loop-cli loop-task new 30m -- npm test
HTTP API
The daemon exposes a REST + SSE API on localhost:8845 (configurable via LOOP_CLI_HTTP_PORT). It starts automatically with the daemon, no extra flags needed.
Quick reference
curl http://127.0.0.1:8845/api/loops
curl -X POST http://127.0.0.1:8845/api/loops \
-H "Content-Type: application/json" \
-d '{"command":"echo hi","intervalHuman":"5m","description":"test"}'
curl http://127.0.0.1:8845/api/loops/abc123
curl -X POST http://127.0.0.1:8845/api/loops/abc123/pause
curl -X POST http://127.0.0.1:8845/api/loops/abc123/resume
curl -X POST http://127.0.0.1:8845/api/loops/abc123/trigger
curl -X POST http://127.0.0.1:8845/api/loops/abc123/stop
curl -X DELETE http://127.0.0.1:8845/api/loops/abc123
curl http://127.0.0.1:8845/api/loops/abc123/logs?tail=50
curl -N http://127.0.0.1:8845/api/loops/abc123/logs/stream
curl -N http://127.0.0.1:8845/api/events
curl http://127.0.0.1:8845/api/tasks
curl http://127.0.0.1:8845/api/projects
Interactive docs
- Swagger UI:
http://127.0.0.1:8845/api/docs
- OpenAPI 3.0 spec:
http://127.0.0.1:8845/api/openapi.json
From the CLI/TUI
loop-task api, prints all API endpoints to stdout- Board: press Ctrl+G or type
api, shows a toast with API info
Response format
All responses use a consistent JSON envelope:
{"ok": true, "data": ...}
{"ok": false, "error": {"message": "..."}}
If the port is already in use, the daemon skips the HTTP server and continues with IPC only.
Network access (remote / VMs)
The HTTP API (8845) and MCP server (8846) bind to 0.0.0.0 (all interfaces) by default, so a daemon on a VM or homelab box is reachable f, other machines out of the box — connect over SSH, Tailscale, or your LAN. loop-task http-host governs the bind for both.
The HTTP API is unauthenticated. Anything that can reach the bound port can create and trigger loops, i.e. run commands on the host. Because the default is 0.0.0.0, securing access is your responsibility at the network layer: run the box behind a VPN (Tailscale), reach it only via an SSH tunnel, and/or block the port at the cloud firewall so it isn't exposed to the public internet.
Change the bind host at any time (persisted in daemon settings, not an env var, and the daemon rebinds live, no restart):
loop-task http-host
loop-task http-host local
loop-task http-host 100.99.155.102
loop-task http-host all
Locking it down: if the box isn't behind a firewall/VPN you trust, either set loop-task http-host local and reach it through an SSH tunnel (ssh -L 8845:127.0.0.1:8845 <host>), or expose it tailnet-only with tailscale serve --bg 8845 (HTTPS at https://<node>.<tailnet>.ts.net, restrict further with Tailscale ACLs; never tailscale funnel).
Development
Requires Node.js >= 20. Uses pnpm for package management.
pnpm install
npm run build
Run locally:
tsx src/cli.ts
node dist/entry.js new --now 30m -- npm test
node dist/entry.js run --now --max-runs 1 10s -- echo hello
Quality gates:
pnpm run typecheck
pnpm run lint
pnpm run test
pnpm run build
Testing the board in a browser (ttyd)
Agents: Do NOT use ttyd unless the user explicitly asks you to check the CLI in a browser. It is never the default. Do not start a ttyd server on your own for "manual pass" tasks or visual QA, those are for the human. Reach for ttyd only when the user says "check the board in the browser", "use ttyd", or similar.
The board is an interactive TUI, so it needs a real terminal, you can't drive it from a piped/captured shell (and neither can an AI agent). ttyd shares a terminal over HTTP, which makes the board reachable from a browser and scriptable by browser-automation agents, but only when explicitly requested.
Install ttyd (see the ttyd README, e.g. winget install tsl0922.ttyd, brew install ttyd, or apt install ttyd), then serve the board from an interactive terminal:
ttyd -W -w "C:\Projects\Personal\loop-cli" -p 7681 pnpm run dev
ttyd -W -w "C:\Projects\Personal\loop-cli" -p 7681 node dist/entry.js
Open http://localhost:7681 in a browser and use the board as normal. -W makes it writable so keystrokes reach the TUI. Handy for demos, for testing on a machine without a good local terminal, and for letting an AI agent drive the board (navigate, send keys, screenshot; ttyd renders via xterm.js on a <canvas>, so read state from screenshots, not page text).
Windows note: always pass -w "<absolute repo path>". Without it, ttyd gives the spawned command no valid working directory and it fails with CreateProcessW failed with error 267, for every command (pnpm, npx, node all fail the same way; it is not a .cmd-shim issue). On macOS/Linux -w is optional but harmless. Start ttyd from a real interactive terminal; a detached/console-less launch can crash its ConPTY on Windows.
License
MIT