
Security News
PyPI’s New Archival Feature Closes a Major Security Gap
PyPI now allows maintainers to archive projects, improving security and helping users make informed decisions about their dependencies.
By Sarah Gooding - Jan 30, 2025
next-server-state
Advanced tools
A package that provides shared state management between Server and Client components in Next.JS v13 app router
:warning: This package is an experimental project to test and create the best approach for seamlessly sharing state between Server and Client components in Next.js app router. Contributions and suggestions are welcome :pray: .
This package provides shared state between server and client components in Next.js App router. It utilizes server-side session storage to store the state, seamlessly synchronizing it across components. Additionally, it offers a easy approach for reading and writing state data from both server and client sides.
Demo: https://next-server-state.vercel.app/
npm i next-server-state
Create file with path: /pages/api/server-state/[...path].ts (or .js if youre not using typescript)
/pages/api/server-state/[...path].ts
import { setupServerStateRoutes } from 'next-server-state';

export default setupServerStateRoutes();
Setup your server state:

// /lib/my-server-state.ts
import {
  createServerState,
  getServerState,
  useServerState
} from 'next-server-state';

type MyServerStateProps = {
  first_name: string;
  last_name: string;
  counter: number;
};

export const MyServerState =
  createServerState<MyServerStateProps>('my-state-unique-key', {
    first_name: '',
    last_name: '',
    counter: ''
  });

export function useMyServerState() {
  return useServerState<MyServerStateProps>(MyServerState);
}
export async function getMyServerState() {
  return getServerState<MyServerStateProps>(ExampleOneServerState);
}
Wrap your server and client component of which you wish to consume the server state in
import { MyServerState } from '../lib/my-server-state.ts'; // import state variable from the file you initialised it in

export const MyParentComponent = () => {
    return (
        <MyServerState.Provider>
            // ...your server and client components go here
        </MyServerState.Provider>
    )
}
How you use the server state depends on whether you're using it on server side or client side:
const [state, updateState] = useServerSide(myServerState)
const [state, updateState] = getServerSide(myServerState)
Notice: Using
getServerSideon client side will result in an error, and same goes with usinguseServerSideon the server side. so make sure you use the corosponding functions correctly.
Client Component you can read and set state data like so:
'use client'
import { useMyServerState } from '../lib/my-server-state.ts'; // import from the file you initialised the server state in

export function MyClientComponent(){
    const [state, updateState] = useMyServerState();

    const handleIncrement = ()=>{
		updateState({
		    counter: Number(state.counter) + 1
		})
    }

    return (
        <div>
            <p>Counter: <span>{state.counter}</span></p>
            <button type="button" onClick={handleIncrement}>Increment</button>
        </div>
    )
}
Server Component you can read state and render it like so:
import { getMyServerState } from '../lib/my-server-state.ts'; // import from the file you initialised the server state in

export async function MyServerComponent(){
    const [state, updateState] = await getMyServerState();

    // If needed although not recommended, You can also update state on a server component render
    // await updateState({ first_name: 'new name' })
    // const [newState] = await getServerState();

    return (
        <span>
            <span>{state.first_name}</span>
            // ...
        </span>
    )
}
Client Component with Server Actions you can read and set state data like so:
// server-actions.ts
'use server'
import { getMyServerState } from '../lib/my-server-state.ts'; // import from the file you initialised the server state in

export async function actionIncrementCounter(formData: FormData) {
  const [state, updateState] = await getMyServerState();

  updateState({
    counter: Number(state.counter ?? 0) + 1
  });

  return { message: 'Updated' };
}
// MyClientComponent.ts
'use client'
import { useMyServerState } from '../lib/my-server-state.ts'; // import from the file you initialised the server state in
import { actionIncrementCounter } from './server-actions.ts'; // Your server actions

export function MyClientComponent(){
    const [state] = useMyServerState();

    return (
        <div>
            <p>Counter: <span>{state.counter}</span></p>
            <form action={actionIncrementCounter}>
                <button type="submit">Increment</button>
            </form>
        </div>
    )
}
App Route Handler you can read and set state data like so:
import { getMyServerState } from '../lib/my-server-state.ts'; // import from the file you initialised the server state in

export async function POST() {
    const [state, updateState] = await getMyServerState();

    updateState({
        counter: Number(state.counter) + 1
    })

    return { message: 'Counter incremented' };
}
FAQs
A package that provides shared state management between Server and Client components in Next.JS v13 app router
We found that next-server-state demonstrated a not healthy version release cadence and project activity because the last version was released a year ago. It has 1 open source maintainer collaborating on the project.
Did you know?

Socket for GitHub automatically highlights issues in each pull request and monitors the health of all your open source dependencies. Discover the contents of your packages and block harmful activity before you install or update your dependencies.
Security News
PyPI now allows maintainers to archive projects, improving security and helping users make informed decisions about their dependencies.

Research
Security News
Malicious npm package postcss-optimizer delivers BeaverTail malware, targeting developer systems; similarities to past campaigns suggest a North Korean connection.
Security News
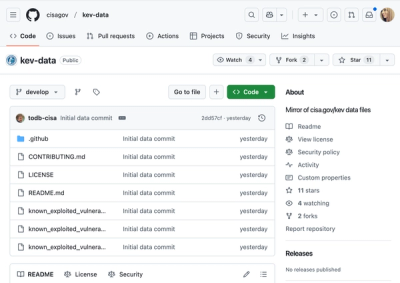
CISA's KEV data is now on GitHub, offering easier access, API integration, commit history tracking, and automated updates for security teams and researchers.