Security News
Another Round of TEA Protocol Spam Floods npm, But It’s Not a Worm
Recent coverage mislabels the latest TEA protocol spam as a worm. Here’s what’s actually happening.
ng-fire-admin
Advanced tools
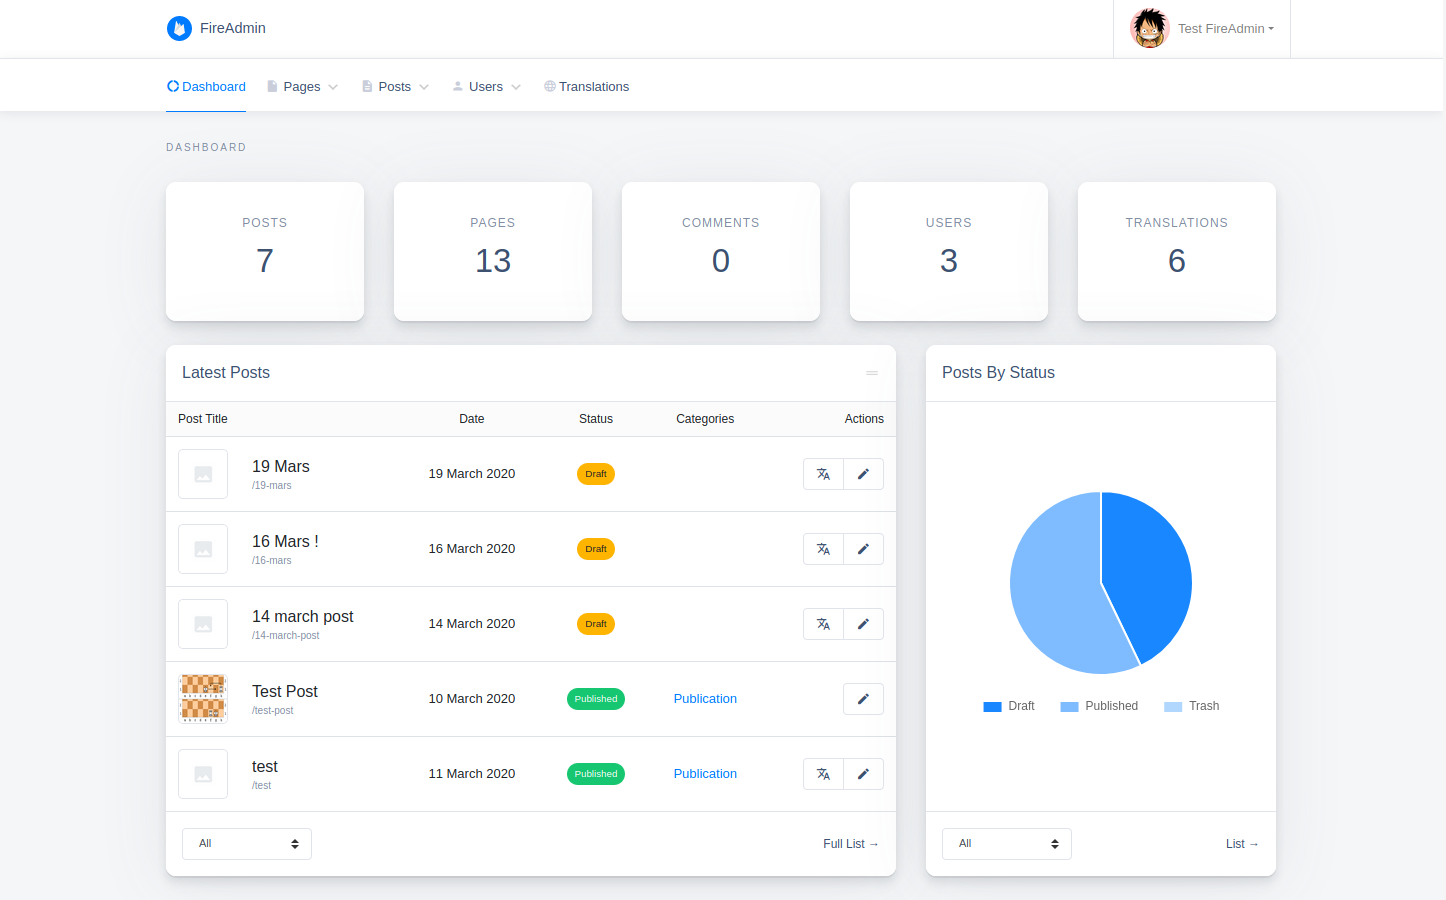
 FireAdmin
A minimalistic headless CMS around Angular & Firebase.

npm install --save ng-fire-admin
It's recommended to use a multi-project workspace with basically 2 main applications (one for the frontend part & the other for the backend) to avoid any potential conflicts, then apply the following changes on your backend app:
  ng new my-workspace --createApplication="false"
  cd my-workspace
  ng generate application backend --defaults --routing=true
  // you can add the frontend app the same way
  npm install --save ng-fire-admin
1. Setup your firebase project:
Start by adding a new project in your firebase console.
Enable Authentication by email & password.
Add a database to your project.
2. Add your firebase configuration in environment.ts:
  export const environment = {
    production: false,
+   firebase: {
+     apiKey: "<API_KEY>",
+     authDomain: "<PROJECT_ID>.firebaseapp.com",
+     databaseURL: "https://<DATABASE_NAME>.firebaseio.com",
+     projectId: "<PROJECT_ID>",
+     storageBucket: "<BUCKET>.appspot.com",
+     messagingSenderId: "<SENDER_ID>",
+     appId: "<APP_ID>"
+   }
  };
3. Register the FireAdminModule in a module, for example app module:
  import { BrowserModule } from '@angular/platform-browser';
  import { NgModule } from '@angular/core';

  import { AppRoutingModule } from './app-routing.module';
  import { AppComponent } from './app.component';
+ import { FireAdminModule } from 'ng-fire-admin';
+ import { environment } from '../environments/environment';

  @NgModule({
    declarations: [AppComponent],
    imports: [
      BrowserModule,
      AppRoutingModule,
+     FireAdminModule.initialize(environment.firebase)
    ],
    providers: [],
    bootstrap: [AppComponent]
  })
  export class AppModule {}
4. Setup a simple routing as below:
  import { NgModule } from '@angular/core';
  import { Routes, RouterModule } from '@angular/router';

  const routes: Routes = [
+   {
+     path: 'admin',
+     loadChildren: () => import('ng-fire-admin').then(m => m.FireAdminModule)
+   },
+   {
+     path: '**',
+     redirectTo: 'admin'
+   }
  ];

  @NgModule({
    imports: [RouterModule.forRoot(routes)],
    exports: [RouterModule]
  })
  export class AppRoutingModule { }
5. Edit your main component template (generally app.component.html) & keep only the <router-outlet></router-outlet> line:
+ <router-outlet></router-outlet>
6. Add the following styles & scripts entries to angular.json:
  "assets": [
    "projects/backend/src/favicon.ico",
    "projects/backend/src/assets"
  ],
  "styles": [
    "projects/backend/src/styles.css",
+   "node_modules/@fortawesome/fontawesome-free/css/all.min.css",
+   "node_modules/material-icons-font/material-icons-font.css",
+   "node_modules/bootstrap/dist/css/bootstrap.min.css",
+   "node_modules/datatables.net-responsive-dt/css/responsive.dataTables.min.css",
+   "node_modules/quill/dist/quill.snow.css"
  ],
  "scripts": [
+   "node_modules/jquery/dist/jquery.min.js",
+   "node_modules/popper.js/dist/umd/popper.min.js",
+   "node_modules/bootstrap/dist/js/bootstrap.min.js",
+   "node_modules/datatables.net/js/jquery.dataTables.min.js",
+   "node_modules/datatables.net-responsive-dt/js/responsive.dataTables.min.js",
+   "node_modules/chart.js/dist/Chart.min.js",
+   "node_modules/shards-ui/dist/js/shards.min.js",
+   "node_modules/quill/dist/quill.min.js"
  ]
7. You may also need to add the following lines to polyfills.ts:
  // Add global to window, assigning the value of window itself.
+ (window as any).global = window;
8. In order to protect your database & storage data, you must set the following rules in your firebase console:
Firestore Database rules:
rules_version = '2';
service cloud.firestore {
  match /databases/{database}/documents {
    match /{collection}/{document}/{path=**} {
      allow read: if canRead(collection, document);
      allow write: if canWrite(collection, document);
    }
    function canRead(collection, document) {
      return isAccessible(collection, document) || isAdmin();
    }
    function canWrite(collection, document) {
      return registrationEnabled(collection) || isAdmin() || (
        isEditor() && collection != 'config' && isAccessible(collection, document)
      );
    }
    function isAccessible(collection, document) {
      return collection != 'users' || isOwner(document);
    }
    function isSignedIn() {
      return request.auth != null;
    }
    function hasRole(role) {
      return isSignedIn() && get(/databases/$(database)/documents/users/$(request.auth.uid)).data.role == role;
    }
    function isAdmin() {
      return hasRole('admin');
    }
    function isEditor() {
      return hasRole('editor');
    }
    function isOwner(ownerId) {
      return isSignedIn() && request.auth.uid == ownerId;
    }
    function registrationEnabled(collection) {
      return collection == 'users' && (
        !exists(/databases/$(database)/documents/config/registration) ||
        get(/databases/$(database)/documents/config/registration).data.enabled
      );
    }
  }
}
  rules_version = '2';
  service cloud.firestore {
    match /databases/{database}/documents {
      match /{collection}/{document=**} {
        allow read: if collection != 'users' || request.auth != null;
        allow write: if request.auth != null;
      }
    }
  }
Storage rules:
rules_version = '2';
service firebase.storage {
  match /b/{bucket}/o {
    match /{allPaths=**} {
      allow read;
      allow write: if request.auth != null;
    }
  }
}
9. Launch your project using ng serve.
That's it :tada:, enjoy your ready to use backend app!
Run ng build to build the project. The build artifacts will be stored in the dist/ directory.
After building your library with ng build, go to the dist folder cd dist/fire-admin and run npm publish.
Firebase icon by Icons8.
This project is licensed under the MIT license.
FAQs
A mini headless CMS around Angular & Firebase.
We found that ng-fire-admin demonstrated a not healthy version release cadence and project activity because the last version was released a year ago. It has 1 open source maintainer collaborating on the project.
Did you know?

Socket for GitHub automatically highlights issues in each pull request and monitors the health of all your open source dependencies. Discover the contents of your packages and block harmful activity before you install or update your dependencies.

Security News
Recent coverage mislabels the latest TEA protocol spam as a worm. Here’s what’s actually happening.

Security News
PyPI adds Trusted Publishing support for GitLab Self-Managed as adoption reaches 25% of uploads

Research
/Security News
A malicious Chrome extension posing as an Ethereum wallet steals seed phrases by encoding them into Sui transactions, enabling full wallet takeover.