lastfm_monitor
lastfm_monitor is a tool for real-time monitoring of Last.fm users' music activity.
Features
- Real-time tracking of songs listened by Last.fm users (including detection of when a user gets online or offline)
- Possibility to automatically play songs listened by the tracked user in your local Spotify client
- Information about when a user pauses or resumes playback with the option to show a track progress indicator
- Information about how long the user listened to a song, whether it was shorter or longer than the track duration and if the song was skipped
- Email notifications for various events (user becomes active or inactive, specific or all songs, songs on loop, new entries appearing while user was offline, errors)
- Saving all listened songs with timestamps to the CSV file
- Clickable Spotify, Apple Music, YouTube Music and Genius Lyrics search URLs printed in the console & included in email notifications
- Displaying basic statistics for the user's playing session (duration, time span, number of listened and skipped songs, songs on loop, paused playback time and number of pauses)
- Support for detecting offline mode
- Support for detecting Spotify's private mode (not 100% accurate)
- Ability to control the running copy of the script via signals
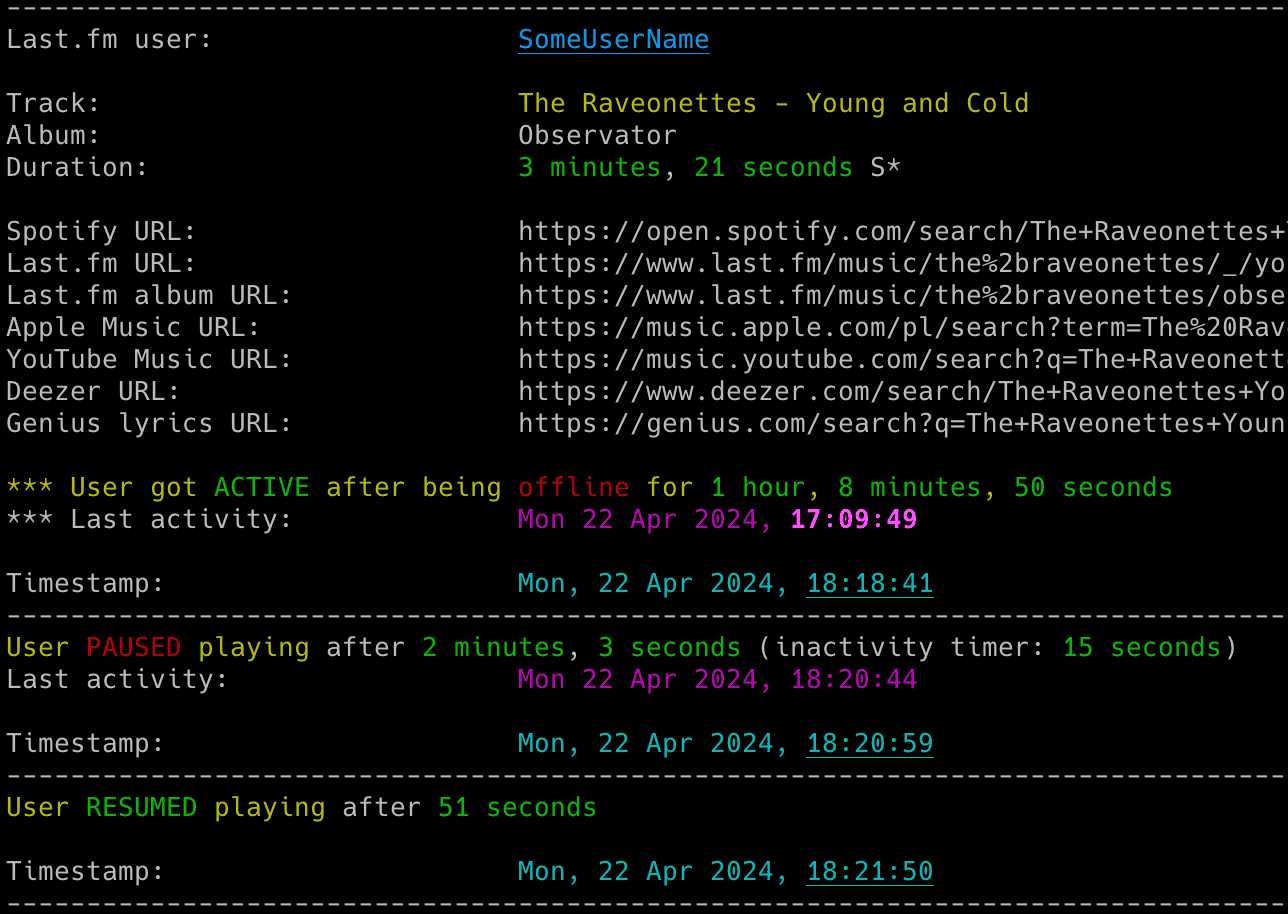
Table of Contents
Requirements
- Python 3.9 or higher
- Libraries: pyLast,
requests, python-dateutil, Spotipy, python-dotenv
Tested on:
- macOS: Ventura, Sonoma, Sequoia
- Linux: Raspberry Pi OS (Bullseye, Bookworm), Ubuntu 24, Rocky Linux 8.x/9.x, Kali Linux 2024/2025
- Windows: 10, 11
It should work on other versions of macOS, Linux, Unix and Windows as well.
Installation
Install from PyPI
pip install lastfm_monitor
Manual Installation
Download the lastfm_monitor.py file to the desired location.
Install dependencies via pip:
pip install pylast requests python-dateutil spotipy python-dotenv
Alternatively, from the downloaded requirements.txt:
pip install -r requirements.txt
Quick Start
lastfm_monitor <lastfm_username> -u "your_lastfm_api_key" -w "your_lastfm_api_secret"
Or if you installed manually:
python3 lastfm_monitor.py <lastfm_username> -u "your_lastfm_api_key" -w "your_lastfm_api_secret"
To get the list of all supported command-line arguments / flags:
lastfm_monitor --help
Configuration
Configuration File
Most settings can be configured via command-line arguments.
If you want to have it stored persistently, generate a default config template and save it to a file named lastfm_monitor.conf:
lastfm_monitor --generate-config > lastfm_monitor.conf
Edit the lastfm_monitor.conf file and change any desired configuration options (detailed comments are provided for each).
Last.fm API Key and Shared Secret
If you store the LASTFM_API_KEY and LASTFM_API_SECRET in a dotenv file you can update their values and send a SIGHUP signal to the process to reload the file with the new secret values without restarting the tool. More info in Storing Secrets and Signal Controls (macOS/Linux/Unix).
User Privacy Settings
In order to monitor Last.fm user activity, proper privacy settings need to be enabled on the monitored user account.
The user should go to Last.fm Privacy Settings.
The Hide recent listening information setting should be disabled.
Otherwise you will get this error message returned by the pyLast library: 'Login: User required to be logged in'.
Spotify Client ID and Secret (optional)
If you want to obtain the track duration from Spotify or use the automatic playback functionality, you need to get Spotify credentials to perform the Client Credentials OAuth flow.
-
Log in to Spotify Developer dashboard: https://developer.spotify.com/dashboard
-
Create a new app
-
For Redirect URL, use: http://127.0.0.1:1234
-
Select Web API as the intended API
-
Copy the Client ID and Client Secret
-
Provide the SP_CLIENT_ID and SP_CLIENT_SECRET secrets using one of the following methods:
- Pass it at runtime with
-z / --spotify-creds
- Use
SP_CLIENT_ID:SP_CLIENT_SECRET format - note the colon separator
- Set it as an environment variable (e.g.
export SP_CLIENT_ID=...; export SP_CLIENT_SECRET=...)
- Add it to .env file (
SP_CLIENT_ID=... and SP_CLIENT_SECRET=...) for persistent use
- Fallback: hard-code it in the code or config file
Example:
lastfm_monitor <lastfm_username> -z "your_spotify_app_client_id:your_spotify_app_client_secret"
The tool takes care of refreshing the access token so it should remain valid indefinitely.
If you store the SP_CLIENT_ID and SP_CLIENT_SECRET in a dotenv file you can update their values and send a SIGHUP signal to reload the file with the new secret values without restarting the tool. More info in Storing Secrets and Signal Controls (macOS/Linux/Unix).
SMTP Settings
If you want to use email notifications functionality, configure SMTP settings in the lastfm_monitor.conf file.
Verify your SMTP settings by using --send-test-email flag (the tool will try to send a test email notification):
lastfm_monitor --send-test-email
Storing Secrets
It is recommended to store secrets like LASTFM_API_KEY, LASTFM_API_SECRET, SP_CLIENT_ID, SP_CLIENT_SECRET or SMTP_PASSWORD as either an environment variable or in a dotenv file.
Set the needed environment variables using export on Linux/Unix/macOS/WSL systems:
export LASTFM_API_KEY="your_lastfm_api_key"
export LASTFM_API_SECRET="your_lastfm_api_secret"
export SP_CLIENT_ID="your_spotify_app_client_id"
export SP_CLIENT_SECRET="your_spotify_app_client_secret"
export SMTP_PASSWORD="your_smtp_password"
On Windows Command Prompt use set instead of export and on Windows PowerShell use $env.
Alternatively store them persistently in a dotenv file (recommended):
LASTFM_API_KEY="your_lastfm_api_key"
LASTFM_API_SECRET="your_lastfm_api_secret"
SP_CLIENT_ID="your_spotify_app_client_id"
SP_CLIENT_SECRET="your_spotify_app_client_secret"
SMTP_PASSWORD="your_smtp_password"
By default the tool will auto-search for dotenv file named .env in current directory and then upward from it.
You can specify a custom file with DOTENV_FILE or --env-file flag:
lastfm_monitor <lastfm_username> --env-file /path/.env-lastfm_monitor
You can also disable .env auto-search with DOTENV_FILE = "none" or --env-file none:
lastfm_monitor <lastfm_username> --env-file none
As a fallback, you can also store secrets in the configuration file or source code.
Usage
Monitoring Mode
To monitor specific user activity, just type Last.fm username as a command-line argument (lastfm_username in the example below):
lastfm_monitor <lastfm_username>
If you have not set LASTFM_API_KEY and LASTFM_API_SECRET secrets, you can use -u and -w flags:
lastfm_monitor <lastfm_username> -u "your_lastfm_api_key" -w "your_lastfm_api_secret"
If you want to obtain the track duration from Spotify or use the automatic playback functionality and you have not set SP_CLIENT_ID and SP_CLIENT_SECRET, you can use -z flag:
lastfm_monitor <lastfm_username> -z "your_spotify_app_client_id:your_spotify_app_client_secret"
By default, the tool looks for a configuration file named lastfm_monitor.conf in:
- current directory
- home directory (
~)
- script directory
If you generated a configuration file as described in Configuration, but saved it under a different name or in a different directory, you can specify its location using the --config-file flag:
lastfm_monitor <lastfm_username> --config-file /path/lastfm_monitor_new.conf
The tool runs until interrupted (Ctrl+C). Use tmux or screen for persistence.
You can monitor multiple Last.fm users by running multiple copies of the script.
The tool automatically saves its output to lastfm_monitor_<username>.log file. It can be changed in the settings via LF_LOGFILE configuration option or disabled completely via DISABLE_LOGGING / -d flag.
The tool also saves the last activity information (artist, track, timestamp) to lastfm_<username>_last_activity.json file, so it can be reused in case the tool needs to be restarted.
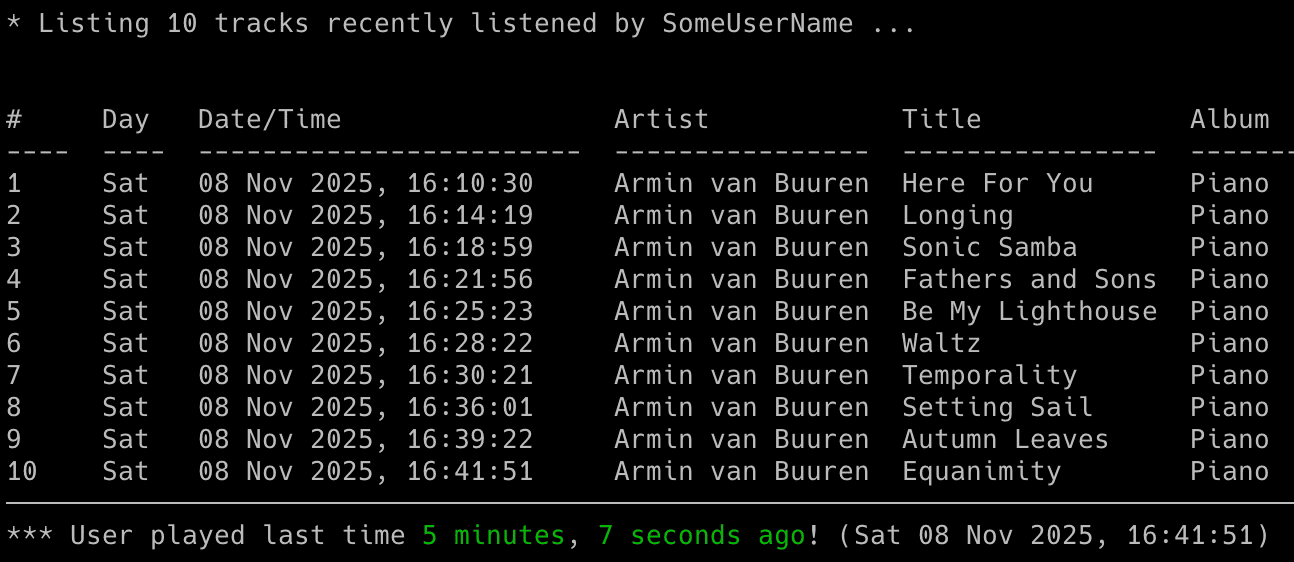
Listing Mode
There is another mode of the tool that prints the recently listened tracks for the user (-l flag).
You can also add the -n flag to specify how many tracks should be displayed, by default it shows the last 30 tracks:
lastfm_monitor <lastfm_username> -l -n 10
If you want to not only display, but also save the list of recently listened track to a CSV file, use the -l flag with -b indicating the CSV file. As before, you can add the -n flag to specify how many tracks should be displayed/saved:
lastfm_monitor <lastfm_username> -l -n 10 -b lastfm_tracks_username.csv
Email Notifications
To enable email notifications when a user becomes active:
- set
ACTIVE_NOTIFICATION to True
- or use the
-a flag
lastfm_monitor <lastfm_username> -a
To be informed when a user gets inactive:
- set
INACTIVE_NOTIFICATION to True
- or use the
-i flag
lastfm_monitor <lastfm_username> -i
To be notified when new entries appear when the user is offline:
- set
OFFLINE_ENTRIES_NOTIFICATION to True
- or use the
-f flag
lastfm_monitor <lastfm_username> -f
To get email notifications when a monitored track or album plays:
- set
TRACK_NOTIFICATION to True
- or use the
-t flag
For that feature you also need to create a file with a list of songs you want to track (one track or album per line). Specify the file using the MONITOR_LIST_FILE or -s flag:
Example file lastfm_tracks_username:
we fell in love in october
Like a Stone
Half Believing
Something Changed
I Will Be There
You can comment out specific lines with # if needed.
Then run the tool with -t and -s flags:
lastfm_monitor <lastfm_username> -t -s lastfm_tracks_username
To enable email notifications for every song listened by the user:
- set
SONG_NOTIFICATION to True
- or use the
-j flag
lastfm_monitor <lastfm_username> -j
To be notified when a user listens to the same song on loop:
- set
SONG_ON_LOOP_NOTIFICATION to True
- or use the
-x flag
lastfm_monitor <lastfm_username> -x
To disable sending an email on errors (enabled by default):
- set
ERROR_NOTIFICATION to False
- or use the
-e flag
lastfm_monitor <lastfm_username> -e
Make sure you defined your SMTP settings earlier (see SMTP settings).
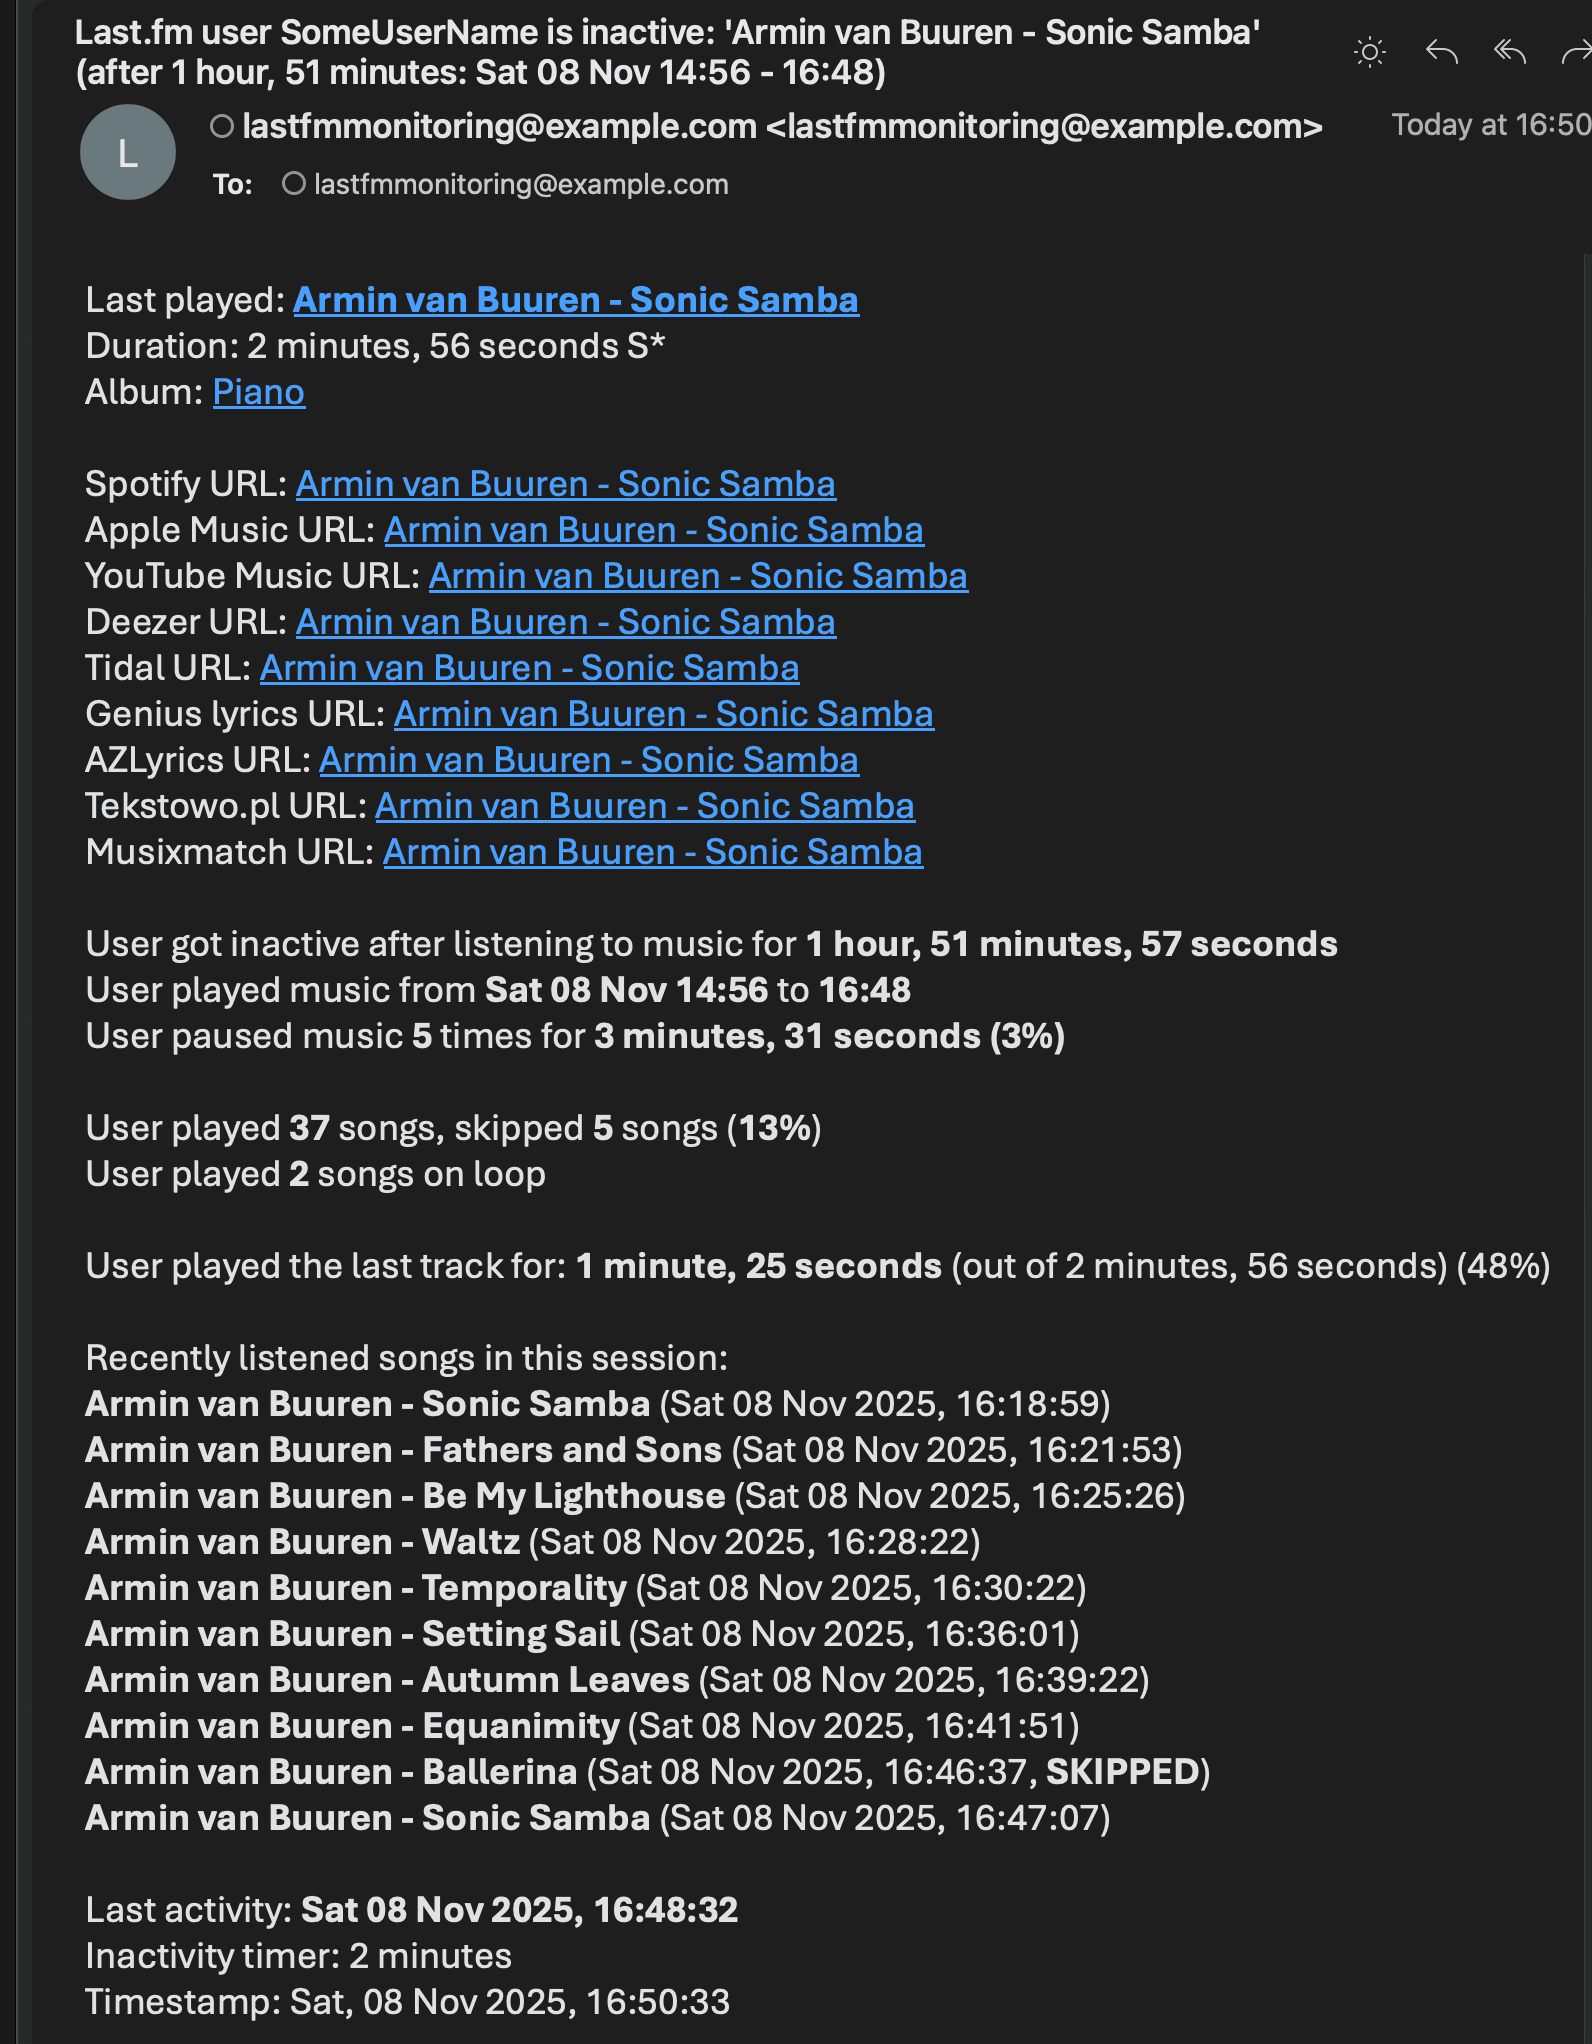
Example email:
CSV Export
If you want to save all listened songs to a CSV file, set CSV_FILE or use -b flag:
lastfm_monitor <lastfm_username> -b lastfm_tracks_username.csv
The file will be automatically created if it does not exist.
Automatic Playback of Listened Tracks in the Spotify Client
If you want the tool to automatically play the tracks listened to by the user in your local Spotify client:
- set
TRACK_SONGS to True
- or use the
-g flag
lastfm_monitor <lastfm_username> -g
Your Spotify client needs to be installed and running for this feature to work.
In order to use this functionality you need to have Spotipy installed as described here and properly defined Spotify client ID and secret values as described here.
The tool fully supports automatic playback on Linux and macOS. This means it will automatically play the changed track. It will also automatically pause and resume playback following the tracked user's actions. Additionally, it can pause or play an indicated track once the user becomes inactive (see the SP_USER_GOT_OFFLINE_TRACK_ID configuration option).
For Windows, it works in a semi-automatic way: if you have the Spotify client running and you are not listening to any song, then the first track will play automatically. However, subsequent tracks will be located in the client, but you will need to press the play button manually.
You can change the playback method per platform using the corresponding configuration option.
For macOS set SPOTIFY_MACOS_PLAYING_METHOD to one of the following values:
- "apple-script" (recommended, default)
- "trigger-url"
For Linux set SPOTIFY_LINUX_PLAYING_METHOD to one of the following values:
- "dbus-send" (most common one, default)
- "qdbus" (try if dbus-send does not work)
- "trigger-url"
For Windows set SPOTIFY_WINDOWS_PLAYING_METHOD to one of the following values:
- "start-uri" (recommended, default)
- "spotify-cmd"
- "trigger-url"
The recommended defaults should work for most people.
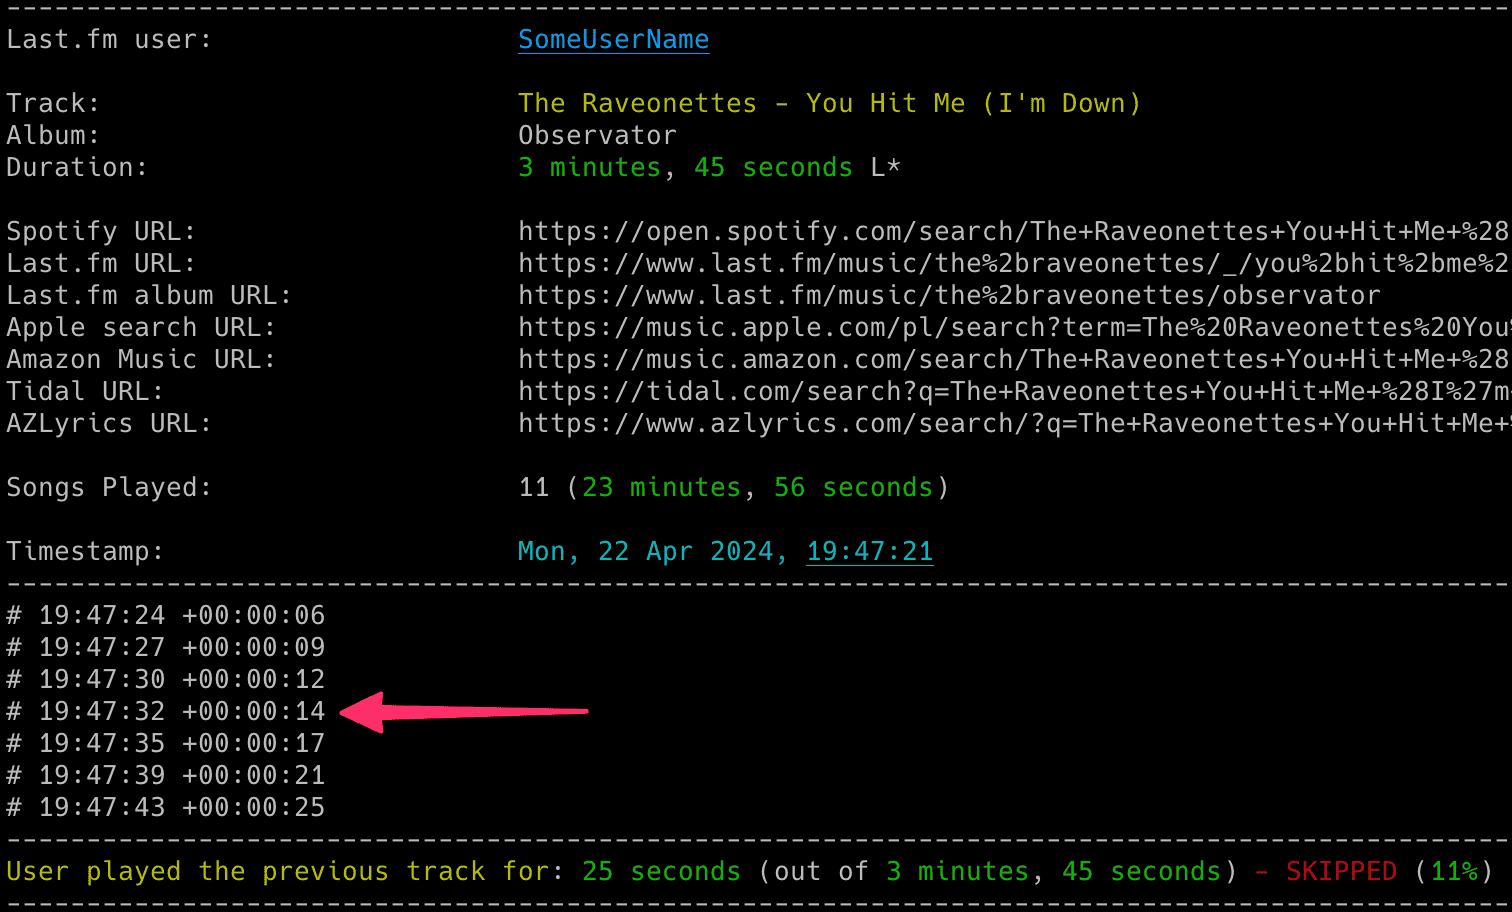
Progress Indicator
If you want to see a real-time progress indicator showing the exact minute and second of the track the user is currently listening to:
- set
PROGRESS_INDICATOR to True
- or use the
-p flag
lastfm_monitor <lastfm_username> -p
For this functionality to work correctly, it is suggested to set the active check interval (LASTFM_ACTIVE_CHECK_INTERVAL / -k flag) to a low value (such as 2-5 seconds).
Getting Track Duration from Spotify
If you want the tool to fetch the track duration from Spotify instead of Last.fm, which very often reports the wrong duration (or none at all):
- set
USE_TRACK_DURATION_FROM_SPOTIFY to True
- or use the
-r flag
lastfm_monitor <lastfm_username> -r
In order to use this functionality you need to have Spotipy installed as described here and properly defined Spotify client ID and secret values as described here.
You will be able to tell if the track duration comes from Spotify as it has an S* suffix at the end (e.g. 3 minutes 42 seconds S*), while those coming from Last.fm have an L* (e.g. 2 minutes 13 seconds L*).
You can disable showing the track duration marks (L* S*) via the -q flag.
lastfm_monitor <lastfm_username> -r -q
Duration marks are not displayed if the functionality to retrieve track duration from Spotify is disabled.
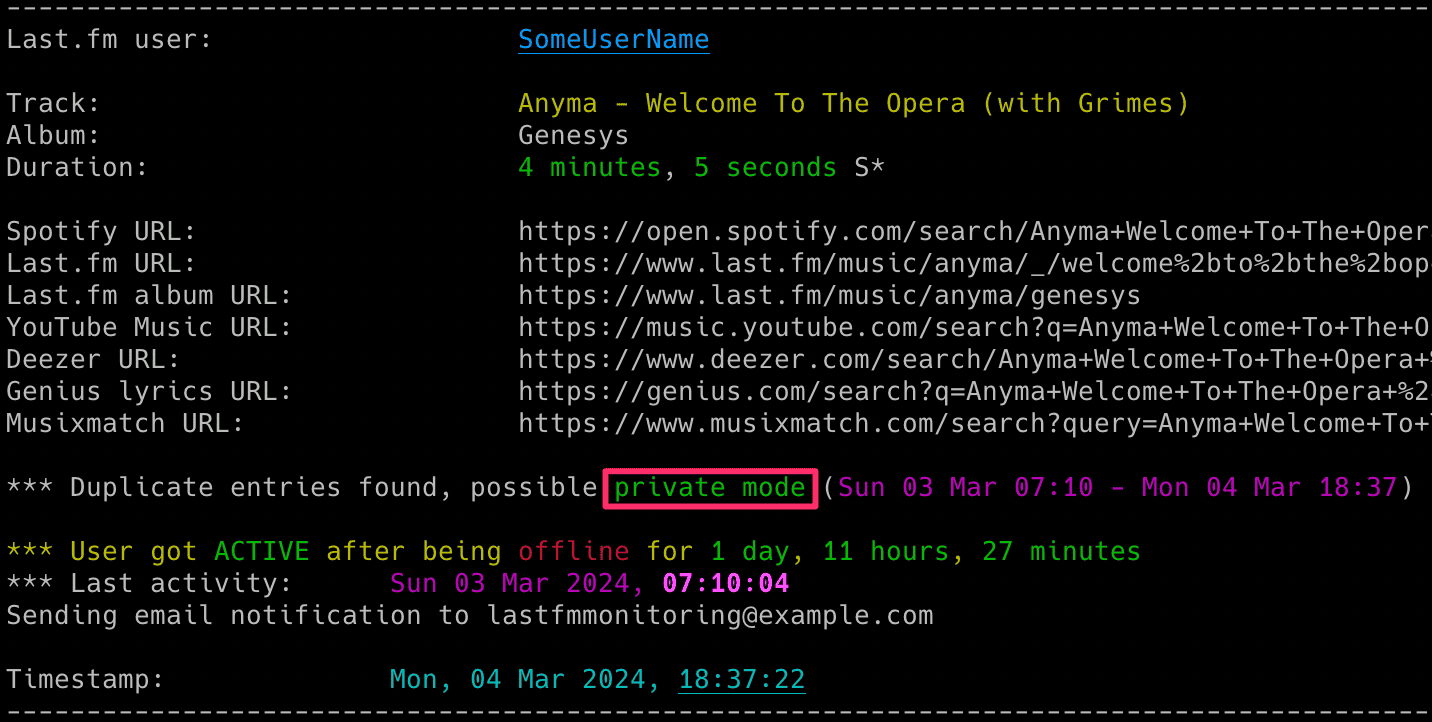
Private Mode Detection in Spotify
The tool includes functionality to detect when private mode is potentially used in Spotify and even estimates the duration of its usage. It is enabled by default and is not configurable.
It is not 100% accurate. I have observed that when private mode is used, especially for extended periods, it often results in many duplicate entries being created in a Last.fm account after private mode is disabled. This leads to different tracks having the same start timestamp.
I suspect this is related to a bug in Spotify and mainly occurs when the user has Spotify on multiple devices.
However, keep in mind that this is not 100% accurate. I have observed duplicate entries even without private mode, but in such cases, the number of duplicate entries is limited. Therefore, do not treat it as something completely certain, but it is a pretty good indicator that private mode was used.
Check Intervals
If you want to customize polling intervals, use -k and -c flags (or corresponding configuration options):
lastfm_monitor <lastfm_username> -k 2 -c 10
LASTFM_ACTIVE_CHECK_INTERVAL, -k: check interval when the user is online, i.e. currently playing (seconds)LASTFM_CHECK_INTERVAL, -c: check interval when the user is considered offline, i.e. not playing music (seconds)
If you want to change the time required to mark the user as inactive (the timer starts once the user stops playing the music), use -o flag (or LASTFM_INACTIVITY_CHECK configuration option):
lastfm_monitor <lastfm_username> -o 120
Signal Controls (macOS/Linux/Unix)
The tool has several signal handlers implemented which allow to change behavior of the tool without a need to restart it with new configuration options / flags.
List of supported signals:
| USR1 | Toggle email notifications when user gets active/inactive or new offline entries show up (-a, -i, -f) |
| USR2 | Toggle email notifications for every song (-j) |
| URG | Toggle showing of progress indicator (-p) |
| CONT | Toggle email notifications for tracked songs (-t) |
| PIPE | Toggle email notifications when user plays song on loop (-x) |
| TRAP | Increase the inactivity check timer (by 30 seconds) (-o) |
| ABRT | Decrease the inactivity check timer (by 30 seconds) (-o) |
| HUP | Reload secrets from .env file |
Send signals with kill or pkill, e.g.:
pkill -USR1 -f "lastfm_monitor <lastfm_username>"
As Windows supports limited number of signals, this functionality is available only on Linux/Unix/macOS.
Coloring Log Output with GRC
You can use GRC to color logs.
Add to your GRC config (~/.grc/grc.conf):
# monitoring log file
.*_monitor_.*\.log
conf.monitor_logs
Now copy the conf.monitor_logs to your ~/.grc/ and log files should be nicely colored when using grc tool.
Example:
grc tail -F -n 100 lastfm_monitor_<username>.log
Change Log
See RELEASE_NOTES.md for details.
License
Licensed under GPLv3. See LICENSE.