Product
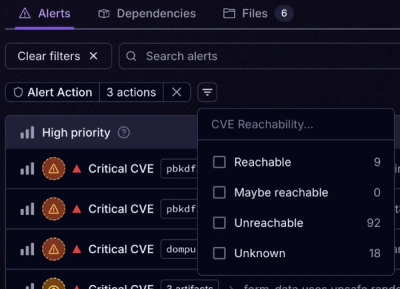
Introducing Tier 1 Reachability: Precision CVE Triage for Enterprise Teams
Socket’s new Tier 1 Reachability filters out up to 80% of irrelevant CVEs, so security teams can focus on the vulnerabilities that matter.
pymenu-cli is a Python library that simplifies the creation of interactive command-line interface (CLI) menus. It provides a convenient way to define hierarchical menu structures and associate actions with menu items.
pip install pymenu-cli
menu.json)actions.py)from pymenu_cli.menu import load_menu
# Define the 'menu' and the 'action' files
menu_file_path = 'menu.json'
actions_file_path = 'actions.py'
# Init the menu with this files
main_menu = load_menu(menu_file_path, actions_file_path)
# Display the menu
main_menu.display()
pymenu-cli --menu menu.json --actions actions.py
pymenu-cli takes care of the menu navigation, menu stying, user input handling, and execution of the associated actions based on the user's selections.
The menu.json file defines the structure of your menu. Here's an example:
{
  "banner": {
    "title": "HELLO",
    "font": "white_bubble"
  },
  "title": "Main Menu",
  "color": {
    "text": "light_blue",
    "background": "black"
  },
  "items": [
    {
      "title": "Option 1",
      "color": {
        "text": "yellow",
        "background": "blue"
      },
      "action": "action_function_1"
    },
    {
      "title": "Option 2",
      "color": {
        "text": "black",
        "background": "light_yellow"
      },
      "submenu": {
        "title": "Submenu",
        "items": [
          {
            "title": "Submenu Option 1",
            "action": "action_function_2"
          },
          {
            "title": "Submenu Option 2",
            "action": "action_function_3"
          }
        ]
      }
    }
  ]
}
In the menu.json file, you can specify the following properties:
banner (optional): The banner configuration for the menu.
title: The text to display in the banner.font (optional): The font to use for the banner. If not specified, the default font will be used.title: The title of the menu or submenu.color (optional): The color settings for the menu or submenu title.
text: The color of the text (e.g., "red", "light_blue").background: The color of the background (e.g., "white", "black").items: An array of menu items, each with its own properties:
title: The title of the menu item.color (optional): The color settings for the menu item title.action (optional): The name of the action function to execute when the item is selected.submenu (optional): A nested submenu with its own title and items.PyMenu CLI supports displaying a banner using ASCII art. The banner can be customized by specifying the banner property in the menu.json file. The banner property has the following sub-properties:
title: The text to display in the banner.font (optional): The font to use for the banner. If not specified, the default font will be used.PyMenu CLI uses the art library to generate the ASCII art for the banner. You can choose from a wide range of available fonts provided by the art library. Here are some font options:
 _____                _
|  ___|  ___   _ __  | |_
| |_    / _ \ | '_ \ | __|
|  _|  | (_) || | | || |_
|_|     \___/ |_| |_| \__|
 .----------------.  .----------------.  .-----------------. .----------------.
| .--------------. || .--------------. || .--------------. || .--------------. |
| |  _________   | || |     ____     | || | ____  _____  | || |  _________   | |
| | |_   ___  |  | || |   .'    `.   | || ||_   \|_   _| | || | |  _   _  |  | |
| |   | |_  \_|  | || |  /  .--.  \  | || |  |   \ | |   | || | |_/ | | \_|  | |
| |   |  _|      | || |  | |    | |  | || |  | |\ \| |   | || |     | |      | |
| |  _| |_       | || |  \  `--'  /  | || | _| |_\   |_  | || |    _| |_     | |
| | |_____|      | || |   `.____.'   | || ||_____|\____| | || |   |_____|    | |
| |              | || |              | || |              | || |              | |
| '--------------' || '--------------' || '--------------' || '--------------' |
 '----------------'  '----------------'  '----------------'  '----------------'
  _    _    _    _
 / \  / \  / \  / \
( F )( o )( n )( t )
 \_/  \_/  \_/  \_/
Ⓕⓞⓝⓣ
🅕🅞🅝🅣
+-++-++-++-+
|f||o||n||t|
+-++-++-++-+
      ___           ___           ___           ___
     /\  \         /\  \         /\__\         /\  \
    /::\  \       /::\  \       /::|  |        \:\  \
   /:/\:\  \     /:/\:\  \     /:|:|  |         \:\  \
  /::\~\:\  \   /:/  \:\  \   /:/|:|  |__       /::\  \
 /:/\:\ \:\__\ /:/__/ \:\__\ /:/ |:| /\__\     /:/\:\__\
 \/__\:\ \/__/ \:\  \ /:/  / \/__|:|/:/  /    /:/  \/__/
      \:\__\    \:\  /:/  /      |:/:/  /    /:/  /
       \/__/     \:\/:/  /       |::/  /     \/__/
                  \::/  /        /:/  /
                   \/__/         \/__/
FFFFFFF                tt
FF       oooo  nn nnn  tt
FFFF    oo  oo nnn  nn tttt
FF      oo  oo nn   nn tt
FF       oooo  nn   nn  tttt
>=======>                        >=>
>=>                              >=>
>=>          >=>     >==>>==>  >=>>==>
>=====>    >=>  >=>   >=>  >=>   >=>
>=>       >=>    >=>  >=>  >=>   >=>
>=>        >=>  >=>   >=>  >=>   >=>
>=>          >=>     >==>  >=>    >=>
    ______                  __
   / ____/  ____    ____   / /_
  / /_     / __ \  / __ \ / __/
 / __/    / /_/ / / / / // /_
/_/       \____/ /_/ /_/ \__/
For a complete list of available fonts, please refer to the art library documentation. If no font is specified in the banner configuration, PyMenu CLI will use the default font provided by the art library.
PyMenu CLI supports color customization of menu titles and items using the colorama library. You can specify the color of the text and background for each menu and item in the menu.json file. The available color options are defined in the TextColors and BackgroundColors enums:
RED, LIGHT_RED, BLUE, LIGHT_BLUE, YELLOW,
LIGHT_YELLOW, GREEN, LIGHT_GREEN, CYAN, LIGHT_CYAN,
MAGENTA, LIGHT_MAGENTA, BLACK, LIGHT_BLACK, WHITE,
LIGHT_WHITE
RED, LIGHT_RED, BLUE, LIGHT_BLUE, YELLOW,
LIGHT_YELLOW, GREEN, LIGHT_GREEN, CYAN, LIGHT_CYAN,
MAGENTA, LIGHT_MAGENTA, BLACK, LIGHT_BLACK, WHITE,
LIGHT_WHITE
To apply colors to a menu or item,
add the color property with the desired text and background colors in the menu.json file.
Here's an example of how the menu with colors would look like:
The actions.py file contains the functions that are executed when a menu item is selected. Here's an example:
def action_function_1():
    print("Executing action 1")

def action_function_2():
    print("Executing action 2")

def action_function_3():
    print("Executing action 3")
Explore the examples directory for sample menu configurations and action implementations. To run an example, follow these steps:
python3 menu_example.py
This project is licensed under the MIT License.
Thank you for considering contributing to pymenu-cli! We welcome all contributions, whether they are bug reports, feature requests, or code improvements. Please take a moment to review this document before submitting your contributions.
If you find a bug, please report it by opening an issue. Include as much detail as possible to help us reproduce and fix the issue quickly. Make sure to include:
We welcome suggestions for new features and enhancements. To suggest an enhancement, please open an issue and provide:
To submit a pull request (PR), follow these steps:
Fork the repository: Click the "Fork" button at the top of this page to create a copy of the repository on your GitHub account.
Clone your fork: Clone the forked repository to your local machine using the following command:
git clone https://github.com/moraneus/pymenu-cli.git
cd pymenu-cli
Create a new branch: Create a new branch for your work. Use a descriptive name for the branch:
git checkout -b feature/my-new-feature
Make your changes: Make your changes in the new branch.
Commit your changes: Commit your changes with a clear and concise commit message:
git add .
git commit -m "Add feature: my new feature"
Push to your fork: Push your changes to your forked repository:
git push origin feature/my-new-feature
Open a pull request: Go to the original repository and open a pull request from your forked repository. Provide a clear and descriptive title and description for your PR.
Before submitting your PR, make sure all tests pass. You can run the tests using the following commands:
# Install dependencies
pip install -r requirements.txt

# Run tests
pytest
FAQs
Did you know?

Socket for GitHub automatically highlights issues in each pull request and monitors the health of all your open source dependencies. Discover the contents of your packages and block harmful activity before you install or update your dependencies.

Product
Socket’s new Tier 1 Reachability filters out up to 80% of irrelevant CVEs, so security teams can focus on the vulnerabilities that matter.

Research
/Security News
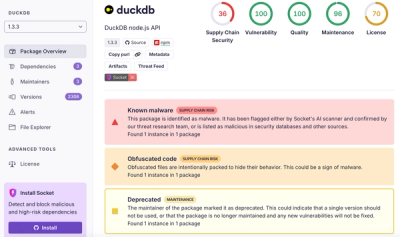
Ongoing npm supply chain attack spreads to DuckDB: multiple packages compromised with the same wallet-drainer malware.

Security News
The MCP Steering Committee has launched the official MCP Registry in preview, a central hub for discovering and publishing MCP servers.