Security News
PyPI’s New Archival Feature Closes a Major Security Gap
PyPI now allows maintainers to archive projects, improving security and helping users make informed decisions about their dependencies.
|ci| |pypi|
.. |ci| image:: https://github.com/smartfile/python-libarchive/actions/workflows/ci.yml/badge.svg
.. |pypi| image:: https://img.shields.io/pypi/v/python-libarchive :target: https://pypi.org/project/python-libarchive
A SmartFile_ Open Source project.
.. figure:: https://www.smartfile.com/assets/img/logos/smartfile-logo-secondary.png :target: SmartFile_ :width: 400 :alt: SmartFile
A complete wrapper for the libarchive library generated using SWIG. Also included in the package are compatibility layers for the Python zipfile and tarfile modules.
Libarchive supports the following:
For information on installing libarchive and python-libarchive, see Building_.
.. _SmartFile: http://www.smartfile.com/ .. _Building: https://github.com/smartfile/python-libarchive/tree/master#installing-libarchive
There are actually two APIs exposed by this library.
The first API is a high level pythonic class-based interface that should seem comfortable to Python developers. If you are just getting started with python-libarchive, this is probably where you should start.
The second API is a low-level wrapper around libarchive. This wrapper provides access to the C API exposed by libarchive. A few additions or changes were made to allow easy consumption from Python, but otherwise, most libarchive example code will work (although with Python syntax). This API will be useful to those familiar with libarchive, or those that need functionality not available in the high level API.
The high level API provides a pythonic class-based interface for working with archives. On top of this is a very thin compatibility wrapper for the standard Python zipfile and tarfile modules. Since the standard Python zipfile and tarfile modules both present a different interface, so do the compatibility wrappers.
These compatibility wrappers are provided so that python-libarchive can be a drop-in replacement for the standard modules. A reason to use libarchive instead of the standard modules is that it provides native performance and better memory consumption. So if you already have code using one of these modules, you can sin many cases just replace the standard module with the libarchive alternative.
However, if you are developing a new project, it is recommended that you forgo the compatibility wrappers. Using the high-level API directly means you can support the many archive formats that libarchive does through the same standard interface.
The workhorse of the high-level API is the Archive class. This is a forward-only iterator that allows you to open an archive of any supported formant and iterate it's contents.
.. code:: python
    import libarchive

    a = libarchive.Archive('my_archive.zip')
    for entry in a:
        print entry.pathname
    a.close()
python-libarchive is also a context manager, so the above could be written as:
.. code:: python
    import libarchive

    with libarchive.Archive('my_archive.zip') as a:
        for entry in a:
            print entry.pathname
You can also extract files. However, you can only extract the current item. Once you have iterated past an entry, there is no going back.
.. code:: python
    import libarchive

    with libarchive.Archive('my_archive.zip') as a:
        for entry in a:
            if entry.pathname == 'my_file.txt':
                print 'File Contents:', a.read()
Besides the read() method, there is also readpath() and readstream(). Readpath() will extract the file to a path or already opened file. Readstream() will return a file-like object that can be used to read chunks of the file. Larger files being read from the archive should probably use one of these functions instead of read() which will read then entire contents into memory.
Writing archives is also straightforward. You open an Archive() class then add files to it using one of the write() methods.
.. code:: python
    import libarchive

    with libarchive.Archive('my_archive.zip', 'w') as a:
        for name in os.listdir('.'):
            a.write(libarchive.Entry(name), file(name, 'r').read())
Again, there is also a writepath() method which will write a file-like object or path directly to the archive. The above example could have been written as the following.
.. code:: python
    import libarchive

    with libarchive.Archive('my_archive.zip', 'w') as a:
        for name in os.listdir('.'):
            a.writepath(libarchive.Entry(name), name)
In addition to the Archive class. There is also SeekableArchive. This class provides random access when reading an archive. It will remember where entries are located within the archive stream, and will close/reopen the stream and seek to the entry's location. So, you can extract an item directly. The first example can be written as follows.
.. code:: python
    import libarchive

    with libarchive.SeekableArchive('my_archive.zip') as a:
        print 'File Contents:', a.read('my_file.txt')
There is overhead involved in using the SeekableArchive, so it is suggested that you use the Archive in cases that you don't need random access to an archives entries. In fact, the above example was probably better off using the Archive class.
Using the low-level API leaves all the work to you. You will need to be careful to create and free libarchive structures yourself. You will also need to be well-versed in the return codes and expected parameters of libarchive. In fact, if you are not, then you probably should stop reading now.
.. code:: python
    from libarchive import _libarchive

    a = _libarchive.archive_read_new()
    _libarchive.archive_read_support_filter_all(a)
    _libarchive.archive_read_support_format_all(a)
    _libarchive.archive_read_open_fd(a, f.fileno(), 10240)
    while True:
        e = _libarchive.archive_entry_new()
        try:
            r = _libarchive.archive_read_next_header2(a, e)
            if r != _libarchive.ARCHIVE_OK:
                break
            n = _libarchive.archive_entry_pathname(e)
            if n != 'my_file.txt':
                continue
            l = _libarchive.archive_entry_size(e)
            s = _libarchive.archive_read_data_into_str(a, l)
            print 'File Contents:', s
        finally:
            _libarchive.archive_entry_free(e)
    _libarchive.archive_read_close(a)
    _libarchive.archive_read_free(a)
As you can see this is a lot more work for little benefit. But as stated before, you may end up interacting with the low-level API if some of the functionality you require is not covered in the high-level API.
And as always, patches are appreciated!
Many Linux distributions include libarchive 2. This extension only works with libarchive 3. In these cases, you must install libarchive to a /usr/local. This will allow it to co-exist with the version installed with your distribution. To install libarchive using autoconf, follow the instructions below.
Prerequisites.
You will need either automake or cmake to install libarchive. Also required is python-dev. In addition, you will also need a compiler and some other tools. To install these prerequisites do the following:
On Debian/Ubuntu:
::
    # Install compiler and tools
    $ sudo apt-get install build-essential libtool python-dev

    # Install automake
    $ sudo apt-get install automake

    # Or install cmake
    $ sudo apt-get install cmake
Or CentOS/Fedora:
::
    # Install compiler and tools
    $ sudo yum groupinstall "Development Tools"
    $ sudo yum install python-devel libtool

    # Install automake
    $ sudo yum install automake

    # Or install cmake
    $ sudo yum install cmake
You should now be able to install libarchive.
::
    $ wget https://libarchive.org/downloads/libarchive-3.6.1.tar.gz
    $ tar xzf libarchive-3.6.1.tar.gz

    # Configure using automake...
    $ cd libarchive-3.6.1/
    $ build/autogen.sh
    $ ./configure --prefix=/usr/local

    # Or configure using cmake...
    $ mkdir build
    $ cd build
    $ cmake -DCMAKE_INSTALL_PREFIX=/usr/local ../libarchive-3.6.1

    # Now compile and install...
    $ make
    $ sudo make install
Now that the library is installed, you need to tell ld where to find it. The easiest way to do this is to add /usr/local/lib to the ld.so.conf.
::
    $ sudo sh -c 'echo /usr/local/lib > /etc/ld.so.conf.d/libarchive3.conf'
    $ sudo ldconfig
Now libarchive 3.6.1 is installed into /usr/local/. The next step is to build and install python-libarchive.
Now that libarchive is installed, you can install the python extension using the steps below.
::
    $ wget https://files.pythonhosted.org/packages/1b/ab/f7791f241675e5041a7e466f6990dcb0a58ff9fb7a3495644aef3612ba40/python-libarchive-4.2.0.tar.gz
    $ tar xzf python-libarchive-4.2.0.tar.gz
    $ cd python-libarchive-4.2.0/
    $ sudo python setup.py install
You can also install using pip.
::
$ pip install python-libarchive
setup.py will explicitly link against version 3.6.1 of the library.
The test suite is located in the root directory. This is done purposefully to make hacking easier. If you make changes to the library, you can run the test suite against the local copy in the libarchive/ subdirectory rather than the version installed on your system.
However, this means you need to have the extension compiled in this same directory. You will also need SWIG for this step. You can accomplish this using the following commands.
On Debian/Ubuntu:
::
$ sudo apt-get install swig
Or CentOS/Fedora:
::
$ sudo yum install swig
Now you can re-SWIG the interface and recompile the extension.
::
    $ cd libarchive/
    $ make
    $ cd ..
Now you can run the test suite from the main directory.
::
$ python tests.py
FAQs
A libarchive wrapper for Python supporting password protection.
We found that python-libarchive demonstrated a healthy version release cadence and project activity because the last version was released less than a year ago. It has 2 open source maintainers collaborating on the project.
Did you know?

Socket for GitHub automatically highlights issues in each pull request and monitors the health of all your open source dependencies. Discover the contents of your packages and block harmful activity before you install or update your dependencies.

Security News
PyPI now allows maintainers to archive projects, improving security and helping users make informed decisions about their dependencies.

Research
Security News
Malicious npm package postcss-optimizer delivers BeaverTail malware, targeting developer systems; similarities to past campaigns suggest a North Korean connection.

Security News
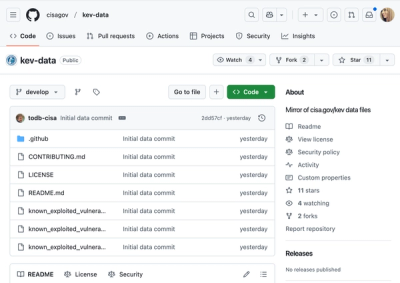
CISA's KEV data is now on GitHub, offering easier access, API integration, commit history tracking, and automated updates for security teams and researchers.