
Product
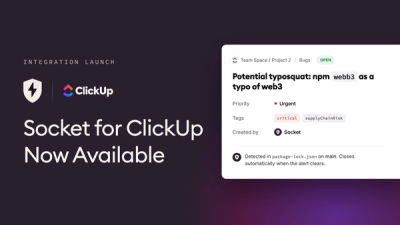
Socket for ClickUp Is Now Available
Create ClickUp tasks from Socket alerts, automate ticketing with custom rules, and keep alert and task status synchronized.
By Jeppe Hasseriis - Aug 26, 2026
@convai/experience-embed
Advanced tools
A library for embedding Pixel Streaming functionality in web applications, supporting both React and vanilla JavaScript/TypeScript implementations.
A library for embedding Pixel Streaming functionality in web applications, supporting both React and vanilla JavaScript/TypeScript implementations.
npm install @convai/experience-embed
First, import the PixelStreamComponent in your React application:
import { PixelStreamComponent } from "@convai/experience-embed";
Create a ref to access the component's methods:
import { useRef } from "react";
import { PixelStreamComponentHandles } from "@convai/experience-embed";

// Inside your component:
const pixelStreamRef = useRef<PixelStreamComponentHandles>(null);
The component provides several methods through the ref:
enableCamera(): Enables the camera for the experiencedisableCamera(): Disables the cameraenableCharacterAudio(): Enables character audiodisableCharacterAudio(): Disables character audioinitializeExperience(): Initializes the experienceExample usage:
const handleEnableCamera = async () => {
  await pixelStreamRef.current?.enableCamera();
};
Add the PixelStreamComponent to your JSX with the required props:
<PixelStreamComponent
  ref={pixelStreamRef}
  expId="your-experiment-id"
  endUserId="user-123"           // Required when using endUserMetadata
  endUserMetadata={{             // Optional: additional user context
    plan: "pro",
    region: "us-east",
  }}
  InitialScreen={<div>Loading your experience...</div>}
/>
You can create a custom loading screen:
const CustomLoadingScreen = () => (
  <div
    style={{
      width: "100%",
      height: "100%",
      display: "flex",
      alignItems: "center",
      justifyContent: "center",
      background: "#000",
      color: "#fff",
    }}
  >
    <h2>Loading your experience...</h2>
  </div>
);

// Use it in your component:
<PixelStreamComponent
  ref={pixelStreamRef}
  expId="your-experiment-id"
  InitialScreen={<CustomLoadingScreen />}
/>;
Show a loading overlay until the embed sends isLoading: false:
<PixelStreamComponent
  ref={pixelStreamRef}
  expId="your-experiment-id"
  LoadingScreenComponent={<div>Preparing experience...</div>}
/>
Import the PixelStreamClient in your TypeScript file:
import { PixelStreamClient } from "@convai/experience-embed";
Create a container element in your HTML:
<div id="pixel-stream-container" style="width: 100%; height: 600px;"></div>
Create a new instance of PixelStreamClient:
const container = document.getElementById("pixel-stream-container");
if (container) {
  const pixelStream = new PixelStreamClient({
    container: container,
    expId: "your-experiment-id",
    endUserId: "user-123",       // Required when using endUserMetadata
    endUserMetadata: {           // Optional: additional user context
      plan: "pro",
      region: "us-east",
    },
    InitialScreen: document.createElement("div"),
    LoadingScreenComponent: document.createElement("div"),
  });
}
The client provides the following methods:
// Enable camera
pixelStream.enableCamera().then((success) => {
  console.log("Camera enabled:", success);
});

// Disable camera
pixelStream.disableCamera().then((success) => {
  console.log("Camera disabled:", success);
});

// Enable character audio
pixelStream.enableCharacterAudio();

// Disable character audio
pixelStream.disableCharacterAudio();

// Initialize experience
pixelStream.initializeExperience();
You can use the @convai/experience-embed package directly in your HTML without any build tools by loading it from a CDN.
Include the library via CDN in your HTML:
<script src="https://unpkg.com/@convai/experience-embed/dist/core/convai-embed.umd.js"></script>
Create a container element in your HTML:
<div id="pixel-stream-container" style="width: 100%; height: 600px;"></div>
Create a new instance of PixelStreamClient:
<script>
  const container = document.getElementById("pixel-stream-container");

  const customInitialScreen = document.createElement("div");
  customInitialScreen.style.cssText = `
    width: 100%;
    height: 100%;
    position: absolute;
    top: 0;
    left: 0;
    z-index: 10;
    display: flex;
    align-items: center;
    justify-content: center;
    background: rgba(0, 0, 0, 0.8);
    color: white;
    font-family: Arial, sans-serif;
  `;
  customInitialScreen.innerHTML = `
    <div style="text-align: center;">
      <h2>Welcome to the Experience</h2>
      <p>Click anywhere to start</p>
    </div>
  `;

  const pixelStream = new PixelStreamCore.PixelStreamClient({
    expId: "your-experiment-id",
    container: container,
    endUserId: "user-123",       // Required when using endUserMetadata
    endUserMetadata: {           // Optional: additional user context
      plan: "pro",
      region: "us-east",
    },
    InitialScreen: customInitialScreen,
  });

  // Make it available globally for debugging if needed
  window.pixelStream = pixelStream;
</script>
Once initialized, the following methods are available on the pixelStream object:
initializeExperience() Starts the pixel streaming session:
pixelStream.initializeExperience();
enableCamera() Requests access to the user’s camera and sends the video stream to the experience:
pixelStream.enableCamera().then((success) => {
  console.log("Camera enabled:", success);
});
disableCamera() Stops the camera stream:
pixelStream.disableCamera().then((success) => {
  console.log("Camera disabled:", success);
});
enableCharacterAudio() Enables audio from the character (from Unreal/Convai):
pixelStream.enableCharacterAudio();
disableCharacterAudio() Enables audio from the character (from Unreal/Convai):
pixelStream.disableCharacterAudio();
You can add buttons in your HTML to trigger these methods:
<div class="controls">
  <button onclick="pixelStream.initializeExperience()">Start Experience</button>
  <button onclick="pixelStream.enableCamera()">Enable Camera</button>
  <button onclick="pixelStream.disableCamera()">Disable Camera</button>
  <button onclick="pixelStream.enableCharacterAudio()">Enable Audio</button>
  <button onclick="pixelStream.disableCharacterAudio()">Disable Audio</button>
</div>
| Prop | Type | Required | Description |
|---|---|---|---|
| expId | string | Yes | Your experiment ID |
| endUserId | string | No* | User identifier for tracking and long-term memory |
| endUserMetadata | Record<string, any> | No | Additional user context (requires endUserId) |
| InitialScreen | React.ReactNode | No | Custom splash screen shown before experience starts |
| LoadingScreenComponent | React.ReactNode | No | Loading overlay shown until embed sends isLoading: false |
| serviceUrls | object | No | Custom service URLs configuration |
| serviceUrls.sessionFetch | string | No | Custom URL for fetching the session |
| serviceUrls.pixelStreamBase | string | No | Custom base URL for the pixel stream |
*
endUserIdis required if you want to passendUserMetadata. TypeScript will enforce this at compile time.
| Option | Type | Required | Description |
|---|---|---|---|
| container | HTMLElement | Yes | The container element for the stream |
| expId | string | Yes | Your experiment ID |
| endUserId | string | No* | User identifier for tracking and long-term memory |
| endUserMetadata | Record<string, any> | No | Additional user context (requires endUserId) |
| InitialScreen | HTMLElement | No | Custom splash screen shown before experience starts |
| LoadingScreenComponent | HTMLElement | No | Loading overlay shown until embed sends isLoading: false |
| serviceUrls | object | No | Custom service URLs configuration |
| serviceUrls.sessionFetch | string | No | Custom URL for fetching the session |
| serviceUrls.pixelStreamBase | string | No | Custom base URL for the pixel stream |
*
endUserIdis required if you want to passendUserMetadata. TypeScript will enforce this at compile time.
FAQs
A library for embedding Pixel Streaming functionality in web applications, supporting both React and vanilla JavaScript/TypeScript implementations.
The npm package @convai/experience-embed receives a total of 91 weekly downloads. As such, @convai/experience-embed popularity was classified as not popular.
We found that @convai/experience-embed demonstrated a healthy version release cadence and project activity because the last version was released less than a year ago. It has 1 open source maintainer collaborating on the project.
Product
Create ClickUp tasks from Socket alerts, automate ticketing with custom rules, and keep alert and task status synchronized.
Product
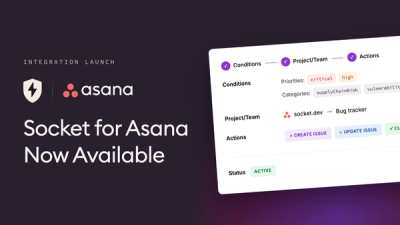
Create and manage Asana tasks directly from Socket alerts, with manual task creation, automated ticketing rules, and two-way sync.
Security News
Open VSX has removed three extension IDs from its malicious-extension list as the legitimate publishers they impersonated move to claim the names for themselves.